


After many months of reading and learning from the incredible people here at CNCZone I have begun my own build. Last month I ordered 4 NEMA23 steppers, Gecko G540 and some other parts from Ahren over at CncRouterParts.com. With a lot of research and help from CarveOne I finally decided to pattern my router after his. In fact my Z axis is his old one! Thanks again CarveOne!!!
I have decided to go with a 4x8 cutting area so I ordered up some 3x3x1/8th in steel tube for the main frame and some cold rolled 4x9x1/4in steel for the side rails. My machine is REALLY close to CarveOnes. He has been a great help with the design.
Sooooo,
To continue, I wanted a machine that I can basically cut foam with. Maybe a Joes hybrid 4x4... Then I wanted to be able to get a little more out of it and had designed a 4x6 version...
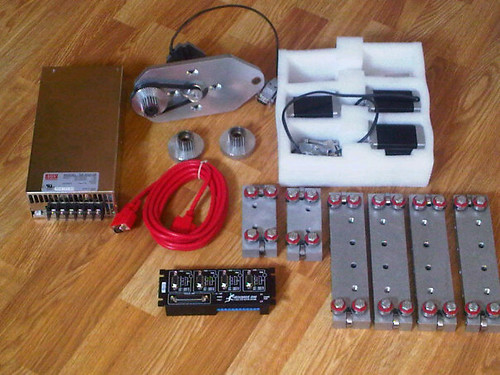
Then after much more reading and beating myself up I decided to build a 4x8. You know as well as I do that things change and I then decided to build it out of steel. I went ahead and ordered the electronics from Ahren at CNCRouterparts.com and started playing with that when it came in. Since then I have built the z axis from the parts that CarveOne sent me and then ordered the steel for the table.
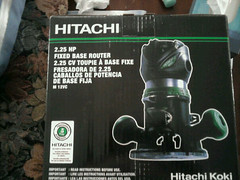
I ordered the router. A Hitachi MV12
Then I ordered the parts from Ahren at CncRouterParts.com.
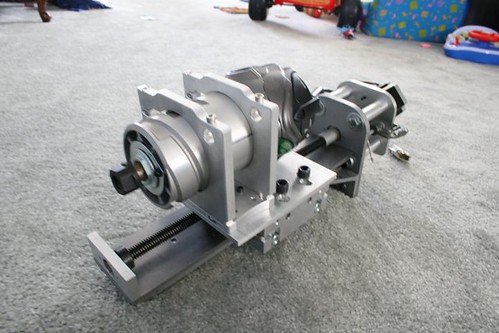
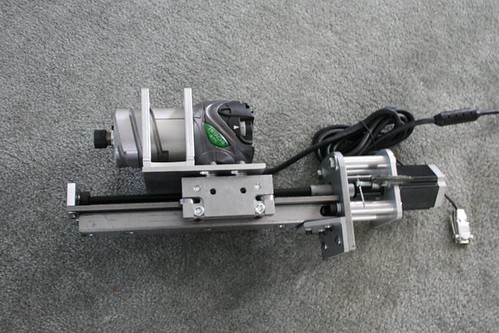
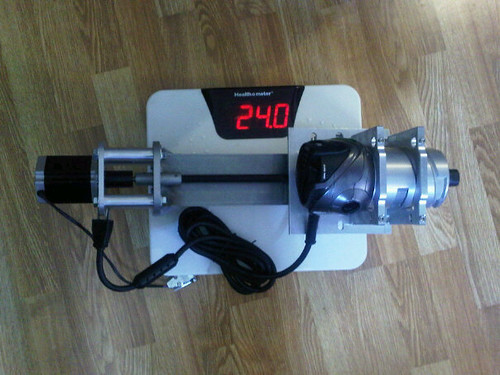
After the great help of CarveOne he sent me the parts I needed to build a VERY solid z axis. I also ordered the Hitachi mount from K2CNC.com
As you can see, the finished Z axis is 24lbs. VERY SOLID!!!!
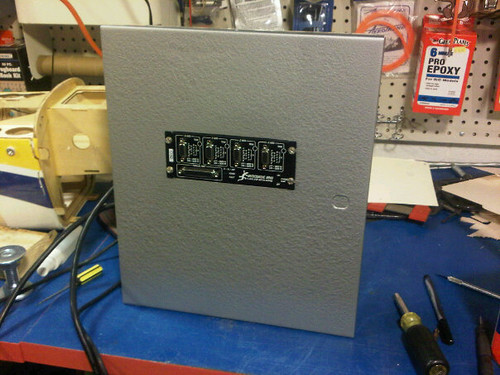
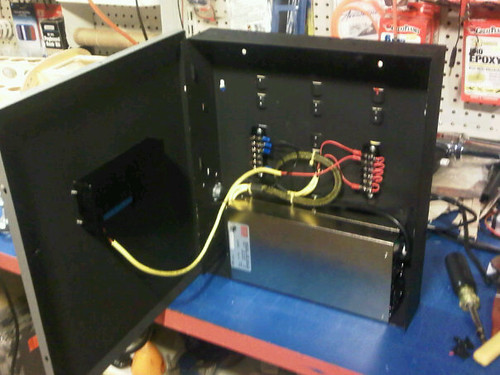
In my downtime while waiting for the steel to make it to the metal shop I got the control box built. It was an old alarm panel that I cleaned up and set up to hold the G540 from Geckodrive.
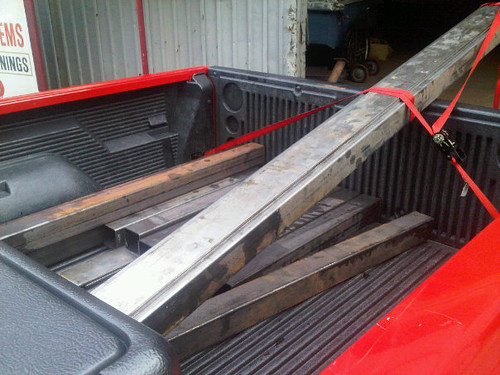
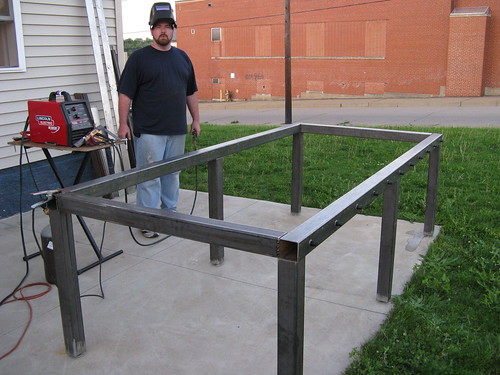
Finally the steel came in on Monday 5/3/2010 from T-Fab just outside of Pittsburgh. Great guys and cant beat their prices!
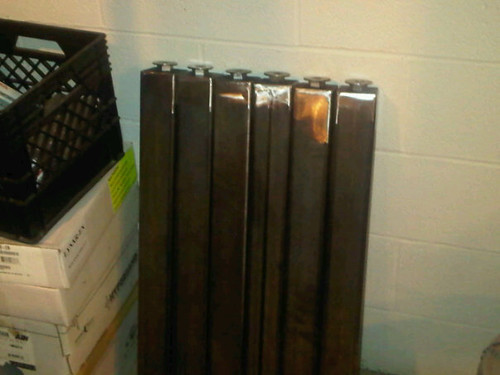
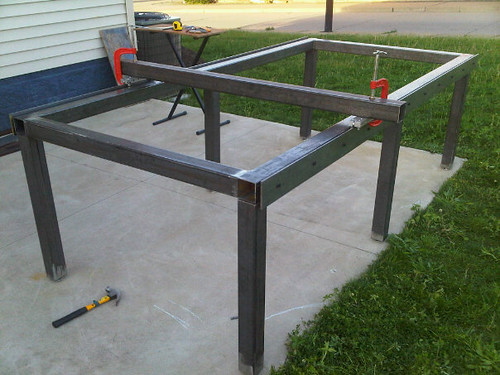
You know I was excited and on Tuesday built the legs. There are 6 3x3 legs that are going to support this beast and each one has an adjuster that I had built the night before out of 3/4in bolts, nuts and washers. By the way, Gorilla glue is AWESOME for putting parts together in preperation for welding!
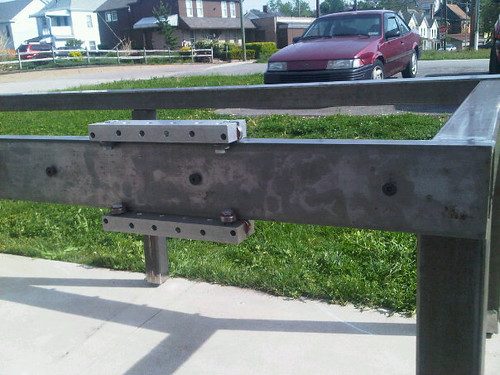
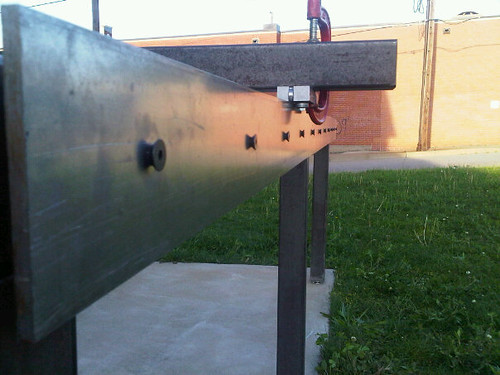
I had to take the side rails and drill every 10 inches to place a weldnut to hold the outside cold rolled steel rails.
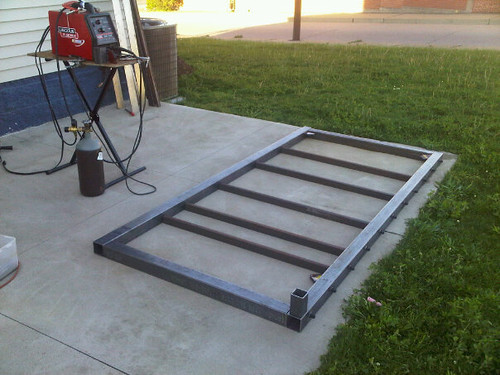
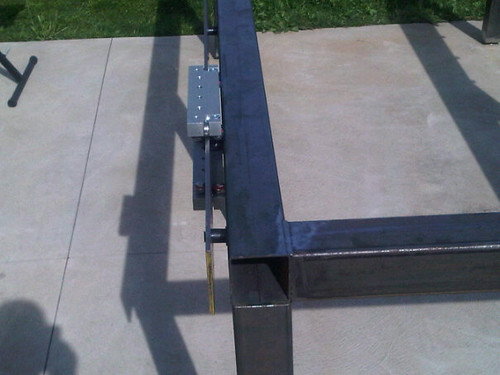
After sitting down and making sure everything lined up correctly and level I decided to lay out the frame.
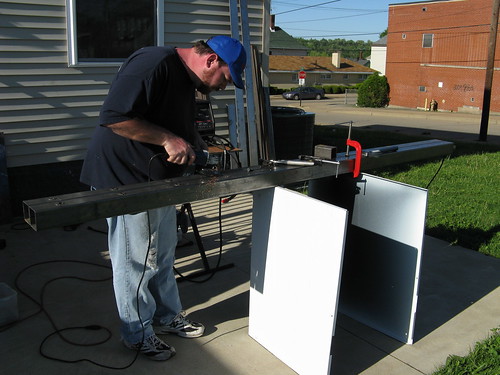
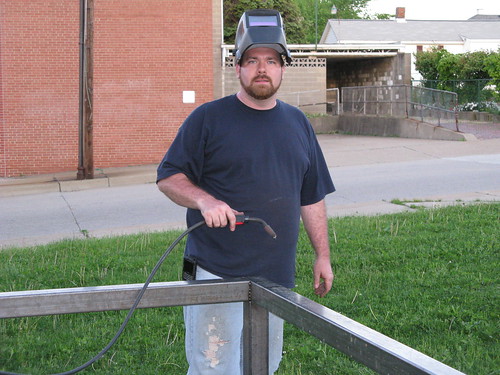
After getting everything straight I decided to let the sparks fly!
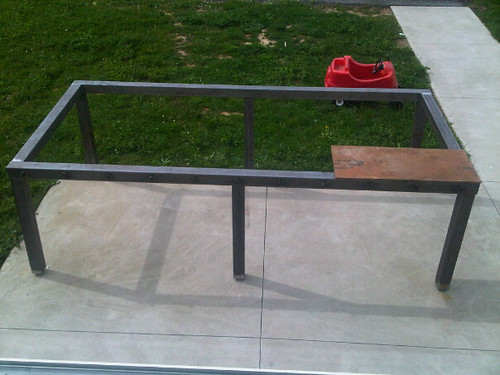
Got everything ground down and the table is SOLID!!!!!
I then drilled and installed the siderails. They are 4inx1/4inx9ft cold rolled steel. I forgot to order the countersink but this will all be flush here soon.
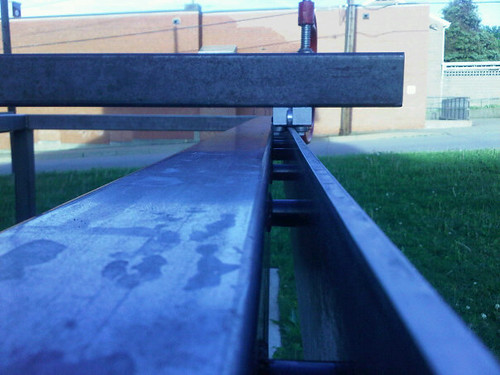
For fun I decided to see how smooth the bearings and rails were.
With a 300lb load on it (me) everything was SMOOOOTH!!!
I need to order the gear rack next and begin construction on the Y axis.
There will be more to come. I will be painting the frame here soon. I need to drill the legs to be bolted to the frame and then once that is all done I can move the table to my basement where the rest of the work will begin. I am looking forward to this project and want to thank all of you for letting me learn from you. I will keep this updated as I go and am looking forward to any comments or assistance.
Thanks Again!!!!!!!!!!
Ernie
Thread: New 4x8 Steel CNC router build
Results 1 to 20 of 82
-
05-09-2010, 10:53 PM #1
 Registered
- Join Date
- Jan 2010
- Posts
- 110
 New 4x8 Steel CNC router build
-
05-09-2010, 11:01 PM #2
Registered
- Join Date
- Jul 2006
- Posts
- 1062
That looks solid as a rock!
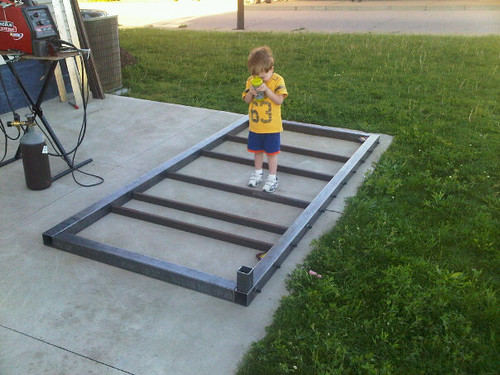
I wonder if the wee fella was "pressed" to try the gantry before you?
Belt screw or rack for the drive?Keith
-
05-09-2010, 11:04 PM #3
Registered
- Join Date
- Jan 2010
- Posts
- 110
Its r&p on the X and Y. Im using the kit from CncRouterparts.com. I am a complete Noob to this and am building this with basic hand tools. Its a HELL of a learning experience!!!
:banana:
Ernie
-
05-09-2010, 11:06 PM #4
Registered
- Join Date
- Jan 2010
- Posts
- 110
Naa, I was supermannin it back and forth though.. Im suprised the wife didn't take a picture of that! ha ha ha Originally Posted by Kipper

Ernie
-
05-09-2010, 11:10 PM #5
Gold Member
- Join Date
- Apr 2009
- Posts
- 5516
Yooooooooo! Very cool so far!
-
05-09-2010, 11:10 PM #6
Registered
- Join Date
- Jul 2006
- Posts
- 1062
The cncrouterparts stuff is a great alternative to spending big gobs of cash...Nice design of linear motion...What kind of foam cutting are you intending to do?
Oh and I hope the scars don't show once the missus catches you using the ironing board as a Mig rest
Keith
-
05-09-2010, 11:16 PM #7
Registered
- Join Date
- Jan 2010
- Posts
- 110
Lol, Actually its my keyboard stand with a piece of ply across it... Makes a great temporary bench.
I wanted to cut depron and other such foams to build RC airplanes. Well, that turned into plywood and then wanting to do some light aluminum....
So now I have this MONSTER in the back yard...
Ernie
-
05-10-2010, 12:04 AM #8
Registered


- Join Date
- Aug 2009
- Posts
- 392
That looks great! Should be one helluva solid machine. Looking forward to seeing more updates, keep up the great work.
-
05-10-2010, 12:10 AM #9
Registered
- Join Date
- Aug 2008
- Posts
- 1166
Hi Ernie,
It's nice to see someone else in Pittsburgh building their own machine. Your machine looks really nice.
I'm about 5 miles down the road from you if you're around T-Fab (just googled it). I've been looking for a place to buy some steel from to build my next router, so I'll have to check them out. Up until now I've been buying all my material off the internet but it seems dumb to pay to ship big pieces of steel...
John
-
05-10-2010, 01:01 AM #10
Member
- Join Date
- Apr 2007
- Posts
- 8082
Making me real jealous with all of that steel and welding going on Ernie!!
You're doing what I wanted to do initially, but was too cash limited at first. (That hasn't changed much so far.) You won't regret doing the steel frame first. You'll have a solid foundation to expand on. I hope the Z axis parts do a good job for you.
CarveOneCarveOne
http://www.carveonecncwoodcraft.com
-
05-10-2010, 10:38 PM #11
Registered
- Join Date
- Jan 2010
- Posts
- 110
Carveone - Get on it.. the steel wasn't to bad.
John, T-Fab has great prices and Jeff the owner said he has aluminum and anything else you could want. What they dont have in stock can be ordered!
Ernie
-
05-11-2010, 02:52 AM #12
Registered
- Join Date
- Apr 2010
- Posts
- 0
Great Work! I'm not sure we have the same definition of "basic", though. Originally Posted by Ernie34
-
05-11-2010, 04:23 AM #13
Registered
- Join Date
- Jan 2010
- Posts
- 110
I am really trying to make this thing to last and produce the best quality I can. The only tools that I have is a little drill press, a harbor freight chop saw, random drills, harbor freight 4in grinder and a little lincoln mig welder. Not much compared to others on here but I know its more than others have. I am gracious for the opprutunities that I have been given and the tools that I have.
I am excited to get this done but again have run into the money issue. I need to order the gear racks. About $250 before shipping, and other little things. It will be slow from here. I want to clean the frame, bondo it and then use an automotive paint to finish it. Im thinking gloss black and hammered silver... Should look nice when done. To save money I am going to use the left over 4in cold rolled steel from the side rails to make the y axis. They came as 12 footers. I cut them to 9foot for the rails which left me with 2 3foot pieces. I will join them and use that for the mean time. I hate to do that but if I can get it straight enough and fill the gap in the middle with a tack weld I think I can get it to be pretty good.
Everyone on here has been great and I have learned ALOT!!! I have Igus chain ready to mount, all the CNCrouterparts stuff ready to go. The Z axis was courtesy of CarveOne. I need to make the brackets for the x axis and the y axis.
Once this is built and running I will be re-making parts and brackets for better precision. My Z axis plate isn't the best and should be longer and made of a thicker aluminum for example. I have some other things I want to do as well. I already have the cross hair lasers for the dust collector when I get it made as well as the possibility of making this a vaccum table .... Lots of ideas from all of you. I am just hoping that this can pay itself off pretty quick. Im not in it for the money but I spent money that I really could have put to better use. I have 2 young children the youngest of which is only a month old. So I hope you all can see where I am coming from. Single income household with alot of bills. We'll get er done soon though Im sure....
Keep watching... I do tricks! ha ha
Ernie
-
05-11-2010, 06:26 AM #14
Registered
- Join Date
- Apr 2010
- Posts
- 0
No worries! The mig welder (and more importantly the skill to use it) just falls way down on my list of basic shop tools. Different shops for different folks, though! Originally Posted by Ernie34
I feel your pain!I am excited to get this done but again have run into the money issue. I need to order the gear racks. About $250 before shipping, and other little things. It will be slow from here. I want to clean the frame, bondo it and then use an automotive paint to finish it. Im thinking gloss black and hammered silver... Should look nice when done. To save money I am going to use the left over 4in cold rolled steel from the side rails to make the y axis. They came as 12 footers. I cut them to 9foot for the rails which left me with 2 3foot pieces. I will join them and use that for the mean time. I hate to do that but if I can get it straight enough and fill the gap in the middle with a tack weld I think I can get it to be pretty good.
Everyone on here has been great and I have learned ALOT!!! I have Igus chain ready to mount, all the CNCrouterparts stuff ready to go. The Z axis was courtesy of CarveOne. I need to make the brackets for the x axis and the y axis.
Once this is built and running I will be re-making parts and brackets for better precision. My Z axis plate isn't the best and should be longer and made of a thicker aluminum for example. I have some other things I want to do as well. I already have the cross hair lasers for the dust collector when I get it made as well as the possibility of making this a vaccum table .... Lots of ideas from all of you. I am just hoping that this can pay itself off pretty quick. Im not in it for the money but I spent money that I really could have put to better use. I have 2 young children the youngest of which is only a month old. So I hope you all can see where I am coming from. Single income household with alot of bills. We'll get er done soon though Im sure... This last paragraph reminds me of the classic story though:
The Boss: "Why did you spend $XXX at YYY?"
Me: "Because I needed ZZZ to help with my project, and it was on sale."
The Boss: "Isn't your project to organize the garage?"
Me: "Yes, I needed it to build ________. It will be really nice and very convenient to have it that way."
The Boss: "Doesn't this then create something new that you will need to put away?"
Me: "Well, yeah. Definitely. I reasoned that if I was going to have to buy it, I might as well get a decent one. There's no point in buying junk, so I definitely wasn't planning on throwing it away!"
The Boss: "So, you're going to have to add a place to keep this, too, then?"
Me: "Yeah, I saw on AAA.com where a guy had his on this floating caster assembly so that he could move it around the shop or tuck it away easily. In looking at it, I thought of a few ways that it could be improved. Of course, To really do it right, I'd need to get ...".
-
05-11-2010, 06:30 AM #15
Registered
- Join Date
- Jan 2010
- Posts
- 110
One thing always leads to another.
For example, My other hobby leads into this one which will im sure lead into more.....
But I am having fun!
Ernie
-
05-11-2010, 12:28 PM #16
Member
- Join Date
- Apr 2007
- Posts
- 8082
I wish I could Ernie. I'm hung up on a contract job with a local company here at home for the next month or so. The home work shop will be my job site for a while and all else has to take very low priority. However, when that job is completed I will then go wide open on my home projects again. And the steel will already be on hand. Originally Posted by Ernie34
CarveOneCarveOne
http://www.carveonecncwoodcraft.com
-
05-12-2010, 07:23 PM #17
Registered
- Join Date
- Jan 2010
- Posts
- 110
CarveOne,
Im sure that when you do your steel machine I will be watching like a hawk again!!!!!
Ernie
-
05-13-2010, 01:30 AM #18
Member
- Join Date
- Apr 2007
- Posts
- 8082
I was already planning one since last year kinda similar to yours except that it will have the legs tied together about 4" off the floor and a full width and length lower deck. There will be adjustable machine feet on the legs. My shop floor wasn't leveled off as a proper machine grade floor when it was poured. Sure wish I had specified that now. Worst dip is no worse than 1/8" though, and fortunately, where the CNC machine is located is "virtually flat".
CarveOneCarveOne
http://www.carveonecncwoodcraft.com
-
05-13-2010, 01:35 AM #19
Registered
- Join Date
- Mar 2008
- Posts
- 3655
Really nice work so far, Ernie. I'm sure it will be quite a machine when finished.
Hang in there. Remember: "Life is what happens while you are making other plans." Sometimes it takes a little longer than you thought it would.
CR.http://crevicereamer.com
Too many PMs. Email me to my name plus At A O L dot com.
-
05-13-2010, 01:54 AM #20
Member
- Join Date
- Apr 2007
- Posts
- 8082
He IS getting a good start on it.
I've had to steal a little out of each paycheck for yet one more building block for a year before having mine come together. (Some of it came together twice due to R&P upgrade along the way.)
I think I recall that Ernie already has most of the major stuff he needs to complete it except for the racks. Everything else is fairly minor, relatively speaking.
CarveOneCarveOne
http://www.carveonecncwoodcraft.com


 Reply With Quote
Similar Threads
-
Diy steel router build
By mkc2 in forum Australia, New Zealand Club HouseReplies: 122Last Post: 03-11-2014, 02:20 AM -
2nd Build - Steel Tube, Moving Gantry Style, Mill / Router
By InventIt in forum Vertical Mill, Lathe Project LogReplies: 73Last Post: 02-26-2012, 08:15 AM -
1st build: Bright orange steel framed router
By basskitcase in forum CNC Wood Router Project LogReplies: 20Last Post: 05-13-2010, 09:33 PM -
Router aluminium steel easy build
By Bartuss1 in forum News AnnouncementsReplies: 0Last Post: 02-06-2010, 10:09 PM -
First Router Build - 4x4, steel, R&P
By cxixer in forum CNC Wood Router Project LogReplies: 43Last Post: 02-09-2008, 09:15 PM
