


Thanks! Here is a link to more info on it along with a video..Originally Posted by met4life

http://edsjunk.net/EdsJunk/Blog/Entr...rol_Panel.html
Results 41 to 55 of 55
-
02-05-2013, 05:55 PM #41
 Registered
- Join Date
- Apr 2011
- Posts
- 63
-
02-05-2013, 06:03 PM #42
Registered
- Join Date
- Feb 2010
- Posts
- 61
EDIT: Ed you responded at the same time I posted and got there first

Since he has not responded I will pass on what I know about his build which can be found here: Originally Posted by Bloy2004
http://www.cnczone.com/forums/diy-cn...rol_panel.html
He is using the I-PAC keyboard encoder found here:
The I-PAC
It does not have analog inputs, all are digital (on/off).
You can get a similar controller that does have up to 8 analog axis and configure it for CNC control. It is called the Teensy++ 2.0 for 27.00 found here:
PJRC Store
and use Generic HID software to configure it in any fashion that you need. The software and a tutorial on building a CNC pendent can be found here:
Generic HID - DIY USB HID / Joystick / CNC Pendant
A more plug and play joystick controller (8 axis, 32 buttons [or up to 16 rotory encoders, mix and match] and a 4-way hat switch) can be purchased from Leo Bodnar here:
BU0836X 12-Bit Joystick Board [BU0836X] - £49.99 : Leo Bodnar, Simulator Electronics
I have used both in various Simulated Cockpit projects over the years.
The best controller that I have found so far (and the cheapest) for CNC has been the Contour Shuttle Pro. I purchased mine on Ebay for 20.00.
But if you want to create your own custom panel such as Ed3XP's excellent example you can use any of the above controller boards with very good results. The Teensy++ 2.0 is the cheapest and gives the greatest range of use (IMHO).
-
02-09-2013, 02:31 PM #43
Registered
- Join Date
- Sep 2010
- Posts
- 528
Before
Everyone's enclosures look so nice I'm getting jealous. I haven't had (taken) the time to build an enclosure yet, partly because I am still making configuration changes.
Once I have my spindle and VFD moutned I'll get rid of the SuperPID and put everything in a nice rack mounted case.
Here is a 'before' picture.James Harvey
Harvey Development Corp.
www.Harvey-Development.com
36" x 52" CNC Router
ULS-25E 12" x 24" Laser Engraver
-
02-09-2013, 05:25 PM #44
Registered
- Join Date
- Jul 2007
- Posts
- 177
Just the controller enclosure for the main spindle of my recent CNC lathe project. Axis of support as inverter and PC are included in my mobil mill controller hand so have a separate enclosure!
Why reach for speed, when you could have precision instead!!!
-
09-03-2014, 01:31 PM #45
Registered
- Join Date
- Nov 2008
- Posts
- 47
Re: Show off your controller enclosure
I've had this old Dell Dimension E521 for quite sometime now and wanted to turn it into a CNC control case.
I have fabricated, welded and powder coated for many years and thought this would be a fun and cool project to build.
It's all welded, sandblasted and powder coated Astatic Red.
Objectives;
Designed this for a 4 axis unit
Wanted to have easy access to all components
Internally air cooled
Cool looking
I still have a long way to go but at least to hard part is done...I hope!
Cable management is going to be the fun part.
Here is a Before picture.
Attachment 248222
And the After pictures.
Attachment 248224Attachment 248226Attachment 248228Attachment 248230Attachment 248232Attachment 248234Attachment 248236
For the front panel, would it be possible to have an LED light to show what drives are in motion? I'd also like to have an LCD panel to show the voltage the power supply is running. This is just for coolness is all, but any help or ideas would be great. I'm not much on electronics!
This share is for everyone!! If you have questions about the build I'll be more than happy to answer your questions and maybe some guidelines to help you get started on your own.
More pictures to come when it's completed.
Thanks!
An added note: I spent the last 12 hours on this build on my wife's Birthday! Thank you for your understanding and hopes this gets me out of the doghouse!!I'm always having a PICNIC....Problem In Chair Not In Computer!
-
09-03-2014, 02:09 PM #46
Registered
- Join Date
- Apr 2014
- Posts
- 0
Re: Show off your controller enclosure
Finally got mine done:
-
09-03-2014, 03:04 PM #47
Community Moderator
- Join Date
- Dec 2003
- Posts
- 24221
Re: Show off your controller enclosure
The common practice in industrial panel building is to keep any heat sourcing items at the top of the cabinet, Large transformers, power supplies etc.
Al.CNC, Mechatronics Integration and Custom Machine Design
“Logic will get you from A to B. Imagination will take you everywhere.”
Albert E.
-
09-03-2014, 06:29 PM #48
Registered
- Join Date
- Mar 2004
- Posts
- 392
Re: Show off your controller enclosure
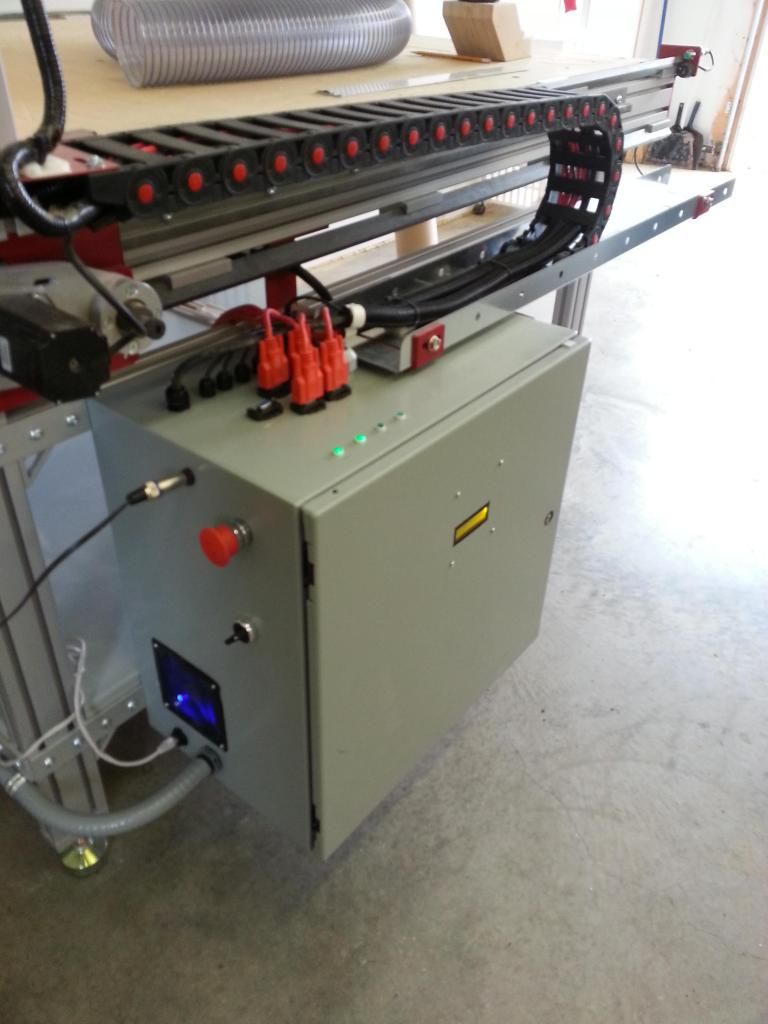
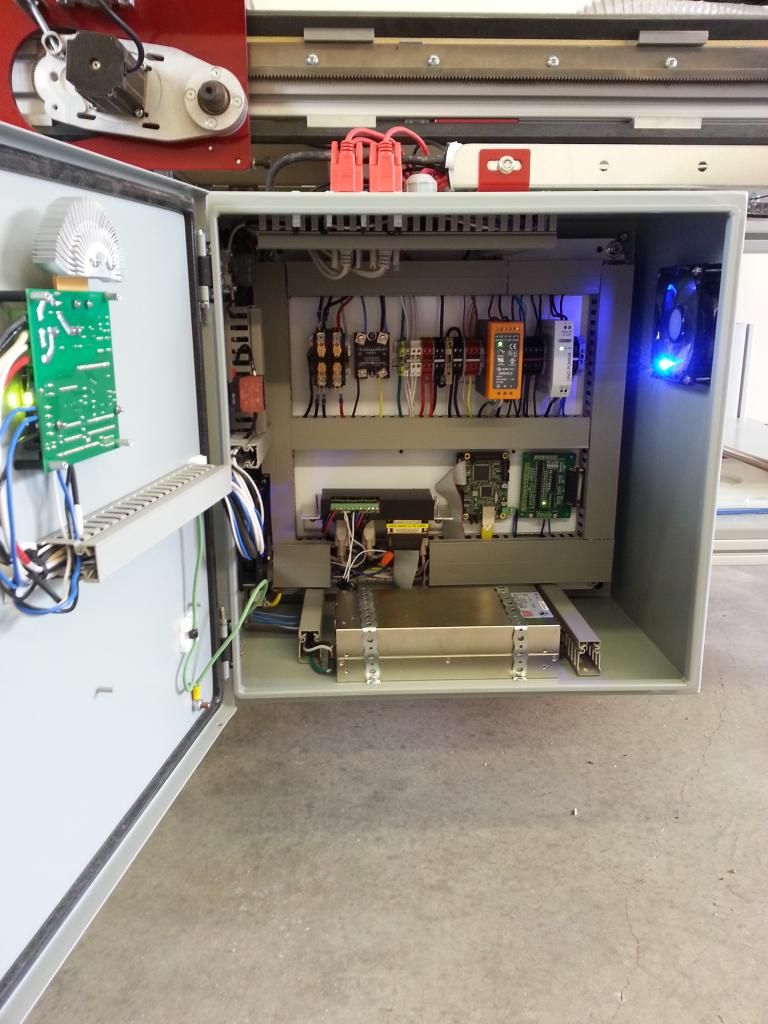
Mine is almost done. Once the router is running I will create a nice front panel.
Attachment 248256 Attachment 248258
-
09-03-2014, 08:04 PM #49
Registered
- Join Date
- Sep 2014
- Posts
- 30
Re: Show off your controller enclosure
man, wish mine looked as good as these! I'm a bit short on space in mine. It's not finished btw

-
09-04-2014, 05:24 AM #50
Registered
- Join Date
- Nov 2010
- Posts
- 520
Re: Show off your controller enclosure
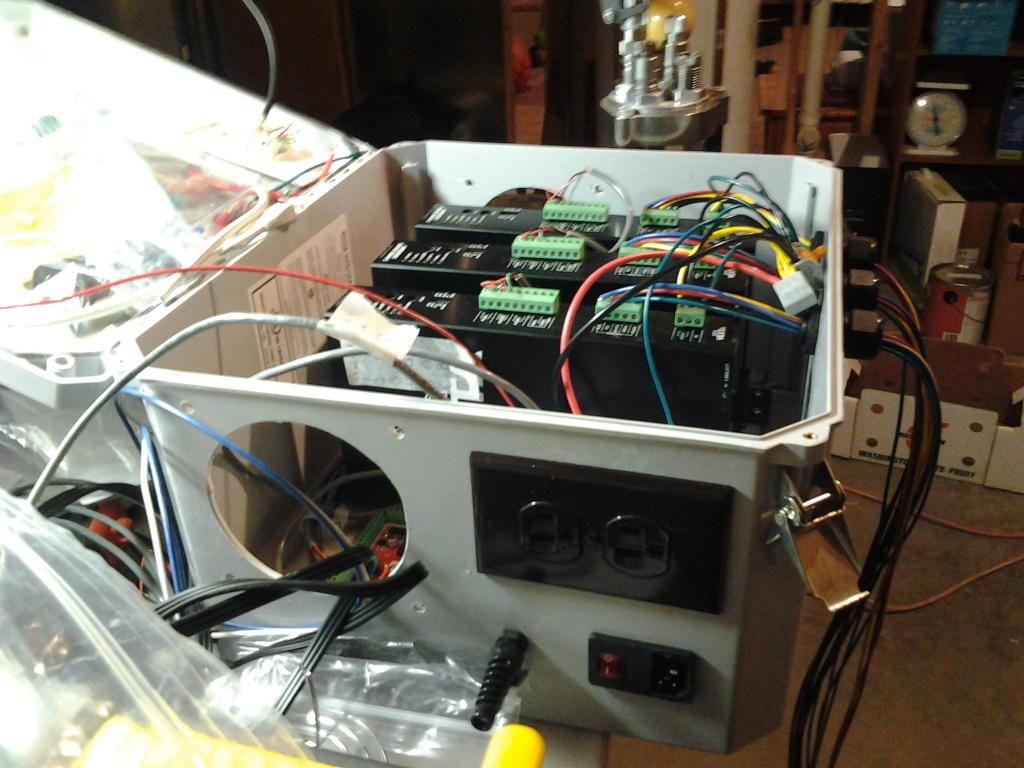
Here are a couple of pictures of my enclosure. I have two fans that pull air through a filter to cool the electronics inside. I made a temp. face for the enclosure from 1/8" plywood, with the idea that I would change some things. After using the machine for a bit now, I have found that I do not use the manual speed control for the SPID. If I need to change the spindle speed I will do it in Mach3. I will be removing this option from the front panel in the future.
-
09-04-2014, 03:47 PM #51
Registered
- Join Date
- Jun 2012
- Posts
- 817
Re: Show off your controller enclosure
I thought that same thing once, but my sensor went out in the middle of a job and I didn't want to stop production to tear into it. I used the speed control knob for a few days until I had time to dig in. Originally Posted by RicknBeachcrest
-
09-10-2014, 05:30 PM #52
Registered
- Join Date
- Jun 2012
- Posts
- 17
Re: Show off your controller enclosure
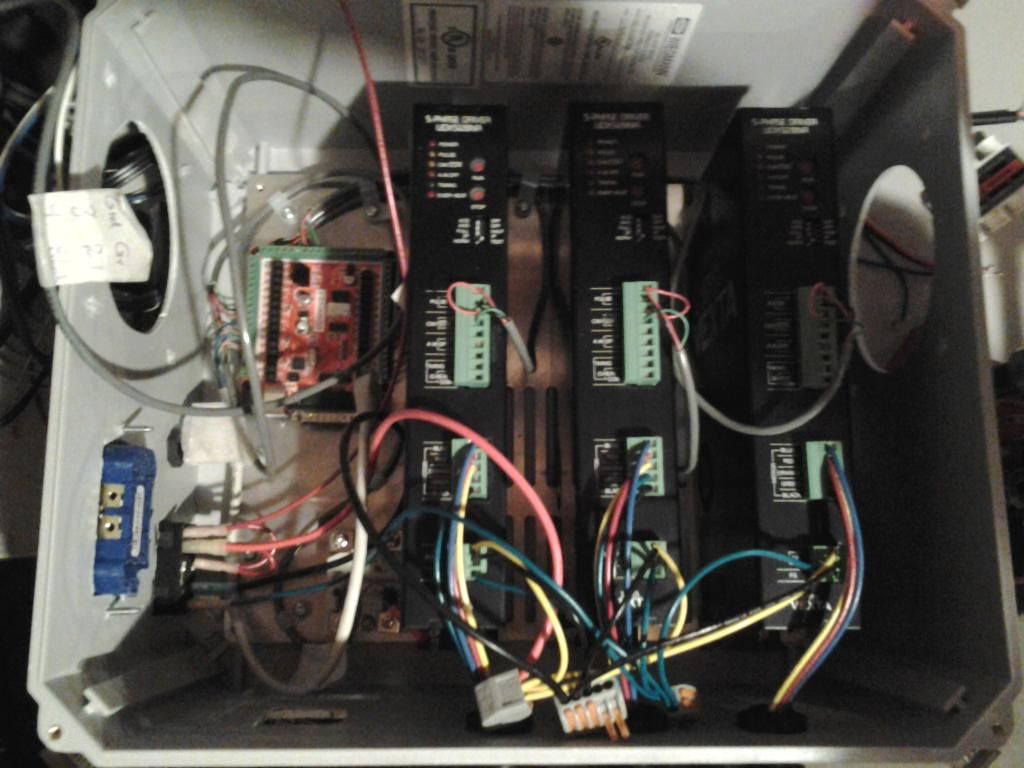
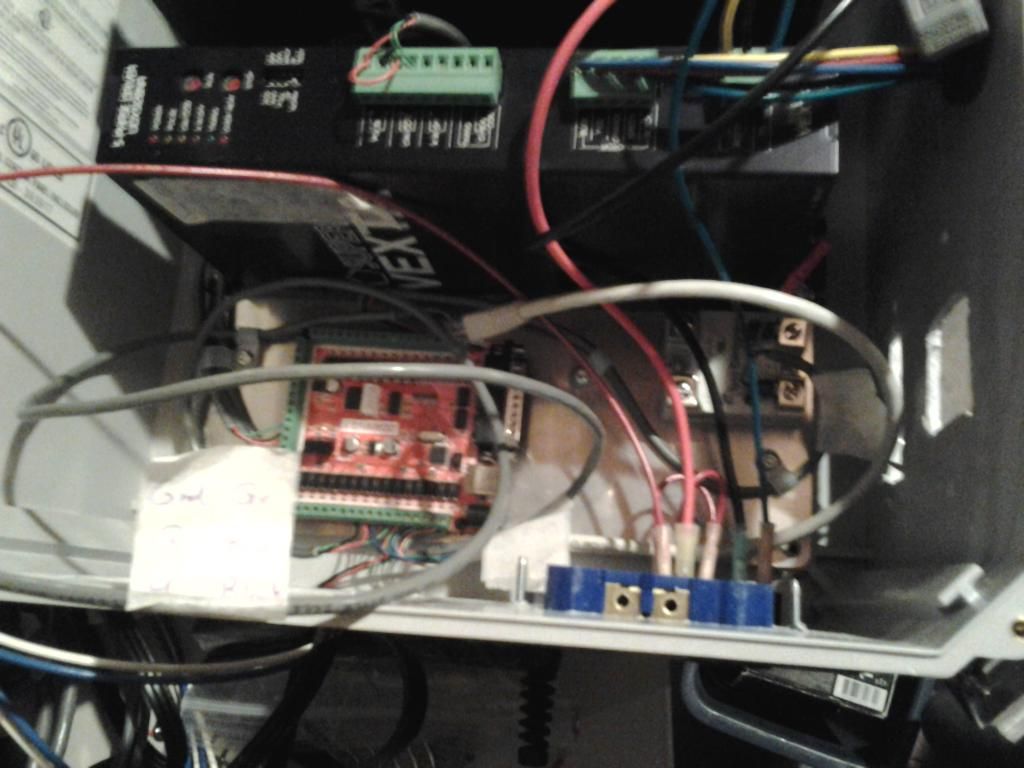
Looks like I had a similar approach as CurtisBarclay. Started with an old Dell E521. Mine is pretty cramped, as I managed to cram in ALL electronics for my setup, including the computer. Computer also had to have a second parallel port installed via PCI slot, which is used exclusively for I/O stuff. Excuse the mess, pictures were taken while wiring was still in progress and un-sorted...
External buttons and manual control I/O (Start, Stop, E-Stop, XYZ Jog, etc...) and such connect through the DSUB9 connector on the back, and external sensors and table related I/O (Limit/Home, Probe, etc...) go through the DSUB15.
Ive got a couple other enclosures for other machines, but I think that this is the one that I am proudest of. Other enclosures are just simple boxes with necessary ports installed. Sometimes painted, sometimes not.
-
09-11-2014, 12:22 PM #53
Registered
- Join Date
- Nov 2008
- Posts
- 47
Re: Show off your controller enclosure
Great layout! Considering you have the PC and drives all in the same case. I had the same thoughts, but my concern was heat buildup between the motherboard and drives. Also I wanted ease of access to any component and to have the ability to expand in the future. I'm fortunate enough to have 2 of these cases, one for the PC and one for the drives. Originally Posted by Seelesturm
I'm always having a PICNIC....Problem In Chair Not In Computer!
-
09-11-2014, 12:34 PM #54
Registered
- Join Date
- Nov 2008
- Posts
- 47
Re: Show off your controller enclosure
As someone had mentioned I had the drives to close together and wouldn't dissipate heat very well and couldn't agree more.
Here is a picture of the first one I made;
Attachment 249168
Here is picture if the revised one I made;
Attachment 249170
Actually I like the new one better.I'm always having a PICNIC....Problem In Chair Not In Computer!
-
09-13-2014, 01:59 AM #55
Registered
- Join Date
- Jun 2012
- Posts
- 17
Re: Show off your controller enclosure
Heat is a little bit of an issue for me in that setup, but a couple precautions make it a bit better. Both 5 inch bays are replaced by fans that are aimed through the heat syncs on the drivers, which help quite a bit. Keeping it off of ridiculous uptimes also helps, hour on, hour off. In the machine that assembly is on, that is not usually a problem. Wire jungle of everything also adds a bit of an issue as well...
I have contemplated water cooling pads, but overall, the easiest solution would be to expand the assembly into two units, or just make a big box again.
Honestly, I spent so much time on it that I am not willing to admit it as needing to be completely redone yet haha

 Reply With Quote


Similar Threads
-
Automation Technology CNC controller enclosure
By ChrisAttebery in forum For Sale OnlyReplies: 0Last Post: 06-12-2014, 07:57 PM -
DIY Controller enclosure
By Jkountz in forum CNC Machine Related ElectronicsReplies: 0Last Post: 12-22-2012, 03:16 AM -
Stepper controller enclosure?
By jviss in forum Uncategorised MetalWorking MachinesReplies: 19Last Post: 09-17-2012, 09:04 AM -
New controller PC / electronics enclosure
By blades in forum Mini LatheReplies: 15Last Post: 07-22-2010, 06:26 PM -
EDGE II controller(phoenix V.6) can not show error messages of Command THC
By Automation in forum Hypertherm PlasmaReplies: 3Last Post: 06-18-2010, 03:20 PM
