


Plenty of space to upload them directly to cnc zone...
Sent from tapatalk
Thread: Blower for The Demon V8
Results 21 to 40 of 82
-
06-30-2013, 11:54 PM #21
 Registered
- Join Date
- Dec 2004
- Posts
- 783
-
07-01-2013, 06:15 PM #22
Gold Member
- Join Date
- Jan 2006
- Posts
- 2985
Right click on an image, view link in new tab, then you can browse the pictures on photobucket. Originally Posted by stevehuckss396

Nice work!
Matt
-
07-02-2013, 12:54 AM #23
Registered
- Join Date
- Dec 2006
- Posts
- 603
Hey that works good, thanks.
-
07-06-2013, 12:29 AM #24
Registered
- Join Date
- Dec 2006
- Posts
- 603
I have the new gear cover done. Just need to sand blast it and thread the holes.
-
07-06-2013, 04:33 PM #25
Registered
- Join Date
- Dec 2006
- Posts
- 603
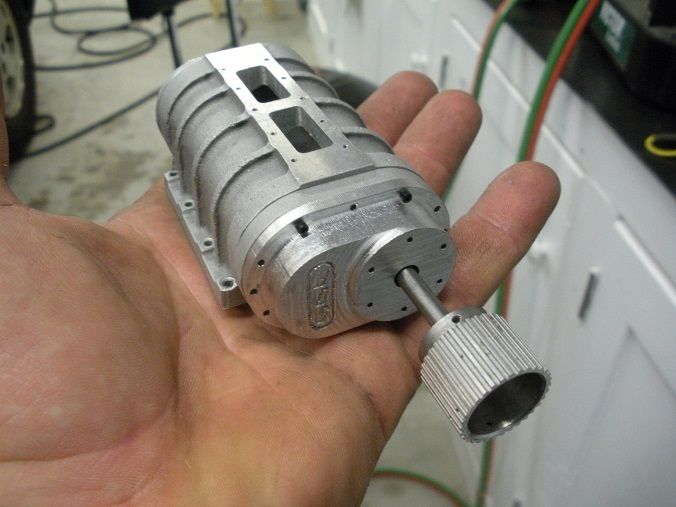
Got the drive snout done. I recycled the prototype by shortening it up and re-boring the bearing pocket.
-
07-06-2013, 08:13 PM #26
Registered
- Join Date
- Dec 2006
- Posts
- 603
Well i'm done for the day.
The adjusting bracket I had made long ago. All I had to do is drill and tap the threads and then slit it so it would snug down on the snout. Then I threaded it so the idler wheel pin would thread into it. The idler pin I cheated a little and used a piece of 9/32 hex bar I had on hand. The idler wheel itself is to the drawing. Alignment looks very good with the crank pulley. I need to get a belt so the pictures will be much cooler.
-
07-12-2013, 11:28 PM #27
Registered
- Join Date
- Dec 2006
- Posts
- 603
Google has not let me on in a few daze so here is the latest.
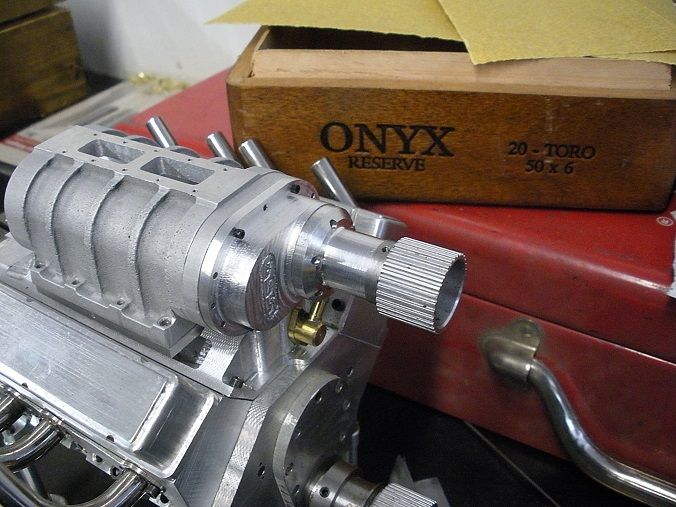
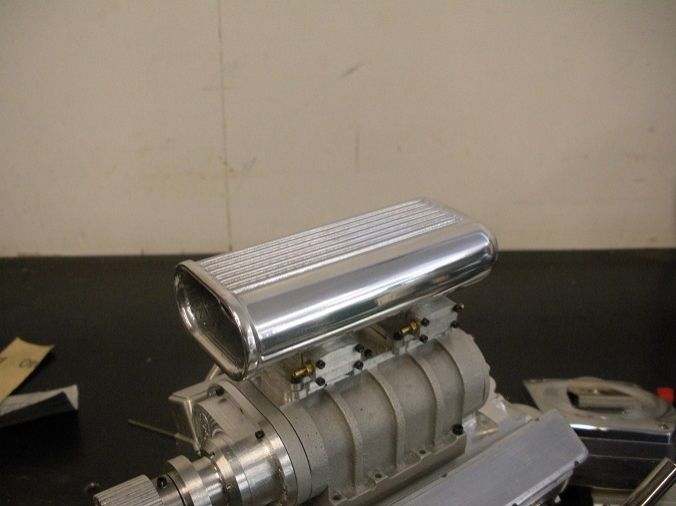
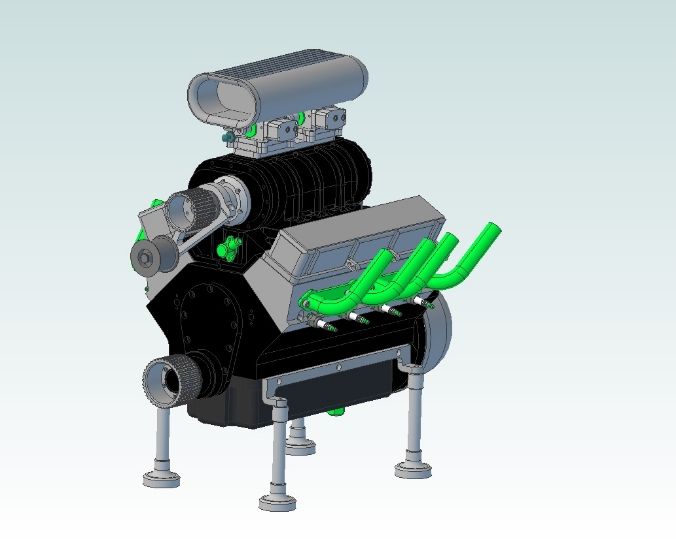
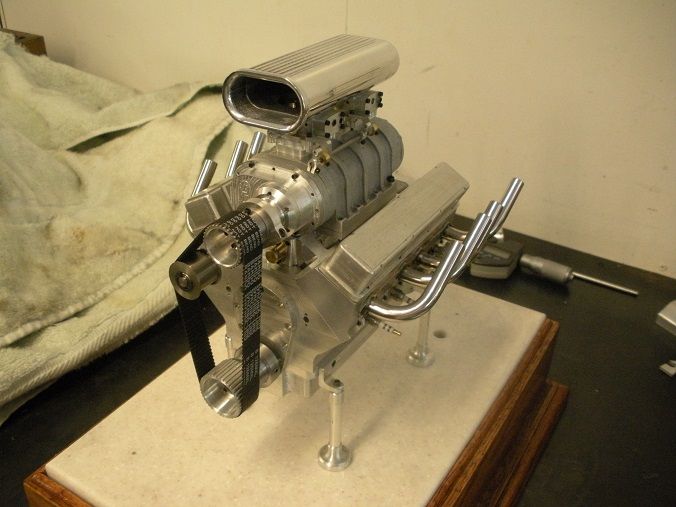
Blower is done, just needs gaskets. and I made the air scoop with a little help from CamBam.

-
07-13-2013, 02:18 PM #28
Registered
- Join Date
- Dec 2006
- Posts
- 603
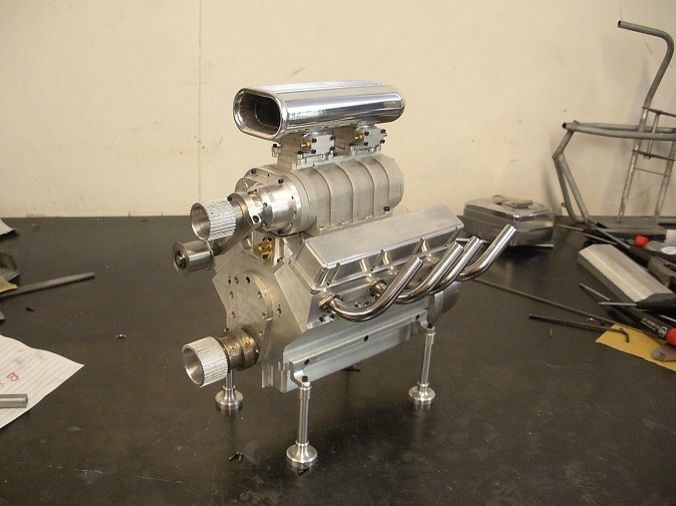
Pretty darn close!
-
07-19-2013, 08:12 PM #29
Registered
- Join Date
- Dec 2006
- Posts
- 603
I have started on the linkage for the carbs. 2 small brackets, a shaft, and a couple of retainers to maintain position of the rod. This rod will rotate to open and close the carbs.

When you cad this stuff up it's real easy to loose track of just how small the parts can get. On the computer you can just zoom in a little more. Cant do that in the garage.

-
07-20-2013, 05:07 PM #30
Registered
- Join Date
- Dec 2006
- Posts
- 603
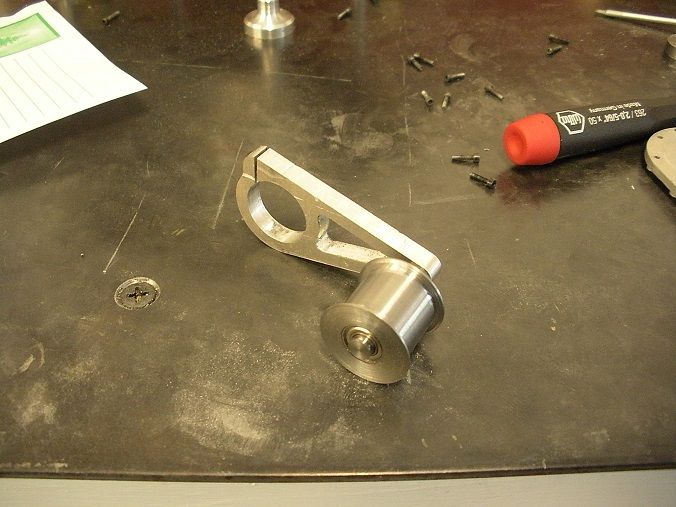
Got my pivot arms done. I think i'm going to spend the rest of the day making spark plug boots. Makes for a nice easy day.

-
07-25-2013, 10:42 PM #31
Registered
- Join Date
- Dec 2006
- Posts
- 603
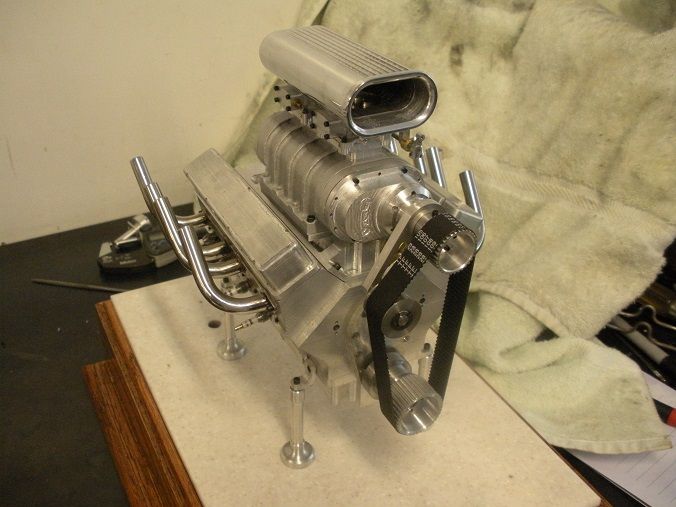
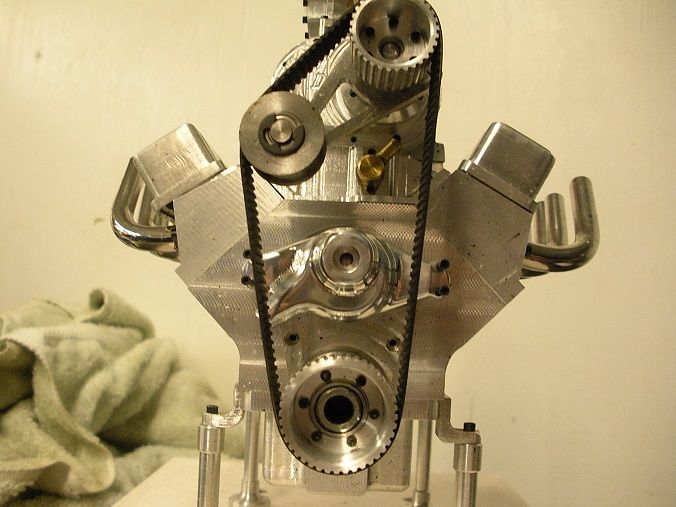
Blower belts came in the mail today. The fit is perfect. With any luck I should be back at it early next week.
-
07-26-2013, 12:03 AM #32
Gold Member
- Join Date
- Jan 2006
- Posts
- 2985
Is that a custom belt or do you just call up the auto parts store and ask for a Demon V8 blower belt?

-
07-26-2013, 01:44 AM #33
Registered
- Join Date
- Dec 2006
- Posts
- 603
Originally Posted by keebler303
Belt for a 2013 Demon without air or power steering should do it.
It's not a "custom belt" for Belt Corp but it is wider than most and I had to order a 10 pack.
-
08-08-2013, 02:02 AM #34
Registered
- Join Date
- Dec 2006
- Posts
- 603
Finally a little progress!
I have been tied up with maintaining other engines. The Peewee V4 now has a new distributor cap, rotor, and hall sensor. She's running real nice now. The V8 had a water pump burn up. My own fault. The first design had the coolant return hose right under the fill cap so when I run it the coolant sprays out the vent hole in the cap. The coolant got low and the pump got no lube so it is now a little loose.
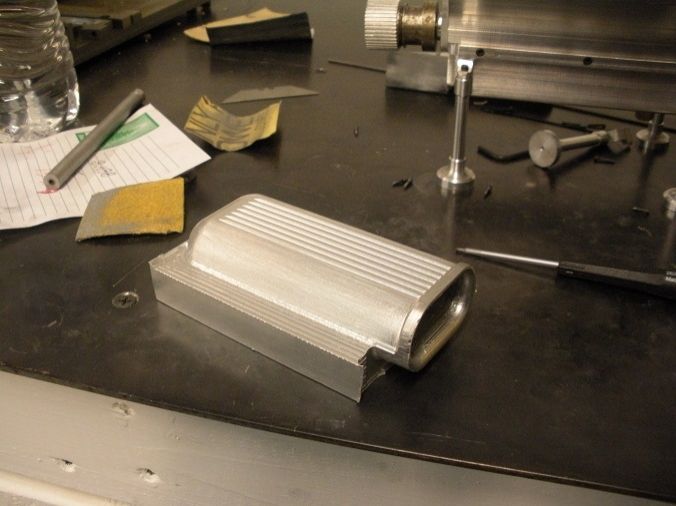
One thing I didn't like about the old one is the fact that the body doubles as a bearing race. The body has to be made from bronze or brass. I am going to see how a pump with sealed bearings works. With ball bearings I should be able to get away with an aluminum pump. I also am making this one like a real pump in the sense that it draws water from the inlet and feeds coolant to both sides of the pump like a real one. I don't need it to do that but I may in the future. I figured I would make enough parts for 3 pumps. I need one for the V8, one for the blown V8 and one for spare parts.
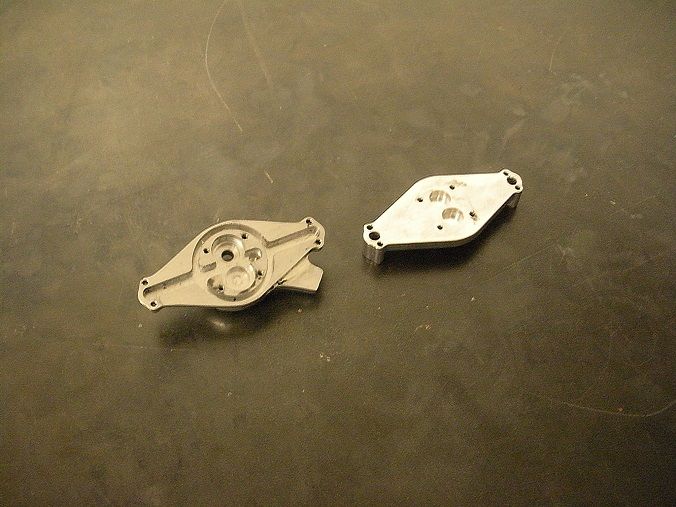
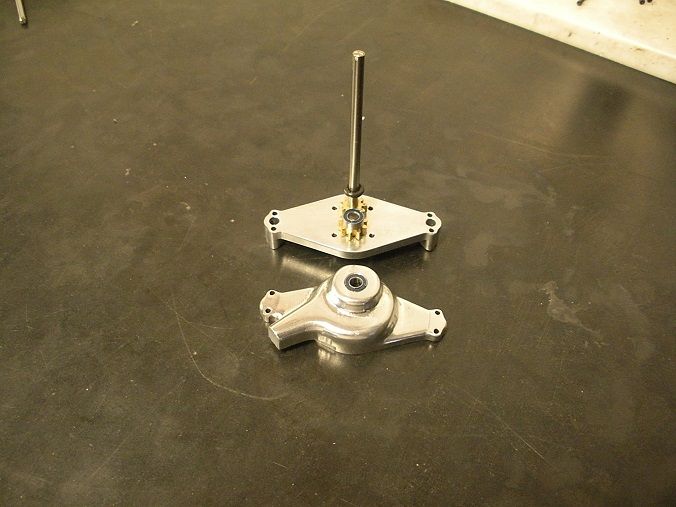
The top piece is the back side of the pump. All the passages are milled into the back of the body. The lower piece is the front of the back plate. The back plate allows the pump to span the timing cover and carries the rear bearings.

-
08-10-2013, 11:00 PM #35
Registered
- Join Date
- Dec 2006
- Posts
- 603
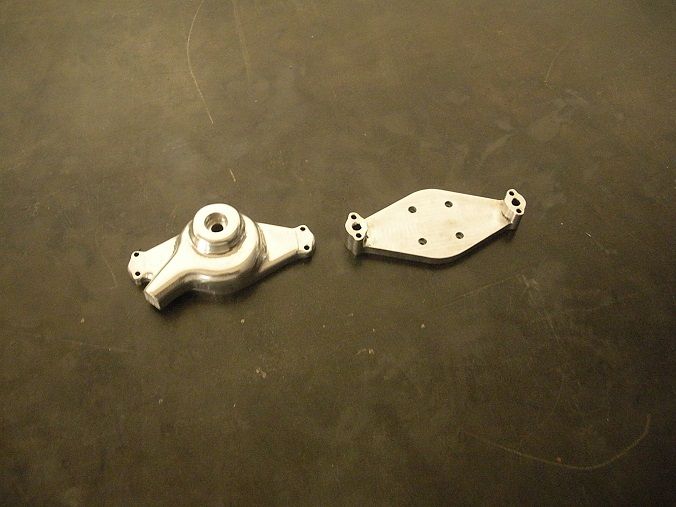
Little more on the pump today. The rear plate and body are complete. I rounded off some corners to make it look different but I think I like the old style better.
Now I need to make me some guts.
-
08-12-2013, 01:08 AM #36
Registered
- Join Date
- Dec 2006
- Posts
- 603
HELLO HELLO HELLO HELLO HELLO HELLO HELLO
Anybody home! It sure is dead in the IC section these days. I thought it would be busier with the merger with the other forum.
-
08-12-2013, 01:29 AM #37
Gold Member
- Join Date
- Feb 2009
- Posts
- 2143
Hello! I don't have much to say, but read every post in this thread... Fantastic and beautiful work!
CAD, CAM, Scanning, Modelling, Machining and more. http://www.mcpii.com/3dservices.html
-
08-12-2013, 01:37 AM #38
Registered
- Join Date
- Dec 2006
- Posts
- 603
I was more refering to the entire IC section. Nobody seems to be doing much anymore. Maybe it being summer here in the states everybody is out of the shop. Does it seem slow to you mcphill or is it just me.
-
08-12-2013, 02:39 AM #39
- Join Date
- Nov 2006
- Posts
- 73
Steve Originally Posted by stevehuckss396
It does seem to be slow at times. Summer holidays probably plays a part in it with families traveling for holidays. I see this on a lot of forums where it just seems to go almost dead for a couple of days then picks up almost to overload a few days later.
Fine job that you are doing on the water pump as well as the rest of the engine and blower.
Cheers
Don
-
08-13-2013, 12:52 AM #40
Registered
- Join Date
- Dec 2006
- Posts
- 603
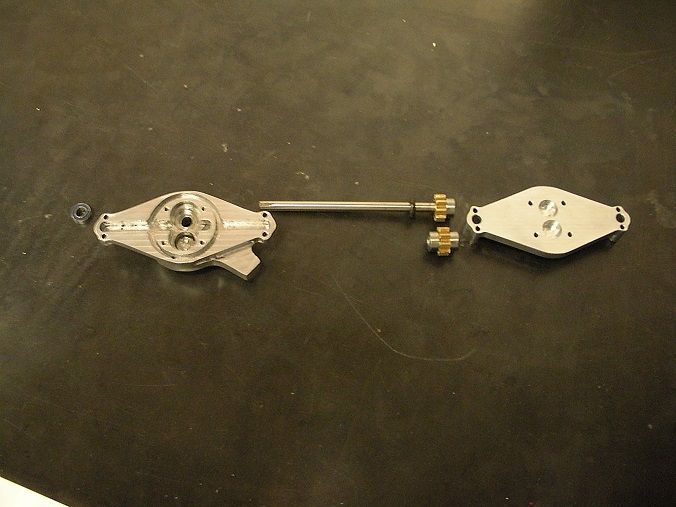
I have finished the 2 shafts other than the fact that the drive shaft needs to be trimmed to length. On the old pump the shafts rode in a reamed hole so the case needed to be brass or bronze. Now the shafts ride in 1/8 X 1/4 inch bearings. The o ring seal has been moved to a small pocket in the rear of the front case. I still need to make a gasket but I have my trusty template so that should go fast and then an easy finish and it should be mounted tomorrow if life will allow. I'm in a bit of a hurry because I have a metal club meeting Wednesday and I'm trying to turn it into an engine run so I would like to be ready.

 Reply With Quote
Similar Threads
-
Steve Huck's Demon V8 version 1.5
By cforcht in forum I.C. EnginesReplies: 504Last Post: 04-25-2022, 02:54 PM -
Demon V8 updates, getting them?
By stevehuckss396 in forum I.C. EnginesReplies: 0Last Post: 02-08-2014, 06:25 PM -
Fan , blower , connection , help
By josvanhout in forum CNC Machine Related ElectronicsReplies: 1Last Post: 11-03-2013, 10:40 PM -
Building a Little Demon V8
By maxine in forum I.C. EnginesReplies: 7Last Post: 06-21-2013, 06:21 AM -
Vacuum or Blower
By stickermanstl in forum Commercial CNC Wood RoutersReplies: 2Last Post: 03-04-2010, 01:38 PM
