


Nice work.
I would have thought using the rotary table to cut the 80mm hole would have been much quicker. Could have finished the bore with the boring head if better precision needed.
Results 81 to 100 of 117
-
07-06-2016, 10:45 AM #81
 Registered
- Join Date
- Jan 2008
- Posts
- 1528
Re: 5 Axis CNC Plastic Cutting Router "The CutaRouterer"
7xCNC.com - CNC info for the minilathe (7x10, 7x12, 7x14, 7x16)
-
07-06-2016, 11:01 AM #82
Junior Member
- Join Date
- Jul 2015
- Posts
- 57
Re: 5 Axis CNC Plastic Cutting Router "The CutaRouterer"
Daniellyall
You very well may be right, but I'm running out of time and money, so only if it's a massive problem will I change either the ballscrew or the motor. Thanks for the suggestion though.
pipping88
The hole is also 80mm deep, I don't have, nor do I want to buy an endmill long enough for that. And to be honest, I think the boring head is faster at this point, the rotary table seems to have developed a massive amount of play, not just standard wormgear backlash, but the table tilts side to side, so I can't take big cuts... Not even medium cuts. And that's why it took me 18 hours to cut that complex hole.
-
08-09-2016, 10:30 AM #83
Registered
- Join Date
- Mar 2016
- Posts
- 1
Re: 5 Axis CNC Plastic Cutting Router "The CutaRouterer"
hi Christian, you're right there is very few DIY 5 axis CNC finshed on the Web.
So nice idea to share your work.
I am a french manufacturer of rc car bodyshell too. I don't own CNC yet so i have to make my mould milled by mill shop. But i 'm working on a build of a cnc mill (3 axis first i think)
i hope you will have this machine finished soon.
Stef
-
08-09-2016, 01:34 PM #84
Registered
- Join Date
- Jun 2005
- Posts
- 1729
Re: 5 Axis CNC Plastic Cutting Router "The CutaRouterer"
ChristianLL,
You did a very nice job, well done.
Russ
-
08-09-2016, 02:17 PM #85
Junior Member
- Join Date
- Jul 2015
- Posts
- 57
Re: 5 Axis CNC Plastic Cutting Router "The CutaRouterer"
Oh that's awesome! Have you got a website? I'd love to see your body shells. Originally Posted by eightman

And thank you for the kind words. Rest assured this project will be finished and I will continue to answer questions after it's finished. In fact, I expect to have the machine ready to make moulds in a few weeks! I recently started documenting my daily work on Instagram, you can follow me at Christian (@moonpies) • Instagram photos and videos
-
08-09-2016, 03:19 PM #86
Junior Member
- Join Date
- Jul 2015
- Posts
- 57
Re: 5 Axis CNC Plastic Cutting Router "The CutaRouterer"
ALRIGHT! I know it's been a while, I'm sorry. It was all just machining the same sort of stuff, nothing new to see until now, so here we go!
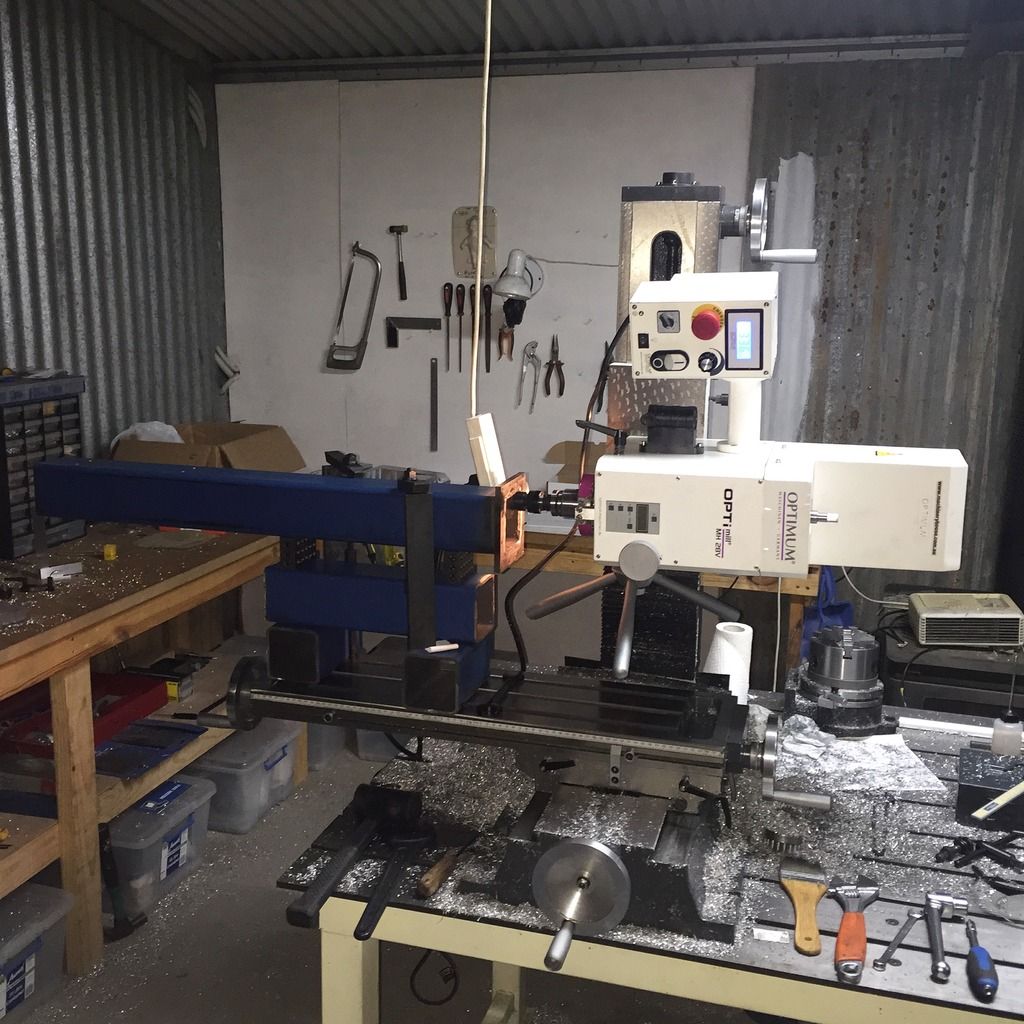
I spent the past 5 weeks standing in front of the purpose bought mill, making all the parts I need for this rotary head. It's winter here right now, so it's damn cold in the shed, often times I'd stand still for 4 hours straight just turning the little hand on the rotary table to mill out a circular pocket and I'd end up with completely numb feet. There's aluminium chips all over the floor, in my bed room 50 metres away and my father said he found a chip at his work 20km away! It must have stuck to his boot and made the whole way haha!
Basically, what I'm saying is, I've been working relentlessly, I haven't been lazy since my last post.
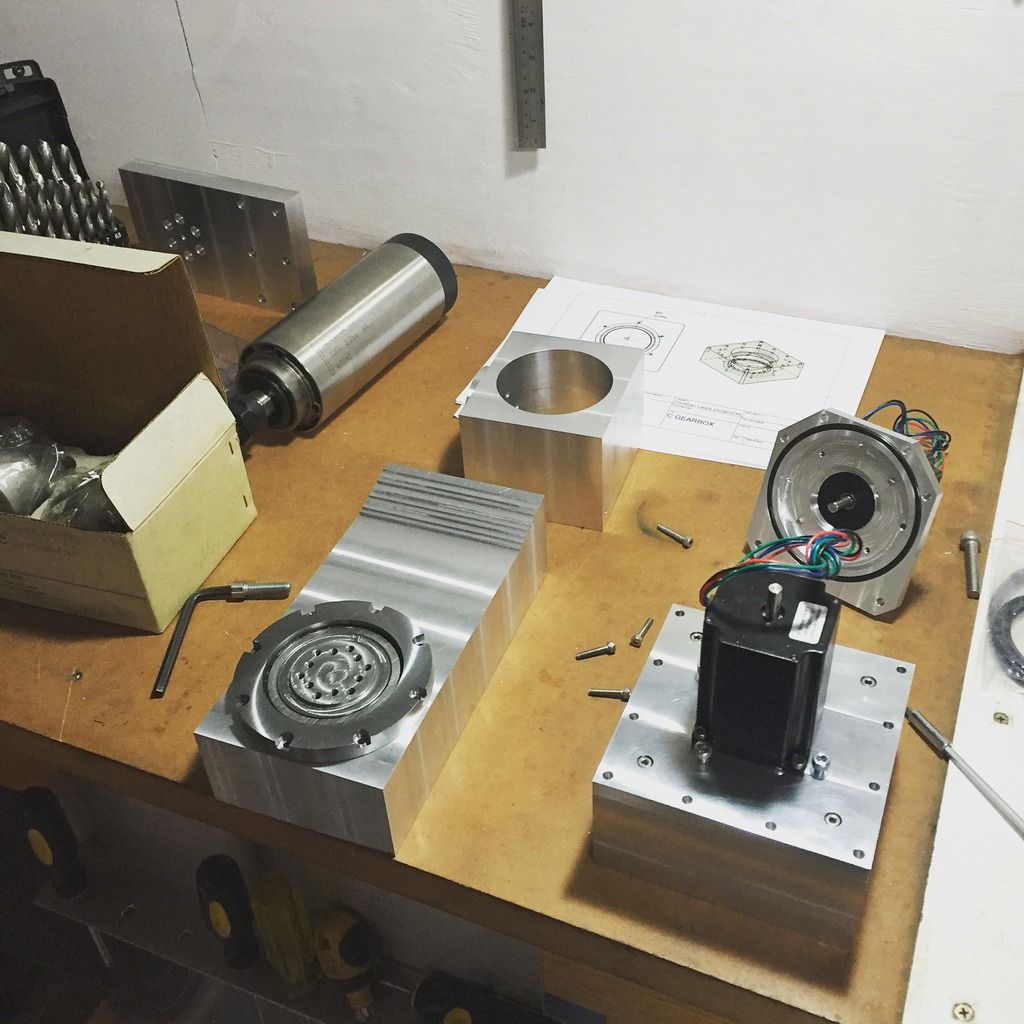
PICTURES!
Here's the first time I dropped a harmonic drive circular spline in it's rightful position.
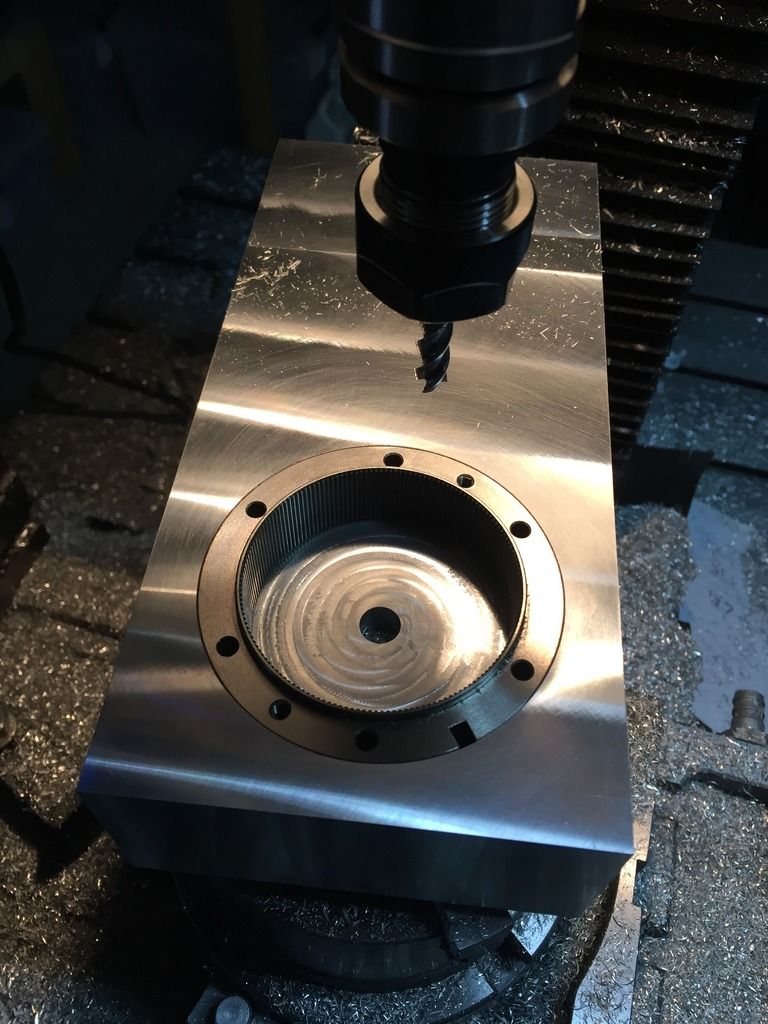
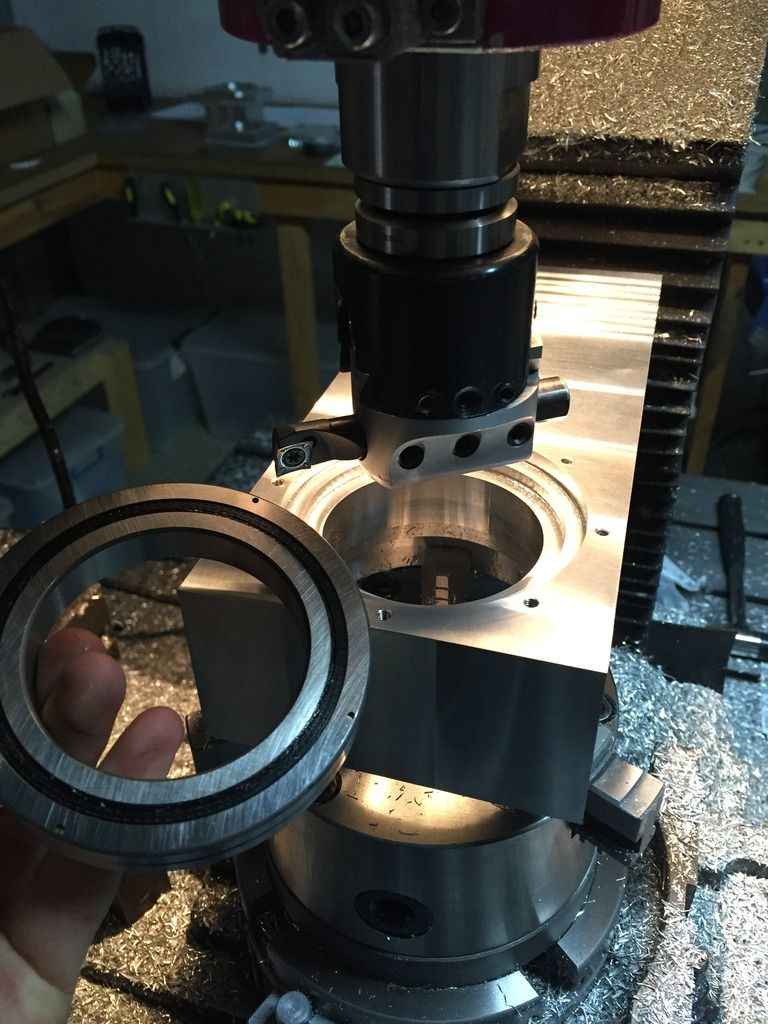
Then flipped it over to bore the seat for the cross roller bearing. There is only one cross roller bearing on each rotary axis (that's all that's necessary), they're designed to take axial, radial, and momentary load, they're fantastically cool things. About AUD$160 each.
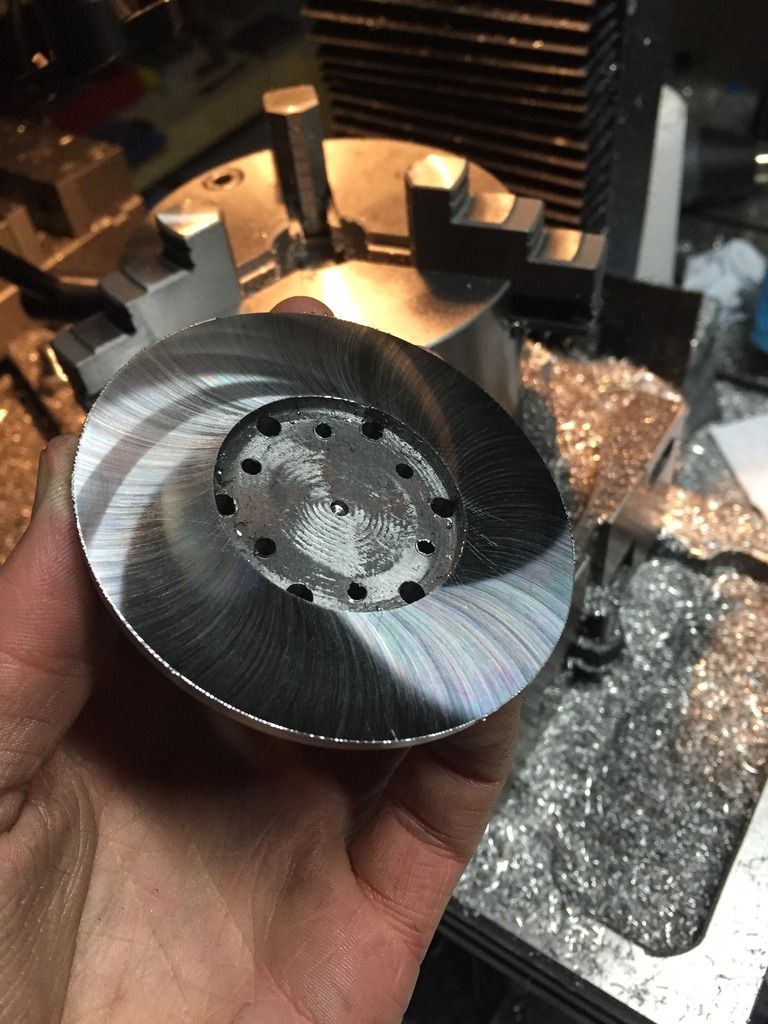
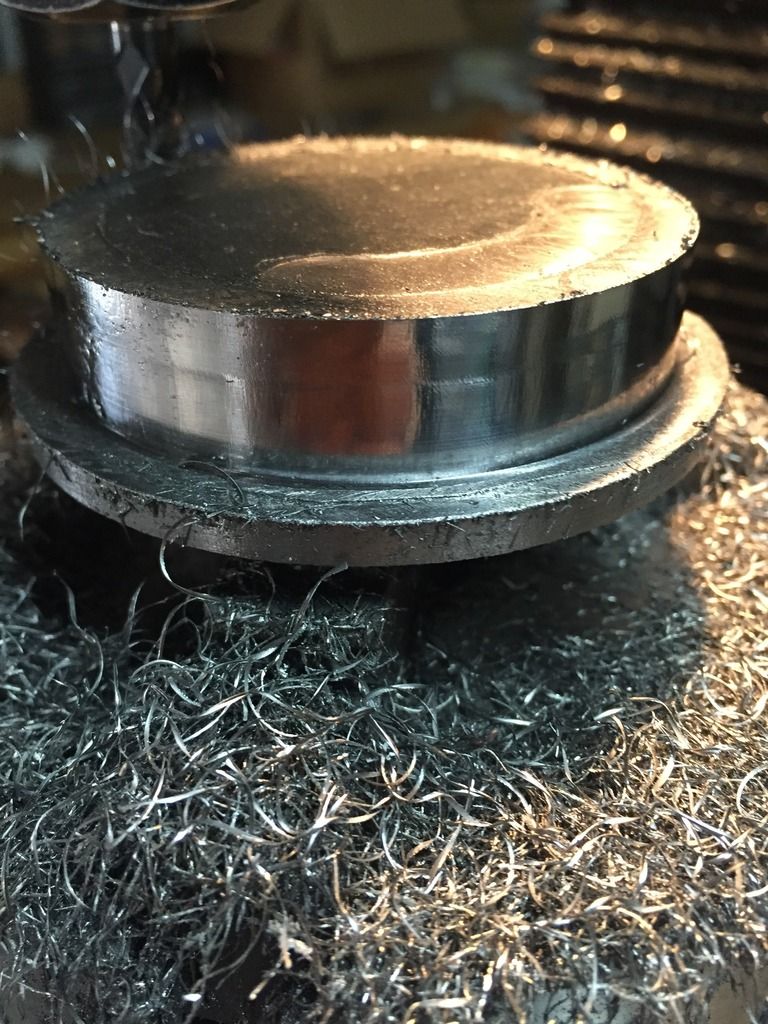
This is a steel part that fits inside the cross roller bearing and that fancy looking finished face was sanded and polished so it would seal up against an o-ring to retain the oil for the harmonic drive unit. Harmonic drives have to be bathed in oil when operating (like a car transmission), so that was the main reason for the very thick vertical piece of aluminium on the rotary head. Obviously that was just a great excuse for a super cool and solid rotary head design as well.
Things starting to go together here.
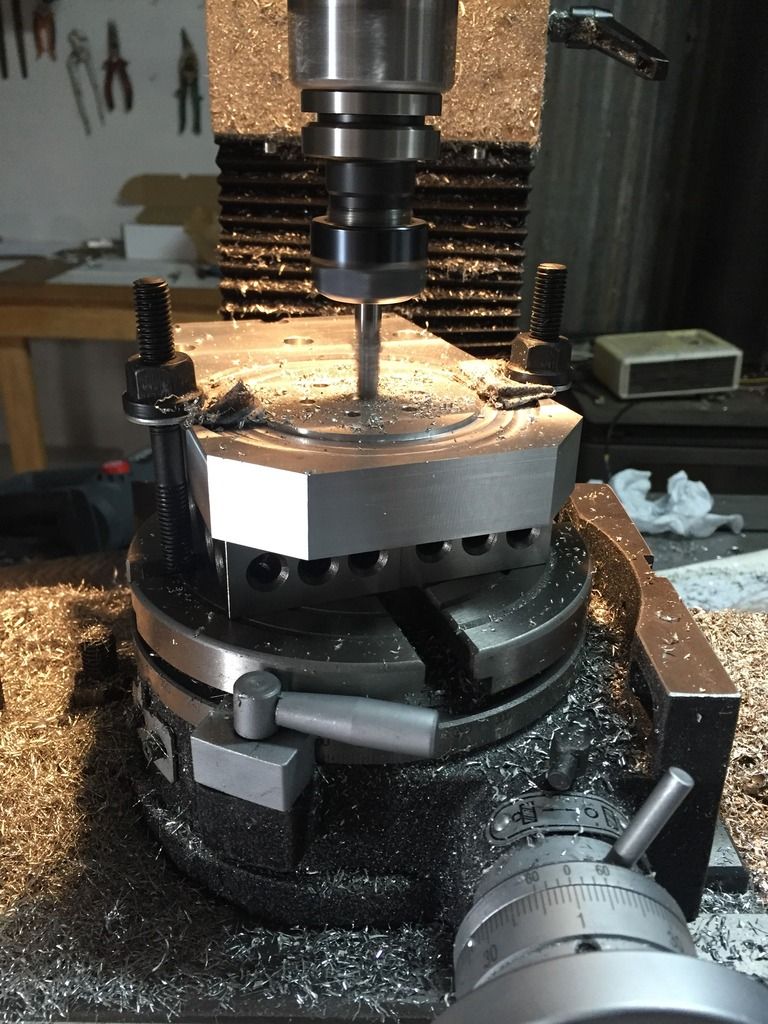
I bought an 8mm 4flute carbide endmill by Deskar to speed up cutting steel on the rotary table, this was the first cut. Amazing finish!
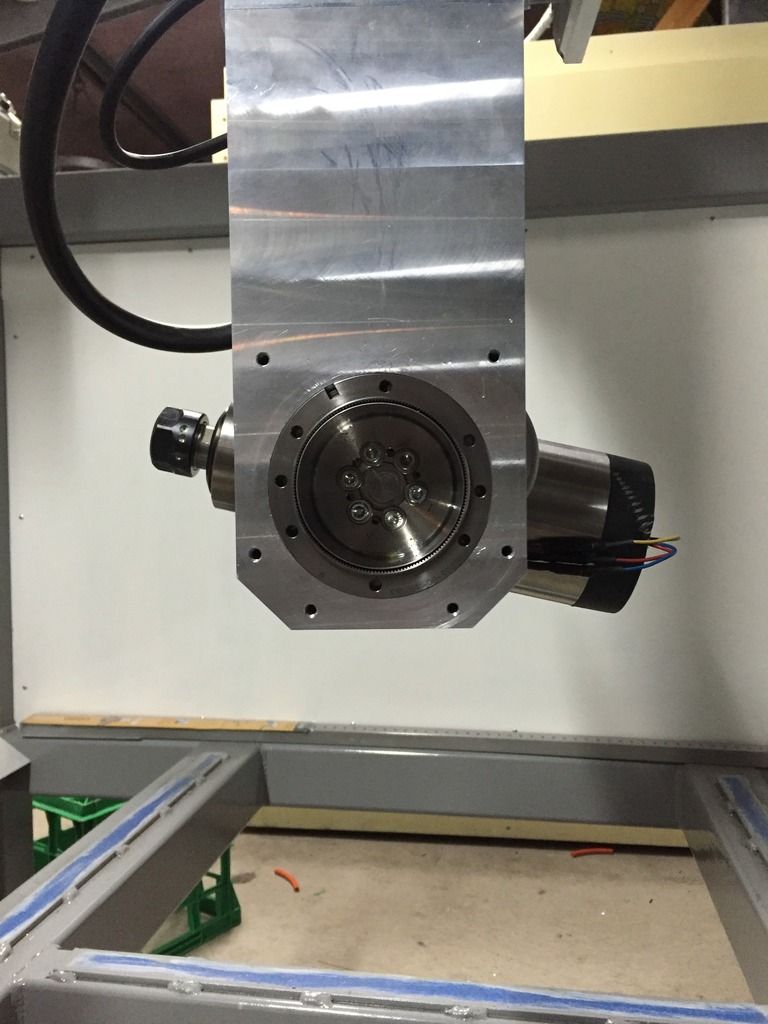
This was an exciting time. I'd finally got to the point where I could mock all the drive gear together and turn the harmonic drives by hand! 80:1 reduction.
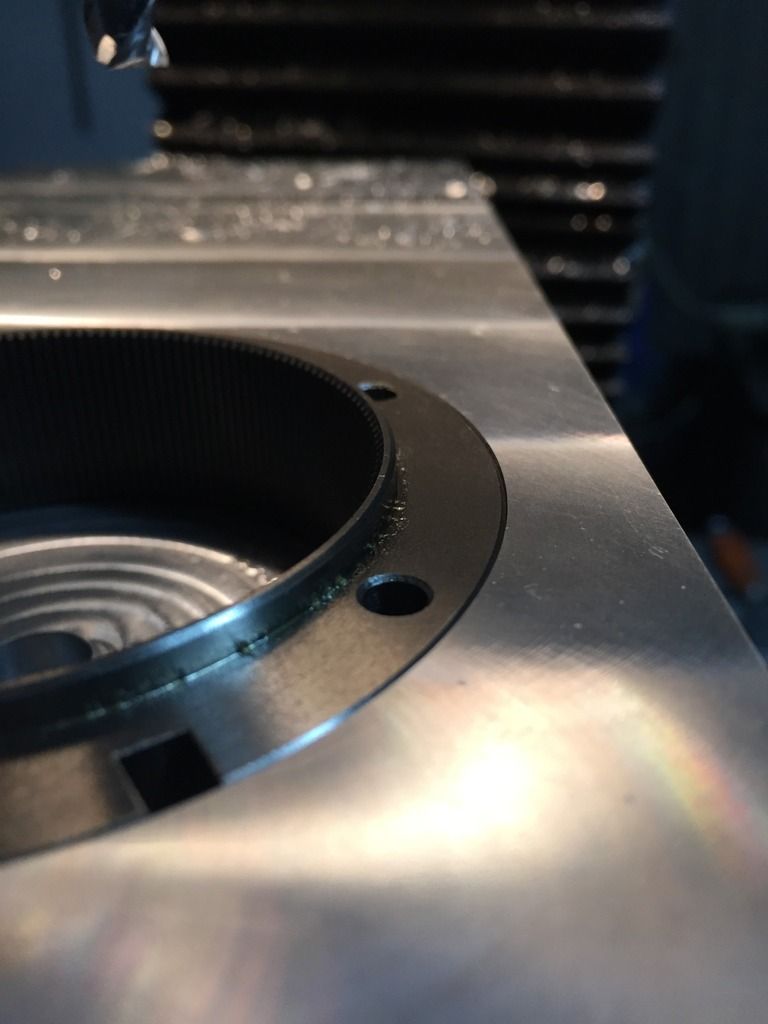
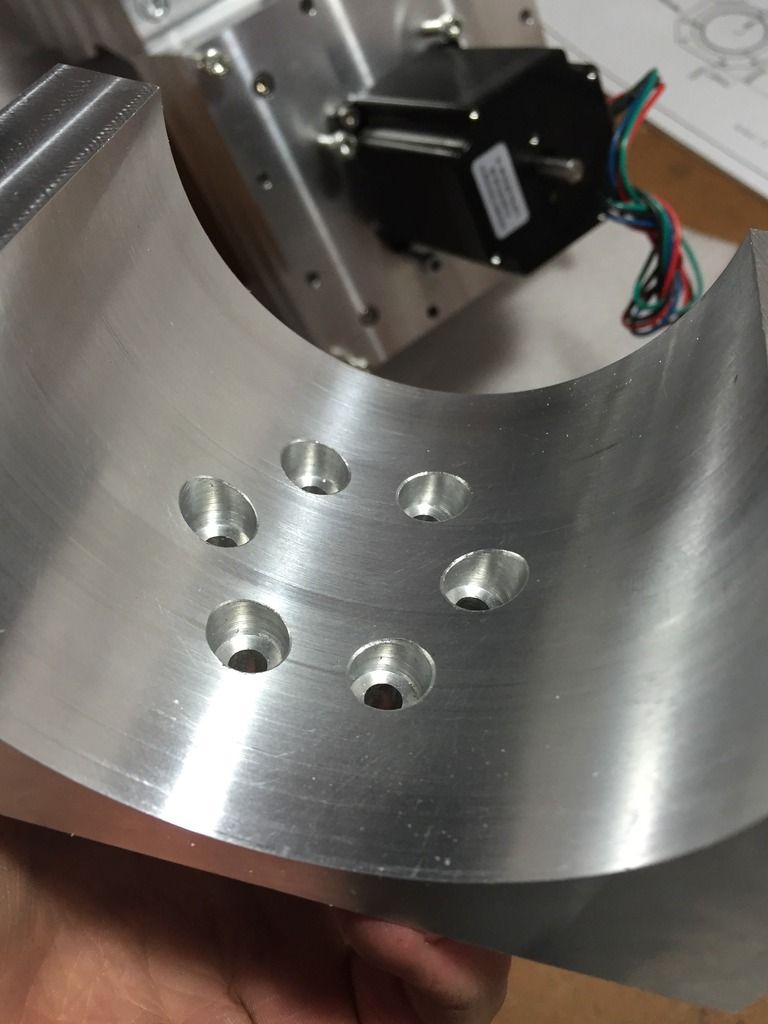
Here's some counterbore pornography.

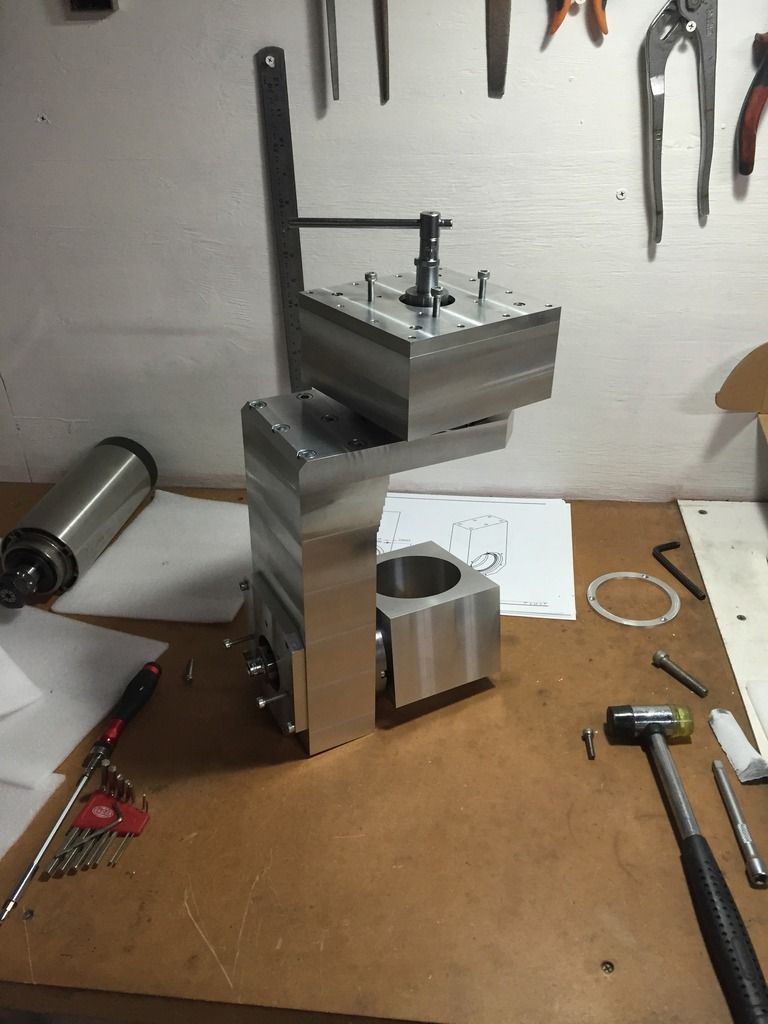
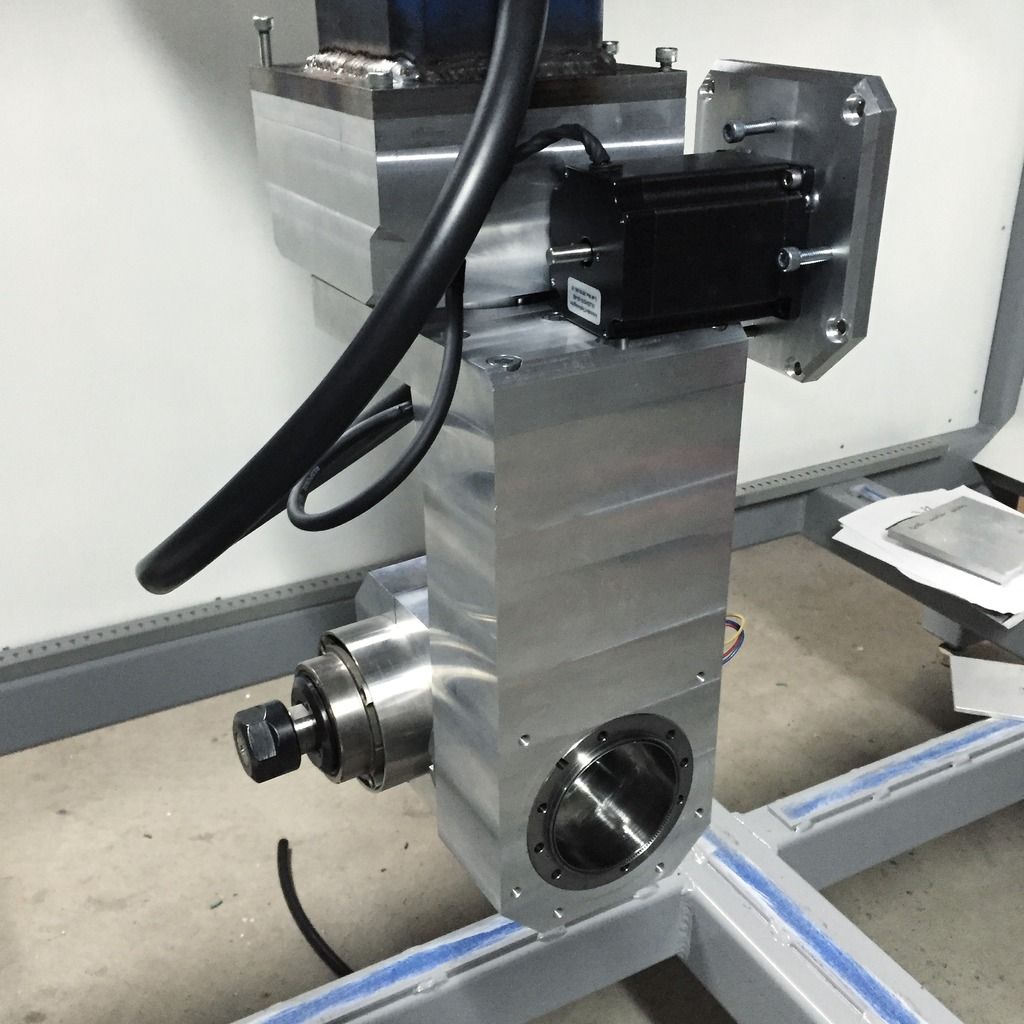
Does this look precarious to you?
What about this?
This was fun to admire, interesting angles and lines. I love it.
I may or may not have made a small squeaking noise from being over excited when I did this.

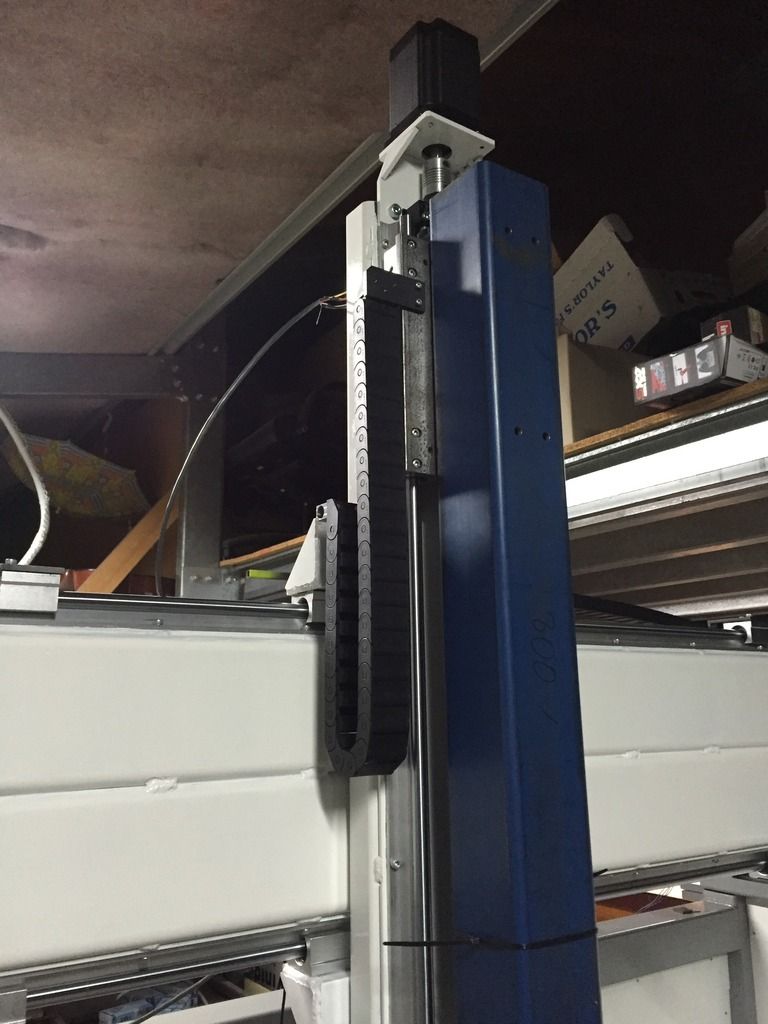
Clean cable chain install.
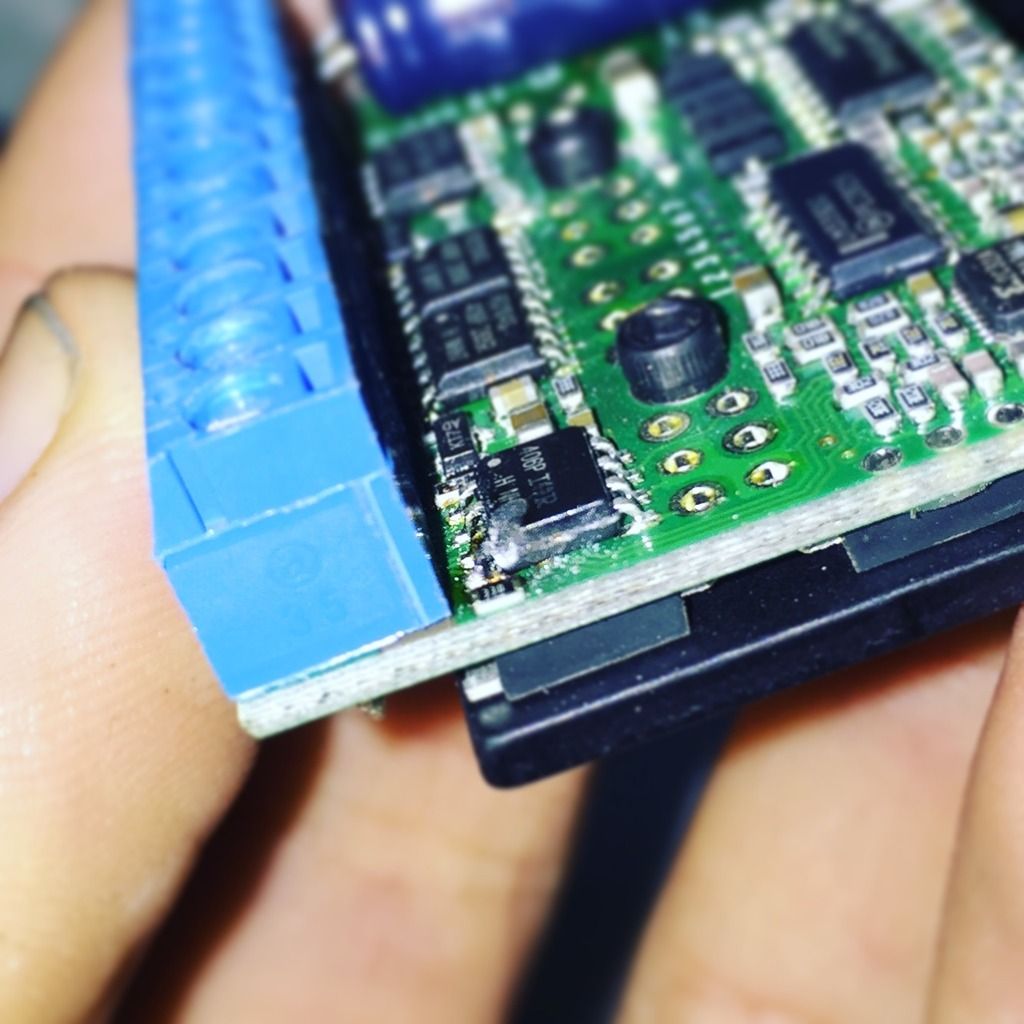
I was neglectful enough to accidentally cut the stepper motor wire for the B axis while it was still powered on. This obviously shorted it and left that little sh*t stain on the PCB. AUD$130 and two days later there's a new one installed and ready to go.
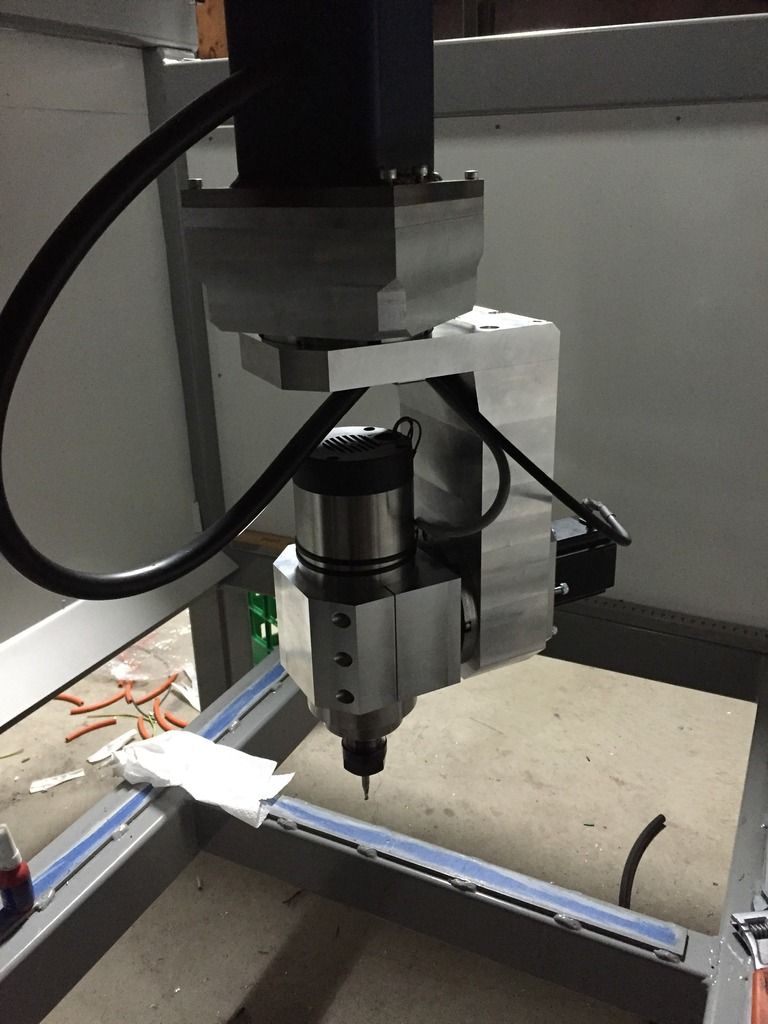
This was just before I assembled the B axis for the millionth time tonight, but this time I was filling it with oil, so hopefully there's no leaks and that's the last time I have to assemble it.
Eye candy.
And here's the head as it sits tonight. The cable management was a time consuming thing to figure out and decide on a final arrangement, I was concerned of the cables drooping over time and becoming ineffective. I still am, but it seems to be reliable for now. The C axis can turn from -360° to +360°, the C axis from -135° to +145°. I could improve the B axis to have more, but it was my favourite balance of neat cable management vs rotation range. I won't need more than 135° anyway.
Next on the agenda is to fill the C axis with oil and test for leaks, that will be scary because the orientation of the unit means the chamber that it sits, sealed inside of must be filled almost to the top, so there's lots more oil to spill and more oil pressure when spinning. If that all goes well, then I'll be moving on to the work surface which is a sheet of MDF about 40mm thick, there will be many holes drilled with threaded inserts for work holding. Then I'll start talking about that secret weapon I mentioned quite a while ago.
Bye now. And always be happy in your hearts.
-
08-09-2016, 03:43 PM #87
Registered
- Join Date
- May 2015
- Posts
- 1422
Re: 5 Axis CNC Plastic Cutting Router "The CutaRouterer"
This is a thing of beauty to watch unfold, thank you so much for sharing your progress with us. You must be getting excited now as you get so close!
-
08-11-2016, 11:55 AM #88
Registered
- Join Date
- Jan 2008
- Posts
- 1528
Re: 5 Axis CNC Plastic Cutting Router "The CutaRouterer"
Awesome!!!
7xCNC.com - CNC info for the minilathe (7x10, 7x12, 7x14, 7x16)
-
08-12-2016, 06:31 AM #89
Registered
- Join Date
- Mar 2014
- Posts
- 735
Re: 5 Axis CNC Plastic Cutting Router "The CutaRouterer"
Dang thats cool!
Sent from my VS980 4G using Tapatalk
-
09-09-2016, 10:38 AM #90
Junior Member
- Join Date
- Jul 2015
- Posts
- 57
Re: 5 Axis CNC Plastic Cutting Router "The CutaRouterer"
Okay! Been a while again, how's going guys?
I've got some tasty stuffs for you all. I've had the machine running for over a week now, making some parts out of wood. My biggest regret is the crappy linear rails, they are just horrible once you put load on them, but fortunately, they're JUST rigid enough to do what I need them to - cut wood and plastic.
Let's talk about CAM and Kinematics: (this is the 'secret weapon' I mentioned a while ago)
Fusion 360 STILL doesn't have proper 5 axis support yet, so right now I'm having to stitch multiple 3 axis paths using Tool Orientation together to get myself a useful tilting tool path. But how does the machine handle the kinematics to keep the tool on the correct path? Mach4 doesn't support kinematics - something I wasn't really aware of before I bought an Ethernet Smooth Stepper (which only works with Mach3 and 4). You think not having the kinematic features of expensive controllers is going to stop me? Hardly, I'll just make my own! Cue Cipher - my python script for Blender 3D that can take a generic Fanuc 5 axis gcode program that uses I, J, K tool vectors to define tool angle, do some cogitating on it for a while, then spit out gcode with X, Y, Z, B, C coordinates compatible with Mach3 and Mach4. It also applies RTCP compensation by hard coding it into the gcode, rather than relying on the machine controller to handle it on the fly, which has the advantage of know exactly which way the rotary axes are going to spin when the B axis is at zero (otherwise known as a singularity or gimbal lock).
But wait... This still doesn't work, Fusion 360 won't give me any good 5 axis gcode yet. So I also made a feature that can take a 3 axis program and add simultaneous 5 axis motion to it! You need to do some very simple trickery in Fusion 360 to make it work correctly, then you've got 5 axis toolpaths! It also works with 3+2 toolpaths of course, in fact Cipher is deciphering a 3+2 toolpath for me as I type.
Cipher will handle the process of unwinding the C axis at the 360° limit. You also get a 3D animation that you can playback to see the toolpath in action.
Here's the problems I must mention:
• It's only a script, there's no interface, every action is done through the python console in Blender. I tried to create a user friendly interface, but it was too cumbersome to figure out how to do it well.
• I'm short on time right now, but I'll soon put the script up for free download along with a video that explains how to use it, because honestly, it's not easy to learn how to use, I mostly made it for myself.
• I'm far from a professional programmer, so if you choose to use my script, don't complain to me that it crashed your machine. Feedback to help me improve it would be great, though.
What about the machine build?
As I said, the machine is working now, there's still some rough edges - particularly with the electrical - but it's cutting useful parts. So let's get into some pictures!
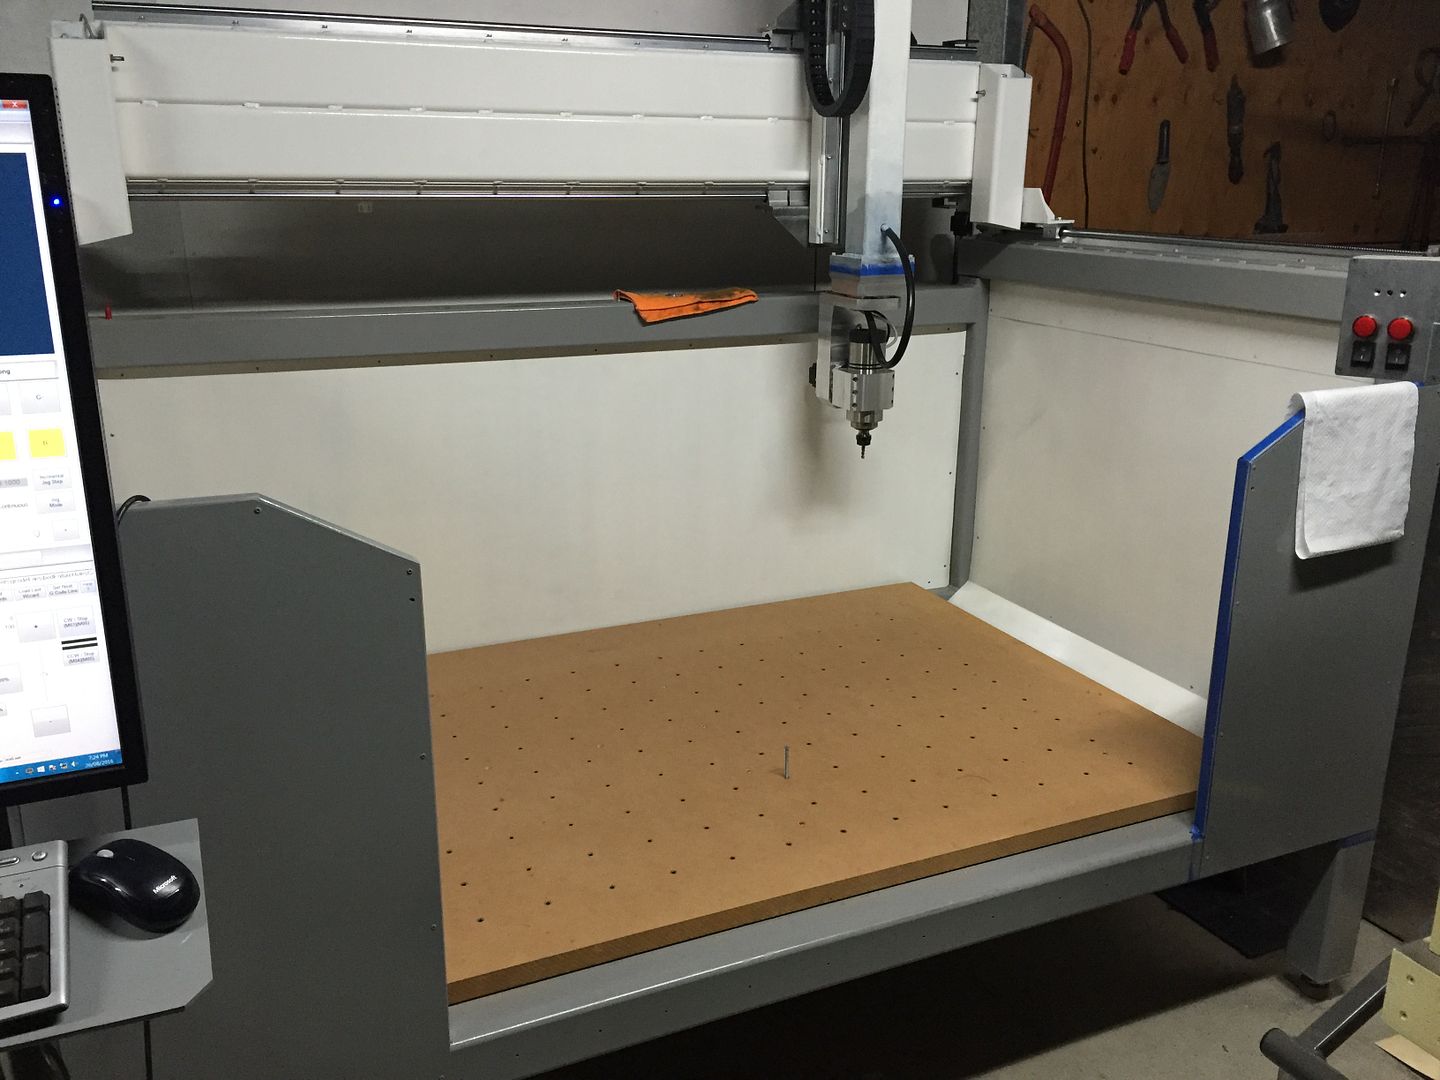
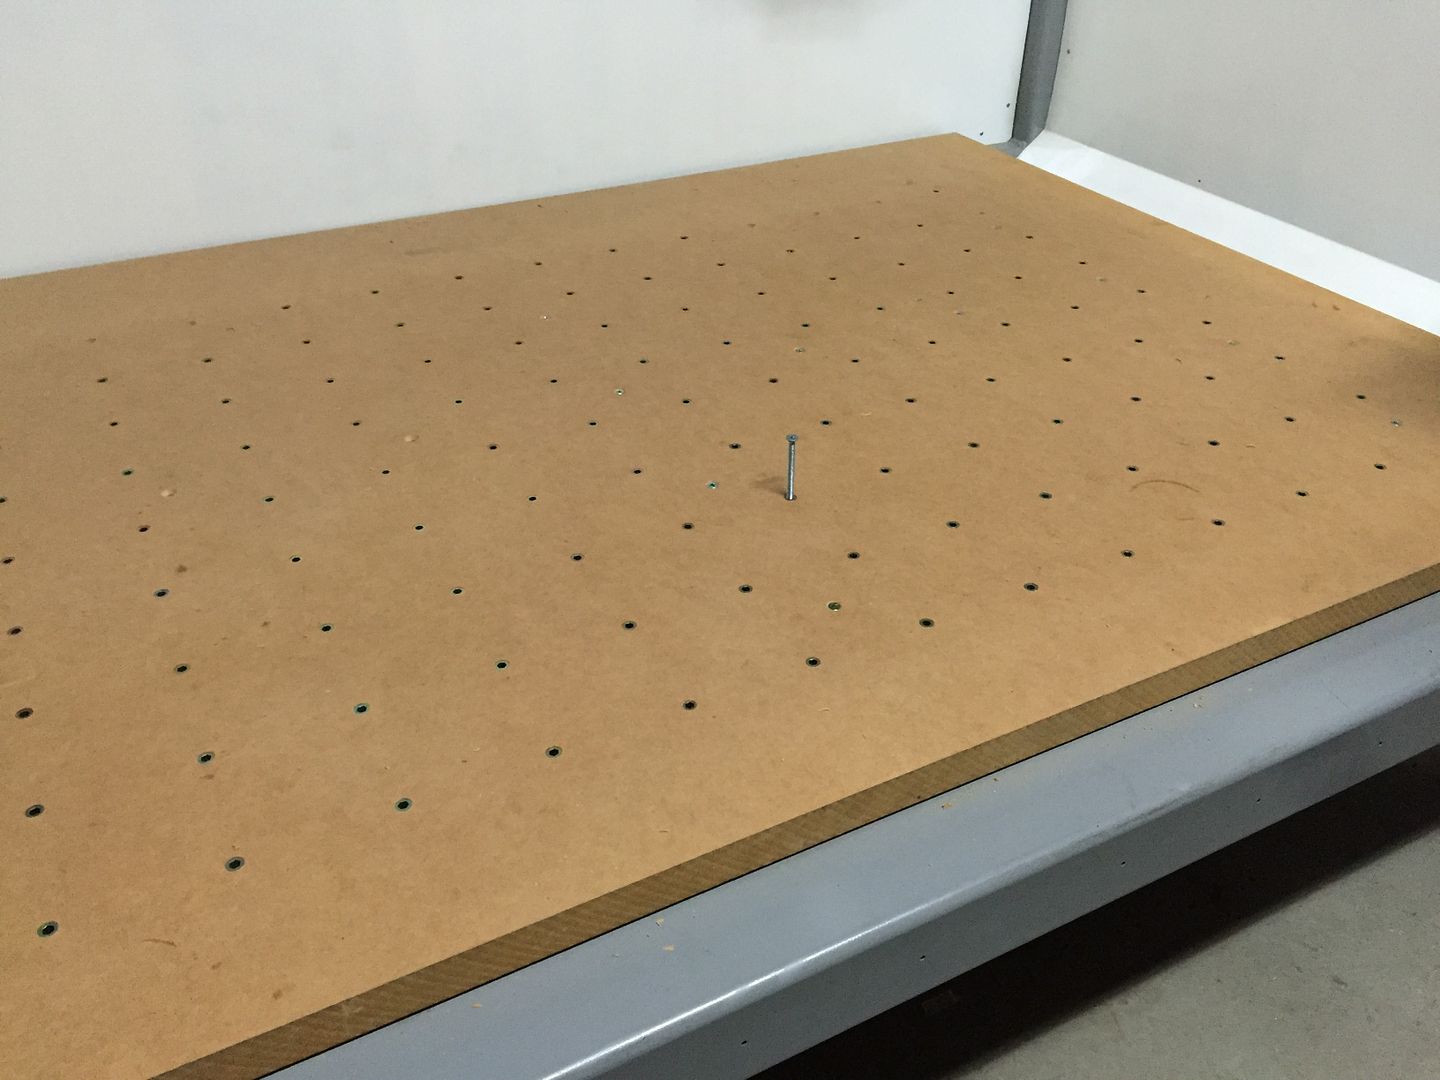
Here you see the machine moments after my father, brother and I lifted the MDF work surface into the machine.

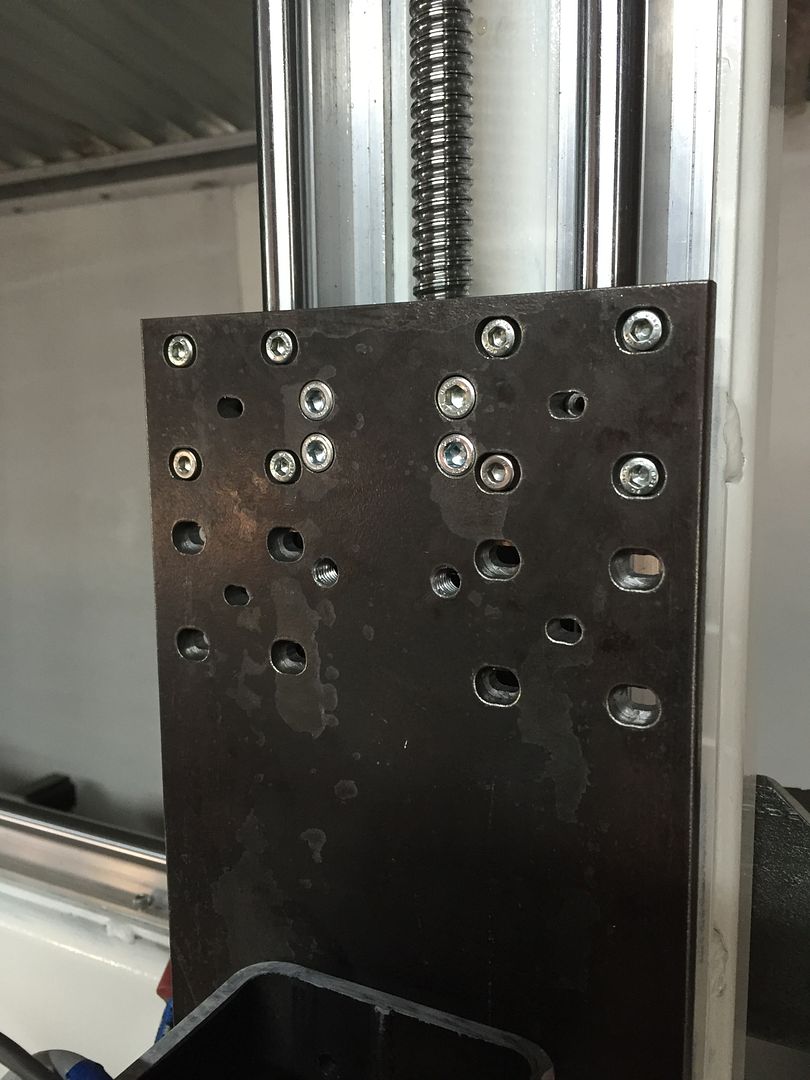
With a little test cutting I realised the Z axis carriage plate was too short, the distance between the top and bottom linear bearings was too small in comparison to the lever action of the tall Z column, so I made a much longer one. Before the ratio was about 5:1, now it's 3:1... If that makes sense to you guys.
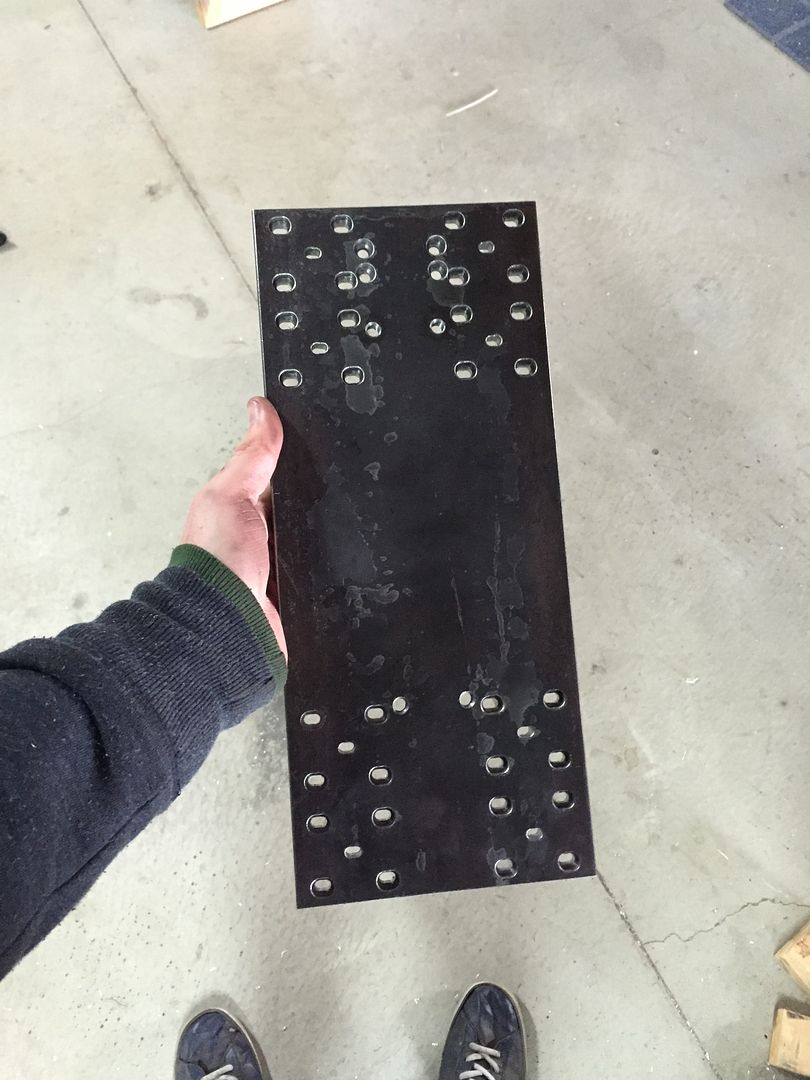
Then I drilled holes and gave them M6 threaded wood inserts for work holding. It works quite well. I bought some M6 all-thread and cut some lengths for simple, modular fixtures.
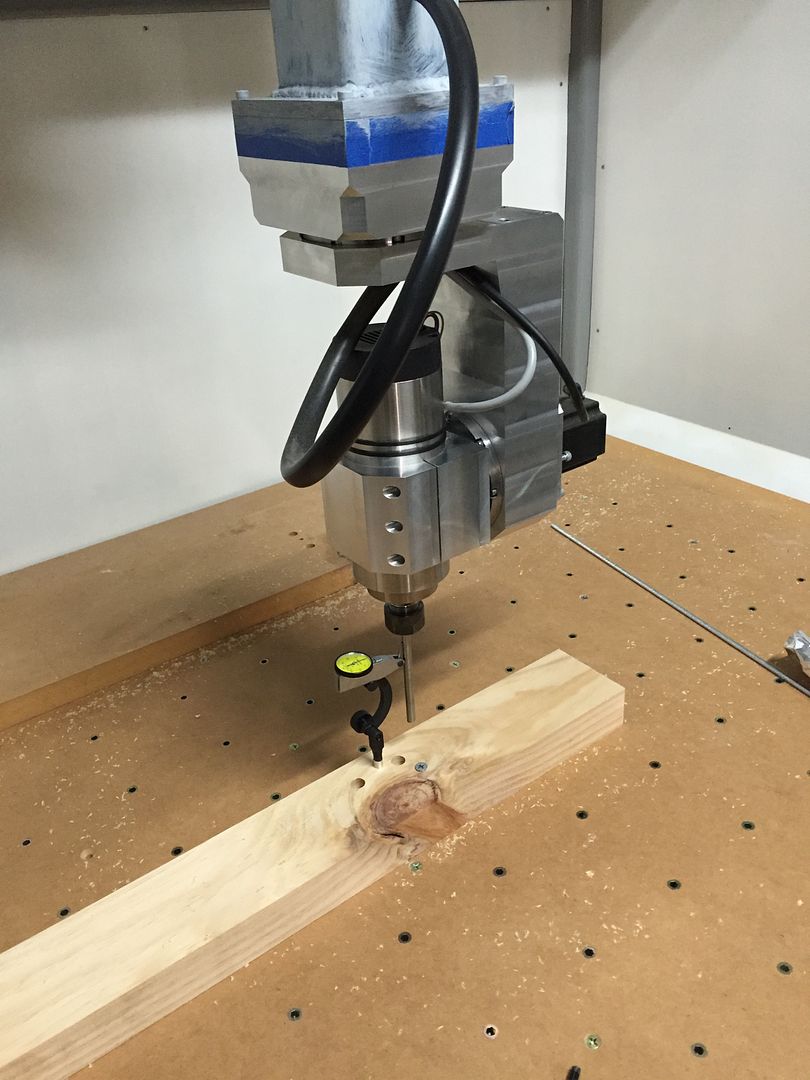
Here I'm fine tuning the rotary axes so that the spindle is concentric with the C axis, as well as finding 0 degrees on both axes.
After all that, I made my very first part! It's an RC off road buggy body shell mould that I designed. It's scaled down by a factor of 10 here (that would make it a 1/100th RC car body). Unfortunately, MDF comes up with a very furry finish, which is not good for vacuum forming.
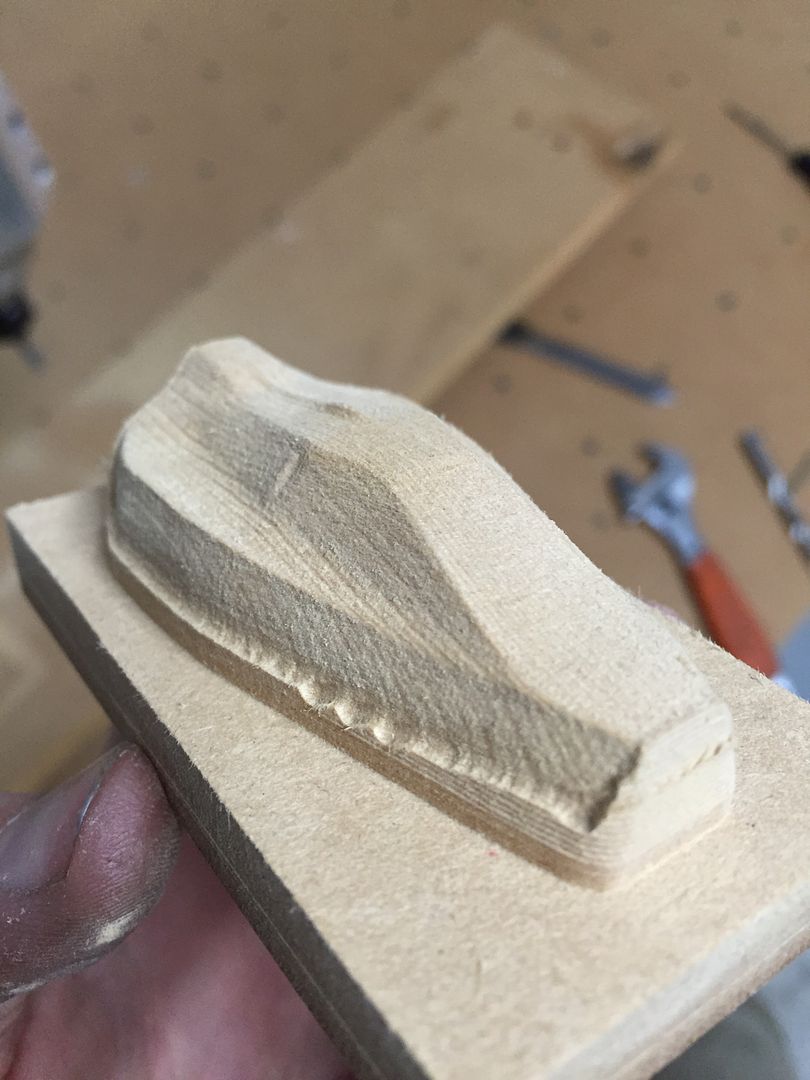
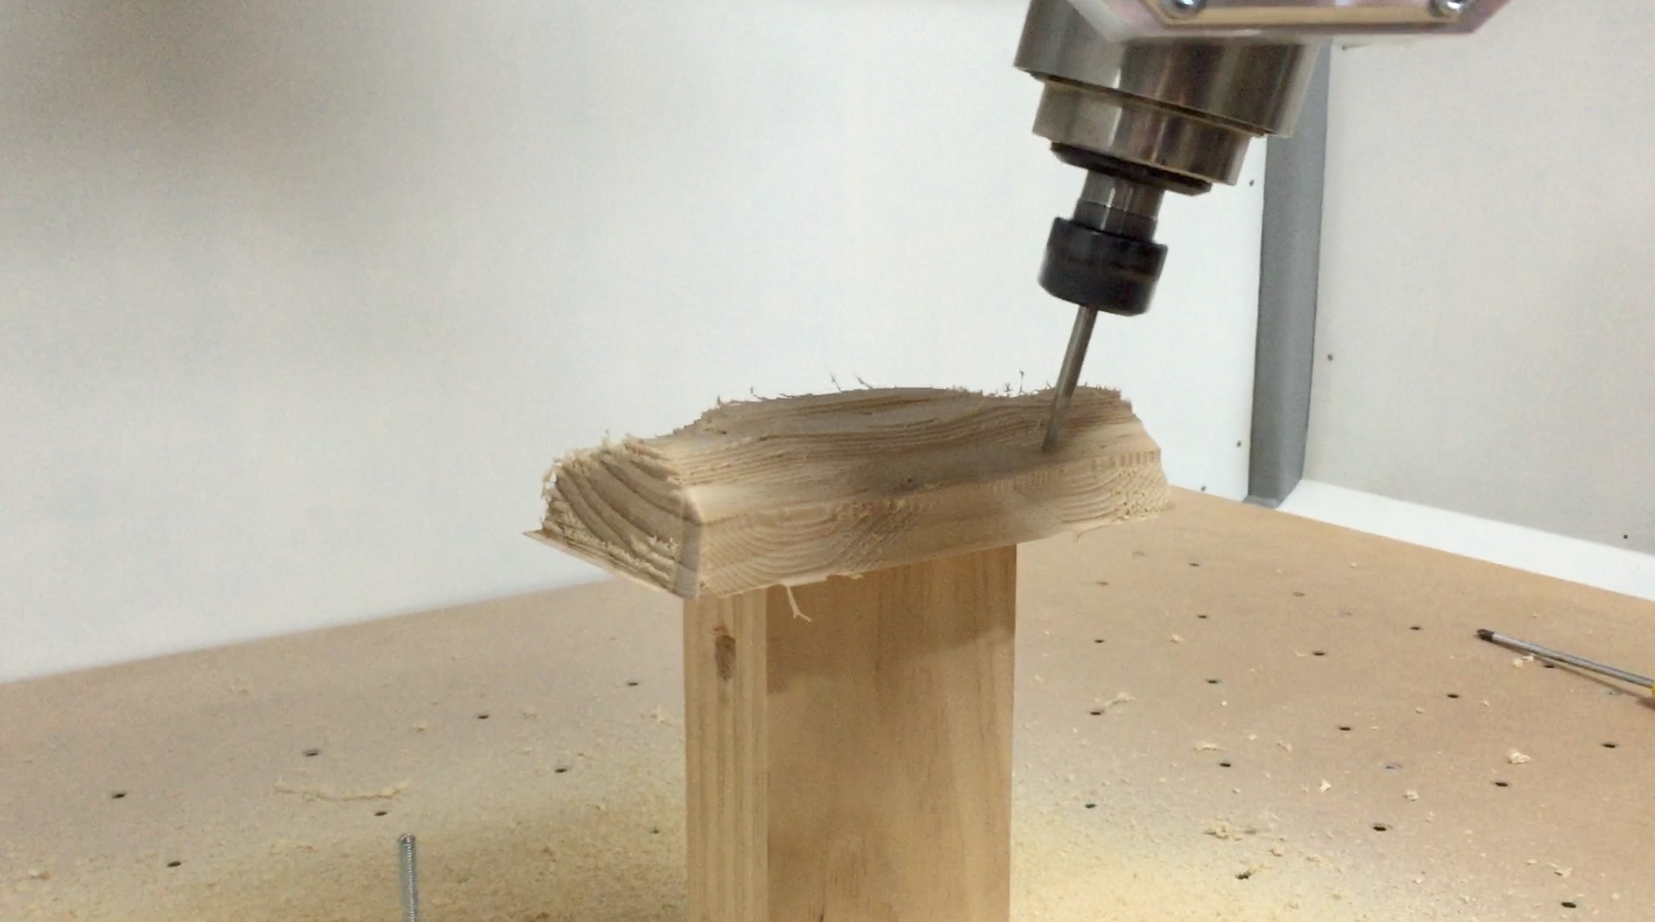
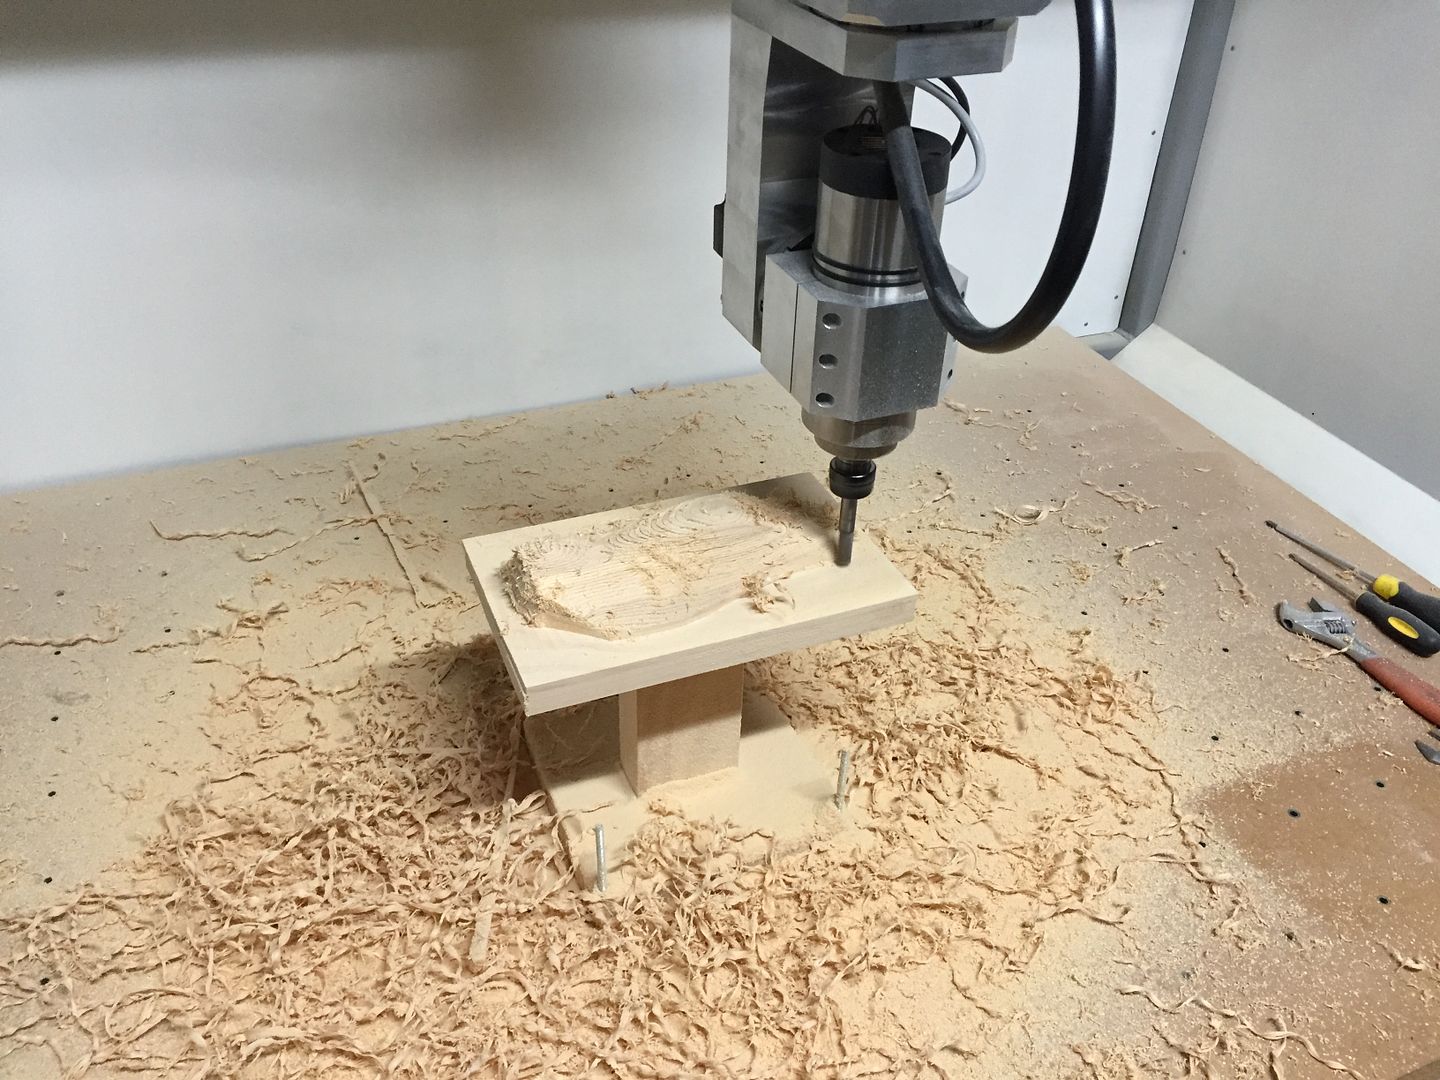
Then I made a spoiler mould in its full scale for a 1/10th Schumacher Cougar KR off road buddy. This time from high quality Pine wood, still a bit soft, but it sands to a beautiful finish, I'm still working on finding the right polymer coating to make it work spotlessly with clear polycarbonate vacuum forming.
You see it doing a 5 axis parallel pass with a 4mm ball end mill in the first photo.
You can also see a couple mistakes in the finished part. The hole in the middle was just my mistake when setting up, I accidentally drove the tool straight down into the part. But the random curve next to it was a bug in Cipher (my 5 axis compensation program). I have since fixed that by breaking up any movement larger than 5° into 5° steps so the swing of the tool never gets far off track.
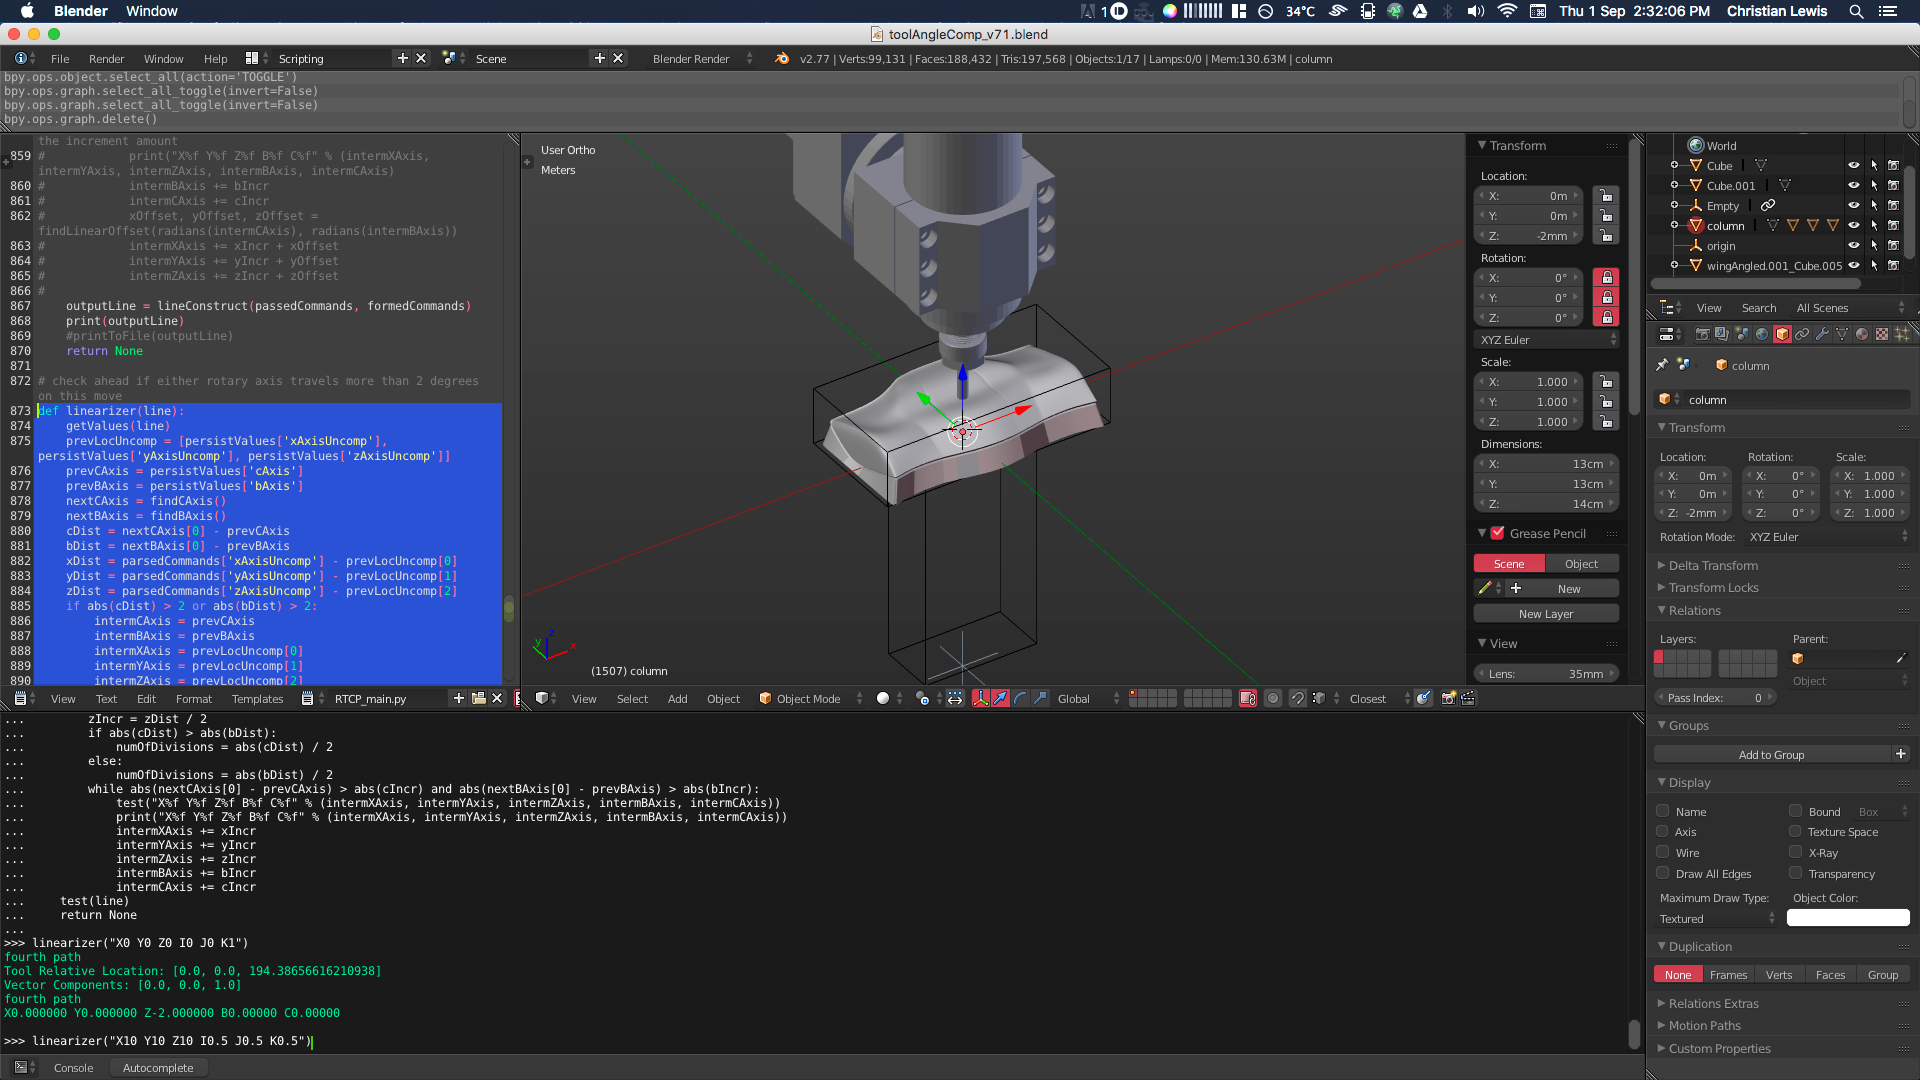
The last picture is a screen shot of what it looks like to use Cipher to create the 5 axis parallel toolpath... I told you it's not easy to learn.
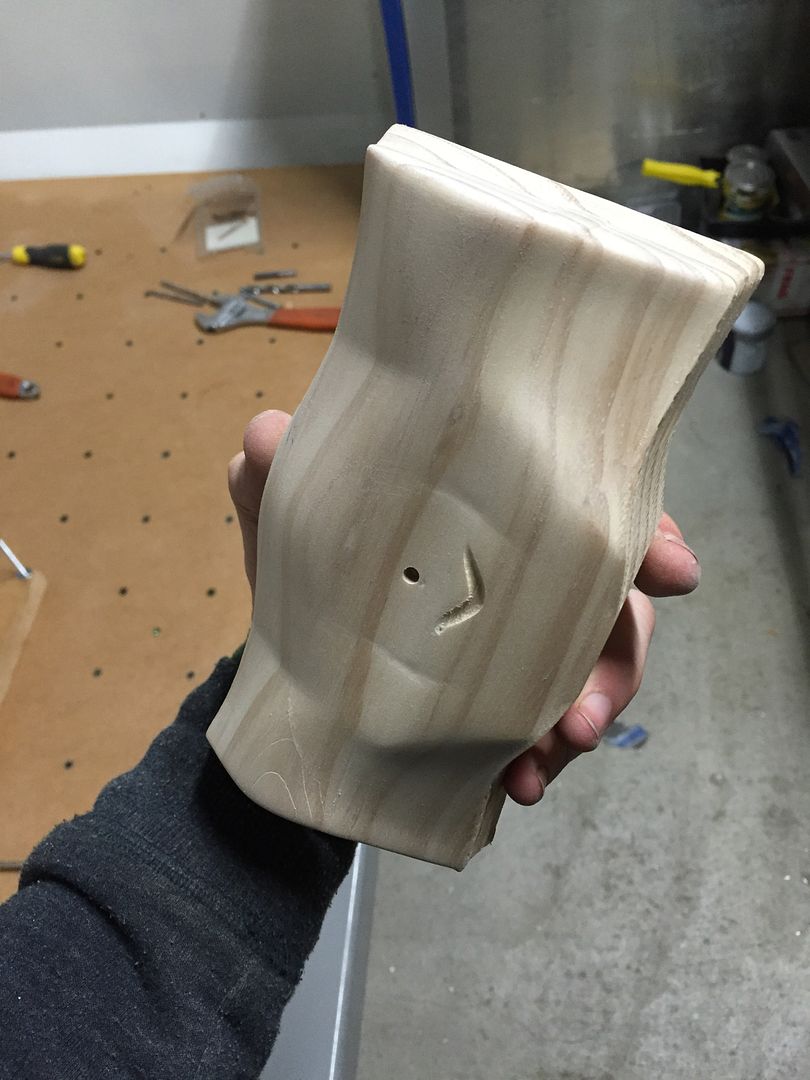
Finally, here is a full size body shell for the same car that I was machining today. That was using a horrible, chinese, 4 flute endmill not meant for wood but it was the only tool I have long enough to do that 3 axis adaptive strategy.
And that's it for now! Again, I'll soon make a tutorial on how to use Cipher for anyone who's interested in turning 3 axis toolpaths into 5 axis and I'll make Cipher available for download along with the video.
I'd also like to urge people to follow me on instagram if you want to be more frequently updated on what I'm doing with the machine. click here for my profile
Okay, bye now.
-
09-09-2016, 01:17 PM #91
Registered
- Join Date
- Jun 2005
- Posts
- 1729
Re: 5 Axis CNC Plastic Cutting Router "The CutaRouterer"
Very nice build, great job man.
Russ
-
09-09-2016, 01:31 PM #92
Neuer Benutzer
- Join Date
- Jan 2013
- Posts
- 228
Re: 5 Axis CNC Plastic Cutting Router "The CutaRouterer"
Looks great! how about a video? I'd love to see that 5 axis in motion.
-
09-10-2016, 03:38 AM #93
Junior Member
- Join Date
- Jul 2015
- Posts
- 57
Re: 5 Axis CNC Plastic Cutting Router "The CutaRouterer"
Thanks! Click here for a 5 axis video on my Instagram page. Originally Posted by TTalma
-
09-10-2016, 11:32 AM #94
Gold Member
- Join Date
- Sep 2009
- Posts
- 1856
Re: 5 Axis CNC Plastic Cutting Router "The CutaRouterer"
looks good I wont one now
http://danielscnc.webs.com/
being disabled is not a hindrance it gives you attitude
[SIGPIC][/SIGPIC]
-
09-10-2016, 03:57 PM #95
Registered
- Join Date
- Mar 2013
- Posts
- 140
Re: 5 Axis CNC Plastic Cutting Router "The CutaRouterer"
Tremendous job! You should be very proud of it.
-
09-27-2016, 08:30 AM #96
Junior Member
- Join Date
- Jun 2006
- Posts
- 48
Re: 5 Axis CNC Plastic Cutting Router "The CutaRouterer"
Why didn't you use LinuxCNC to control? It has 5-axis kinematics and it's entirely free ... check this video, similar machine to yours.
-
09-27-2016, 12:00 PM #97
Junior Member
- Join Date
- Jul 2015
- Posts
- 57
Re: 5 Axis CNC Plastic Cutting Router "The CutaRouterer"
You make a very good point. If I'm honest, I didn't know about LinuxCNC having 5 axis kinematics builtin before I bought the Ethernet Smooth Stepper which only works with Mach3 and Mach4 so I'm kind of locked into either of those right now unless I buy a different motion controller. But I'm actually kind of glad I took this difficult route, even though it did give me many more headaches and continues to. I learned so much in the process of programming Cipher (the translator program) and I'm tremendously proud of it. It even helped to garner the attention of Autodesk CAM's product manager. Furthermore, having Cipher means I can watch what the machine will do in a 3D animation before I even load the program onto the machine.
If I was to make another 5 axis machine, I'd probably just give LinuxCNC a shot.
-
09-27-2016, 12:29 PM #98
Junior Member
- Join Date
- Jun 2006
- Posts
- 48
Re: 5 Axis CNC Plastic Cutting Router "The CutaRouterer"
I have also started with Mach3 + smooth stepper on my machine and as long as was only 3-axis, everything worked good, but after BC head upgrade and conversion from steppers to servo system, there was no better (and cheaper) solution, but to sell smooth stepper (with mach3 license) and make transition to LinucCNC. I absolutely don't regret for time and some money, LinuxCNC consumes very "standard" 5-axis G-code and with kinematics (TCP), you don't care about tool length and even combination with manual tool change+tool sensor works nice.
-
09-30-2016, 06:46 PM #99
Neuer Benutzer
- Join Date
- Jan 2013
- Posts
- 76
Re: 5 Axis CNC Plastic Cutting Router "The CutaRouterer"
What board did you use and what servos? Originally Posted by Tomax
-
10-01-2016, 12:09 PM #100
Junior Member
- Join Date
- Jun 2006
- Posts
- 48
Re: 5 Axis CNC Plastic Cutting Router "The CutaRouterer"
I'm using PWM board from Pico Systems and also PWM servo amplifiers Originally Posted by Black Forest
Servos are DC servos (brushed), from HERE

 Reply With Quote
Similar Threads
-
FastCut 2" end mill. 4 flutes 7-3/4" OAL, 4" cutting length. 1/2" radius, 79504
By joedesu1 in forum For Sale OnlyReplies: 0Last Post: 02-04-2014, 02:06 AM -
Cutting a 7.1" circle from 0.5" thick 6061 alum - End Mill "loading up"
By herrmc in forum Tormach Personal CNC MillReplies: 21Last Post: 01-13-2014, 04:10 AM -
X Axis "Goes Off Pattern", "Awry", "Skewed", "Travels"
By DaDaDaddio in forum Laser Engraving / Cutting Machine General TopicsReplies: 1Last Post: 05-06-2013, 09:59 AM -
Whats the "proper" technique for cutting out 2D profiles on a cnc router?
By Zeppelin1007 in forum WoodWorking TopicsReplies: 8Last Post: 01-04-2013, 04:03 AM -
Anyone play with the Chinese "router fourth axis" yet?
By bogiestl in forum Benchtop MachinesReplies: 10Last Post: 05-05-2012, 02:30 PM
