


Once mixed, grab a handful and squeeze into as solid a mass in your fist. When you place it on a hard flat surface there should be no sagging whatsoever. This is referred to as 0(zero) slump. As to density of mix , I personally like to keep as many 'fines" as possible, but do omit the coarser grains although I think 2mm as a max is sufficient. All clean ups generally require diamond abrasives.
I am impressed with the quality of your work, and have a lot of respect for people who are 'hand's on'.
Results 4,761 to 4,780 of 5053
-
01-07-2014, 04:41 PM #4761
 Registered
- Join Date
- Jun 2013
- Posts
- 31
-
01-07-2014, 10:50 PM #4762
Registered
- Join Date
- Jul 2013
- Posts
- 27
Not that much luck with those very dry mixtures.
Sorry for the lack of interesting pictures; working with epoxy and taking photographs does not combine well.
Sorry for the nice pink gloves too; I get these for free (and yes, they are scented as well :drowning:)
Mix 1:
- 1/3 60 micron microballoons
- 1/3 0,25-0,4mm sand
- 1/3 0,8-1,4mm sand
With 0,85% epoxy and 20 minutes of mixing the mixture behaved exactly like dry and looked like it came directly from the desert, except that the microballoons didn't dust out that much.
I had to increase epoxy content to 2,25% by weight and do some _very_ thorough mixing before something started to happen:
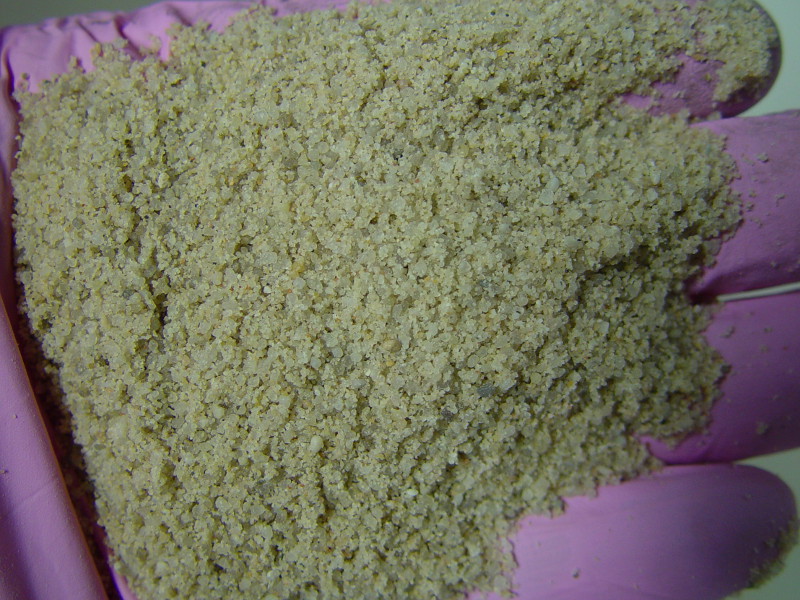
When balling in the fist:
Not quite there yet. I stopped adding more epoxy; that would go towards the mixtures I am already using.
I did try to ram a sample though. Didn't work too well; hitting the mixture here made it rise there. Those microballoons act like ball bearings; I saw that behaviour before. But OK, we shall see how it turns out after curing.
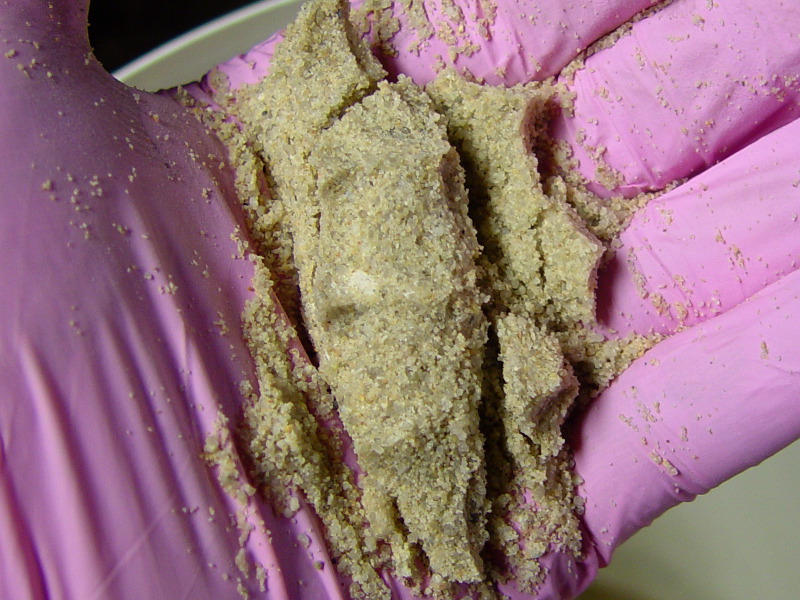
Mix 2:
- 40% 2,0-4,0mm gravel
- 60% 0,25mm-0,4mm sand.
According to maximum density formulas this is way too much fines, but you tend to favor fines and so did I.
With 1% by weight epoxy (I overshooted when mixing in the epoxy):
At least it looks slightly wet :)
Balled in the fist:
No good...
I did ram a sample of this mixture though, one smaller in a metal mold, one larger in a disposable soup mug. We shall see.
Next, I increased epoxy content to almost 2%. It still did not want to form a ball in the fist, but it seemed to compact fairly nicely. So I rammed 2 samples again.
At last I had a few drops of epoxy left in the mixing cup. Added them to 0,25-0,4mm sand only, but that did not change the behaviour of the mixes.
Now I will cure the samples for 24 hours at room temperature followed by a postcure at 60-70 degrees. Let's see wheich mixture deserves a larger wooden mold for a second test.
Preliminary conclusion is that I like ~8% by weight of epoxy much better. That is a zero-slump and still fairly dry mixture. You can make 'snowballs' out of that if you wish.
A sidenote: the epoxy system I use is designed for laminating glass/aramid/carbon, is very thin when mixed (250mPa.s) and has hardly any 'tack'. Between the gloved fingers it feels more like a drop of engine oil than a glue.
That certainly does not help when forming a ball in the fist, but it should not matter when rammed into a mold.
-
01-09-2014, 11:46 PM #4763
Registered
- Join Date
- Jul 2013
- Posts
- 27
I did not do the postcure; it would not have made a difference. The first two mixtures were very weak, only the last one with 2% epoxy and 40/60 gravel/sand is OK.
It took some effort to destroy this small sample, but less than the wetter mixtures tested before.
The sample is also porous. You can blow through it.
I do have a larger sample. Will put that through post cure, and see how tough it is:
-
01-12-2014, 06:18 PM #4764
Registered
- Join Date
- Jun 2013
- Posts
- 31
EG Composite casting
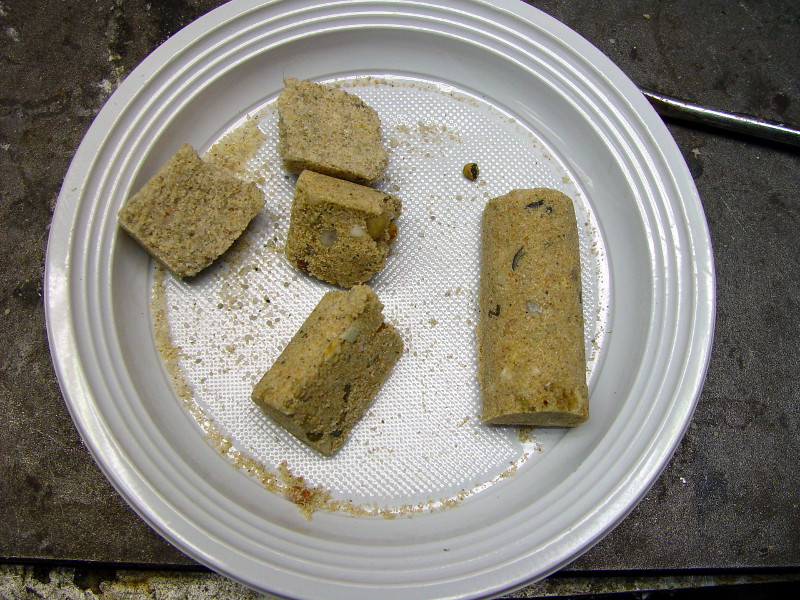
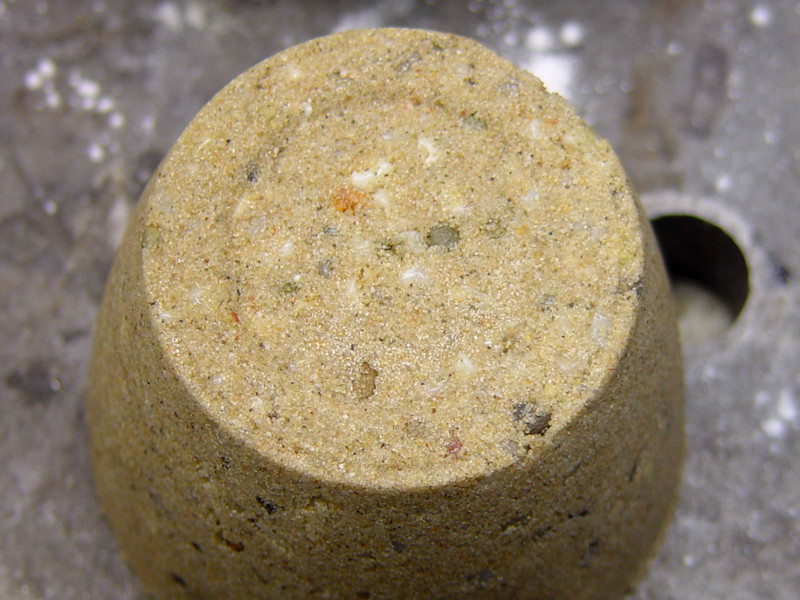
Hi DaBit,
Here's a casting as per spec suggested. 0.85% resin to aggregate. Rammed into mold with pneumatic sand rammer.
Attachment 218338
-
01-12-2014, 07:32 PM #4765
Registered
- Join Date
- Jul 2013
- Posts
- 27
Looks great!
Questions:
- Is your aggregate sharp (crushed stone) or round (river sand)? Mine is pretty round.
- Are you also using epoxy resin, or something else?
-
01-12-2014, 10:05 PM #4766
Registered
- Join Date
- Aug 2008
- Posts
- 247
Hi Stonemason101~
Nice piece. Well done.
I understand the pneumatic tamping process, but what do you mean by 0.85% resin to aggregate?
~john
-
01-15-2014, 05:27 PM #4767
Registered
- Join Date
- Aug 2008
- Posts
- 247
Stonemason101~
Are you suggesting 0.85% epoxy resin by weight?
~john
-
01-15-2014, 09:32 PM #4768
Junior Member
- Join Date
- Jun 2007
- Posts
- 3891
I'm confused by this too. maybe he's missed a decimal for 8.5%? every industrial application I've read about is up near the 10% mark.
-
01-15-2014, 10:10 PM #4769
Registered
- Join Date
- Aug 2008
- Posts
- 247
ihavenofish~
8.5% by weight would certainly result in the "snowball" consistency shown in the images.
The lowest I've been able to get without vibration, vacuum, or pressure is 10% by weight -- and only for smallish size samples.
Although he doesn't say, I think JohnMcNamara's Timing Pulley (one of my favorites) was north of 12%.
The Breton Process for manufactured quartz uses polyester resin at 7%, a whole lot of pressure (100 tons), and heat curing. The videos I've seen show a similar consistency just prior to "stamping" the slab.
~john
-
01-16-2014, 06:36 AM #4770
Junior Member
- Join Date
- May 2007
- Posts
- 68
Hi John O'Hara
I have worked by volume with my epoxy experiments not by weight, and to determine volume I like to mix a sample batch of aggregate mixture then fill it with water measuring the water carefully as I go until the aggregate is covered.
If I had accurate scales it could be done by weighing the aggregate before and after to calculate the volume of a certain weight of water to cover the aggregate.
My assumption here is that the epoxy will fill the same voids as the water, making the test more accurate than weight comparison which is affected by the density of different aggregates even though they may have the same physical properties.
PS: I just revisited a site that I had seen some time ago.. MADVAC CNC MadVac CNC - home made 4'x8' cnc precision gantry router If you have not seen It well worth a visit.
This man Mr. Vaclav Stejskal uses epoxy to bed nearly all the steelwork in his machine design. He also uses Piano wire to define the X axis (Long axis) of his machine in an unusual way. He has stretched the wire along and a couple of mm above the steel tube then created a dam and filled it with epoxy slightly above the wire. After curing the epoxy the final process being to scrape back the epoxy until the wire only just breaks the surface. Thus generating a horizontal and vertical plane.
As is well known a stretched wire is a very accurate way to to define a straight line over longer distances. (Many of the components of the CERN Hadron collider were aligned with stretched wire) https://www.google.com.au/#q=CERN+stretched+wire
It is also known that for a given distance the wire will sag due to gravity forming a Catenary curve. https://www.google.com.au/#q=Catenary%20curve
The wire will sag in air at the mid point about .002 inches over 96 inches (even if stretched just short of its yield strength)
However.... In this case the wire is suspended in liquid epoxy until it cures and sets. Epoxy has a much higher density than Air, this is going to create some buoyancy for the wire, The sag will be less! The sixty-four dollar question being how much less ??
Gee I wish I paid more attention to my physics and maths teachers.
I wonder if anyone in here would like to do the math?
Regards
john
-
01-16-2014, 07:00 AM #4771
Registered
- Join Date
- Jun 2013
- Posts
- 31
Guys,
My humblest apologies for my mistake in conveying the correct info! John, your question is mega relevant.... It is 7,5% - 8,5% resin to aggregate! Once again..Apologies, especially to DaBit. We are currently working 14 hrs per day 7 days a week to complete our new production runs and the launch of new product. The mind does tend to tire somewhat laddies!! The general rule of thumb we advocate is using the least binder (irrespective of chemical composition,i.e. whether its epoxy or acrylic resin) we can get away with , as this rams the best into the molds.
We generally also stick to volumetric measuring, as different aggregates, as you all are well aware of , have different SG's. e.g:Granite 2,6 and sandstone 2,2.
-
01-16-2014, 09:00 AM #4772
Junior Member
- Join Date
- May 2007
- Posts
- 68
Hi All
On the sag of a tensioned steel wire suspended in epoxy compared to Air; will the Catenary sag be less?
Refer my post #4770 above
The specific gravity of air is 740 times less than water Link:
COMPARING THE DENSITY OF AIR TO WATER
The specific gravity of epoxy resin is 1.1 to 1.2 times that of water (see page 6 link below)http://msdssearch.dow.com/PublishedL...romPage=GetDoc
The specific gravity of steel at 7800 KG per Cubic metre versus that of water at 1000 KG per metre = 7.8 times
Therefore the difference in specific gravity for epoxy compared to steel would be less at about about Six times.
Adding it up Air compared to water X water compared to steel. = 740 X 7.8 = 5772
Or compare the density of:
Steel at 7800 kg per cubic meter divided by Air at 1.225KG per cubic meter at sea level. = 6367 times
I am not sure why the above figures are not closer, (5772 and 6367) Maybe one of the references are incorrect. However it has made it clear to me that 6 times compared to many thousands of times is a huge difference.
If it can be proved that the sag is reduced by even a factor of 10 making .002 into .0002 Then this is a very inexpensive and method for builders of epoxy based machinery to generate flat surfaces and lines at the same time.
EDIT: Particularly over longer distances that are beyond the reach of straight edges that a small shop might have (Big straight edges require a crane!). And without the use of optical tooling or Lasers, and without the need for milling or grinding machines or any other machinery for that matter.
I have used wire alignment to align machinery before there is little difficulty working to within .0002 inches in the vertical plane. The Catenary sag has always been more of a problem, both in its calculation and working with it, you have to measure the gap from the side, often difficult.
Burying the very fine wire in set epoxy then just exposing it by scraping fixes it in space. A straighter line in two planes.
Well worth more research in my view.
Link to Roeslau wire. You can get very fine piano wire down to .006 inches thickness:
Roeslau Music Wire - Technical Data
Regards
John
-
01-18-2014, 04:49 PM #4773
Registered
- Join Date
- Jul 2013
- Posts
- 27
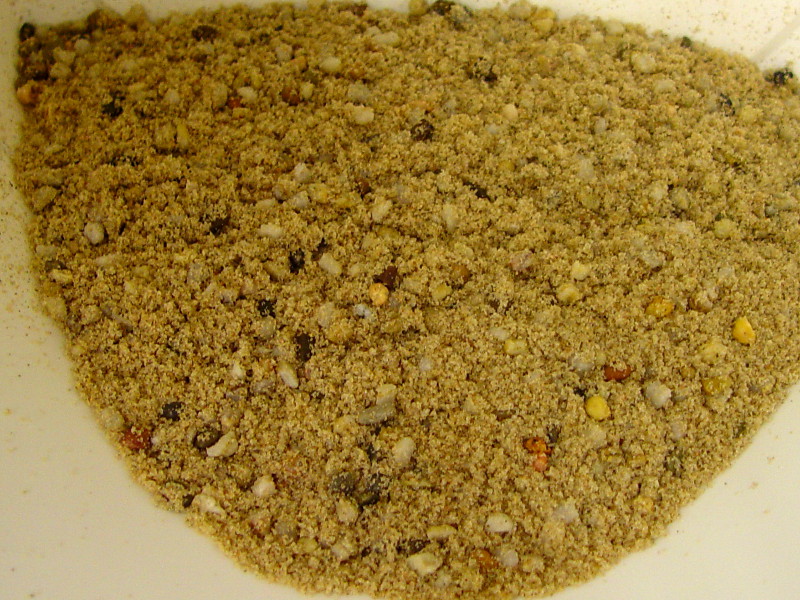
A dry mixture in a real application. I decided I like dryer mixtures.
Not sure about the amount of epoxy; I mixed until the mixture looked and felt right (it is slightly 'sluffy' then). It is somewhere around the 4% by weight mark.
Aggregate mixture is 64% 0,25-0,4mm quartz and 36% 0,8-1,4mm quartz. Layer thickness is only 9mm, so no larger aggregate this time.
When mixed thoroughly you can model sand castles with this mixture.
Loosely spread out over the surface:

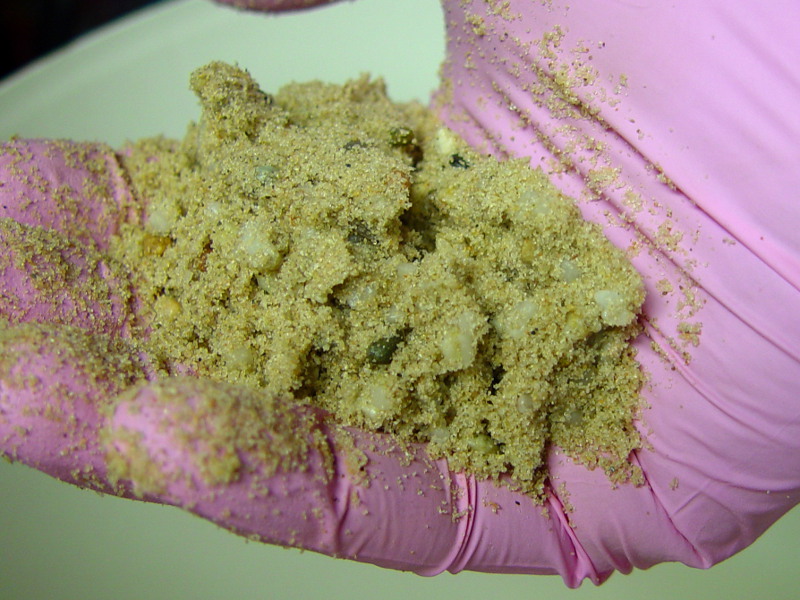
After some hammering to compact it:
This really looks pretty. Density is ~2150kg/m3. Not bad either.
Closeup:
Still a little too much epoxy. The sand sticks slightly to the piece of wood used to compact it and pulls out when moving the piece of wood. But this is not really a problem; it doesn't harm the surface finish.
@Stonemason101: 8,5% by weight of epoxy gives me a quite muddy mixture which doesn't hammer well. So far I do like the lower resin contents. It does give a porous end result due to the voids between the grains not filled with epoxy, but on the other hand it is almost impossible that these mixtures shrink.
For the final mold I will use a 8-10% mixture for the shell so it will flow more easily into voids, and a dryer mixture for the inside.
-
01-19-2014, 07:54 AM #4774
Registered
- Join Date
- Jun 2013
- Posts
- 31
Hi DaBit,
That cast is looking the business..... You've done extremely well! Please don't forget that aggregates under a microscope look like sponges with micro holes. The denser the molecular structure, the less the holes, therefore the sloppier the mix. With exactly the same ratios and different aggregates, you'll get varying blended mix viscosity's. To fill the voids, why not try using finer filler. You probably have to increase your resin slightly, but that all comes down to testing.
Good luck and steam on. Are you post-curing at 60degC? Does your 4% by weight convert to around the 8% by volume mark, with an SG of over 2?
Cheers Kevin
-
01-20-2014, 12:47 AM #4775
Registered
- Join Date
- Jul 2013
- Posts
- 27
It looks great indeed. I was happy too Originally Posted by Stonemason101


If I use a a very lean mixture, I want the voids. Only the grains get glued together and the reuslt is slightly porous. This is an advantage, because swince the air can escape during the hammering process there are no air bubbles in a compacted mix other than the voids between the grains.To fill the voids, why not try using finer filler. You probably have to increase your resin slightly, but that all comes down to testing.
70 degrees C. My epoxy requires it.Are you post-curing at 60degC?
I guess so. SG of quartz is around 2700kg/m3, epoxy around 1100kg/m3, so it should even a little more by volume in the final mix.Does your 4% by weight convert to around the 8% by volume mark, with an SG of over 2?
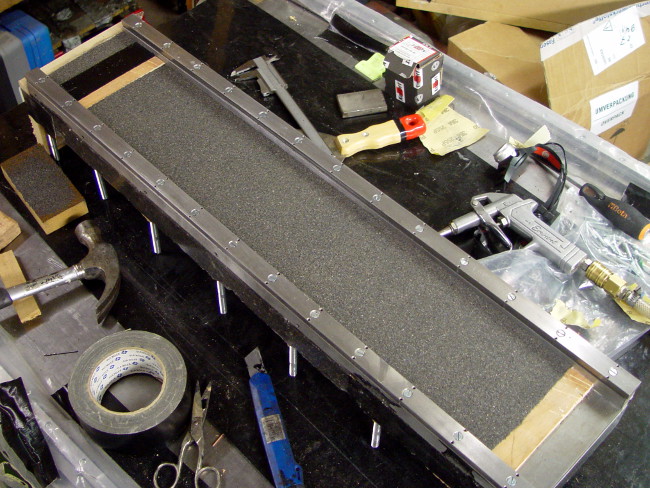
Today I poured the gantry:
(ehm, 'poured' is not exactly the right word...)
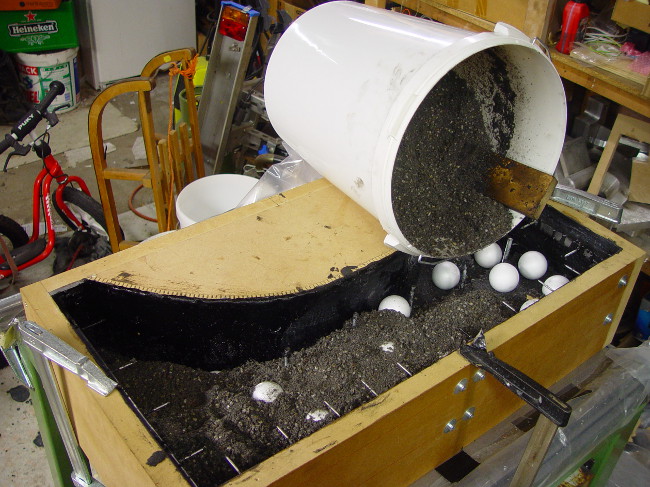
Several layers. Bottom layer, thickness a millimeter or so, is a mix of hollow glass bubbles and epoxy. Enough epoxy to have it still flow. This will give a solid surface which is sandable if I need to.
Layer above that: a wet mix with aggregate 4mm-0,25mm. 8% epoxy, maybe even more. I mixed until I liked the consistency. This layer must adhere to several parts, so that is why I used extra epoxy.
Then, several layers of 4mm-0,25mm aggregate, a bit of quartz flour and 3% epoxy (30kg aggregate, 1kg epoxy). Not too much quartz flour; that tends to increase the epoxy need of the mixture.
3% of epoxy given a mix which is very nice to hammer down. Which I did using a manual hammer and a piece of wood wrapped in packing tape by the way; more control over the process. You can see the low resin content; the mixture is just not as black as the rest even though there is still 2% pigment in the epoxy mix.
The last layer is a little more wet once again; the shell takes most of the forces and I do not want to gamble there.
Surface finish on the wet last layer is not that good. The wet stuff sticks to everything.
The polystyrene balls are there to reduce weight; this will be a moving gantry. They are distributed as irregular as I could; in electronics regular structures are bad for resonances, in mechanics I don't think it is different.
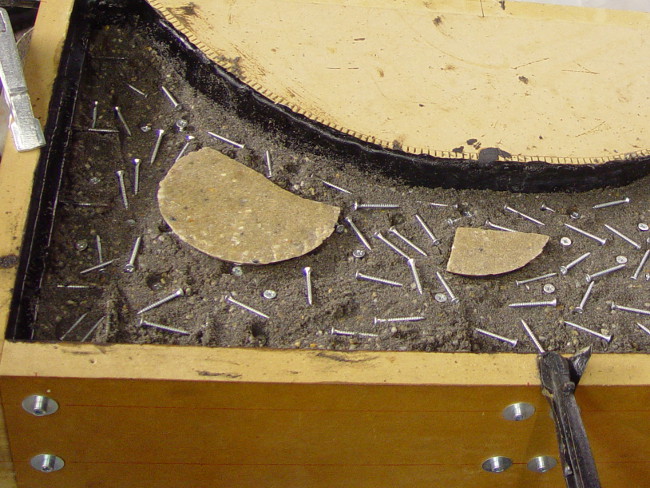
BTW: I used some reinforcement too. Saw the box with woodscrews on the workbench, and thought 'why not?'
I also put in old pieces of EC tests. Sanded them with 80 grit and threw them in. It is the same stuff and otherwise I would just throw them away.
And now, the hardest part: waiting....
-
01-20-2014, 07:33 AM #4776
Registered
- Join Date
- Jun 2013
- Posts
- 31
Hi DaBit
Please post a pic when you've demolded.
-
01-21-2014, 10:14 AM #4777
Registered
- Join Date
- Jul 2013
- Posts
- 27
Hi Stonemason101,
I will post a pic when demolded. But for the coming few days I just leave the part alone and give the epoxy plenty of time to do it's initial cure. I used a very slow resin system and it is not very warm in the shed. No problem, slow and steady is good. Although I do suffer from that little evil voice in my head saying 'Demold.. You...MUST... demold... Demold now..'. I suppose everybody using composites is very familiar with that voice
-
01-21-2014, 12:47 PM #4778
Registered
- Join Date
- Apr 2007
- Posts
- 30
Yes, DaBit,
we have all heard it but when one has a blob on the floor from incorrectly estimating the cure time whilst there is snow and ice at the door !!
It then becomes much easier to take to the Demold whisper with a vengeful push and a shove.
I'm sure you can all now guess how I know these things.
Russell
Ferlach,
Austria
-
01-21-2014, 02:19 PM #4779
Registered
- Join Date
- Jul 2013
- Posts
- 27
Oh yes, I do.... Originally Posted by rad45
Now you also know why I leave the mold for a couple of days before I consider demolding
-
01-21-2014, 11:37 PM #4780
Registered
- Join Date
- Aug 2009
- Posts
- 291
Did you post-cure heat? Originally Posted by DaBit

 Reply With Quote
Similar Threads
-
Epoxy Granite In Practice (Mineral Casting, Polymer Concrete)
By johnohara in forum Epoxy GraniteReplies: 71Last Post: 08-25-2020, 01:18 PM -
Voice Your Opinion On "POLYMER CONCRETE FRAME" Thread!
By walter in forum PollsReplies: 14Last Post: 11-13-2015, 02:57 AM -
Epoxy granite (Mineral casting, Polymer concrete)---Particle size distribution
By Steven.ji in forum Epoxy GraniteReplies: 9Last Post: 01-15-2014, 11:39 AM -
Index to "Epoxy-Granite machine bases" thread
By walter in forum Epoxy GraniteReplies: 13Last Post: 12-02-2011, 05:45 AM -
Epoxy-Rice Machine Bases (was Polymer rice frame?)
By mdierolf in forum Mechanical Calculations/Engineering DesignReplies: 18Last Post: 11-02-2008, 04:16 AM
