


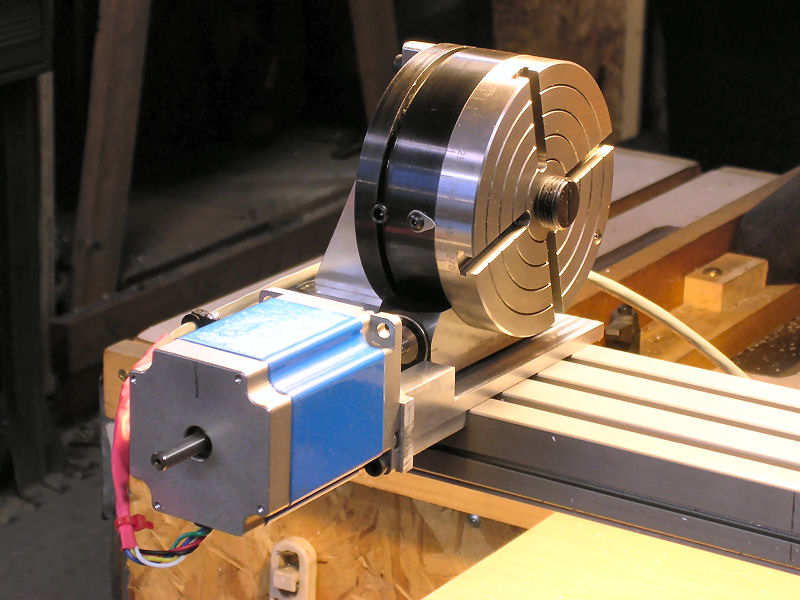
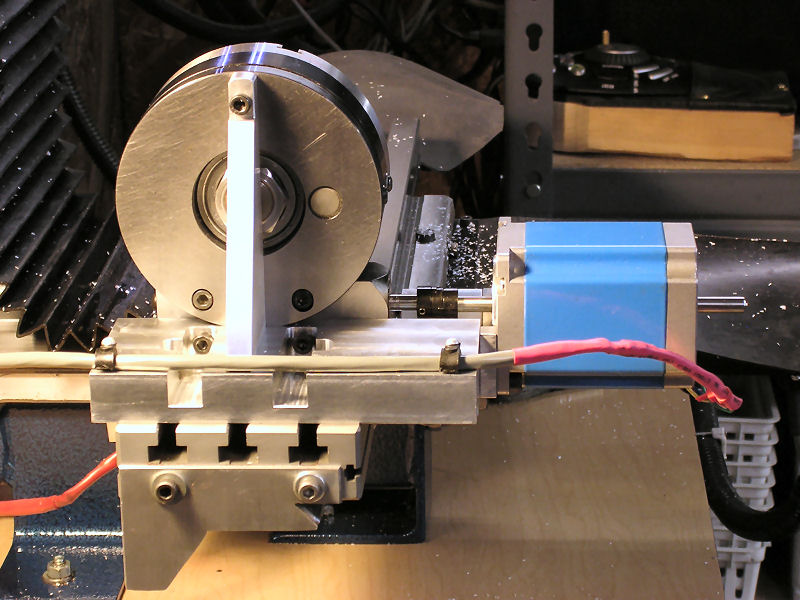
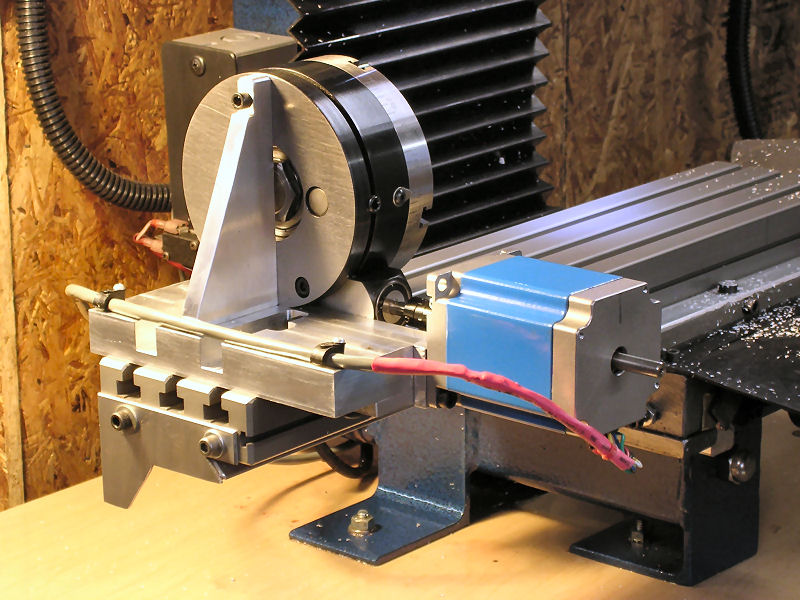
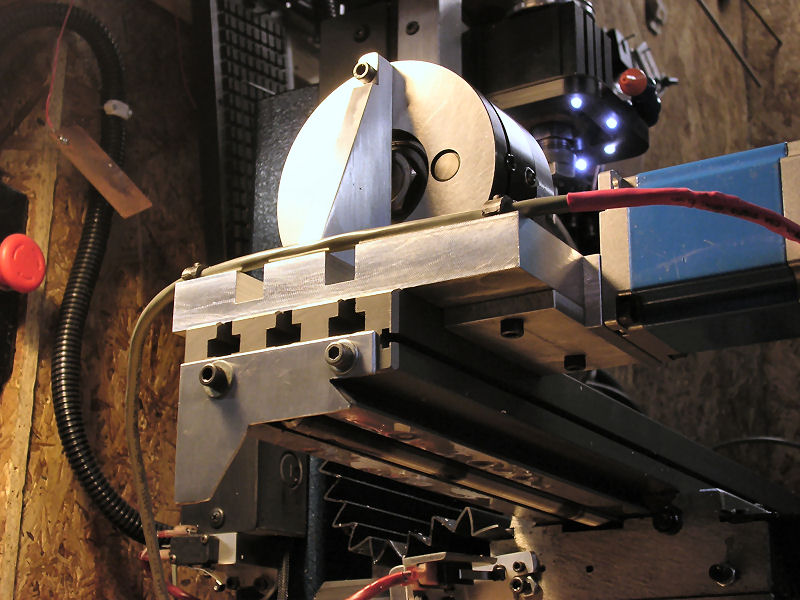
Finished my 4th (A) axis today and thought I'd share a few pics.
It's a Sherline rotary table which is easily the best little table out there that I have found for the money and that's probably why most major benchtop CNC companies use them.
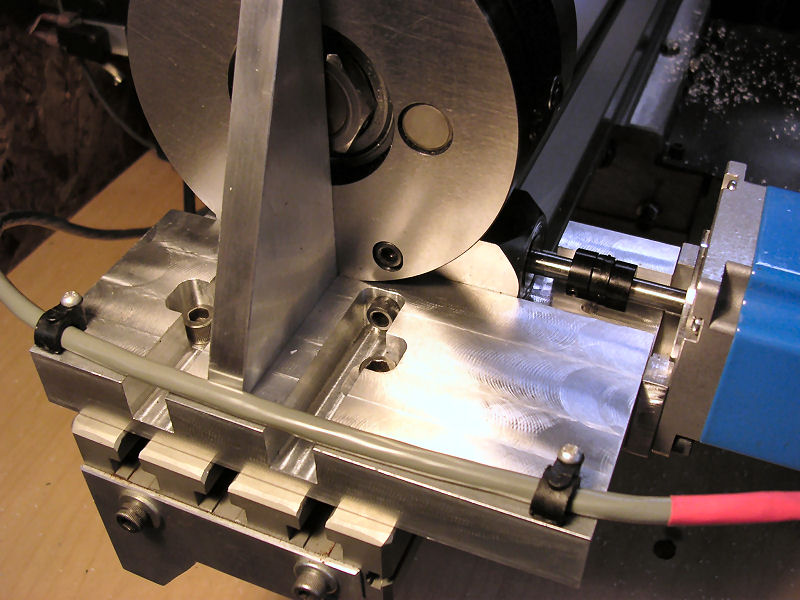
The base has a step block on the bottom that is parallel to the table to ease in mounting and locating the assembly.
The electronics come from Probotix and so far the stuff seems decent but time will tell. No squealing or grinding or anything like that. Just a nice quiet drive.
Now I just have to learn how to use the damn thing
Dave
Thread: Finished my Taig 4th Axis
Results 1 to 17 of 17
-
12-27-2008, 10:39 PM #1
 Registered
- Join Date
- Nov 2007
- Posts
- 980
Finished my Taig 4th Axis
Dave->..
-
12-27-2008, 10:42 PM #2
Registered
- Join Date
- Nov 2006
- Posts
- 1698
SWEET!
 Have you seen this free program: http://www.vectric.com/forum/viewtopic.php?t=2920
-
12-27-2008, 10:46 PM #3
Registered
- Join Date
- Nov 2007
- Posts
- 980
Yes! I actually have that and will give that a go, but thanks for pointing it out
 .
.
By the way, you know me as fretsman68 over at the vectric forum -
Thanks again-
DaveDave->..
-
12-28-2008, 12:35 AM #4
Gold Member


- Join Date
- Feb 2007
- Posts
- 4553

Dave,
Have you run any backlash tests?
Supposedly the standard sherline rotary is set up differently than the stepper driven model.
I would like to set one up like you have in order to save the hundred dollars.
Your setup looks very good.
Any feedack would be awesome,
Jeff...
-
12-28-2008, 01:11 AM #5
Registered
- Join Date
- Nov 2006
- Posts
- 1698
Ahhh yes. Over on the Vectric forum, you might know me as......Thkoutsidthebox Originally Posted by fretsman
 :wee:
:wee:
-
12-28-2008, 01:39 AM #6
Registered
- Join Date
- Nov 2007
- Posts
- 980
Hi Jeff, Originally Posted by jalessi
Ya know, I'm not sure why they (Sherline) say that the manual are different than the CNC versions except to keep you from buying the cheaper manual version and making your own CNC version. I have yet to hear anyone else say that they're different, where have you heard this from?
If you look at the exploded view of these, the manual looks like the CNC version except the Nema 23 mount and the coupler.
As for backlash, I'll have to do some testing as I'll be doing small engraving so that will definitely be a must. Just by looking and playing with it today though, it's less than a 1/4 of a degree easily. It's a really nice tight unit.
EDIT: here are the exploded views for each of the different tables. Like I said, mechanically, I see no difference.
CNC version: http://www.sherline.com/8700inst.pdf
Std. version: http://www.sherline.com/3700inst.pdf
DaveDave->..
-
12-28-2008, 02:31 AM #7
Gold Member
- Join Date
- Feb 2007
- Posts
- 4553

Dave,
Only from from Sherline as you stated.
What they are saying is very suspious no doubt.
Thanks for the PDF links, they need to be disected part by part.
Please keep us posted on accuracy and if you find out anything else.
Jeff...
-
12-30-2008, 07:51 PM #8
Registered
- Join Date
- Nov 2007
- Posts
- 980
Took a couple of minutes to look at the backlash today and was seriously having a problem with coming up with a slick way of doing this? Any one have any specific way of doing this correctly?
By just clamping a block to the table and measuring the "play" in the table under an indicator, it's only .0012" which is not too shabby in my book with a rotary table -
DaveDave->..
-
12-30-2008, 09:02 PM #9
Gold Member
- Join Date
- Feb 2007
- Posts
- 4553
The easiest way to measure the rotary backlash is to mount a bar onto the rotary table and use a dial indicator mounted on a fixed surface. As the bar rotates it will compress the indicator plunger. Turn the handwheel or the motor shaft on the rotary table to a convenient location clockwise and reset the indicator to zero. Go clockwise past this point and then reverse the rotary table CCW until the indicator again reads zero. Look at the handwheel or motor shaft position and the difference from the position when the indicator was zeroed the other way is the backlash in degrees.
-
12-30-2008, 09:31 PM #10
Gold Member
- Join Date
- Feb 2007
- Posts
- 4553
A little more insite.
Jeff...
-
12-30-2008, 09:31 PM #11
Registered
- Join Date
- Dec 2008
- Posts
- 62
Dave..
.0012 is not bad at all, I have not bought one because I thought they might be too Loose, but .0012 thats Great...
Nice Mount you made too
I might have to look into one, Where did you buy itTaig Owners Club.......
Google Search. Taig Owners Club
-
12-30-2008, 09:42 PM #12
Registered
- Join Date
- Nov 2007
- Posts
- 980
Jeff,
As per the pdf (thanks for that!) Doesn't it matter how long the measuring bar is and where you measure on it?
In other words, I'm checking this with the block in about 3/16ths from the outside edge of the table which is 1.813 from the center of the table. That would be "R", correct?
I now have a sherline graduated handle in the stepper shaft with 50 increments for a full revolution. A full revolution equals 5 degrees of rotation on the table.
The indicator moves just under a .001".
The backlash is just under 1 increment of the 50 on the handle so that would make it about 6 minutes, no?
Brian: I bought this second hand from a fella that never used it. I do see them on ebay for sale (manual version) for $234.00 at times.
DaveDave->..
-
12-30-2008, 09:57 PM #13
Registered
- Join Date
- Dec 2008
- Posts
- 62
From your Description it Sounds like a pretty nice piece,
I will keep an eye out...ThanksTaig Owners Club.......
Google Search. Taig Owners Club
-
12-30-2008, 10:16 PM #14
Registered
- Join Date
- Nov 2007
- Posts
- 980
It really is a very nice piece and that's why they're not cheap.
I'm sure you will not be disappointed-
DaveDave->..
-
12-30-2008, 11:06 PM #15
Registered
- Join Date
- Dec 2004
- Posts
- 1137
I'd like to see your intended use for it
-
12-30-2008, 11:08 PM #16
Registered
- Join Date
- Nov 2007
- Posts
- 980
Originally Posted by Jay C
Me too..... lol!
I'll get there in time......
DaveDave->..
-
12-31-2008, 05:33 AM #17
Registered
- Join Date
- Jul 2008
- Posts
- 922
first of i love the rotary table
but on another note
i applaud your efforts at taking very clear photos with very good lighting
Thanks for posting this!

 Reply With Quote
Similar Threads
-
Finished building 3½-axis router
By mrdovey in forum DIY CNC Router Table MachinesReplies: 3Last Post: 08-13-2008, 02:01 AM -
Finished Enclosure! Taig CNC-Pictures!
By CROSSHATCH in forum Taig Mills / LathesReplies: 24Last Post: 07-09-2008, 06:15 AM -
Taig Z Axis
By djh82uk in forum Taig Mills / LathesReplies: 11Last Post: 09-08-2007, 01:37 AM -
Taig enclosure finished! (Update need help!)
By Astroguy in forum Taig Mills / LathesReplies: 6Last Post: 06-21-2007, 01:37 AM -
'got my Z axis finished...
By slp_prlzys in forum DIY CNC Router Table MachinesReplies: 6Last Post: 08-14-2006, 12:23 AM
