


While I am finishing my archtop, I have started on an F5 mandolin.
I want to do the scroll and also get the surface thickness correct.
Despite a lot of comments on BobCAD, I find it good enough for me to do what I want (to date).
Occassional problems such as falling over, but just remember to save often.
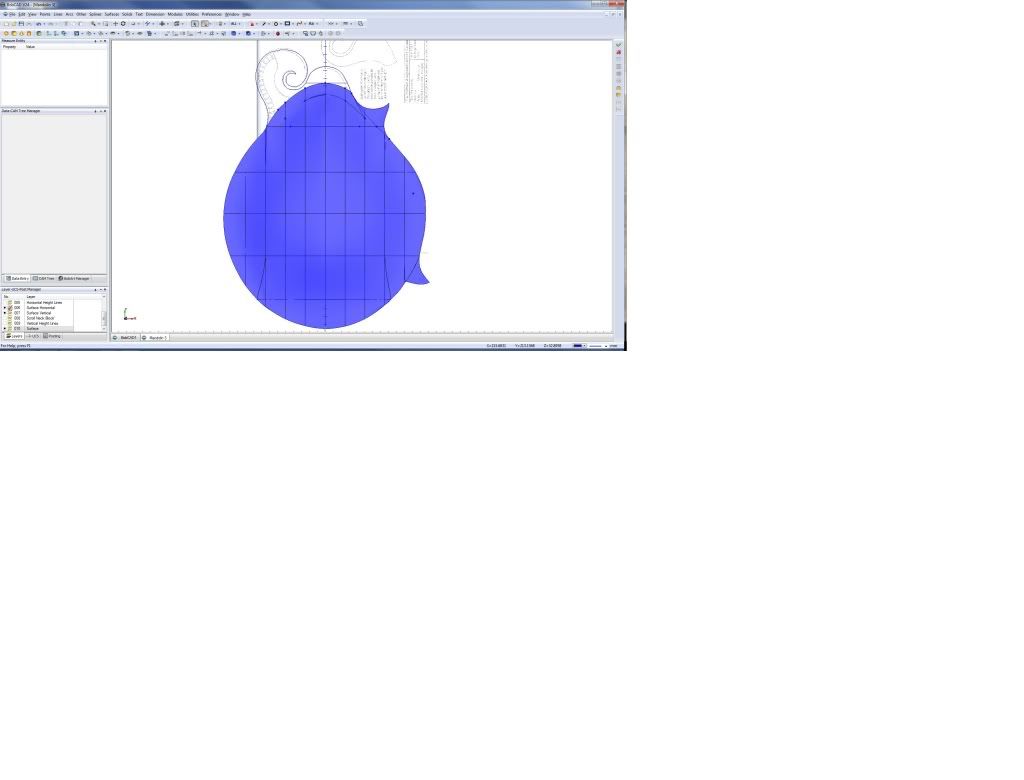
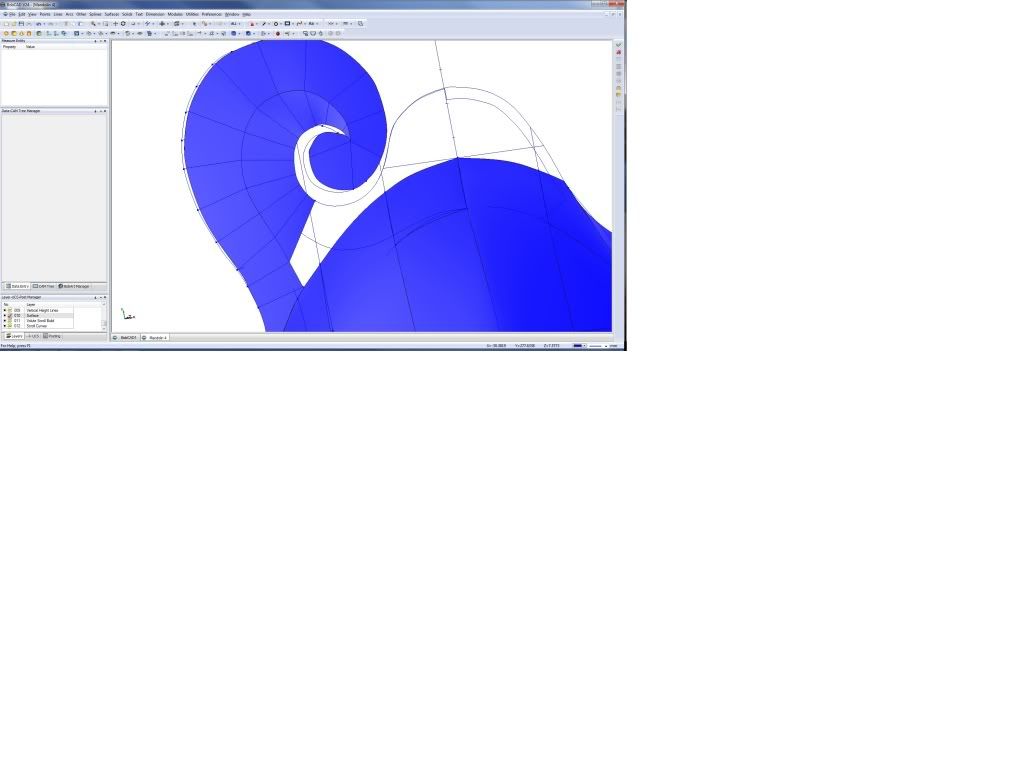
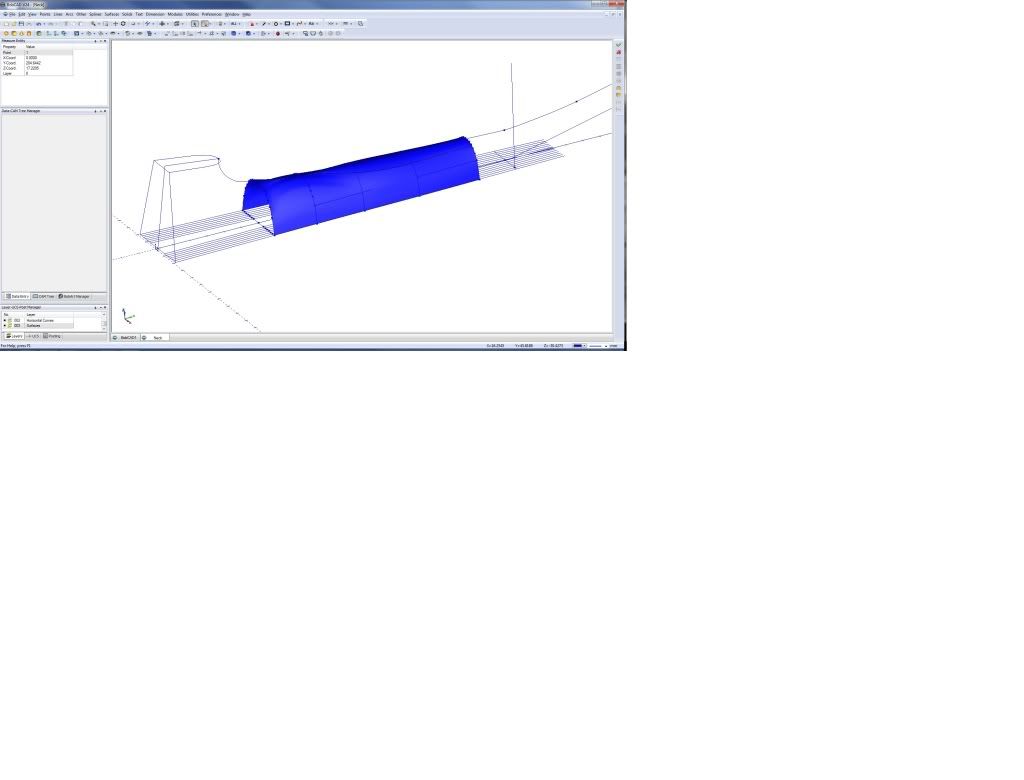
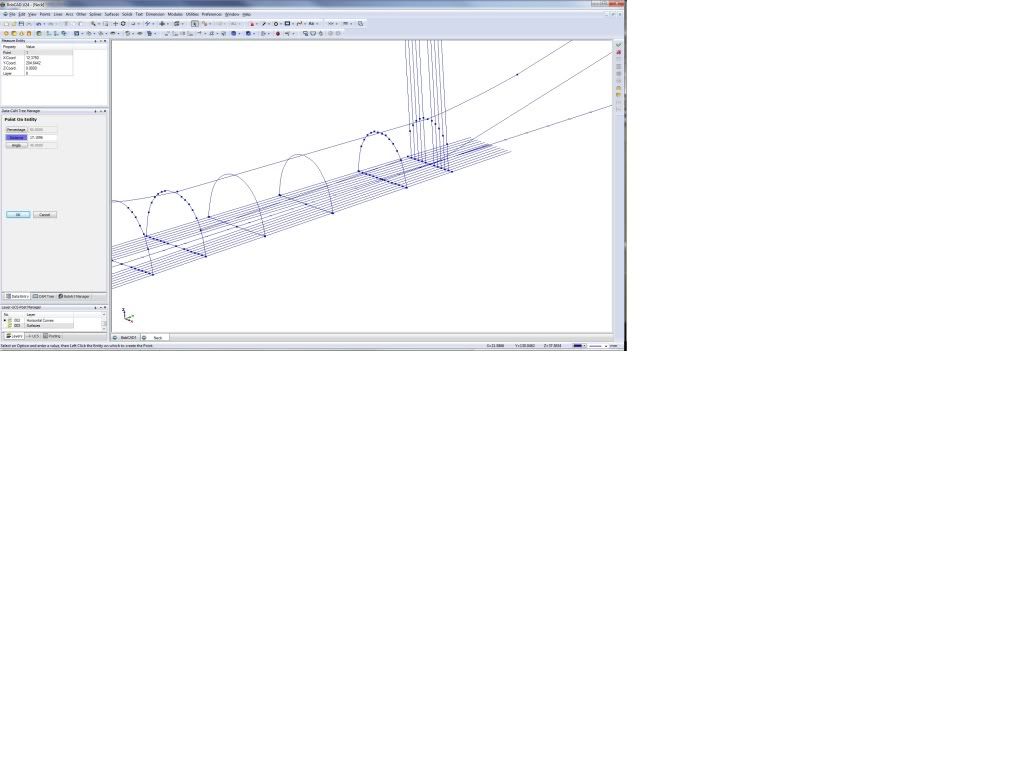
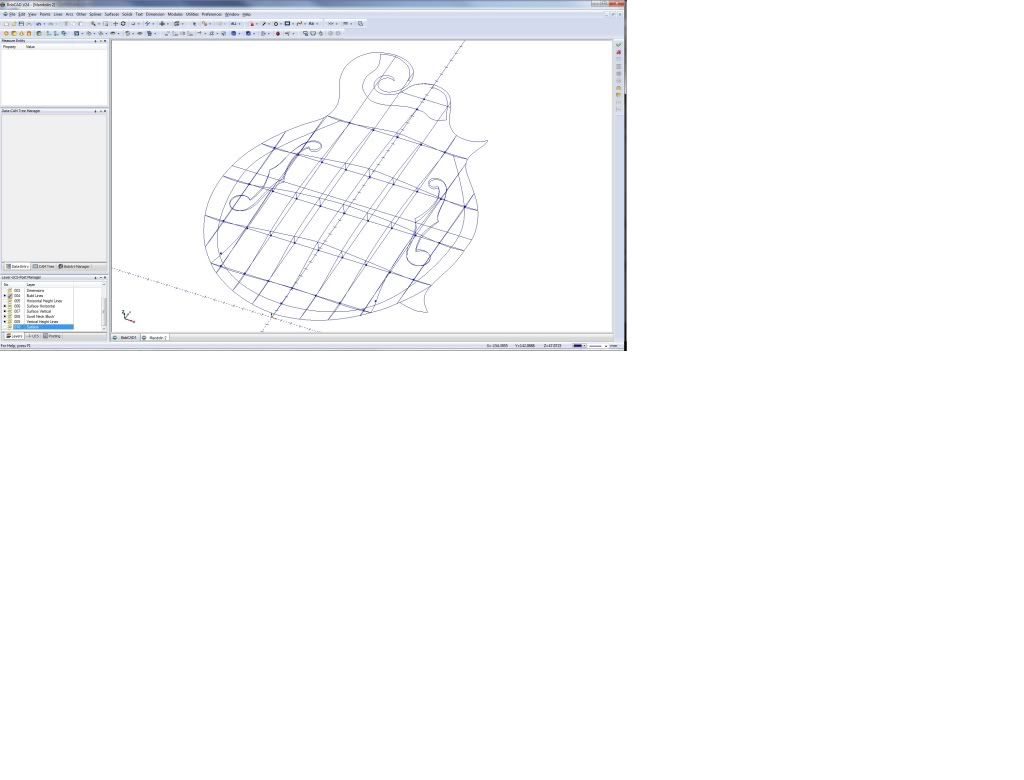
Wire frame:
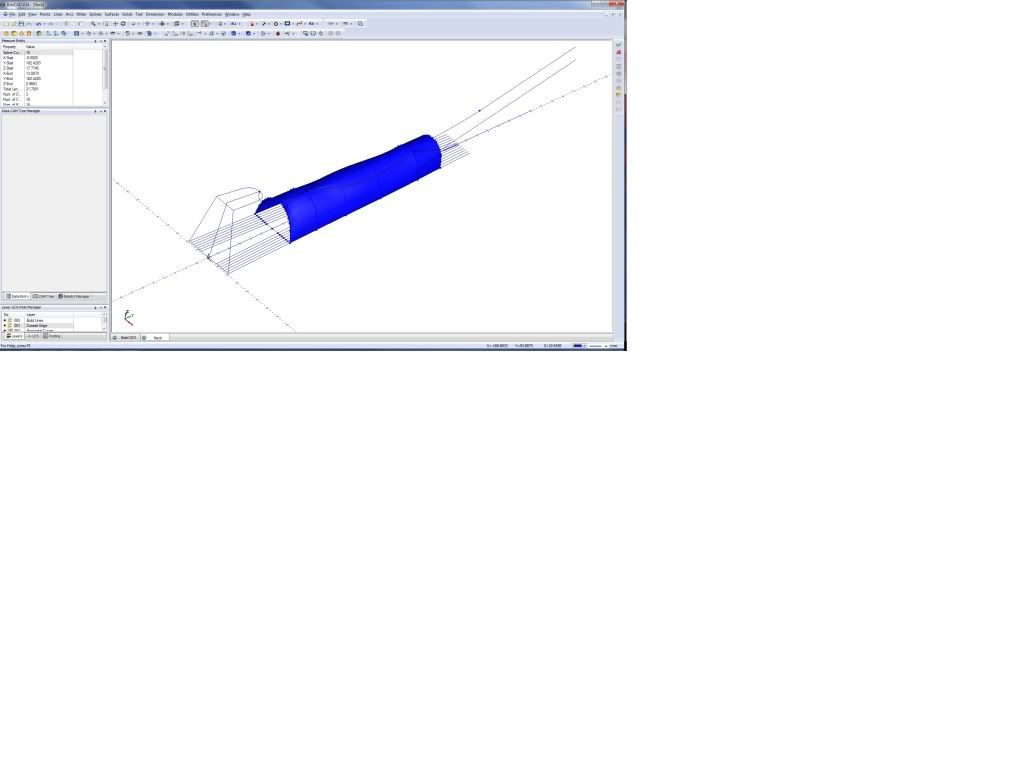
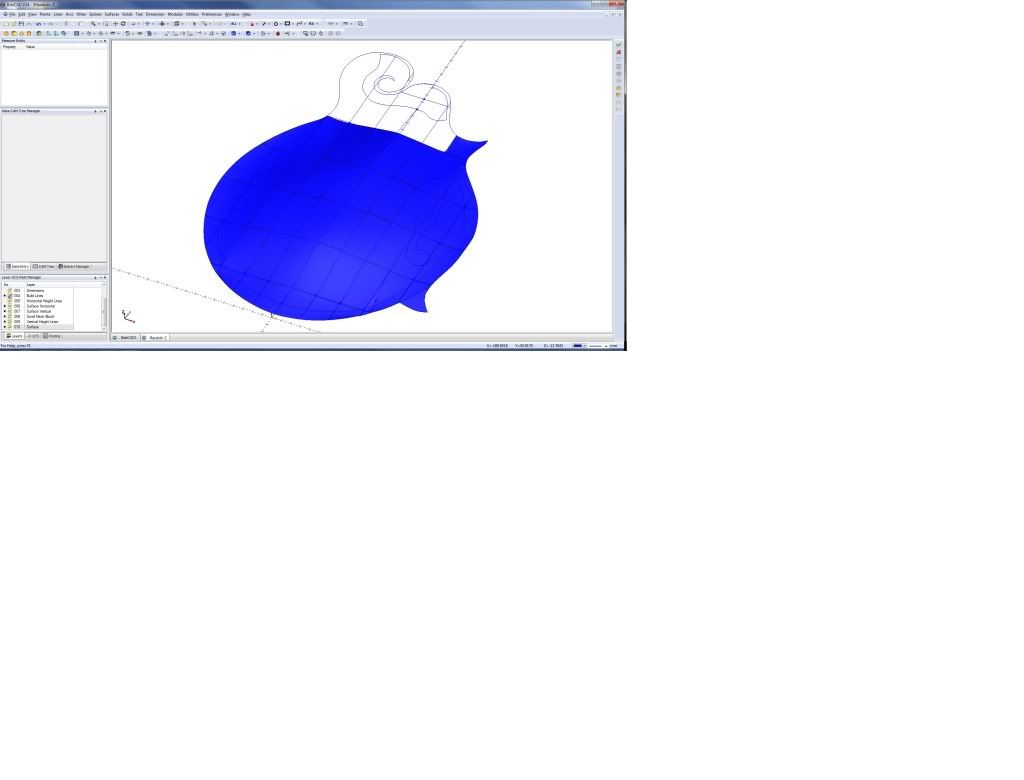
Surface to date:
Still need to work out what happens at the neck and scroll, and also what happens at the triangular bits (are they curved, flat etc).
Garry
Results 1 to 20 of 65
Hybrid View
-
08-28-2011, 01:22 PM #1
 Registered
- Join Date
- Apr 2011
- Posts
- 0
My Mandolin Surface Post in BobCAD V24
-
08-29-2011, 06:16 AM #2
Ghost
- Join Date
- Dec 2008
- Posts
- 4548
Hi Gary, should be an awsome watch... Rememeber that if you go to view menu and turn on "Wireframe", this will show the Isoparams of the surfaces.. This can help you check for any "kinks" in the surface that may not be apparent.. Just in case you didnt know... Nice work.
-
08-29-2011, 11:05 AM #3
Registered
- Join Date
- Apr 2011
- Posts
- 0
More Top Surface
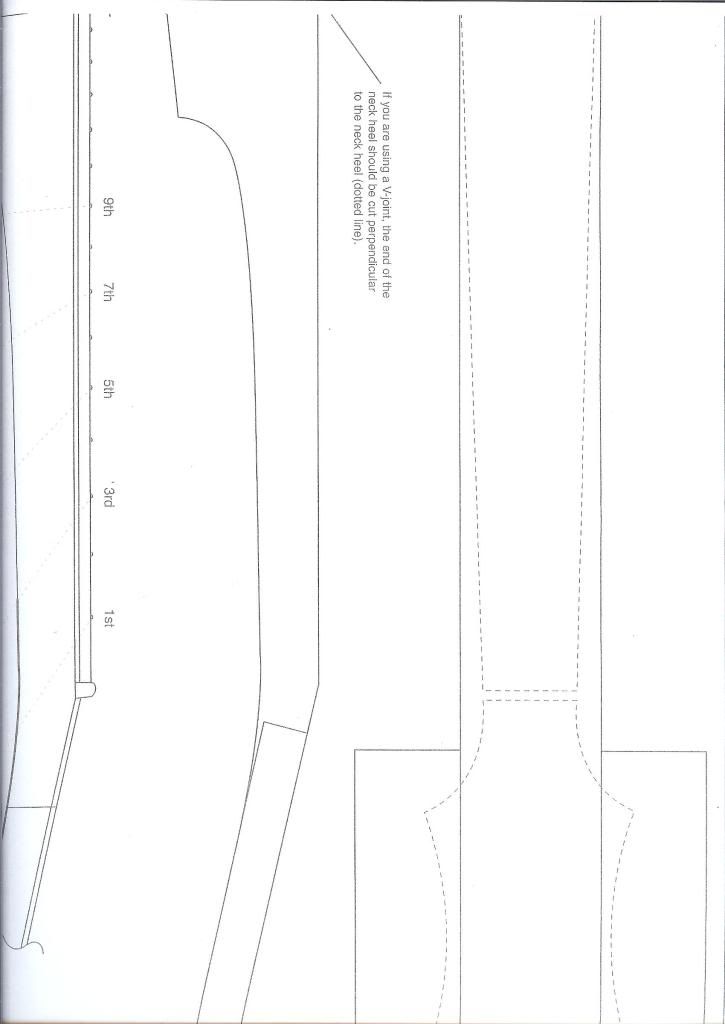
Bit more done. The book I am using is a bit sketchy on how the curve transitions at the neck. After looking at the book's pics, I think it looks like this:
Now onto the scroll.
Garry
-
08-29-2011, 12:07 PM #4
Registered
- Join Date
- Apr 2011
- Posts
- 0
Volute Scroll Started
Actually pretty easy:
Top is 12mm higher than bottom in this drawing. It should be 4mm after reading the book to work it out. Length of curve was 99mm. Stepped down 1mm starting at 12mm every 8.25mm along the curve, then projected to the other curve using point perpendicular.
Then Joined everything up:
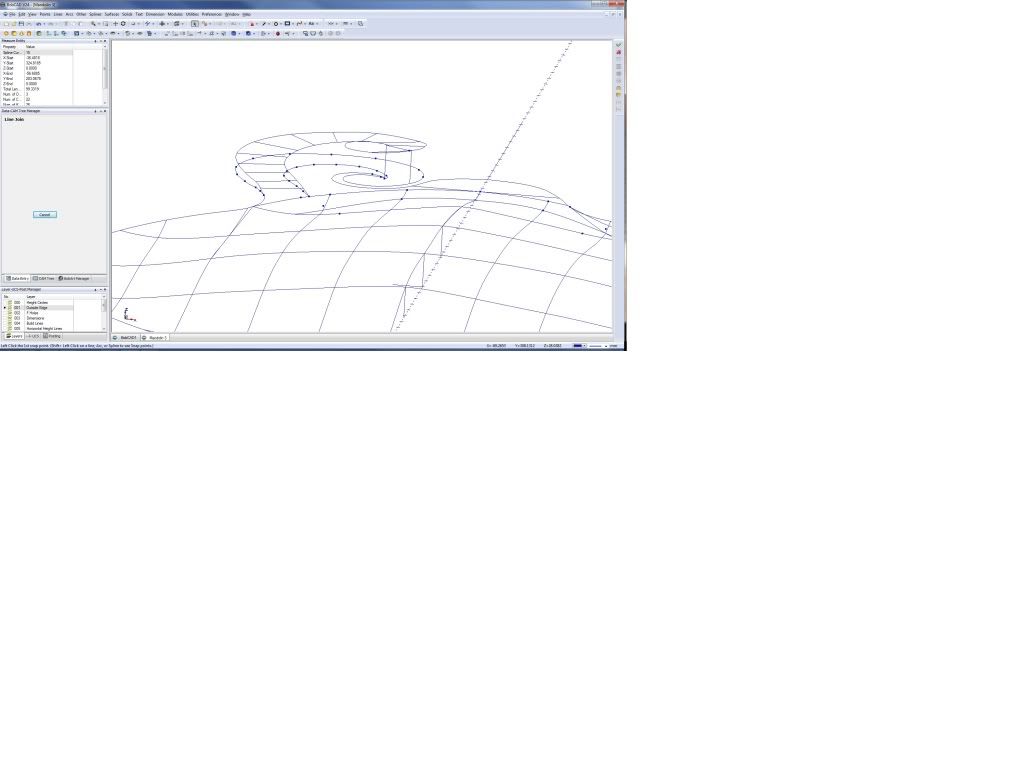
Update
Redid it at 4mm height difference:
-
08-30-2011, 09:09 AM #5
Registered
- Join Date
- Apr 2011
- Posts
- 0
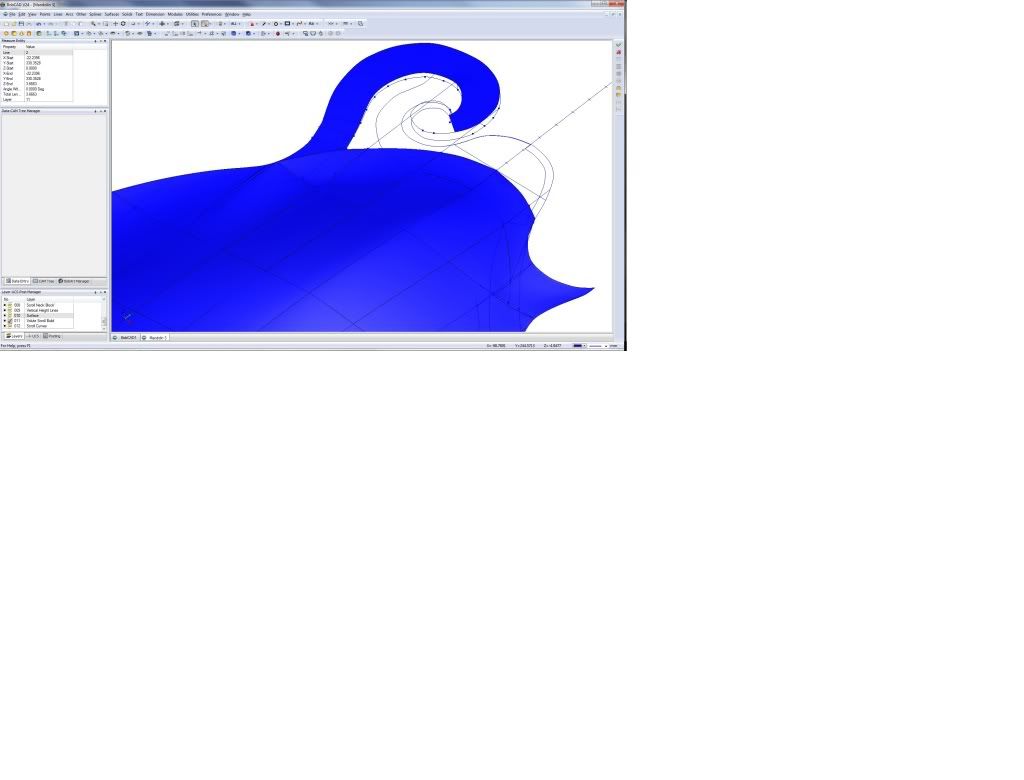
First Go at the Scroll Bevel
I will probably run with this as I can manually adjust:
Garry
-
08-31-2011, 10:20 AM #6
Registered
- Join Date
- Apr 2011
- Posts
- 0
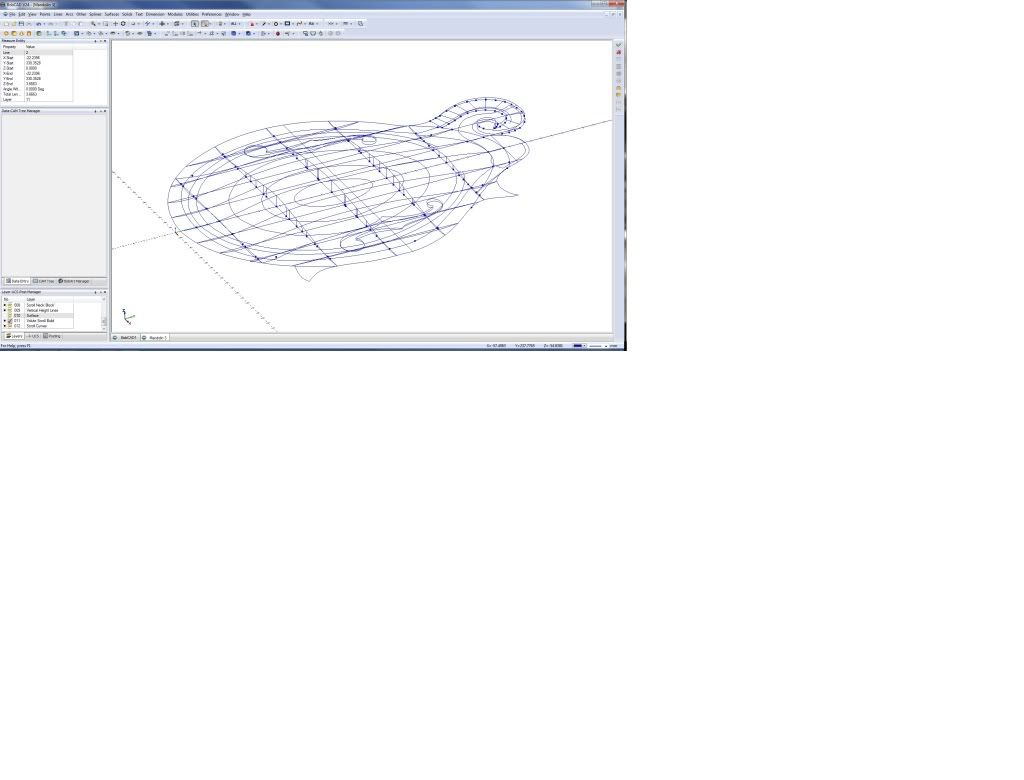
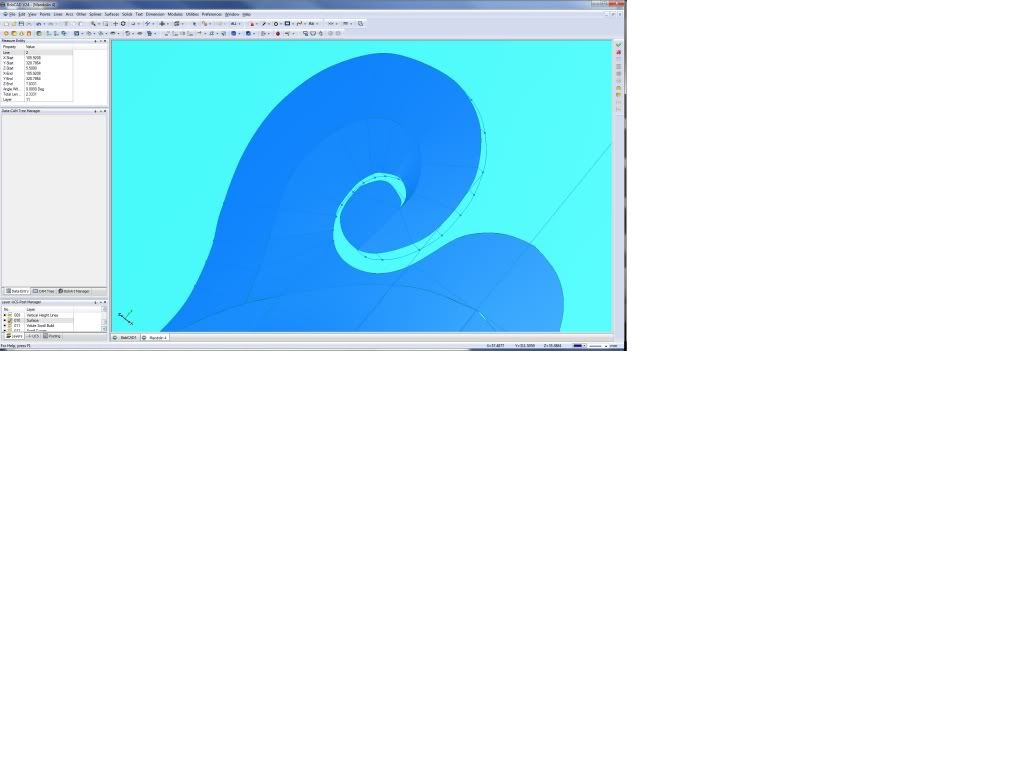
Redid the Scroll/Volute
Looked at some F5 mandolins and pics and also found an error in my curve heights.
Redid the design with a 0.6666 difference from the 'middle' line of the scroll to inside and outside curve perpendiculars:
Backplot in fine profiling:

Ordered the wood to make it all from Stew-Mac.
Hope to get the binding on my hollowbody this weekend.
Garry
-
09-01-2011, 02:28 PM #7
Company Representative

- Join Date
- Jun 2003
- Posts
- 446
Aussiegazza I've been tracking you up here and it looks like you are doing some really nice work with our software. Do you use BobART for anything?
CNCdude
-
09-02-2011, 05:54 AM #8
Registered
- Join Date
- Apr 2011
- Posts
- 0
I have been using BobArt to scan in the shapes and templates. That's as far as I have gotten with it. Very useful! Having a scanned image in the background SHOULD be a standard feature of BobCAD. Rest of it I do not require at the moment. Originally Posted by CNCdude

I do not use the raster to vector options as I have not really had time to learn (tried once), and also because I want long vectors/curves. Not a lot of short ones.
Also my scanner is accurate in the Y direction, but not so accurate in the X direction. I therefore put size lines or points onto the scanned images and correct for the inaccuracy as I trace the shape with the interpolated curve option. Therefore another reason not to use BobArt, as I need to adjust the shape anyway.
In woodworking, a slight error can be allowed. I am more worried about
symmetry. I therefore draw half the shape and use mirror to complete it. Again, why I do not need raster to vector.
BTW to others who may read this, I DO NOT have any relationship with BobCAD, other than I bought their product like everyone else. I could have used Mastercam 4 that has been pirated, but I wanted a legal, supported software product. My son has Solidworks on his laptop, but it is too expensive. I can get him to do things if I need to, but so far, no need.
Update:
I can fit a mandolin neck onto my 'small' mill, so I want to mill the neck:
You can see my use of BobArt in the head profiles below. I will mill the head so I can easily get most of the tight curves at the 'volutes':
Garry
-
09-02-2011, 09:14 AM #9
Registered
- Join Date
- Apr 2011
- Posts
- 0
Head Plate Test
Test Mill of the head plate. Even used a drill profile for the first time!
-
09-02-2011, 12:59 PM #10
Registered
- Join Date
- Apr 2011
- Posts
- 0
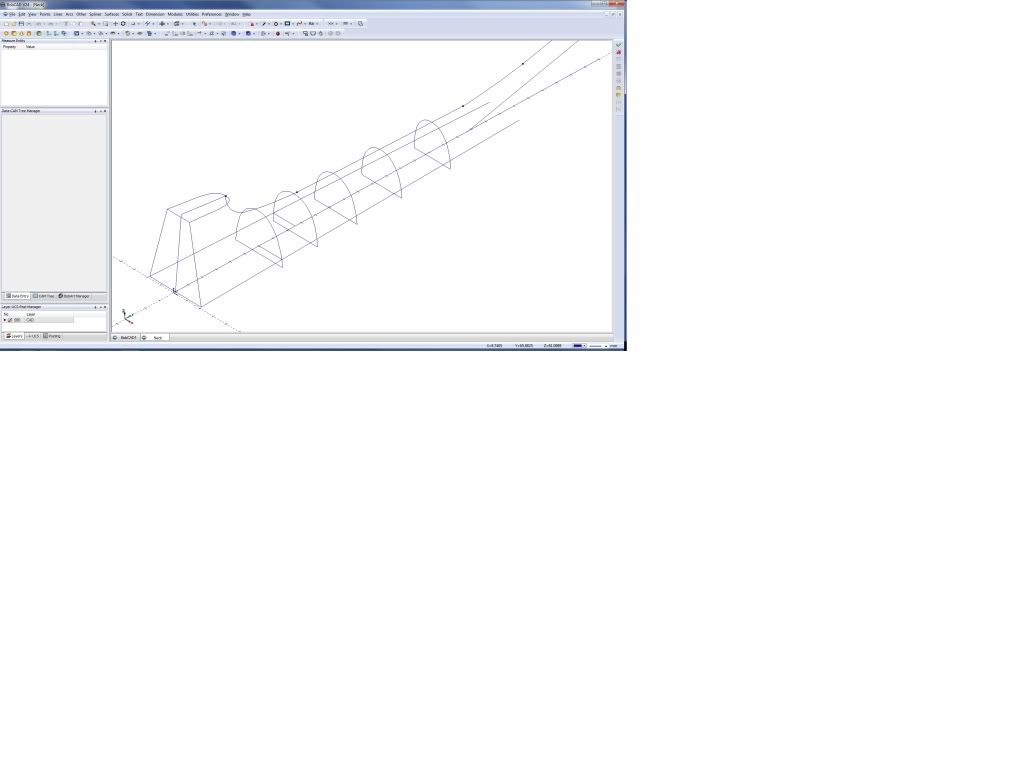
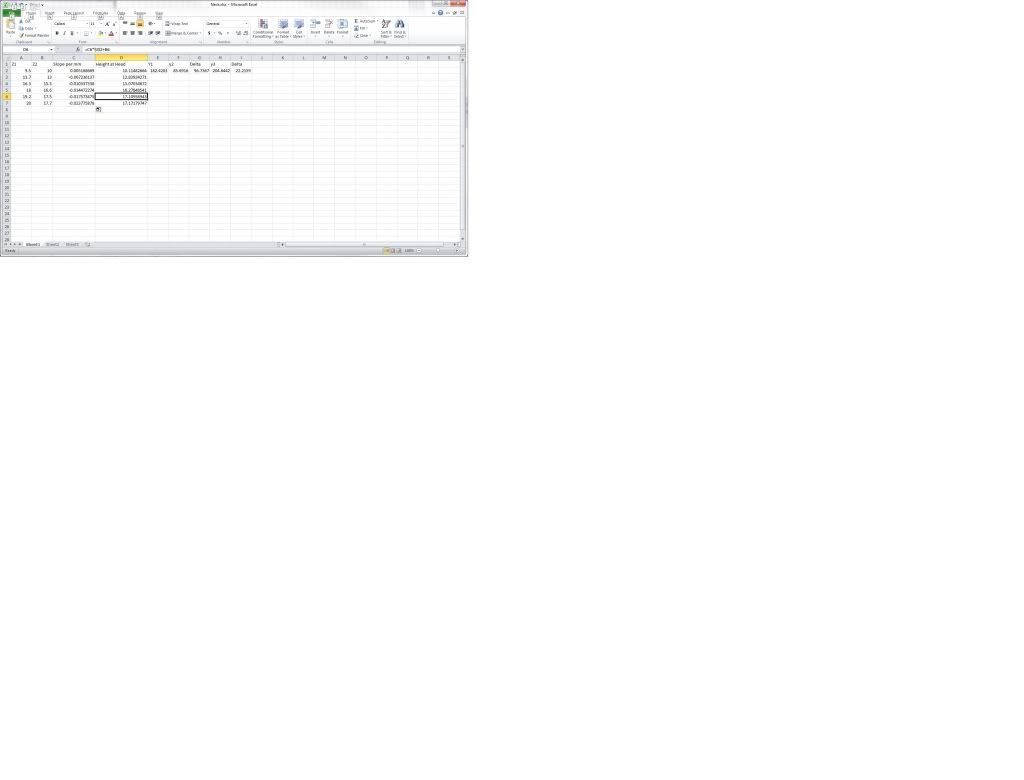
Neck Surface Extrapolation
The book I am using only has 5 neck profiles, so I need to extrapolate both ends of the neck.
Here is my approach:
Drew the 'wire' curves of the known profiles and then did a 'Cross Section' surface (actually did some more but the 2nd pic shows the surface):

Then did lines parallel to the fretboard surface edges and put points at the intersections. Drew vertical lines from these points and put more points on the surface curves where the vertical lines intersected:
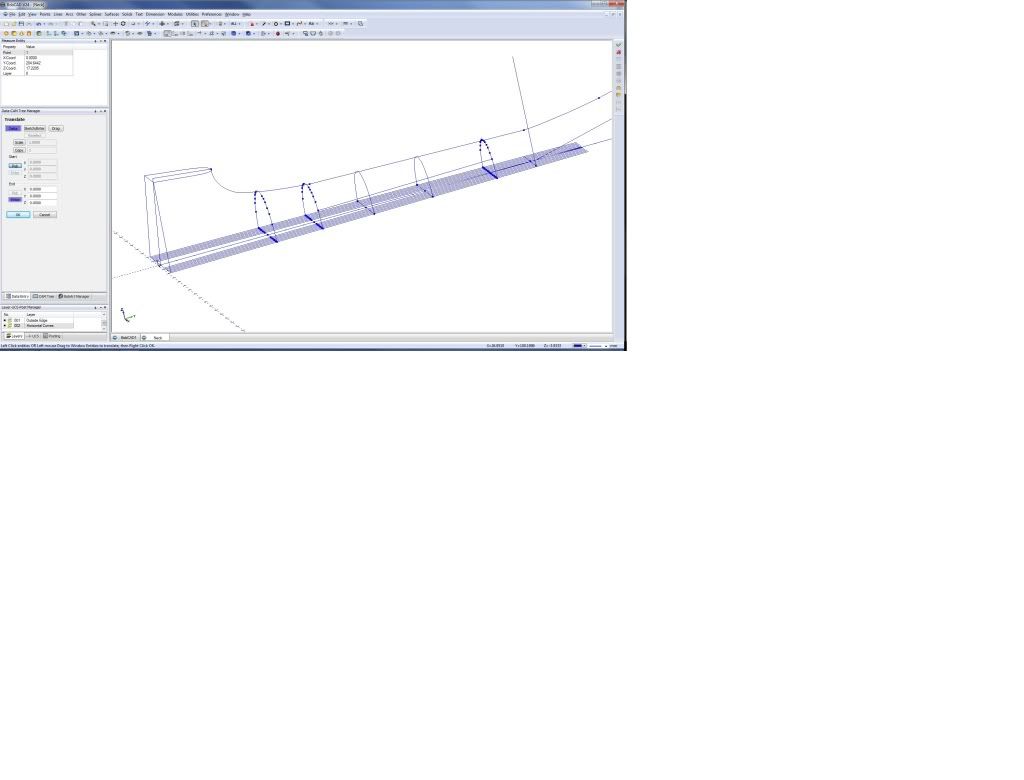
Put points on the parallel lines at the location I want the new curve and drew vertical lines from them:

Here's the tricky bit. I calculated the slope of the lines through the points on the existing curves. When divided by the distance between the curves, you get the 'slope'. I did it in Excel and this results in a 'drop/slope per millimetre'. I know the distance to the new curve, so I can extrapolate the heights of the respective lines based on the curve heights at the last curve I know about:
Put points on the lines and I have a new curve:
Then did another surface:
I hope you can understand all this ;-)
Now need to do this at the heel end and blend in the actual heel as well.
Garry
-
09-03-2011, 08:50 AM #11
Registered
- Join Date
- Apr 2011
- Posts
- 0
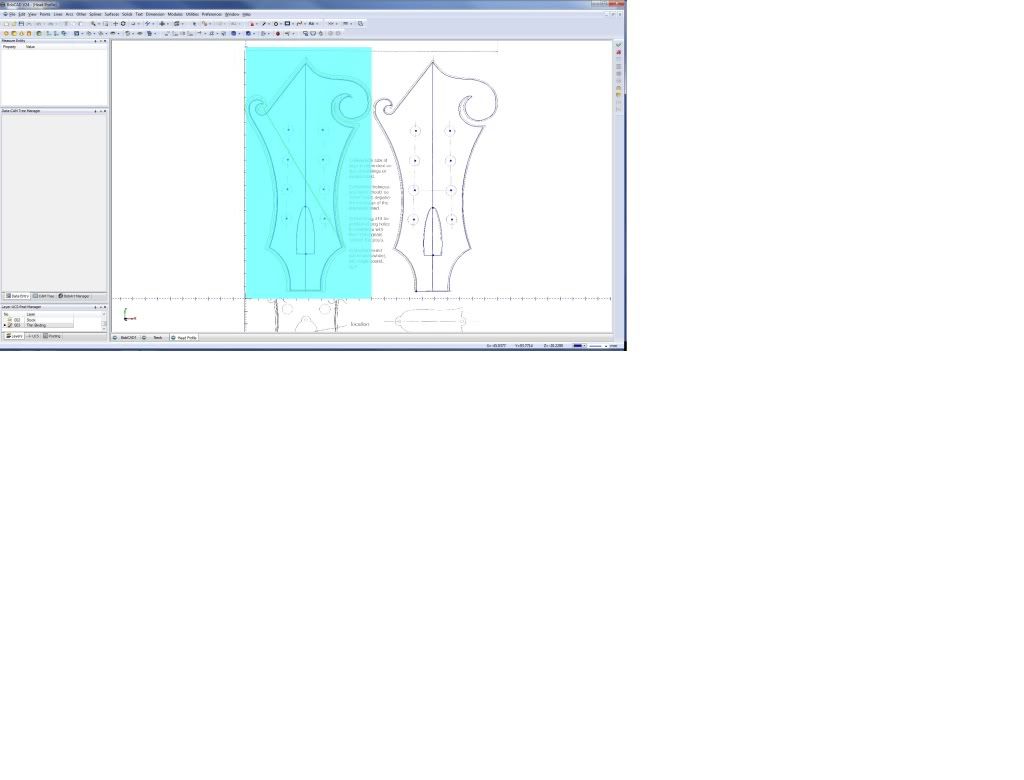
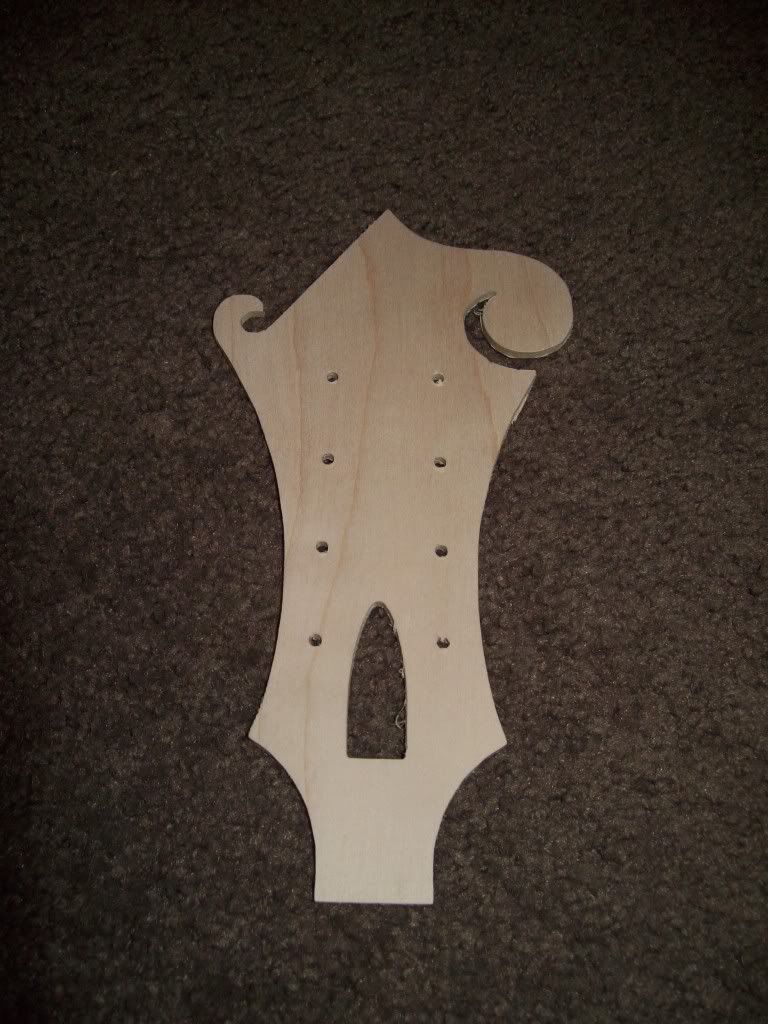
Neck Template
I scanned the template and used BobArt so I could trace it.
Here is the backplot:

I will use two 1 inch sides of birds eye maple with black veneer in between to add some contrast (ie a line up the middle of the neck). Neck is normally made from 2 inch stock.
Garry
-
10-11-2011, 08:21 AM #12
Registered
- Join Date
- Apr 2011
- Posts
- 0
I was responding to a 'troll' or time waster. I cannot delete the message...
Yes, There are some areas that must be done manually.
Mainly the volute scroll inner curve and the head 'cut' area that creates the 'circle'.
I used a hobby knife.
-
10-13-2011, 07:49 AM #13
Registered
- Join Date
- Apr 2011
- Posts
- 0
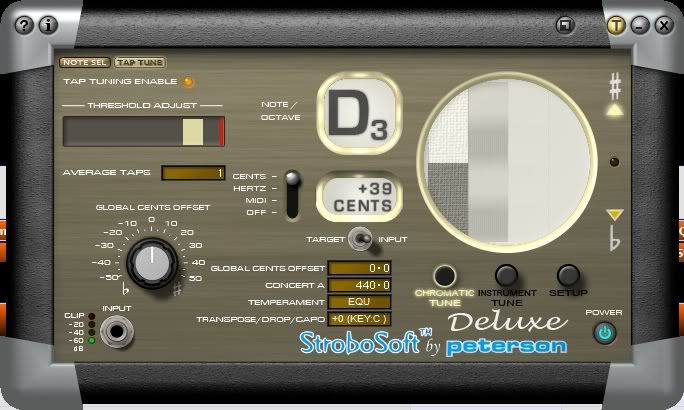
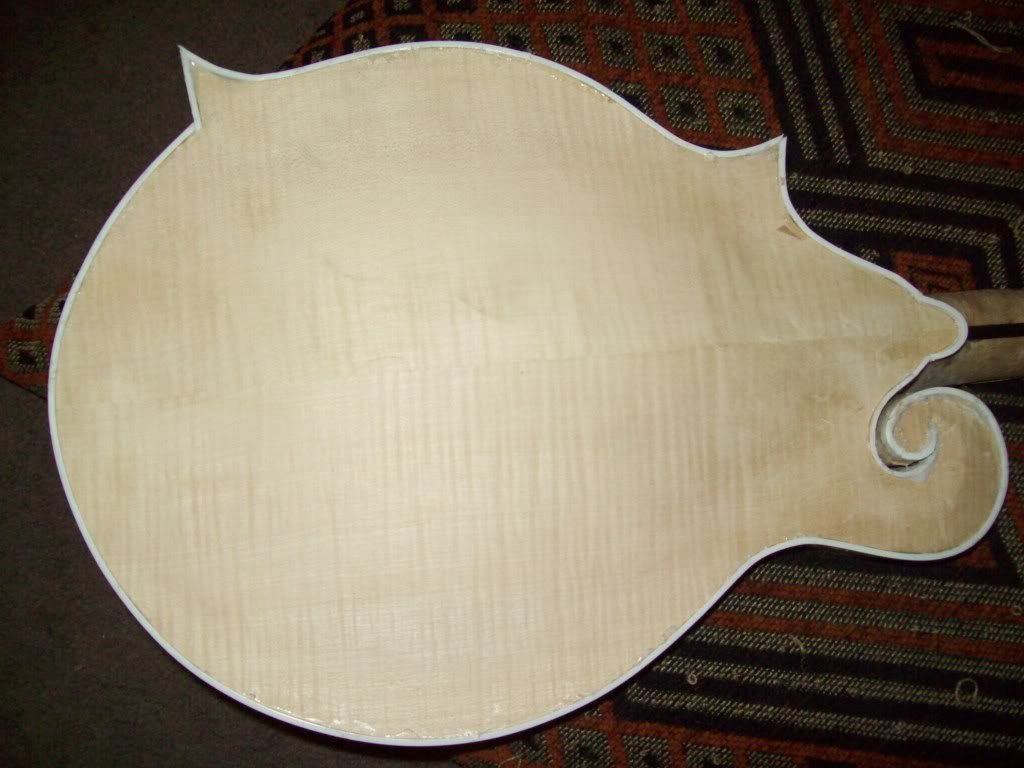
Tap Tuning
Got the back plate on and routed flat to the sides:

Thought I would test the tap tuning software I bought.
Mandolins are traditionally tap tuned to a 'D' ie the body volume etc taps to a 'D'.
My result, before any final finishing:
:wee:
Garry
-
10-15-2011, 11:30 AM #14
Registered
- Join Date
- Apr 2011
- Posts
- 0
Back Plate Binding
Another PITA:
-
10-20-2011, 01:18 AM #15
Registered
- Join Date
- Oct 2011
- Posts
- 0
Hey there, I was wondering if you could tell me how to put a surface on a curved point and line drawing
-
10-20-2011, 08:47 AM #16
Registered
- Join Date
- Apr 2011
- Posts
- 0
Assuming you are talking about BoBCAD, as I cannot talk about other packages in detail, you use the surface feature that allows you to create a surface from three or four sided 'triangles' or 'rectangles'. Originally Posted by devin1030
There are also other surface creation options, but the issue here is that there cannot be too many '3D' changes in the surface, or the function will not work.
You need to break the line drawing of the surface down to an acceptable degree such that the software can compute the surface. Some packages are better at this than others.
Then you use the function to define the outline of the surface section. You do this by defining the 'chain' of lines that form the surface. For a simple triangle, under BoBCAD, you select the starting line (left click on it), select the chain direction (if you select the starting line by left clicking near the line's end point, it will do this automatically) then the starting lines end point by 'shift left clicking' as close as you can get the the end of the first line.
You continue to do thisd for the other sides, until they all join up to define the surface.
Then you right click to get the menu and press 'OK'.
If you have got a complete chain of line segments around the intended surface, it will hopefully work OK.
If you missed even a small bit of the chain, you will get unexpected results.
If there is too much surface changes for the software to calculate, you will also get unexpected results.
Hope this helps.....
-
11-27-2011, 03:05 AM #17
Registered
- Join Date
- Apr 2011
- Posts
- 0
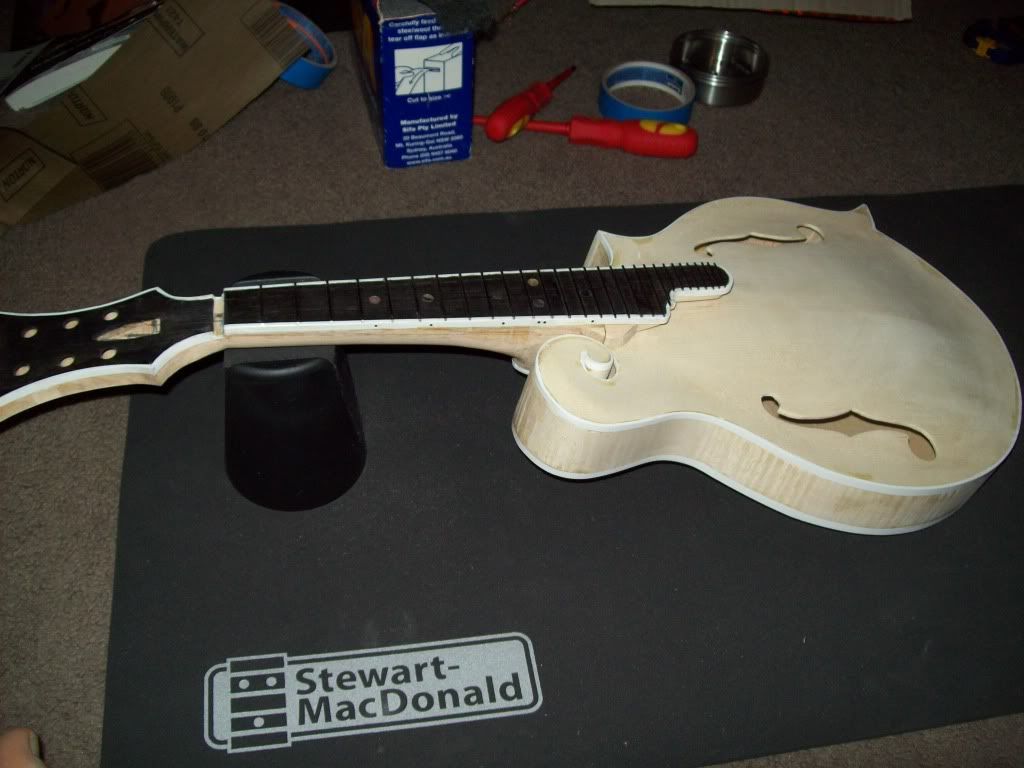
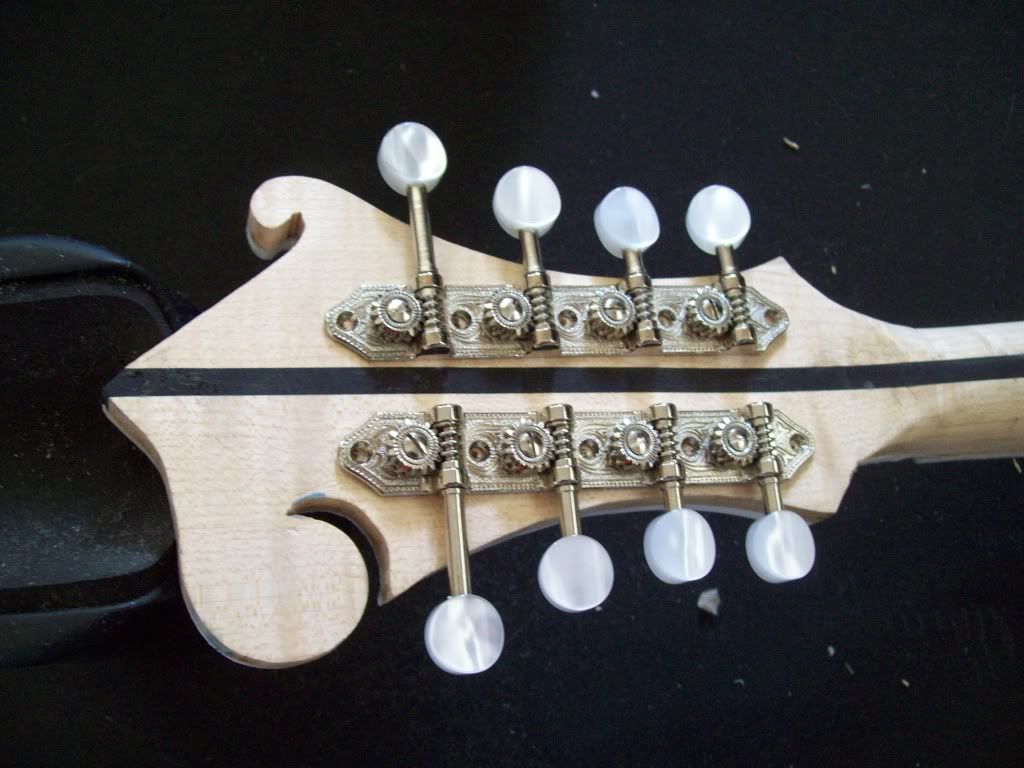
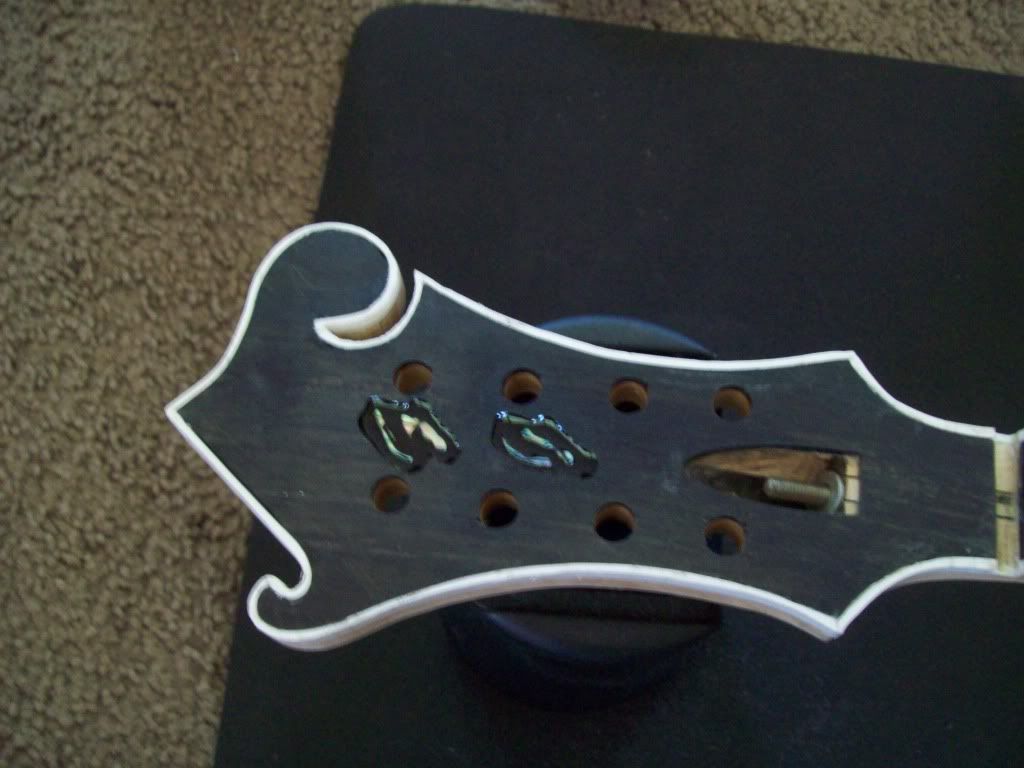
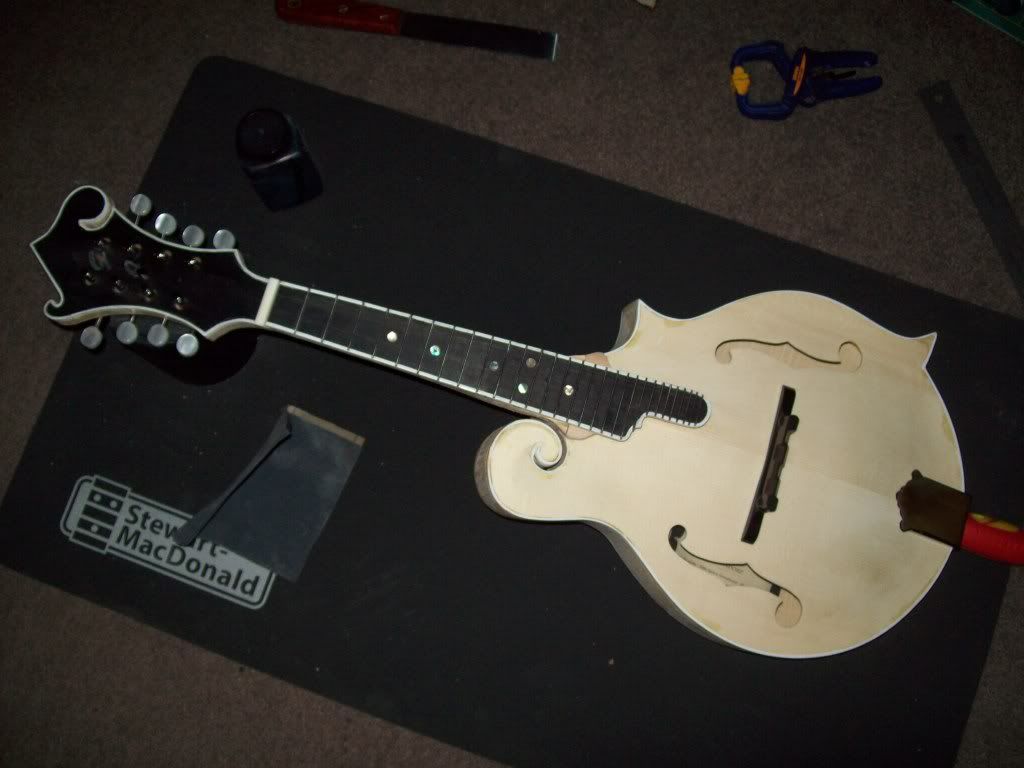
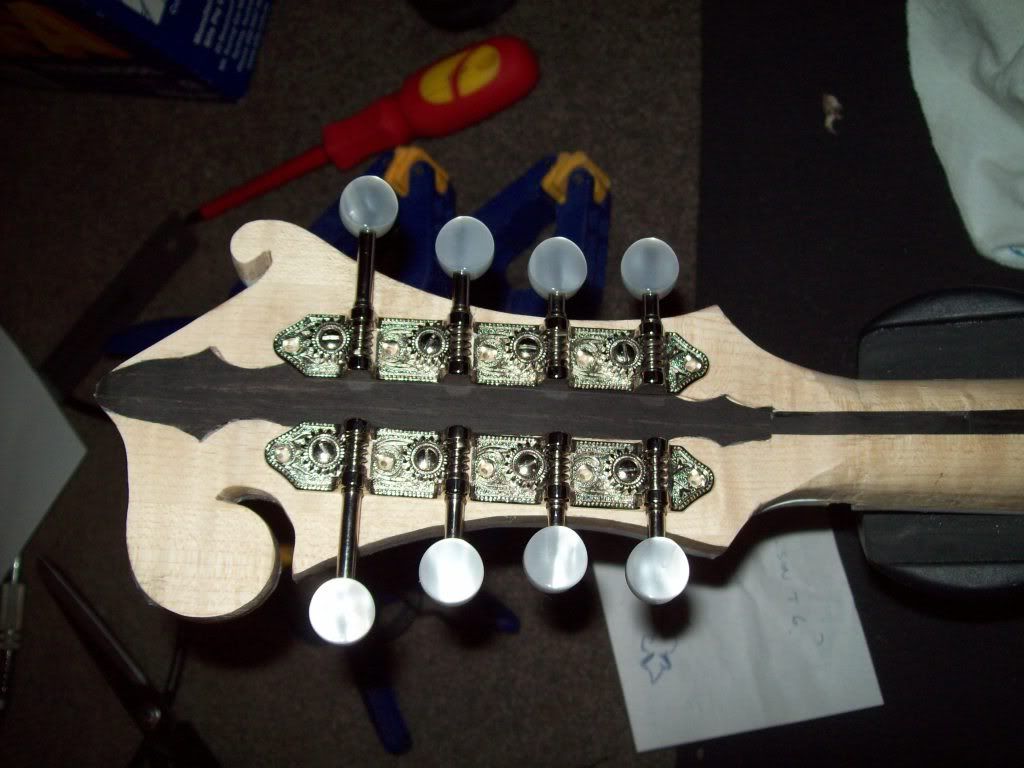
Still Going...
Back onto the Mandolin, rough sanding etc:
StewMac Tuners:
Update: Did the head inlay:
Garry
-
11-28-2011, 09:15 AM #18
Registered
- Join Date
- Apr 2011
- Posts
- 0
Pickguard and Mockup
Still need to fill some gaps, but also want to inlay the pickguard as it is too plain. Also need to stain the ebony blacker...
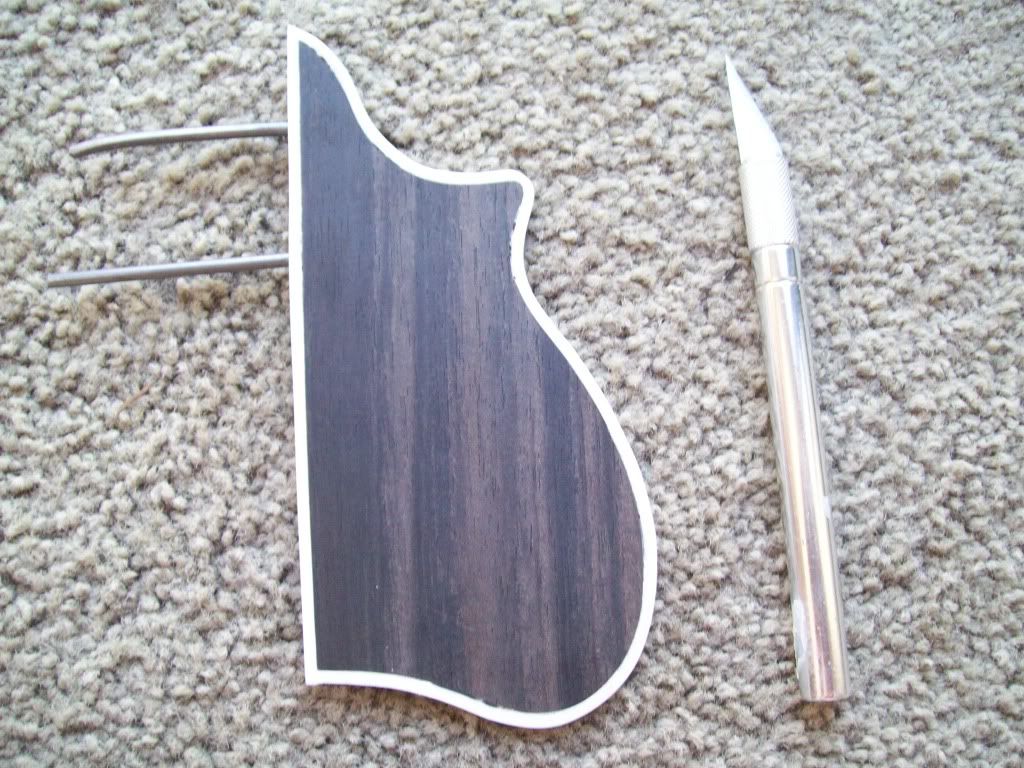
Quick mockup:
Garry
-
11-29-2011, 08:27 AM #19
Registered
- Join Date
- Apr 2011
- Posts
- 0
A Stuff Up and My Fix
When I glued the head plate on, I did not get the top 'point' exactly in the centre of the ebony strip. Then I used the top point as a centre reference.
When I did a test mount of the tuners, I found that the ebony was very visibly off centre:
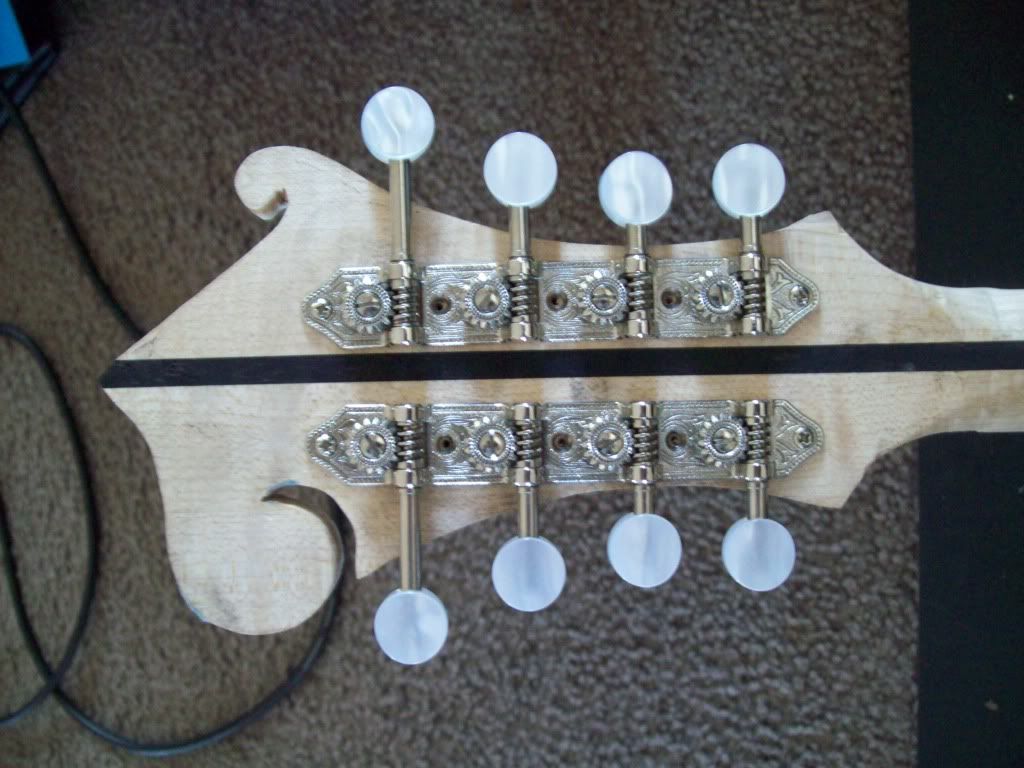
I did a bit of ebony inlay to hide the problem :
Bit of work to do to get the start of the 'fix' to blend (sharp knife and black superglue).
Bugger.
When you stuff up, make a 'feature'.....
Garry
-
11-25-2017, 10:58 PM #20
Gold Member
- Join Date
- Feb 2009
- Posts
- 2143
Re: My Mandolin Surface Post in BobCAD V24
You know this thread is FIVE years old, right?!
CAD, CAM, Scanning, Modelling, Machining and more. http://www.mcpii.com/3dservices.html

 Reply With Quote
Similar Threads
-
Looking for Mandolin g code or dxf
By mredican in forum Musical Instrument Design and ConstructionReplies: 77Last Post: 01-12-2018, 12:02 AM -
Bobcad v24 Surface to Solid
By CADmantoo in forum BobCad-CamReplies: 5Last Post: 06-17-2011, 03:33 PM -
F5 mandolin
By bahed in forum Musical Instrument Design and ConstructionReplies: 0Last Post: 12-25-2010, 12:22 AM -
mandolin info:
By guitarman818 in forum Musical Instrument Design and ConstructionReplies: 1Last Post: 10-18-2006, 03:01 AM
