


Hi everybody,
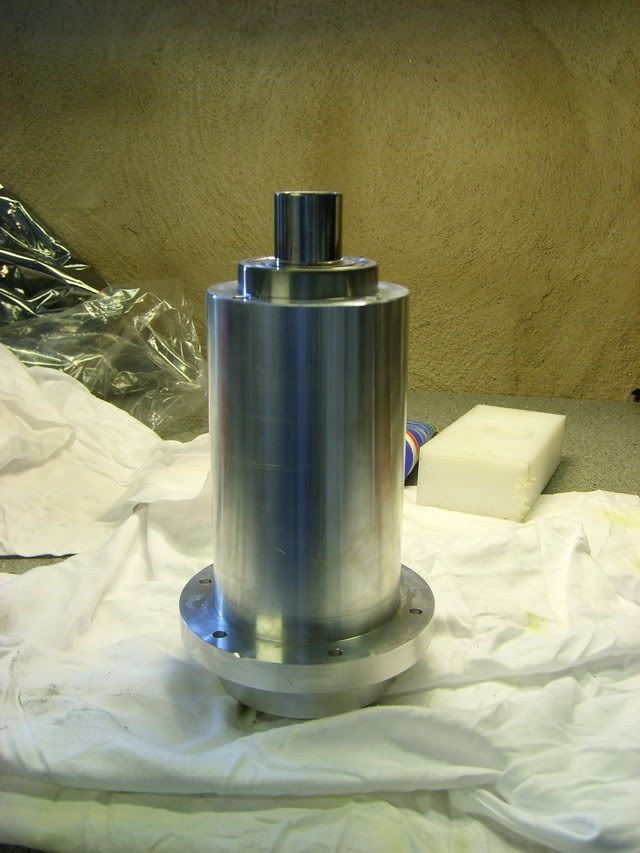
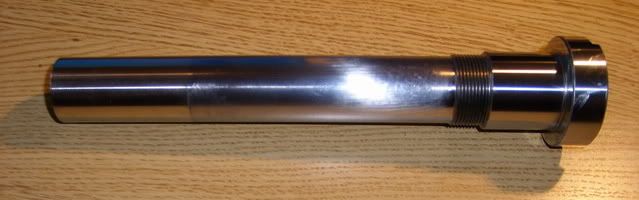
Finally things starts to come together. I got the grinded shaft back the other day - looks absolutely beautiful:
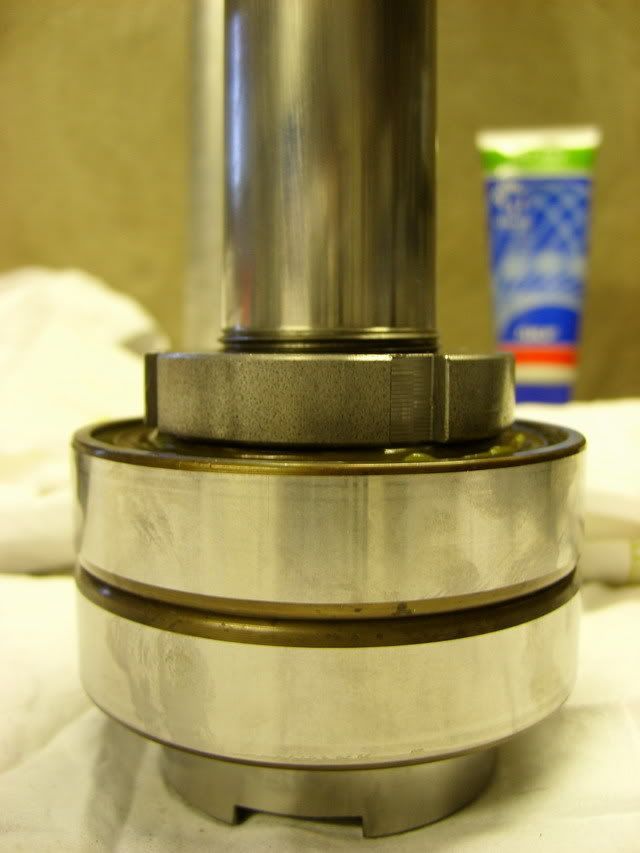
I cleaned the two lower bearings and packed them with grease. The recomended amount for 72XX series bearings is 1.3cm³ but I didn't have any good way to measure that so I filled them, rotated, whiped off excess, rotated again and so on.
I then put the shaft in the freezer and the bearings in the oven on low heat, 80-100C and left them there for a while:
After that they went together without too much effort. I used a piece of aluminum pipe and a plastic hammer to push them om the shaft:
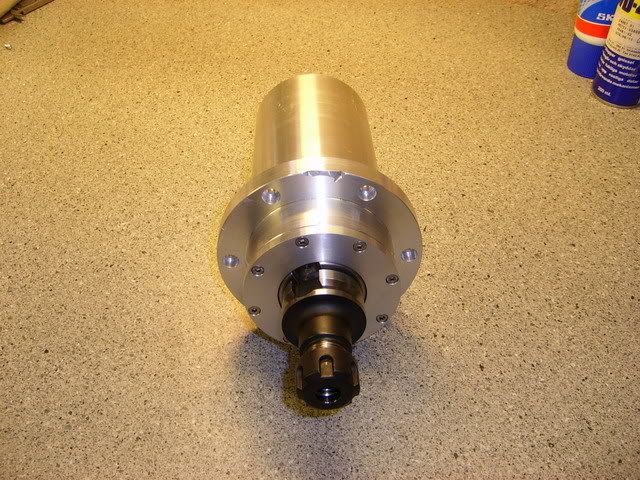
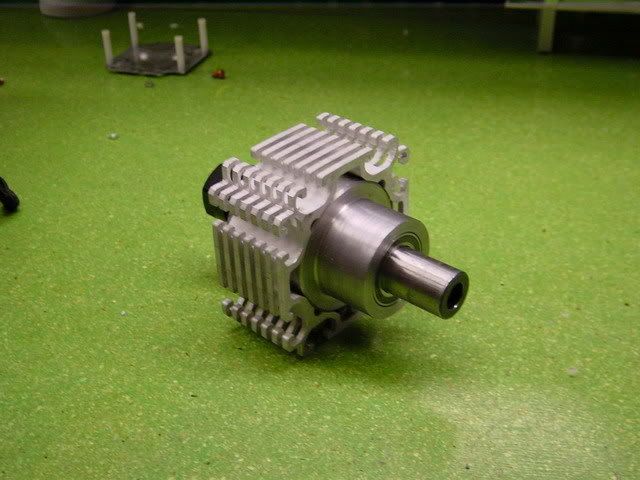
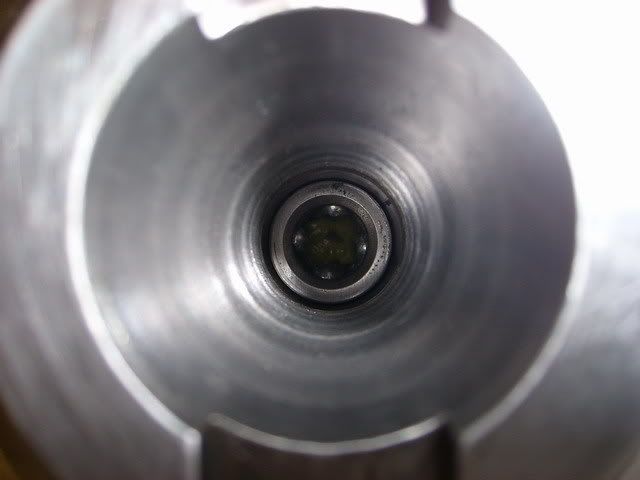
Then I found out that I didn't have any LOCTITE to secure the KM-nut to the shaft so the couldn't mount it in the housing. But I pressed the drawbar tube into the spindleshaft and temporarily fit the gripper to the drawbar for a first test - seems like it actually might work!!
Hopefully I'll be able to fit it in the housing later today, will post again.
/H.O
Thread: BT30 Spindle project
Results 21 to 40 of 174
-
09-26-2007, 08:39 AM #21
 Registered
- Join Date
- Jul 2007
- Posts
- 887
-
09-26-2007, 12:55 PM #22
Registered
- Join Date
- May 2006
- Posts
- 573
Defently one of the more professionel projects here on the zone!
Its looking real good
-
09-27-2007, 02:45 AM #23
Registered
- Join Date
- Aug 2005
- Posts
- 828
Looking very nice!
Was the taper ground also or did you just turn it on the lathe?Dennis
-
09-27-2007, 03:29 AM #24
Registered
- Join Date
- Sep 2007
- Posts
- 23
Wow thats an amazing undertaking. If you need more BT30 holders contact me aor visit me at MariTool.com. I have a large stock of BT30 drill chucks, er11,er16, and er32 collet chucks. Also mine are balanced to 20,000 rpms at no extra charge. I sell them all the time to Fanuc robodrill owners.
Owner of MariTool.com. Mfg. of precision CNC tool holders and accessories.
-
09-27-2007, 06:57 AM #25
Registered
- Join Date
- Jul 2007
- Posts
- 887
Dennis,
Yes, the taper is ground too. The whole lower part of the spindle shaft is hardened so grinding it was more or less a requirement. The shaft is now mounted in the housing and it's looking quite good. The runout is a bit more than I hoped for at 0.01-0.02mm (0.0004") but it is what it is...
fmari,
Thanks! I've seen you on EBAY and I might very well contact you in the future. I definitely want more holders but need to make sure this thing performs before I plow down more money in it.
Will post more photos soon, thanks guys!
/H.O
-
09-27-2007, 07:57 AM #26
Registered
- Join Date
- Jul 2007
- Posts
- 887
More progress...
After having the shaft in the freezer and the housing in the oven for a while they slipped together quite smoothly. The upper bearing, on the other hand took some convincing to get into place. In this photo it's about half way down to it's final destination but after a while I got it all the way down.
At first the spindle turned very easily but after mounting the lower flange, introducing the preload, it's a bit harder to turn but it's still really smooth. I left the seal out for now.
Then I assembled the drawbar and mounted the belleville washers for as little force as possible and did a crude test. I had to push quite hard to get the drawbar down enough for the pullstud to "click" in - it actually seems as if this is going to work.

Next task is to cut off the pneumatic cylinders and fabricate four standoffs so it can be mounted. Then I will make more tests with increased spring force.
/H.O
-
09-27-2007, 09:22 AM #27
Gold Member
- Join Date
- Aug 2006
- Posts
- 1602
Wow, that is really looking great - well done!

So, I guess the next question is, are you going to make an ATC with that lovely spindle?
-
09-27-2007, 11:27 AM #28
Registered
- Join Date
- Jul 2007
- Posts
- 887
Well the plan was/is to be able to make an ATC in the future. That's one reason for choosing the BT30 taper. However, the machine I have at the moment is probably to small to fit one without making it overly complex. I MAY take a shot at it but the first step is to fit the spindle on the machine - lots of work with that alone...
The long term plan is to have another, larger machine sometime in the future and then use this spindle on that machine.
Thanks!
/H.O
-
09-27-2007, 08:46 PM #29
Registered
- Join Date
- Jul 2007
- Posts
- 887
Hi guys,
I got the air cylinder shortened today and fabricated the standoffs. The whole thing assembled looks like this:
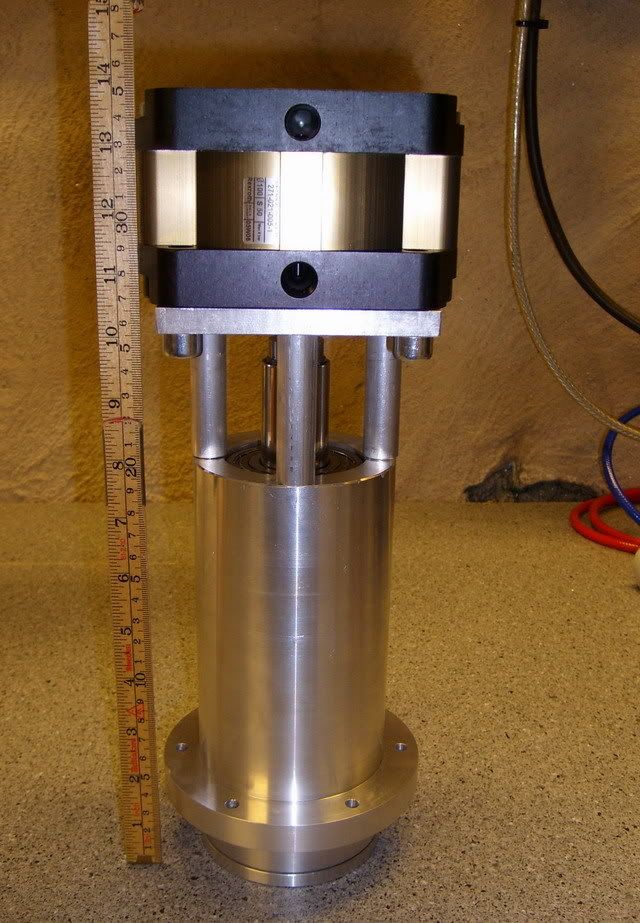
(Drivedogs, pulley and lower seal missing)
I reconfigured the bellevillewashers in stacks of two and fitted a simple manual valve to the cylinder. With the compressor at 4 bars it worked quite nicely. I didn't have enough pneumatic fittings so at the moment the drawbar pushes the piston back but it's good enough for a functional test.
I've uploaded a video to Youtube showing the drawbar in action.
/H.O
-
09-27-2007, 09:21 PM #30
Registered
- Join Date
- May 2006
- Posts
- 573
Sweet looking, that is one big thing:-) More pictures and videos are always welcome
-
09-27-2007, 09:50 PM #31
Gold Member
- Join Date
- May 2005
- Posts
- 1810
I like the balancing robot vid - nice work!
Nice work on the spindle, too!
About what does your new love weigh?
ScottConsistency is a good thing....unless you're consistently an idiot.
-
09-28-2007, 05:52 PM #32
Gold Member
- Join Date
- Aug 2006
- Posts
- 1602
Love the video - can't wait to see it cutting, or infact, the 'larger' machine you plan to build to fit round that mega spindle!
I am having serious spindle envy issues right now
-
09-28-2007, 06:09 PM #33
Registered


- Join Date
- Dec 2006
- Posts
- 532
thats some nice work... are you planing to sell these?
-
09-28-2007, 06:35 PM #34
Registered
- Join Date
- Jul 2007
- Posts
- 887
Thanks guys!
It will probably be a while before it will cut any metal. I need to rebuild the my Z-axis from the linear ways and "out" and that means a lot of work. It will get done though.
I wish I could build them for sale but it just wouldn't be economical for me, or you (the customer). I do intend to publish the drawings etc but I really believe I should give it a proper test run before I do that.
And about that 'larger' machine...that's a project that may or may not happen. At the moment I don't even have room for a larger one so...
Thanks again!
/H.O
-
09-30-2007, 03:47 PM #35
Gold Member
- Join Date
- May 2005
- Posts
- 2502
Absolutely gorgeous work!
Can you tell us a bit more about how you established the preload? Did you experiment with it at all? I'm just wondering if a slight increase would reduce your runout.
Best,
BW
-
09-30-2007, 04:44 PM #36
Registered
- Join Date
- Jul 2007
- Posts
- 887
Thanks Bob!
The bearings are 7207BEGAP so the preload is built in to them. They are mounted back-to-back, the KM-nut keeps the inner races together and the flange keeps the outer races together. Only way to increase the preload now would be to put a (very thin) shim between the inner races.
It would be nice to get rid of that runout though... I think it may be combination of the bearings and the concentricity of the shaft it self. What would be the absolute best, I think, would be to have it reground now when its mounted - but that's something I'm not up to paying for right now....
I want to cut with the thing....lots of work left before that will happen though.
/H.O
-
10-01-2007, 04:22 AM #37
Registered
- Join Date
- Feb 2006
- Posts
- 1072
H.O., thank you for the great descriptions and photos. And for making such an impressive spindle! Originally Posted by H.O

The bearings are http://www.wbds.com/htm/7207BEGAP-SKF.htm ? Do you have a datasheet on the bearings? This place is selling them individually rather than in matched pairs, and doesn't mention the preload.
Thanks again,
Randy
-
10-01-2007, 06:43 AM #38
Registered
- Join Date
- Jul 2007
- Posts
- 887
Hi Randy,
Yes the bearings are 7207BEGAP (EXPLORER) from SKF. They are not matched pairs (to expensive for me) but they are made for universal matching. Designation GA, GB and GC tells you about the the preload - light, medium, and heavy.
You can read more about them here:
http://www.skf.com/portal/skf/home/p...&newlink=1_3_3
SKF's EXPLORER class bearings are made to tighter tolerances than than normal and is usually good for a little higher speed. According to SKF's product tables the 7207BEGAP is only available as EXPLORER class but even so I got the non-EXPLORER when I got mine (old stock?) so I sent them back for new ones.
Thanks!
/Henrik.
-
10-01-2007, 08:35 PM #39
Registered
- Join Date
- Feb 2006
- Posts
- 1072
Thank you for that information, Henrik! I had searched the part number on SKF's site without success. I have thinking about the possibility of making a spindle using a Parlec ER20 (or maybe ER25) straight-shank collet chuck, and your spindle is a good inspiration.
Best regards,
Randy
-
10-01-2007, 09:18 PM #40
Registered
- Join Date
- Jul 2007
- Posts
- 887
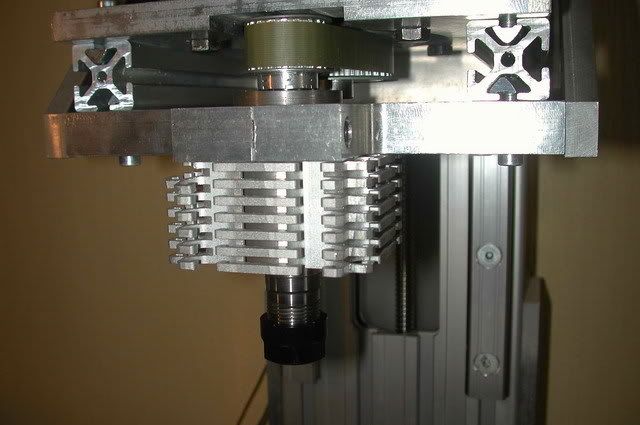
Randy,
That sounds kind of like the one I'm using on my machine now. I built it with an ER16 collet chuck, two deepgroove ballbearings in the business-end and smaller one at the top. Here's two photos of it:
Good luck!
/Henrik.


 Reply With Quote
Similar Threads
-
BT30 Spindle cartridge for a smithy mill
By mlennon in forum Maintenance DIY DiscussionReplies: 0Last Post: 03-12-2013, 05:13 PM -
Looking for a BT30 Spindle
By xtwalt in forum Uncategorised MetalWorking MachinesReplies: 1Last Post: 11-20-2012, 10:10 PM -
BT30 Spindle
By dirtridn2010 in forum Tormach Personal CNC MillReplies: 0Last Post: 05-07-2012, 11:19 AM -
Reasonably priced BT30 ATC spindle.
By dwalsh62 in forum News AnnouncementsReplies: 0Last Post: 05-12-2011, 05:59 PM -
BT30 taper spindle for mold making
By grantmi1 in forum Hard / High Speed MachiningReplies: 5Last Post: 02-28-2006, 09:41 AM
