


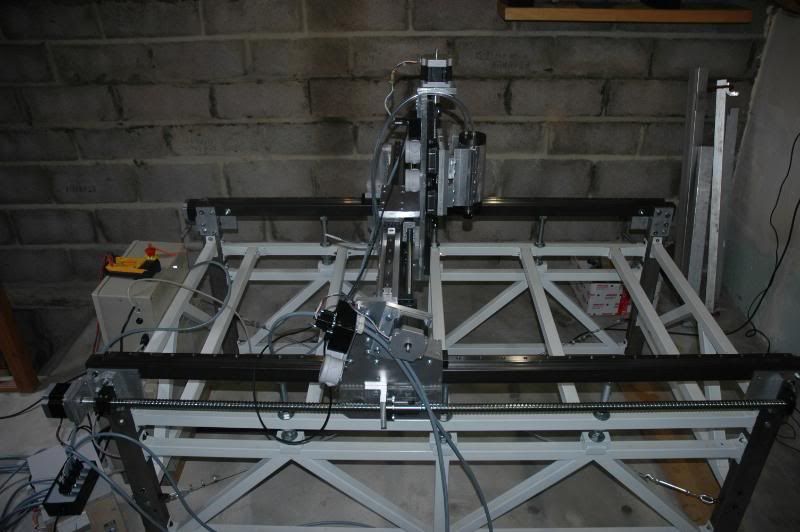
That's one solid gantry.
Thread: 1x1.5m machine
Results 41 to 60 of 70
-
07-04-2010, 02:51 PM #41
 Registered
- Join Date
- Oct 2008
- Posts
- 406
Bob
"Bad decisions make good stories."
-
07-04-2010, 08:05 PM #42
Registered
- Join Date
- Mar 2009
- Posts
- 624
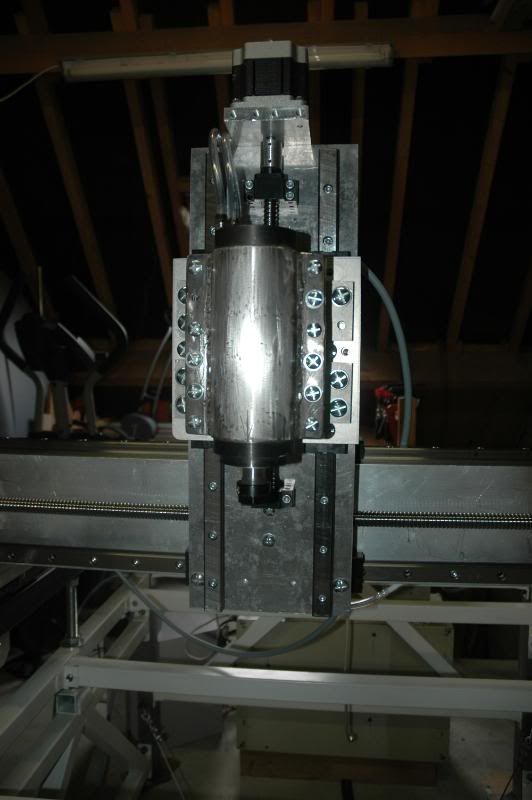
Looking good Stef, what are the large holes for in the gantry sides.?
You will need to take great care and time aligning the motors, ballscrew ends and ballnut. This was the most single time consuming and trouble some aspect of my machine and even the slightest miss-alignment will show as either vibration/whip over this length screw and/or binding making for slower speeds or stalling motors.
Also the screws/nuts will losen up quite a lot after several hours of use and you will also need to re-check the BK/BF bearings after using it a day or two because the nut on the BK will work it's self lose.
The little grub screw that locks the nut is a poor quality and i would recommend replacing them before use because they round off and then your stuffed when you need to re-tighten.
Other than the lengthy time it took tweaking the alignment of the screws the only mechanical problem i've encountered so far was the BK working lose causing slight end float and a pulley coming lose and snapping a belt which was my fault for not re checking after first use.
Cant wait to see it working.!!
-
07-04-2010, 10:01 PM #43
Registered
- Join Date
- Sep 2006
- Posts
- 87
cheers, Originally Posted by hemsworthlad

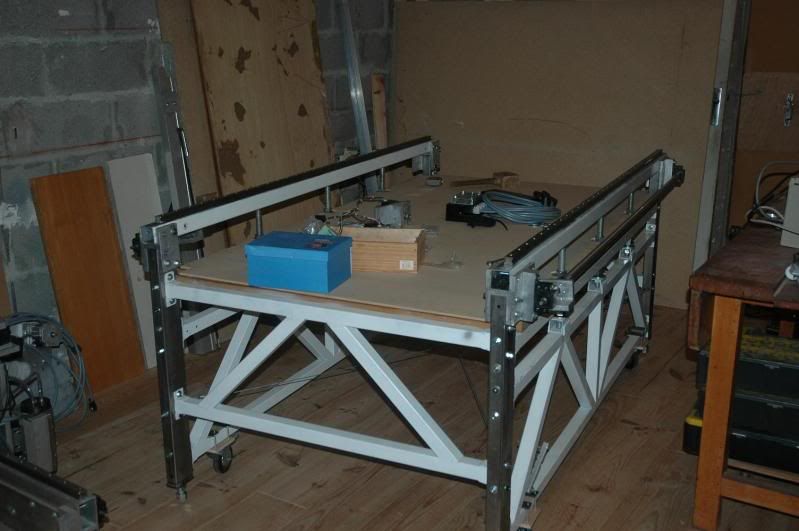
I started making a jig for lining things up. as it stands, i am pretty close, but not spot on. i have a difference of about 0.25mm between the screw and the gantry at the front and the rear of the machine (distance gantry->screw is 35.10 at the front and 35.35 at the back). so i have this to sort out before going any further!
-
07-05-2010, 05:04 PM #44
Registered
- Join Date
- Mar 2009
- Posts
- 58
Look real good stef
 . I did notice in the last pic it looks like the motor is a little out of alignment, I hope there is some adjustment on the mounts to correct that
archer3d
-
07-05-2010, 06:01 PM #45
Registered
- Join Date
- Sep 2006
- Posts
- 87
thanks, Originally Posted by archer3d
oh yes of course, it's not aligned in fact.
I just drilled a 10mm hole on the mount, keeping in mind that that hole would become a 30mm hole in the near future, to be able to take the coupling. the motor is not attached yet.
-
07-05-2010, 07:03 PM #46
Registered
- Join Date
- Mar 2009
- Posts
- 624
Hi stef,
One more thing to watch out for with the BK block from chia.
I've had several blocks now that have needed the seals knocking into the blocks more.
You can tell if the need adjusting by looking at the spacers, they should pretude slightly more than the seals.
The one that usually needs knocking in is the seal nearist the screw most of the ones i've had of him are flush with the spacer and they catch on the screw when attached because the screw dia is larger than the seal, this cause's a slight binding and then when in use wears the seal away.
Be carefull not to knockin too far thou else they bind on the bearings.
-
07-07-2010, 07:56 PM #47
Registered
- Join Date
- Sep 2006
- Posts
- 87
cheers, i'll watch for this. Originally Posted by hemsworthlad
-
07-17-2010, 09:26 PM #48
Registered
- Join Date
- Mar 2009
- Posts
- 624
Hows the machine going Stef any more progress.?
-
07-17-2010, 10:18 PM #49
Registered
- Join Date
- Sep 2006
- Posts
- 87
Not much.. Originally Posted by hemsworthlad
I placed an order a few days ago for some allen screws, and some grub screws for the blocks. they havent arrived yet.
i got my hands on a enclosure big enough to contain all my electronics today.
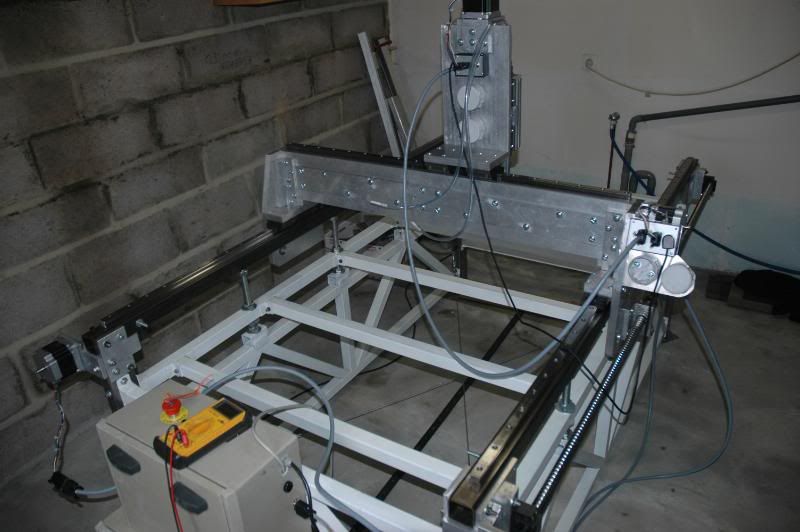
and i have almost finished the bracket that connects the gantry to the lead screws.. i used a couple of clamps to connect one of the screws to the gantry, and the result was impressive. very little effort was required to get the gantry moving. and that was just turning one screw/side only.
so overall, nothing that really stands out.. just detail work.
-
07-17-2010, 10:32 PM #50
Registered
- Join Date
- Mar 2009
- Posts
- 624
Yes my build went like this. . . seemed to hit a stall for a while then the next thing it was up and cutting and hasn't stopped cutting since.!! . . Now it's producing off spring . .Lol Originally Posted by stef_d
Have you seen the Wee Beasty post i put up.? The bloke is so chuffed he hasn't stopped cutting with it as well.!!. . . Next that will be producing off spring.? . . . Machine's building machine's before you know it we'll be living in the matrix. .Lmao.
Keep us posted, let me know if there's anything i can help with or you need anything cutting.
-
01-30-2011, 08:37 PM #51
Registered
- Join Date
- Sep 2006
- Posts
- 87
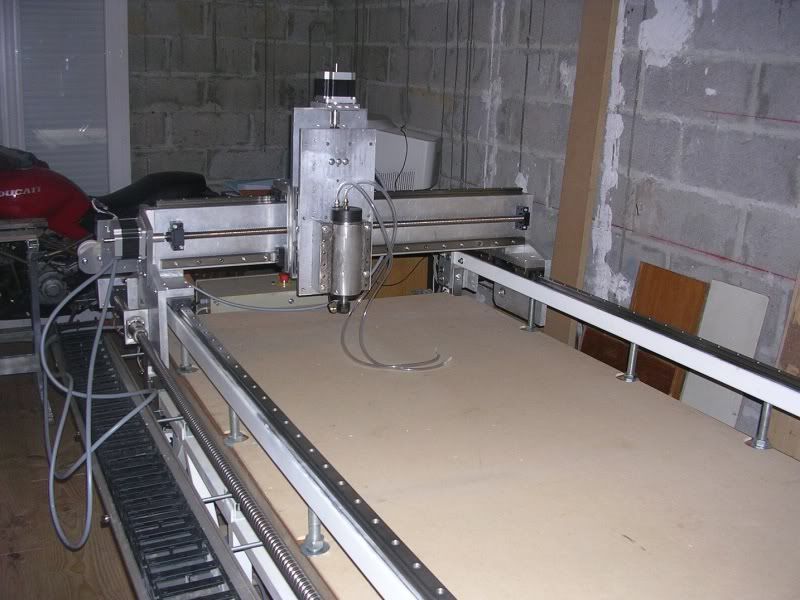
my CNC is nearly complete now:
I have all three axis running, and the spindle is almost operational. It requires water cooling, and that's not 100% working yet.
the spindle is a 24000rpm 2.2Kw fully enclosed three phase motor.

I am so far very pleased with the results. It runs smoothly at decent speeds (enough to get your heart rate going, if the spindle was running !) without any major tweaks. It will still need about 3 months of adjusting and sorting things out, like the cutting bed, the cable carriers, and fixing various bits to be frame.
but i am hoping to cut my first chips in february.

-
01-30-2011, 09:32 PM #52
Registered
- Join Date
- Mar 2009
- Posts
- 624
Looking good Stef, I was only thinking yesterday how you were going.
Hope it chips well.!
-
01-31-2011, 03:14 PM #53
Registered
- Join Date
- Sep 2006
- Posts
- 87
Cheers ! Originally Posted by hemsworthlad
yes, it's comming along nicely. mostly thanks to your help !
-
01-31-2011, 09:54 PM #54
Registered
- Join Date
- Nov 2009
- Posts
- 21
very nice
thats one tidy machine you,ve knocked up there.
what steppers/drivers/power supplies it using? thanks, i did look through the thread but could find any specs
-
01-31-2011, 11:10 PM #55
Registered
- Join Date
- Mar 2009
- Posts
- 624
I'm not 100% on this but seem to think(because I recommended them.!) he's using the same motors and drives I do/did from arceuro trade. Originally Posted by mid_lander
3Nm nema 34's and 9amp drives not exactly sure about what PSU Stef's using but I use a 67V 11A unregulated PSU built by me using toridal transformer and cap's, very easy to build and better suited to steppers.
Dont think you can still get the 9A drives from ArcEuro any more. 7A is the largest I think they do now which is still more than enough and gives you a good range of motors to choose from.!
-
02-01-2011, 07:44 AM #56
Registered
- Join Date
- Sep 2006
- Posts
- 87
Almost ! Originally Posted by hemsworthlad
I do use the same steppers, (2 on x, 1 on z and 1 on y) but i use geckos (G203 i beleive), to drive them.
The PSU is also home built, using a 640VA transformer, diode rectifier, and 50mF (yes, milli) worth of capacitors. probably overkill.
-
02-01-2011, 11:22 AM #57
Registered
- Join Date
- Mar 2009
- Posts
- 624
Ah I thought afterwards that you had the 203v's. Thats what I use now and wasn't sure if i'd told you these or the 9A that I originally used.
The Arc drives are ok and work ok but the 203v's are so much nicer.
-
10-10-2011, 09:25 AM #58
Registered
- Join Date
- Sep 2006
- Posts
- 87
After a very long break during the summer (bought a new house and moved in, then started sorting out the workshop..), I've just started working on the machine again.
I took the oportunity that it was dismantled to sort out a few things including:
-drilling the underside of the feet and welding a M20 nut, so that i can thread M20 rods for leveling.
-attaching 100mm caster wheels, so that i can easily move the machine around (before levelling)
-drilling and welding anti crushing bosses on the wide side of the feet.
-drilling the side beam for the cable carrier rest.
-I also prepared the cutting bed: a 40mm thick slab of MDF, which i sealed with several coat of acetone diluted polyester resin. the result looks stable enough..
I finished all this, and started putting everything back together.
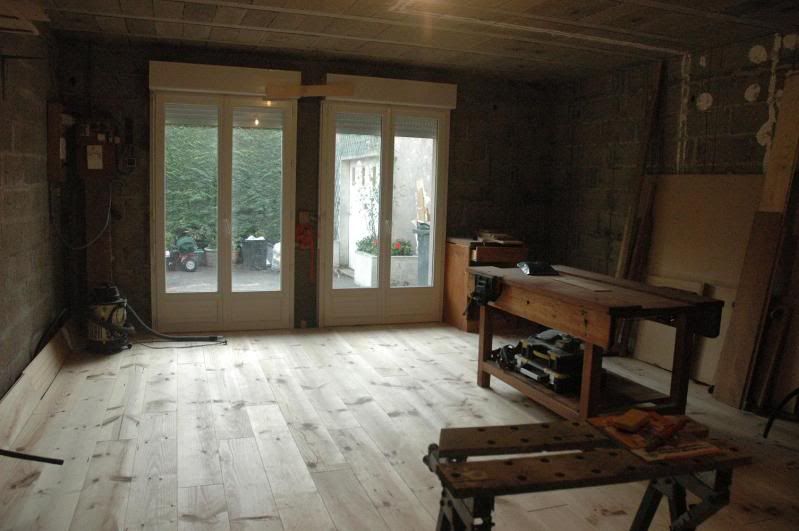
as far as the workshop is concerned, i upgraded to a 26sqm meter woodworking dedicated room. I've installed pine floor boards for comfort which i will drill to reach for the concrete slab underneath, so that the machine feet rests on something a little more stable !
I've also replaced the original leaky and cold sliding garage door by 2 wide double glazed patio doors... plenty of light now comming through !
-
11-07-2011, 09:45 AM #59
Registered
- Join Date
- Sep 2006
- Posts
- 87
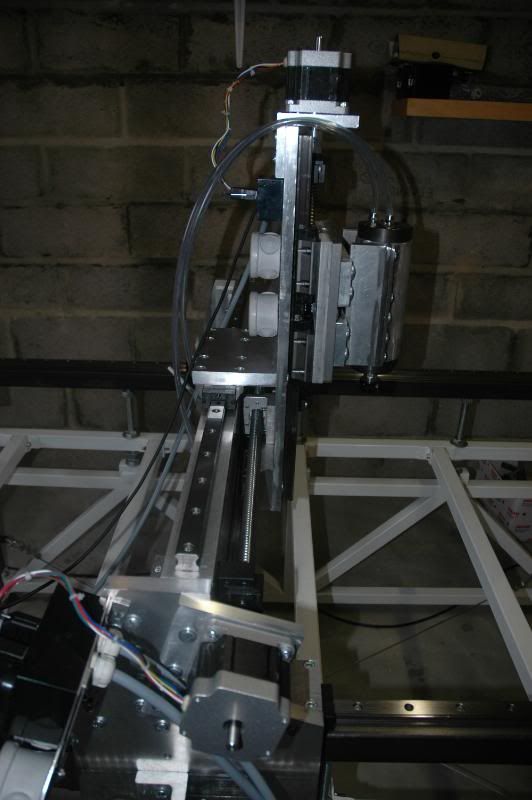
been busy redesigning and rebuilding the z axis.
I reversed the setup. rails are now on the moving zplate. this seems to be a much better setup.
-
11-07-2011, 09:55 AM #60
Registered
- Join Date
- Dec 2005
- Posts
- 134
Can you upload some photo on Z details?

 Reply With Quote
Similar Threads
-
Another machine rigid tapping (stepper machine)
By samco in forum LinuxCNC (formerly EMC2)Replies: 11Last Post: 02-12-2019, 05:53 PM -
saleCNC laser engraving machine and CNC woodworking machine
By zhangrui1588 in forum Laser Engraving / Cutting Machine General TopicsReplies: 3Last Post: 05-08-2011, 09:54 PM -
Hardinge CBN Turning Machine with GE Fanuc Machine Model CS- 51, S.No. CL – 622 -BSP
By M.RISHIKESH in forum Hardinge LathesReplies: 1Last Post: 11-21-2009, 01:03 AM -
Deep Groove Taig machine would it be a good starter machine
By Fritzie15 in forum Taig Mills / LathesReplies: 0Last Post: 09-21-2007, 03:37 AM
