


Started finishing the rockers today. I'm not real happy with some of them so I may make a second batch. I won't be doing much any time soon. Work is getting busy!
Thread: Model V8 engine plans required
Results 101 to 120 of 525
-
11-20-2010, 02:50 AM #101
 Registered
- Join Date
- Dec 2006
- Posts
- 603
-
11-27-2010, 01:32 AM #102
Registered
- Join Date
- Dec 2006
- Posts
- 603
Cross lifters off the list. Both sets are complete. I am hoping to get back to rockers this weekend.
-
11-27-2010, 10:59 PM #103
Registered
- Join Date
- May 2004
- Posts
- 600
That's great work Steve and truly inspiring to see it progressing bit by bit. I liked the novel idea of the captive circlips for the valve spring retainers.
Thanks for sharing.
-
11-28-2010, 12:47 AM #104
Registered
- Join Date
- Dec 2006
- Posts
- 603
Thanks Skippy. The clip idea was not mine tho I cant remember where I saw it. It does work well
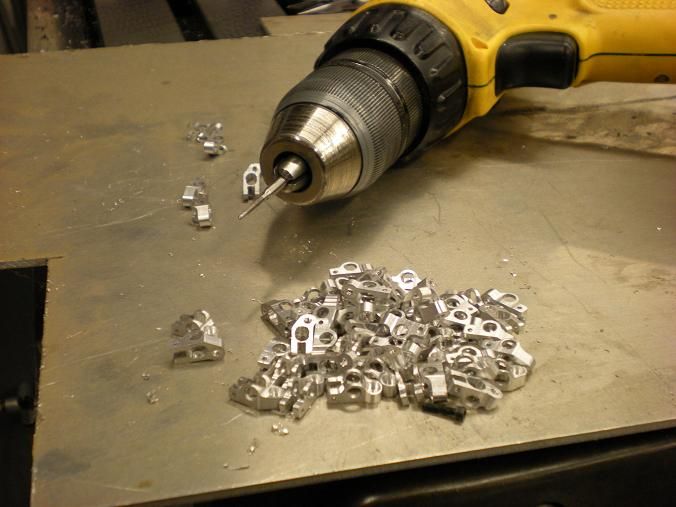
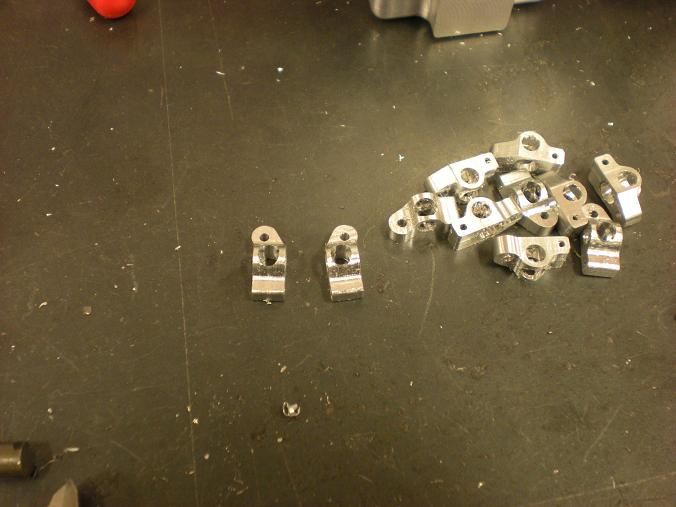
I was supposed to work today but the job was postponed until next week so I woke up and spent a quiet day in the garage. I made another batch of rocker sides. I tossed all the bad ones in the melt bucket. Then I used the CNC mill to make a new fixture. After the fixture was done I started loading the rockers while the mill was still on and ran the pieces right away. The results were much better. I am alot happier with this batch.

-
11-30-2010, 01:16 AM #105
Registered
- Join Date
- Dec 2006
- Posts
- 603
Hello All!
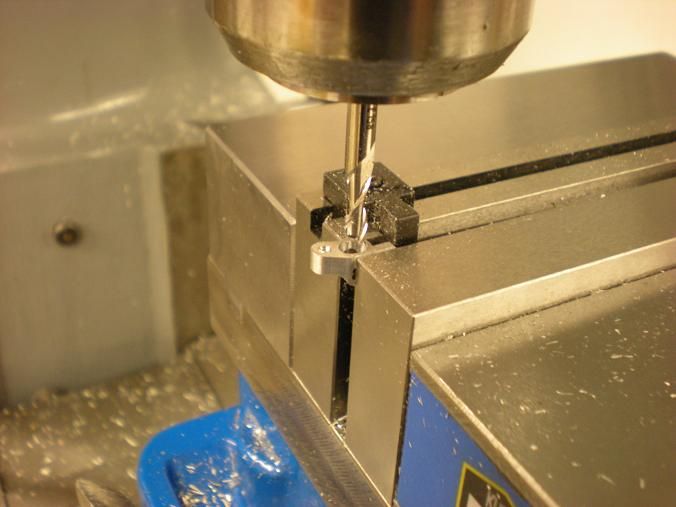
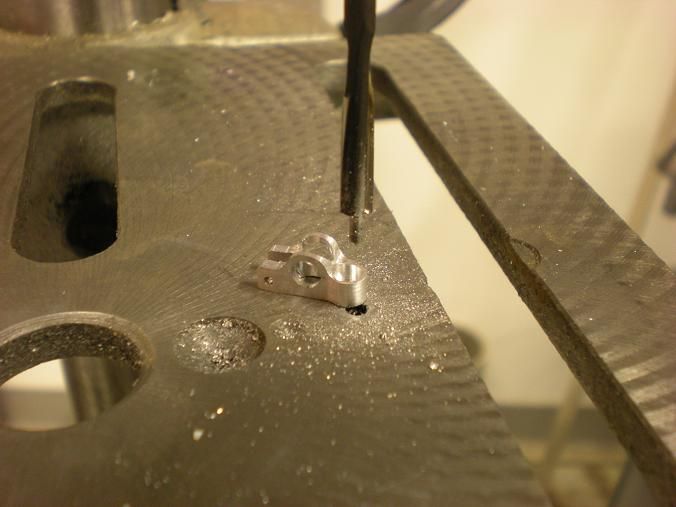
Well, I'm one step closer to having the rockers done. I managed to mill the slot in the nose of the rocker. I had some boo boo's along the way that I managed to fix sorta. Good thing these are hidden under valve covers!! I have three things to do still. I need to cut some clearance in the nose for the spring retainer. The rocker will pop the retainer off if i don't. Then the tail will get counterbored and threaded to accept a 2-56 screw. This will allow the pushrod to push on the screw instead of the aluminum rocker.
I am doing all this because I wanted to make some cool rockers. A much simpler rocker could be made in 1/4 the time. What the h7!! was I thinking.
-
11-30-2010, 01:25 AM #106
Gold Member
- Join Date
- Feb 2010
- Posts
- 3447
wow! This is amazing! Will it run when its done?
-
11-30-2010, 10:33 PM #107
Registered
- Join Date
- Dec 2006
- Posts
- 603
 Originally Posted by diyengineer

I sure hope it runs when it's done. This one did and the design of the V8 is very similar.
[nomedia="http://www.youtube.com/watch?v=1-JRQGPswVA"]YouTube - PeeweeFinished.AVI[/nomedia]
-
12-01-2010, 09:34 AM #108
Gold Member
- Join Date
- Feb 2010
- Posts
- 3447
wow very very impressive... I hope to have the skills to accomplish such a feat one day. Originally Posted by stevehuckss396
-
12-02-2010, 02:02 AM #109
Registered
- Join Date
- Dec 2006
- Posts
- 603
Hello All!
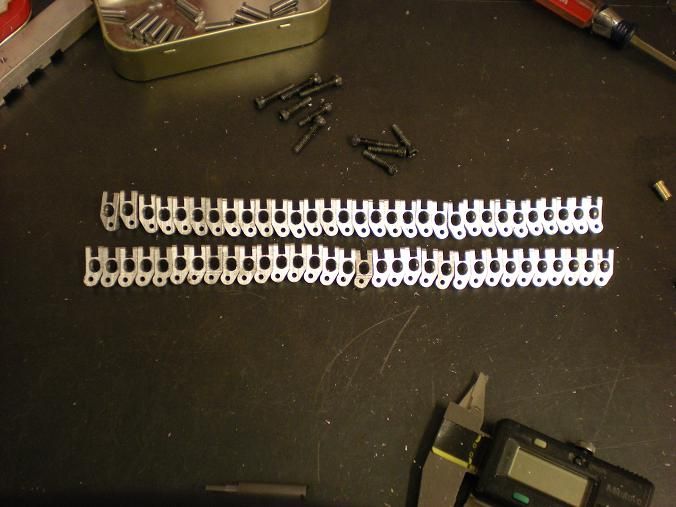
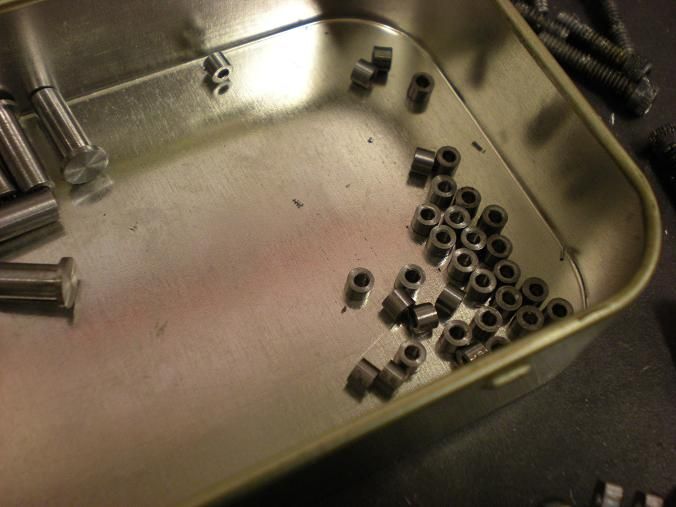
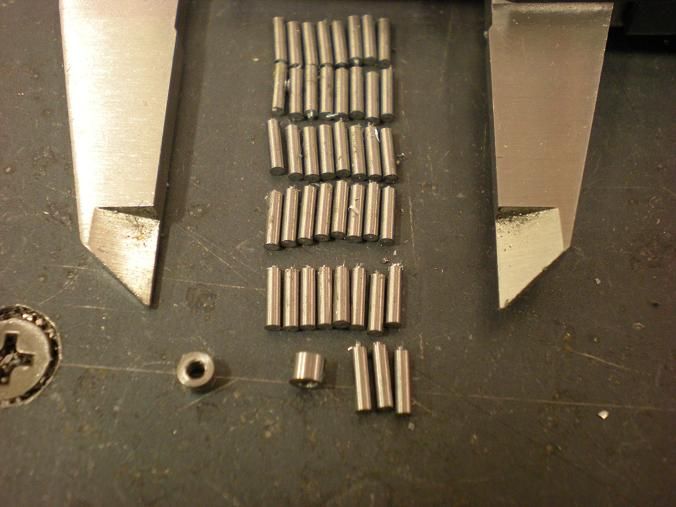
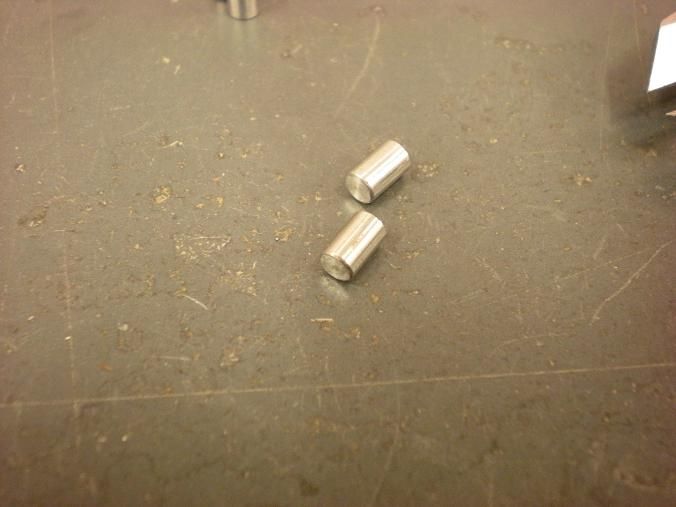
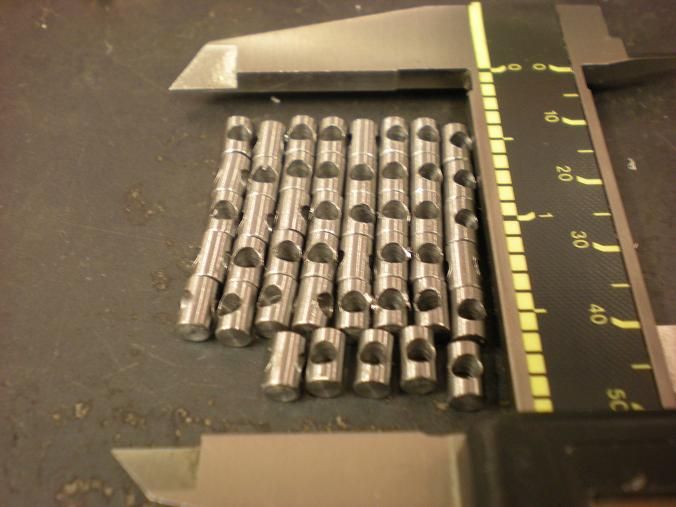
Decided to do something easy tonight. I made the rollers for the rockers and the pins to pin the rollers. The rollers were a case of drilling the center and then parting them off a piece of 1/8 inch droll rod. The pins were just parted off a piece of 1/16 drill rod.
-
12-02-2010, 02:15 AM #110
Gold Member
- Join Date
- Feb 2010
- Posts
- 3447
to be able to build something like this that is so small, what kind of tolerances are required? I'm sure a person could sloppily put it together but it probably wouldnt run or last at all. Let me know this is interesting! Originally Posted by stevehuckss396
-
12-02-2010, 02:49 AM #111
Registered
- Join Date
- Dec 2006
- Posts
- 603
Tolerances are dependant on the part. Some pieces +- ten thousand is fine and some parts need to stay within a half thousand. Say a 5/8 piston made from 6061 aluminum i make .6240 to .6235. I only give myself .0005 tolerance. If its not between those two sizes it goes in the scrap box. Same with a valve stem. Other pieces like a roller on a rocker can be almost anything. A roller .005 under size is still useable. Depends on the piece. Originally Posted by diyengineer
-
12-05-2010, 10:32 PM #112
Registered
- Join Date
- Dec 2006
- Posts
- 603
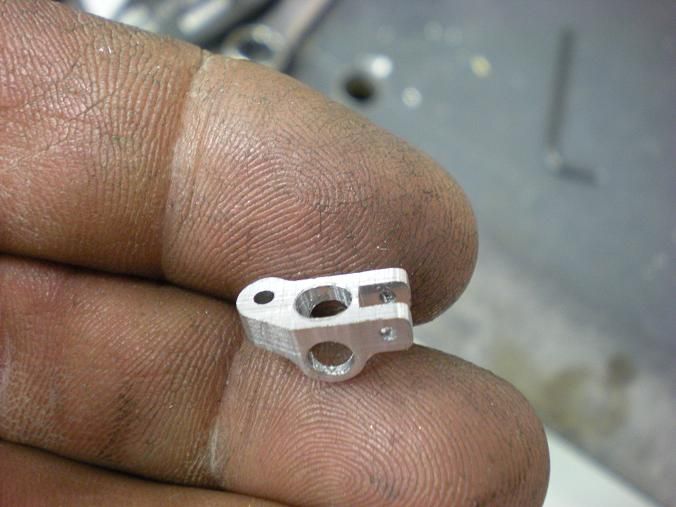
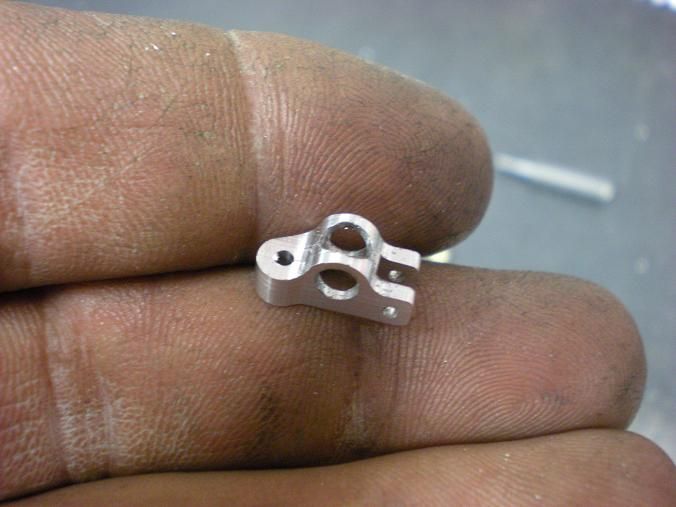
Hello All!
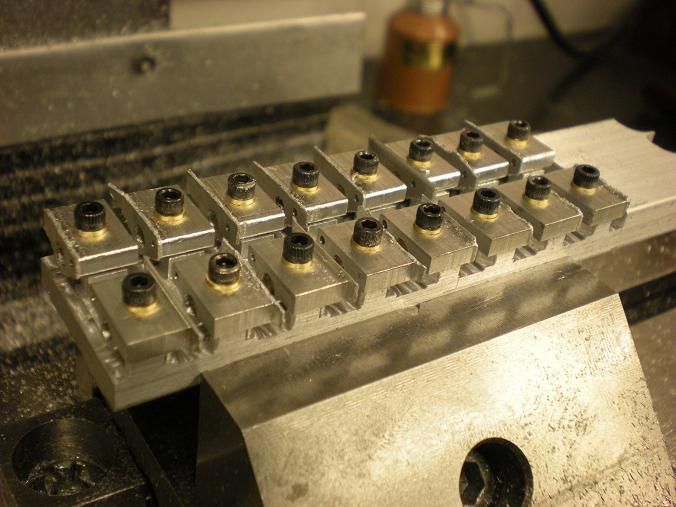
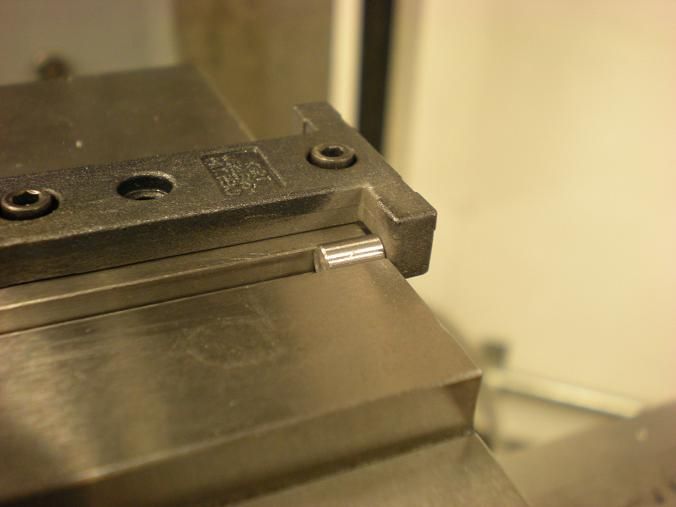
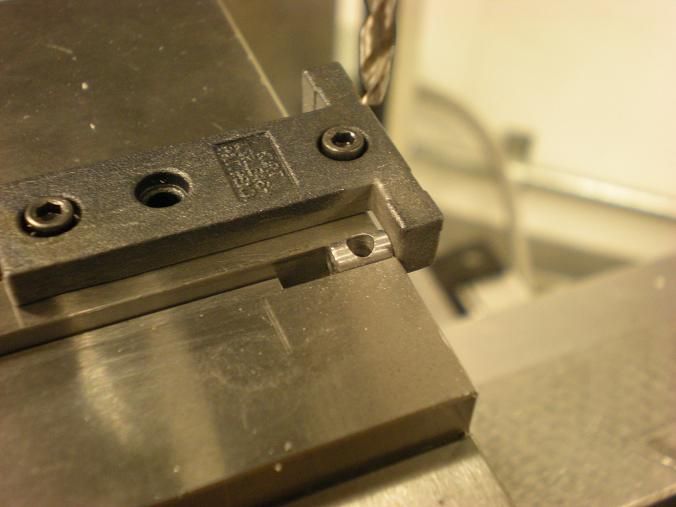
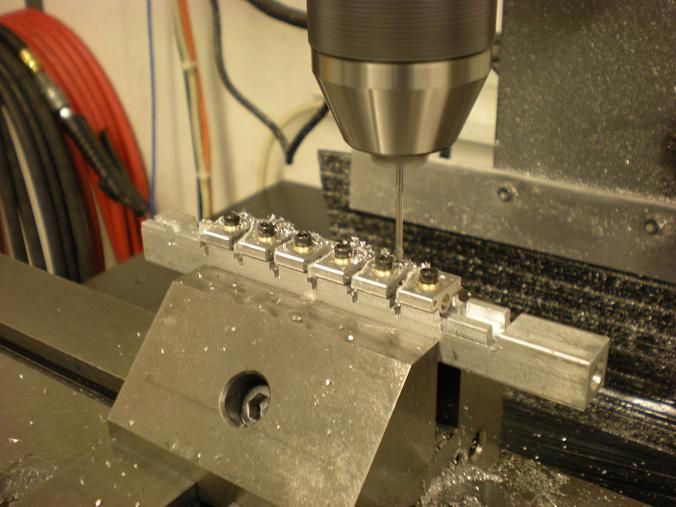
Made some progress in the way of the rocker pivots. They were a little trickier than i thought they would be. These things are only .156 round and .250 long. Made all the barrels first. Just used .156 drill rod and parted off the pieces and used a file to break the corners.
I was able to set the barrel down on a parallel. I had one that is just smaller than the height of the vise jaw.
I started using a center drill to spot the hole but the drill kept wandering anyway. I did'nt know this but found that if i used the center drill to drill as deep as it took to make a starter hole that was just smaller than the drill, It would follow the spotted area and worked much better.
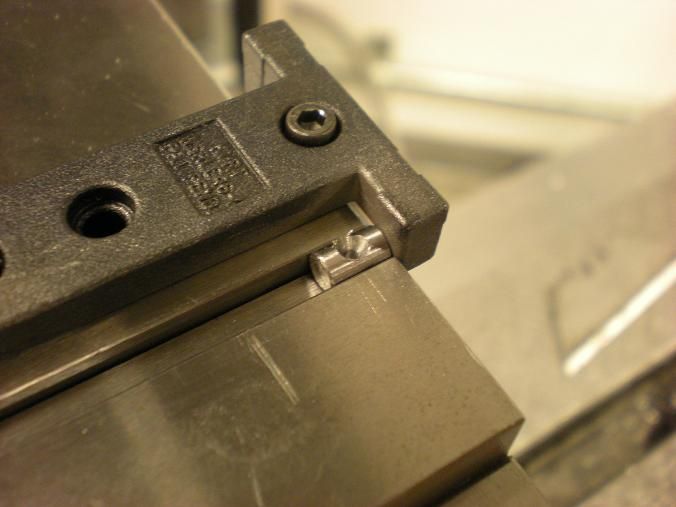
Then Just a drill bit to get the hole in it.
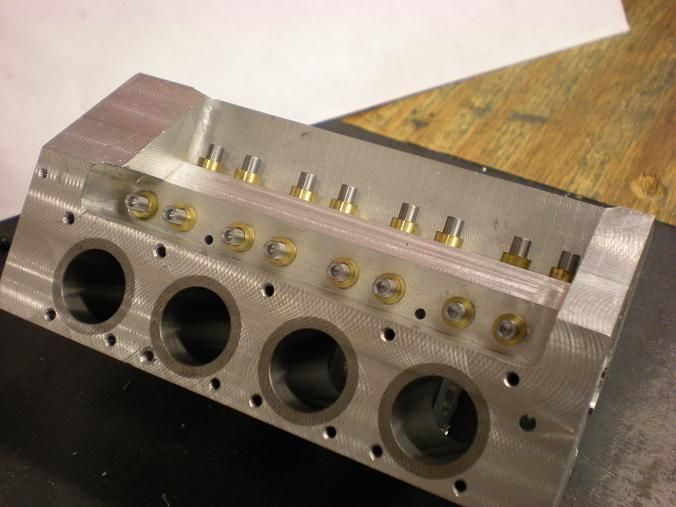
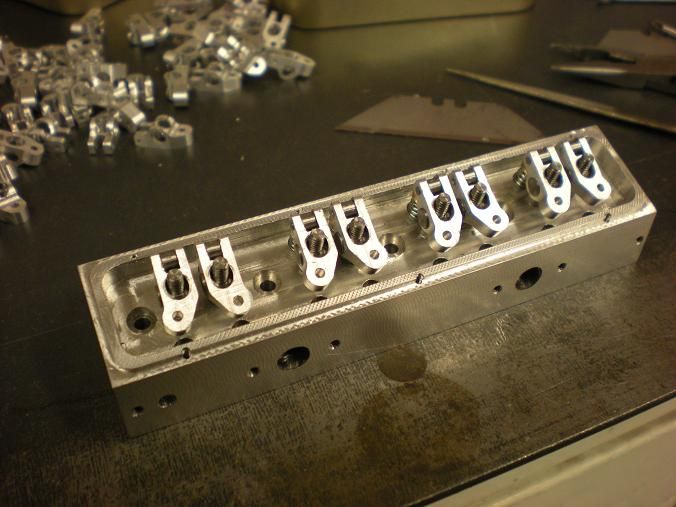
I don't have the nuts done yet but I could not resist putting 8 rockers together just to see what it looks like. Of course the valves would need to be put in also. Everything looks ok so far. I have also used some JB weld to patch up the water jacket fiasco and hope to complete the heads by the end of next week?
-
12-05-2010, 10:50 PM #113
Registered
- Join Date
- Apr 2009
- Posts
- 144
Steve,
WOW!
As a massive gearhead and a beginner machinist this is an amazing project. SO much awesome on one page... Thank you very much for documenting it here for us to see. It is much appreciated.
What kind of mill are you using? Also, when you finish this project I really hope you do decide to sell your plans / files. You can count me in for a set.JGRO Complete - G540, 380oz Nema23s, 1/2-10 ACME, 30"x14", Craftsman router
Joes 4x4 R&P in progress
-
12-06-2010, 01:12 AM #114
Registered
- Join Date
- Dec 2006
- Posts
- 603
Thanks Dustin! Originally Posted by dustin1706
I have a Bridgeport with the 2J (var speed) head. I also have a 9X20 lathe and a home made CNC milling machine.
I plan to make the plans available somehow. I have tried to draw the block but have not had great success. I'll keep trying.
-
12-10-2010, 03:54 AM #115
Registered
- Join Date
- Nov 2010
- Posts
- 0
Steve, I have been following your thread on HMEM. I didn't realize you had one going here to. I have to hand it to ya. Very nice machine work.
-
12-10-2010, 06:49 PM #116
Registered
- Join Date
- Jun 2007
- Posts
- 103
Do you have the solid model files available? I would like to try one of these engines.
-
12-11-2010, 03:41 PM #117
Registered
- Join Date
- Dec 2006
- Posts
- 603
Originally Posted by chipslinger69
I just post it here to show progress so people who want plans wont be left hanging.
-
12-11-2010, 04:01 PM #118
Registered
- Join Date
- Dec 2006
- Posts
- 603
Originally Posted by dougtyler
I do have all the parts modled. I wont be releasing anything until i have a running engine. Along the way I have made some subtle changes to 6 or 7 parts and i'm sure that will continue. When all the parts are made and working, I will look into getting some drawings made.
Sorry!
Steve
-
12-18-2010, 09:41 PM #119
Registered
- Join Date
- Dec 2006
- Posts
- 603
I finally did it!!
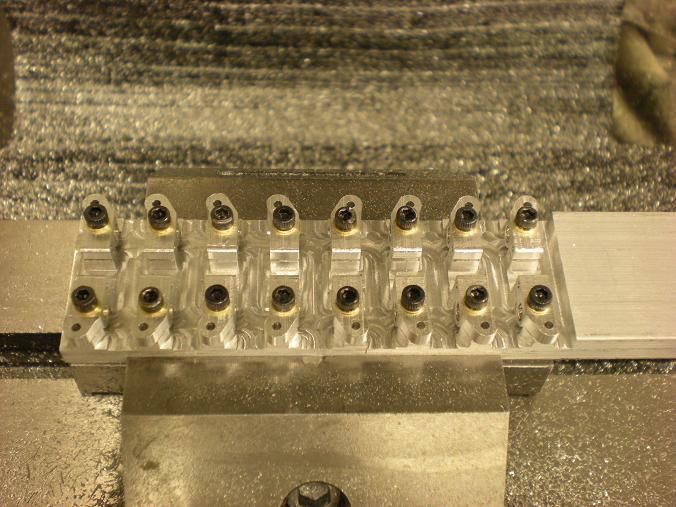
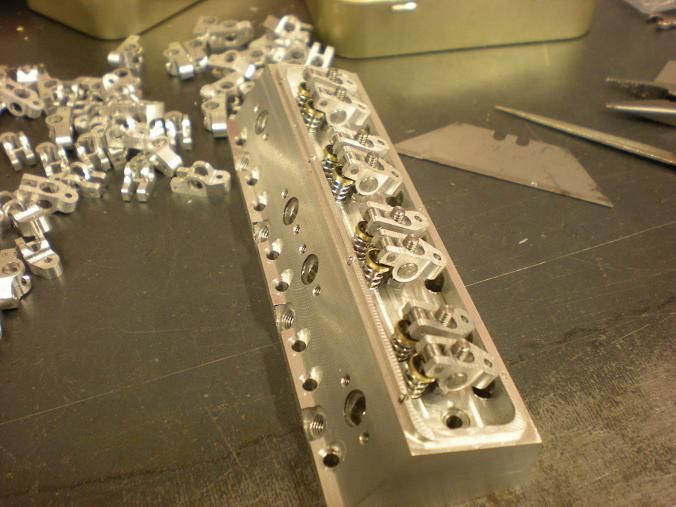
I finally had some time to get the rocker arms done. I put a few together and tested the amount of actual rocking motion and of course, Not enough. I started the day re-cutting the slot by just a few thou. I might have gotten away with what I had but the pushrod length would have had to be exact so why fight it.
Then the counterbore was done. I had a club member regrind a #2 counter bore bit so the pilot was a few thou smaller than the tap drill instead of the clearance hole. I was able to then counter bore the bottom for a caphead screw.
Then all that was left was the tapping of the holes in the tail. Thru hole with 1/16 of material, what the heck. I used the "speed tap wrench" to get the job done.
After that I started to make the adjusting nuts but after 2 I didn't feel like doing them. I wanted to have some fun instead of the production line stuff that has been going on lately. I decided to make the air cleaner lid after looking at JPeter's V8. He has a cool air cleaner on his and I was thinking "I want one of those". So I spent the rest of the session watching the mill make me one.
Sorry about the crappy picture.
-
12-19-2010, 12:23 AM #120
Registered
- Join Date
- Jan 2009
- Posts
- 265
Looks a treat! A good number of people want plans, yahoo groups you say?
Cheers, Dirk.


 Reply With Quote
Similar Threads
-
Engine Plans
By nzer in forum MetalWork DiscussionReplies: 1Last Post: 08-03-2012, 05:14 PM -
I.C. engine plans
By cumminsman in forum I.C. EnginesReplies: 7Last Post: 04-10-2012, 11:43 PM -
Does anyone have any good jet engine plans?
By flyguy1254 in forum Hobby DiscussionReplies: 18Last Post: 04-16-2010, 10:28 AM -
Jet Engine plans
By godspeed in forum Hobby DiscussionReplies: 3Last Post: 05-18-2007, 11:34 AM
