


Arizonavideo makes a G0602 kit?
Thread: Andrew's G07040 build
Results 181 to 200 of 241
-
12-17-2014, 05:45 AM #181
 Registered
- Join Date
- Sep 2012
- Posts
- 323
Re: Andrew's G07040 build
-
12-17-2014, 03:00 PM #182
Gold Member

- Join Date
- Nov 2009
- Posts
- 4415
Re: Andrew's G07040 build
Sorry, I get confused on which thread I am on. I was thinking 0704 again.
A lazy man does it twice.
-
12-24-2014, 05:43 AM #183
Registered
- Join Date
- Sep 2012
- Posts
- 323
Re: Andrew's G07040 build
When I was putting the machine together before my last post I managed to snap off the fitting for oil on my Z ball nut.

Did a little brain storming and this is what I came up with
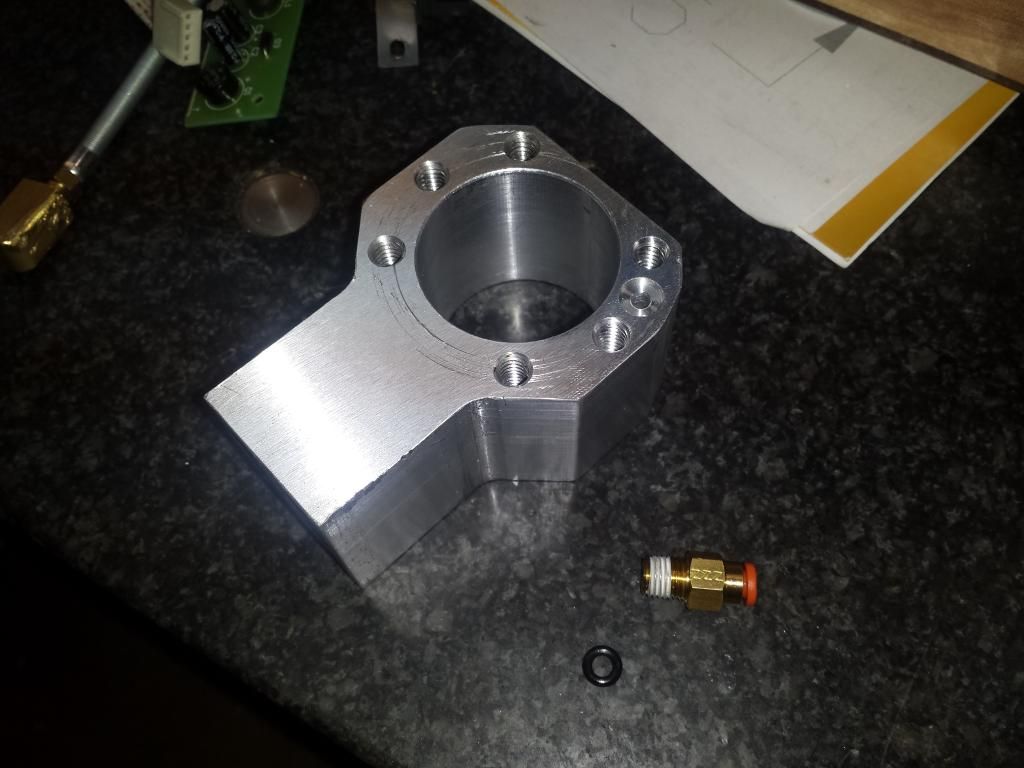
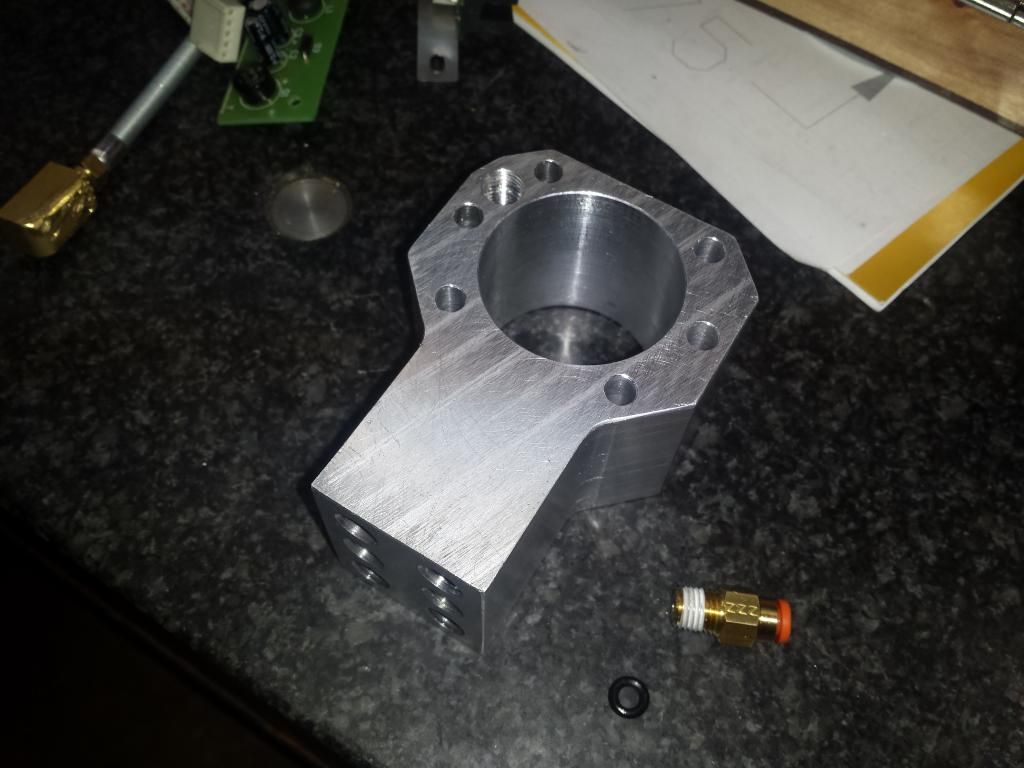

*Milled a hole into the oil passage in the ball nut
*Drill a 1/8" hole thru the bull nut mount
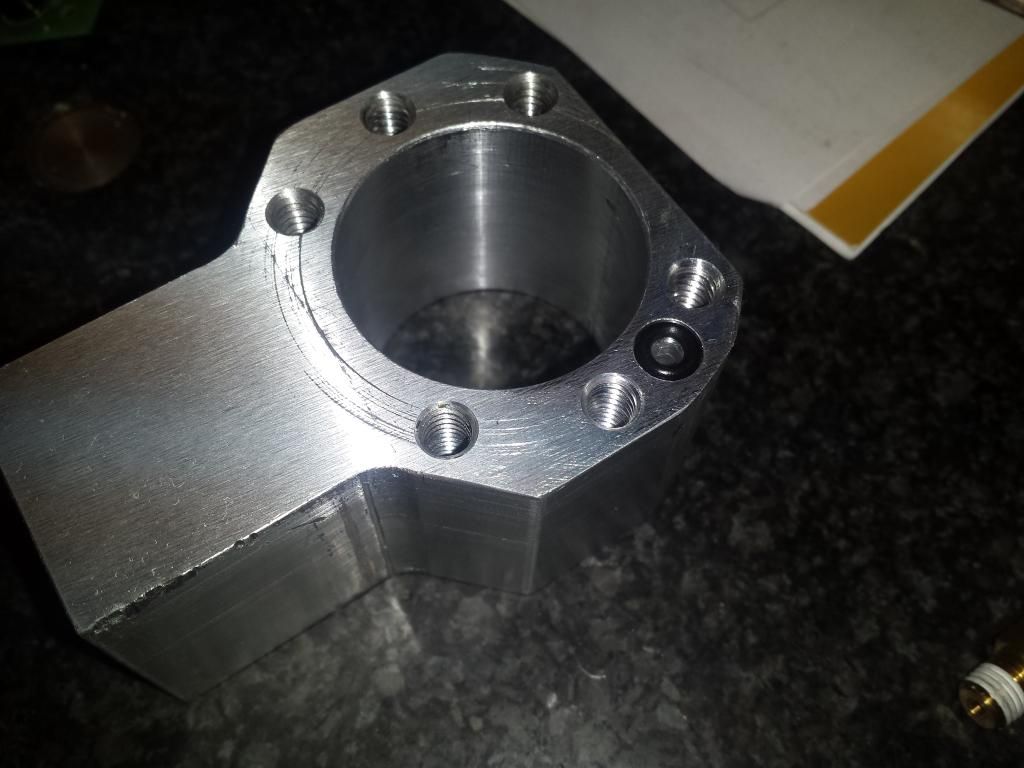
*Put a spot face on the side of the ball nut mount where it meets the ball nut for an o-ring ( over kill I'm sure)
*Tapped the other side of the hole for a 1/16" NPT push to connect fitting
Didn't have time to put it back together yet, and I have to figure out how to repack the balls.
Andrew
-
01-03-2015, 04:15 PM #184
Registered
- Join Date
- Sep 2012
- Posts
- 323
Re: Andrew's G07040 build
Got my coolant ring started this last week.
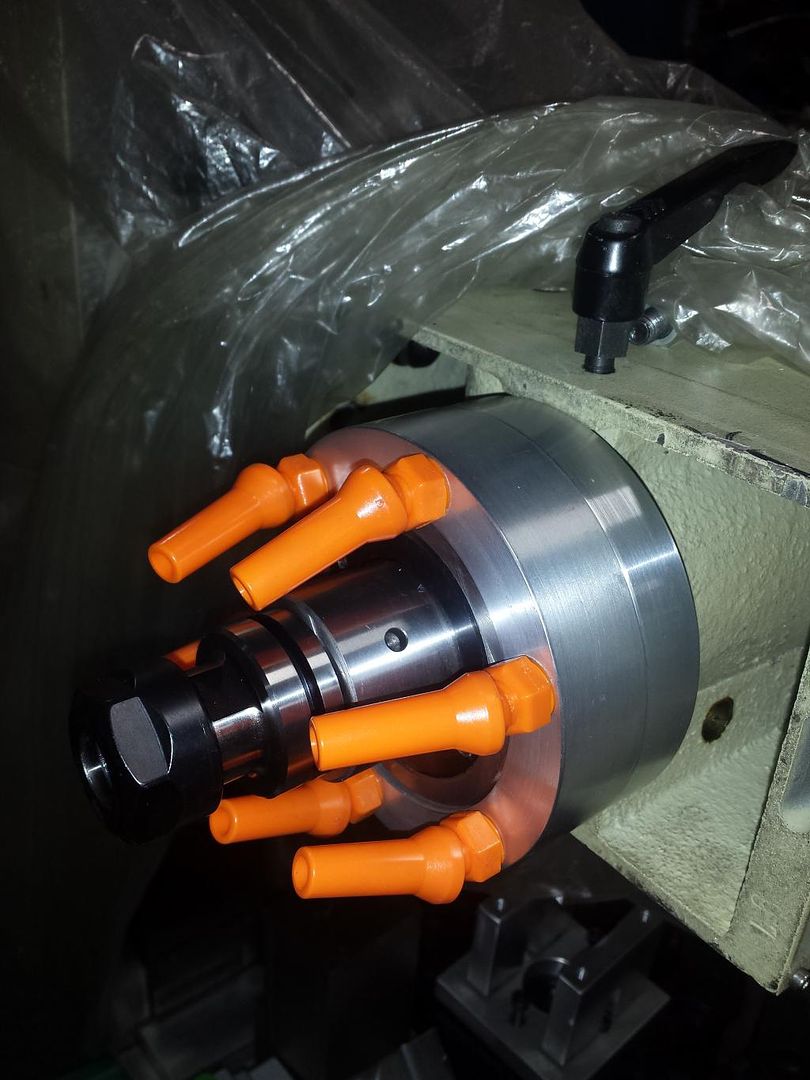
Now I need to order the fittings, the 1/2" OD hosing and spliter from the main 3/4" line. I plan to run 2 line into the ring. Can't wait to see how much pressure the pump I have will have with all six streams. I'm hoping to have 3 set for shorter tools and 3 set for longer tools.
Andrew
-
01-22-2015, 05:32 PM #185
Registered
- Join Date
- Sep 2012
- Posts
- 323
Re: Andrew's G07040 build
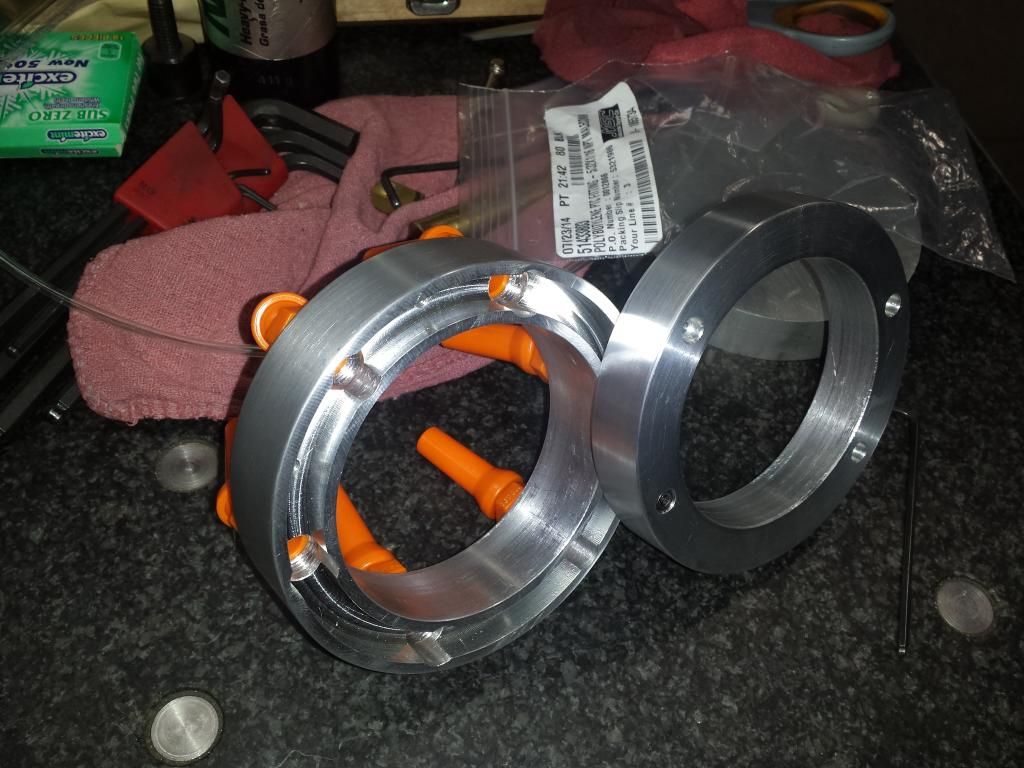
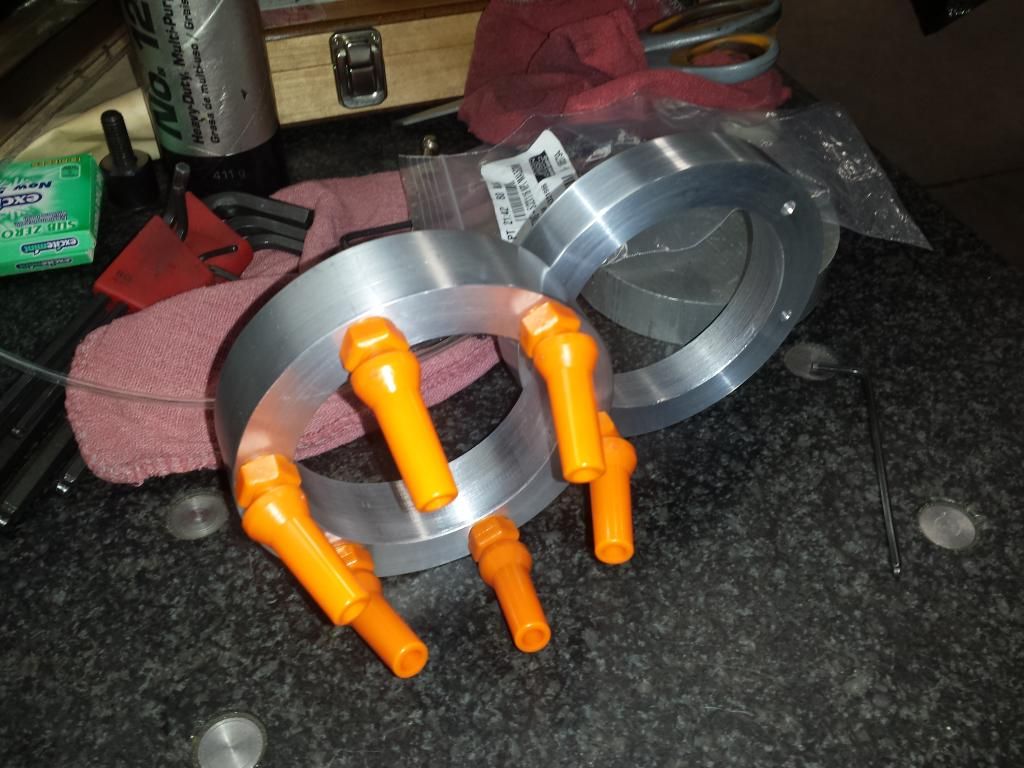
Got a little farther on the coolant ring. I have two fittings feeding the ring from either side and I also have them connected to each other around the front using branch tee fittings. I'd like to say it would help to equalize pressure :bs:, but really I just did it for looks!
Seems I don't have a picture to share this time
The last of the fittings (I hope!) are on there way so I can connect the ring to the pump and see how she flows!
Andrew
-
01-23-2015, 10:38 AM #186
Registered
- Join Date
- Sep 2012
- Posts
- 323
Re: Andrew's G07040 build
Fittings came in!!! :banana:
Did a little test
https://www.youtube.com/watch?v=qFmm0R7pnWE
Shortly after I stopped the video it ran out of water. Full 5 gallon bucket!
Not sure if I want to go down to 1/8" nozzles
Andrew
-
02-07-2015, 04:03 PM #187
Registered
- Join Date
- Sep 2012
- Posts
- 323
 Power Supply issues
So I came into work this morning to work on my machine conversion. Here is how the morning has played out.
- Get everything put together and wired to my control box
- Move the machine around a bit
- post out a simple engraving program from MasterCam to work out what ever issues between MasterCam and Mach3
- Get all that figured out ( had some weird circle issues, all good now)
- E-stop the machine to make changes for tool change height position.
- Release the E-stop and there's a light flicker and a flash in the box and Mach will not reset from E-stop...... F*CK!
- check main fuse on in coming power, that's fine.
- Plug box back into the outlet and notice the MX3660 has no power, then noticed the PSU light was out as well.
- Pull the control box apart to look at the PSU and found the fuse inside blew, ran out to store for new ones.
- Put new fuse in, glug back into wall and this time the main fuse blew.
- So now I replace main fuse, disconnect MX3660 for PSU and try to power it up on it's own.......... blows fuse in PSU again. (nuts)
I've looked at the topside of the PSU board and don't see any burn marks or fried components other than the fuse.
At this point I'm going to say the PSU is Shot. Bought it just over a year ago from CNC4PC. It's a KL-350-48, 7.3a. Guessing what ever warranty there may have been is gone. Never really used it for much more than jogging the machine around for testing less than a hand full of times.
So...... I'm in the market for a new 48V PSU. Anything you guys might recommend?
Thanks,
Andrew(nuts)(nuts)(nuts)
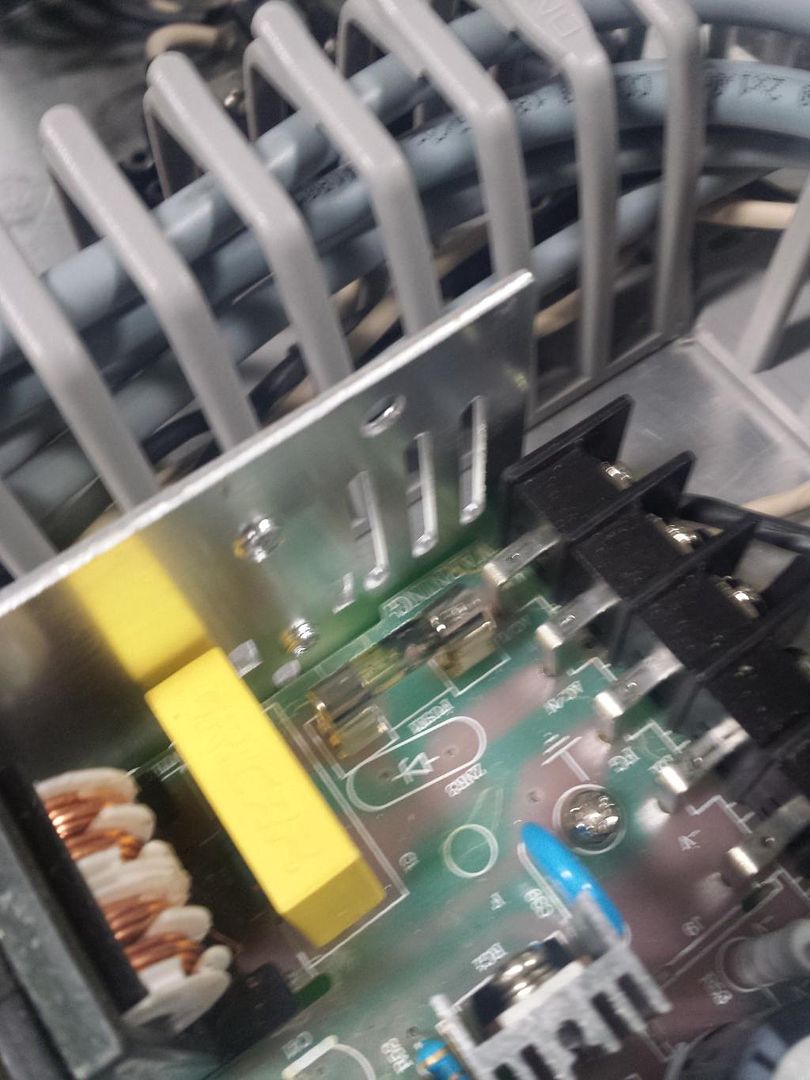
Edit:
Looked one more time at the PSU and found this:
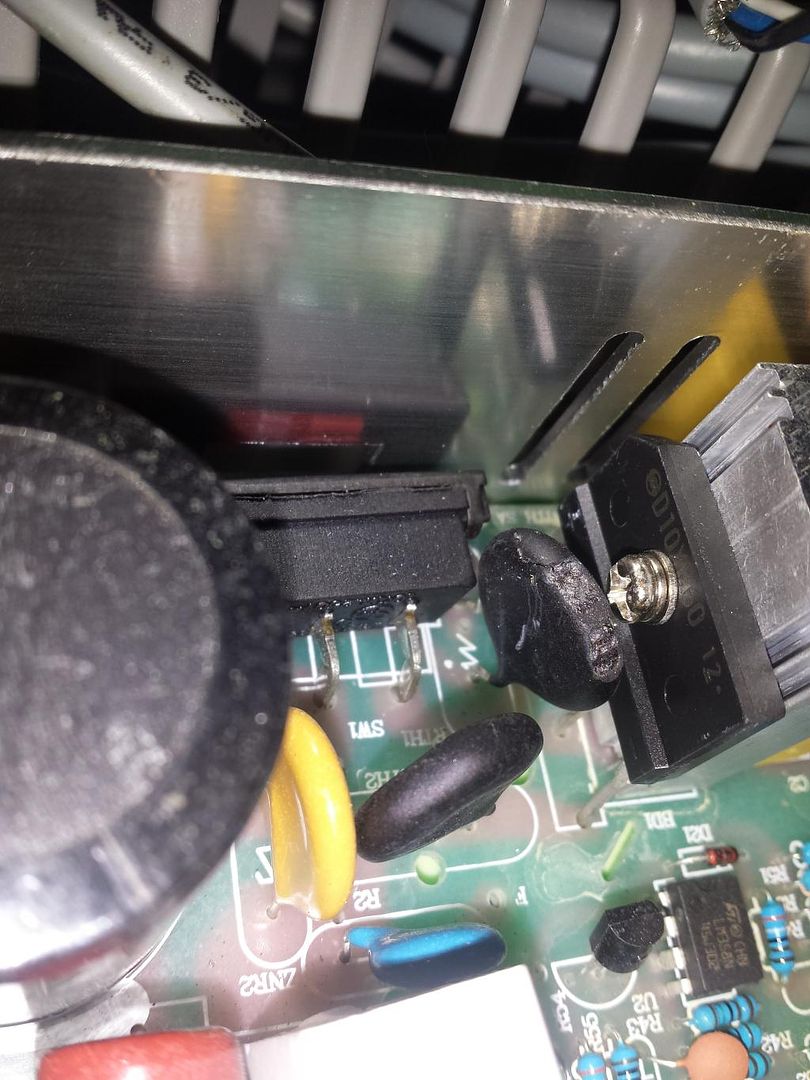
Is this fixable?
Andrew
-
02-07-2015, 06:06 PM #188
Gold Member
- Join Date
- Nov 2009
- Posts
- 4415
Re: Andrew's G07040 build
Is that a damaged capacitor? If so, sure it could be replaced. But why did it blow?
A lazy man does it twice.
-
02-07-2015, 11:15 PM #189
Registered
- Join Date
- Sep 2012
- Posts
- 323
Re: Andrew's G07040 build
I thought the bigger cylinder guys were caps? Originally Posted by Fastest1

Wish I knew why it blew. I didn't do anything differently than I've done before. E-stopped to make changes and when I went off of E-stop.......:wee:
Andrew
Edit:
Looks like It's a "thermistor" Given the RTH1 printed on the board.
Still not really sure what caused it?
-
02-08-2015, 01:32 AM #190
Registered
- Join Date
- Aug 2005
- Posts
- 1108
Re: Andrew's G07040 build
Hi,
When you replace it, buy a genuine Meanwell power supply. There are lots of cheap Chinese copies around which are of unknown quality.
Also, having your Stepper drive mounted to the top of the power supply, using it as a heatsink at the same time covering part of the cooling fan possibly contributed to the problem.
Cheers,
Peter-------------------------------------------------
Homann Designs - http://www.homanndesigns.com/store
-
02-08-2015, 03:50 AM #191
Registered
- Join Date
- Sep 2012
- Posts
- 323
Re: Andrew's G07040 build
yeah, I been told about having the stepper driver on top of the PSU. But it was barely warm to the touch. Maybe like someone had been holding it in their hands for a while.
Thanks for the recommendation on a new PSU
Andrew
-
02-12-2015, 09:59 AM #192
Registered
- Join Date
- Sep 2012
- Posts
- 323
Re: Andrew's G07040 build
Well...... I opened up my MX3660 to see if it was the cause of the fried PSU. I see no scorch mark, bulging parts or anything that would make me worried it is toast! :banana:
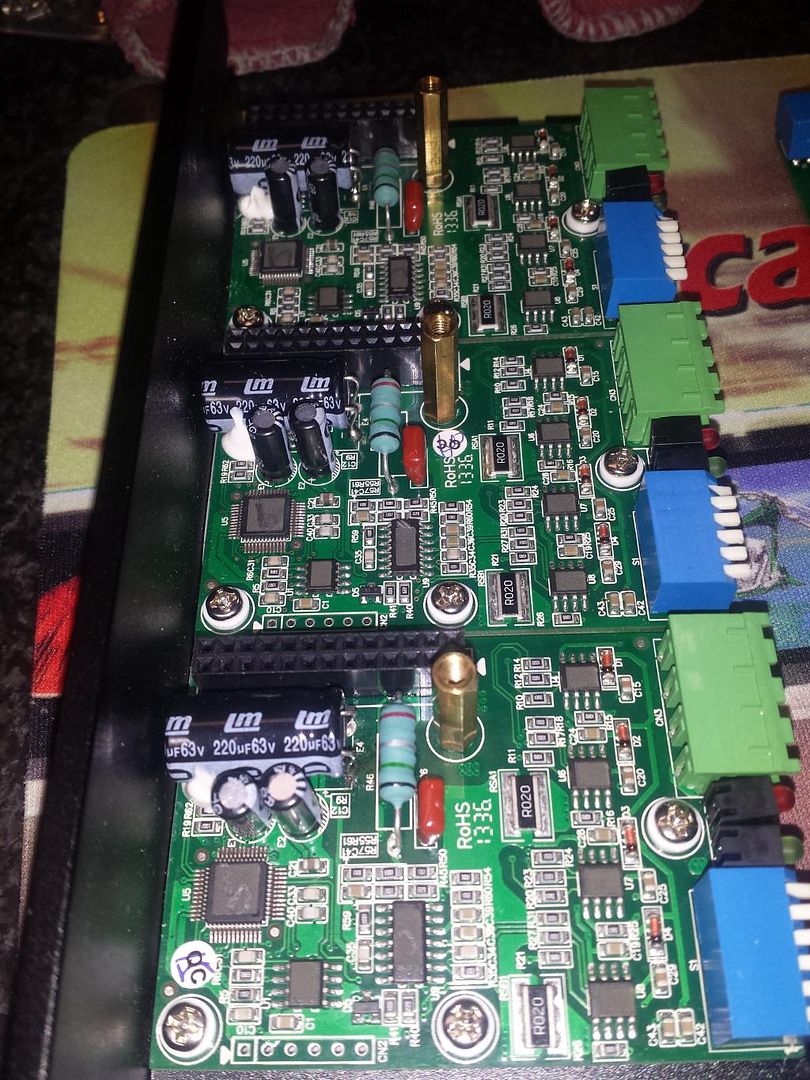
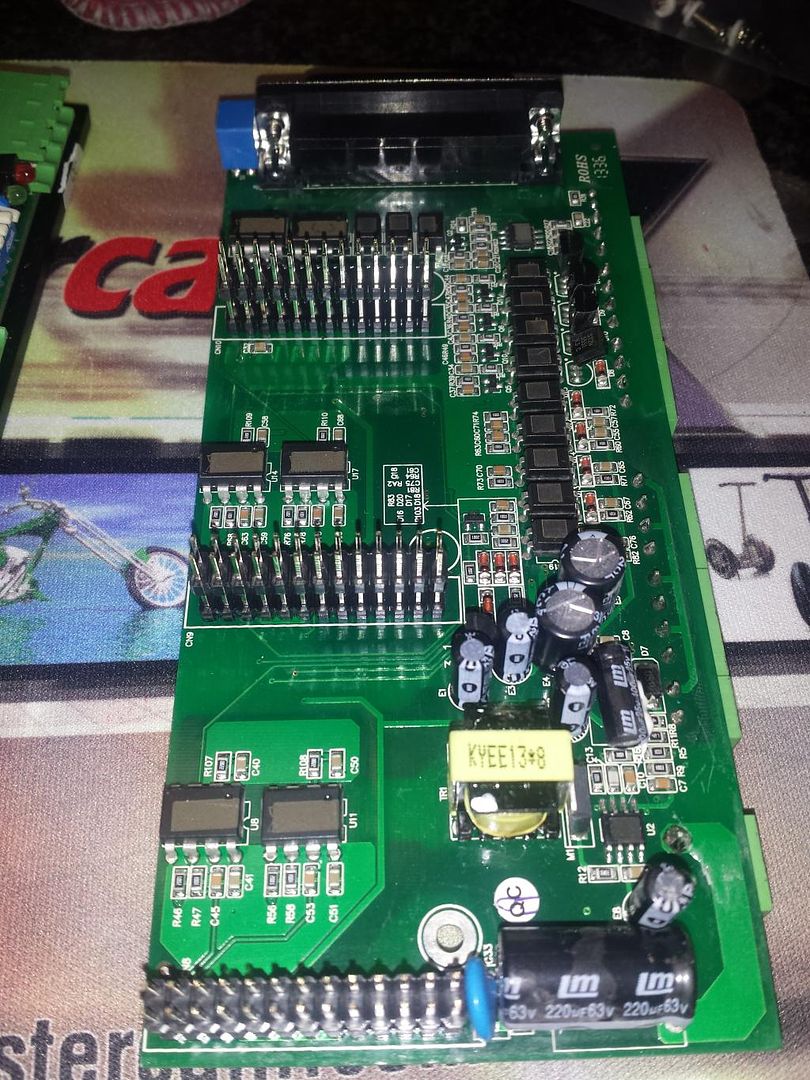
So now I fell better about getting a better PSU. Thinking toroidal (linear) this time. Also thinking 50v since the MX3660 can handle up to 60v. and there are more options in the 50v from Antek. But we'll see what once I can put the $$$ together to order on.
Andrew
-
02-12-2015, 03:26 PM #193
Gold Member
- Join Date
- Nov 2009
- Posts
- 4415
Re: Andrew's G07040 build
I believe the MX3660 tops out about 54V. If you go higher, I think the extra back feeding causes the problems.
A lazy man does it twice.
-
02-12-2015, 05:35 PM #194
Gold Member
- Join Date
- Apr 2009
- Posts
- 5516
Yes can be exacerbated by using a regulated power supply... Originally Posted by Fastest1
-
02-25-2015, 07:18 PM #195
Registered
- Join Date
- Sep 2012
- Posts
- 323
Re: Andrew's G07040 build
started putting together my control box 2.d'ho! Bigger case, new 48v PSU, better spacing
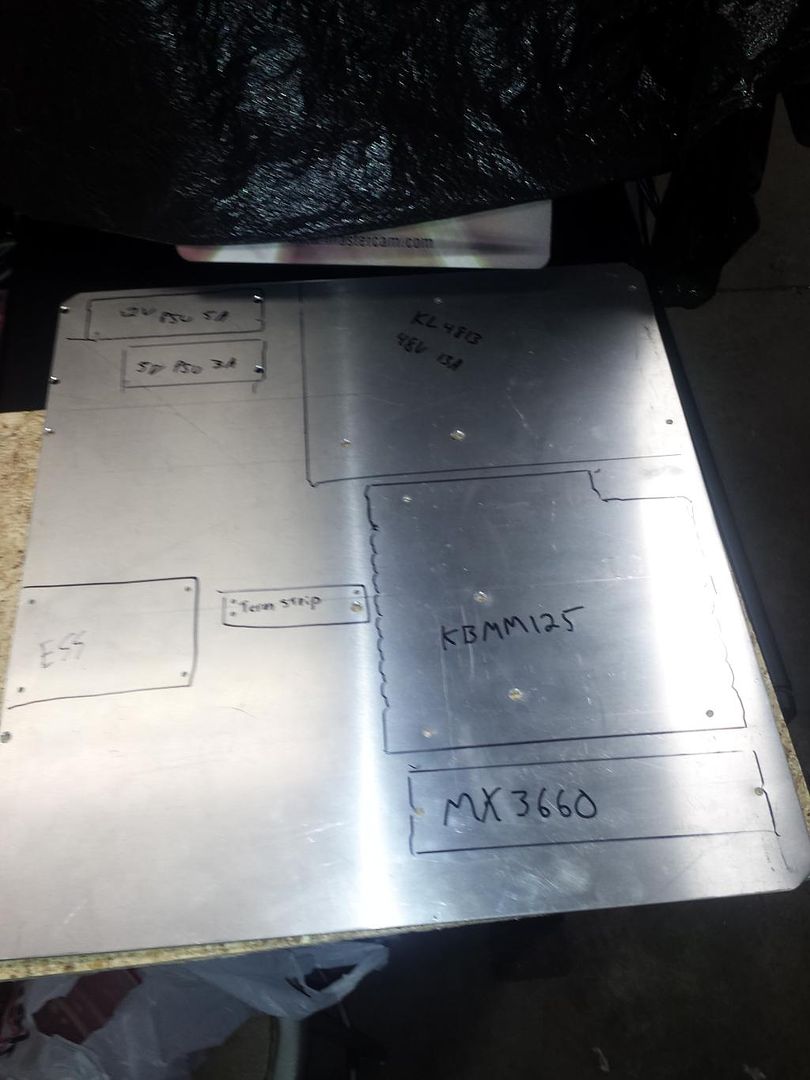
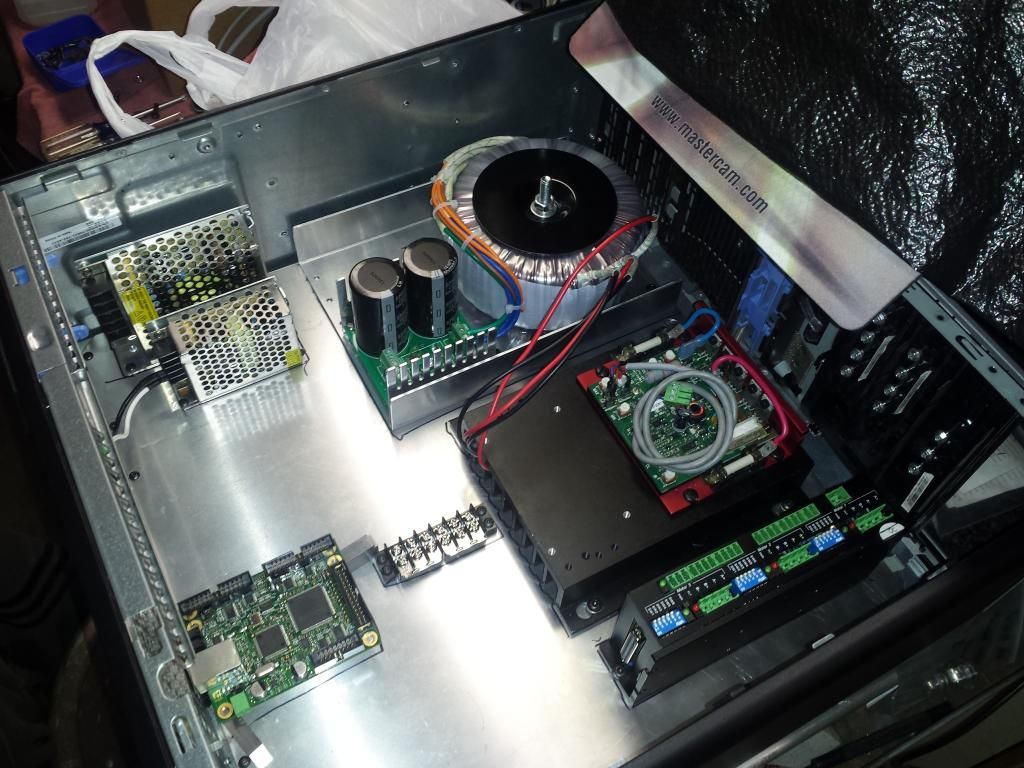
I need to make some standoffs for the ESS, I have some wire and other things on the way to get it all wired up.
Would it be a problem to mount some solid state relays on the KBMM-125 heat sink?
Andrew
-
03-22-2015, 05:16 AM #196
Registered
- Join Date
- Sep 2012
- Posts
- 323
Re: Andrew's G07040 build
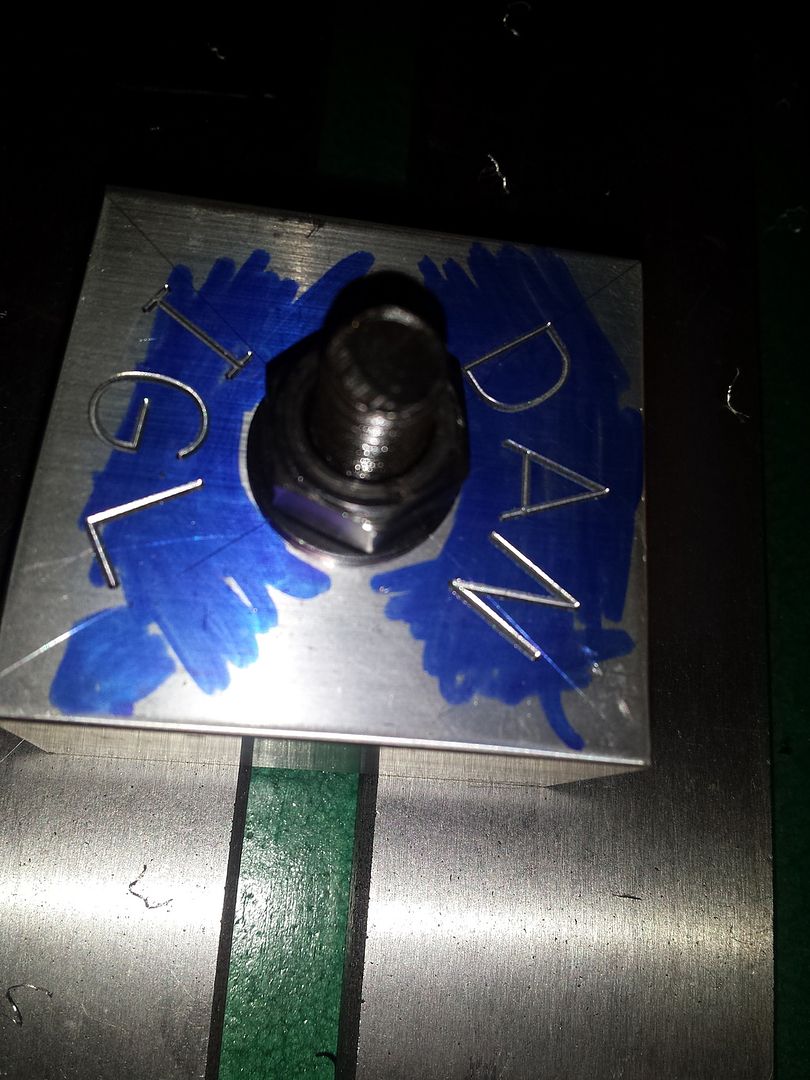
Got a request for pics of my oilier setup, So here you go:
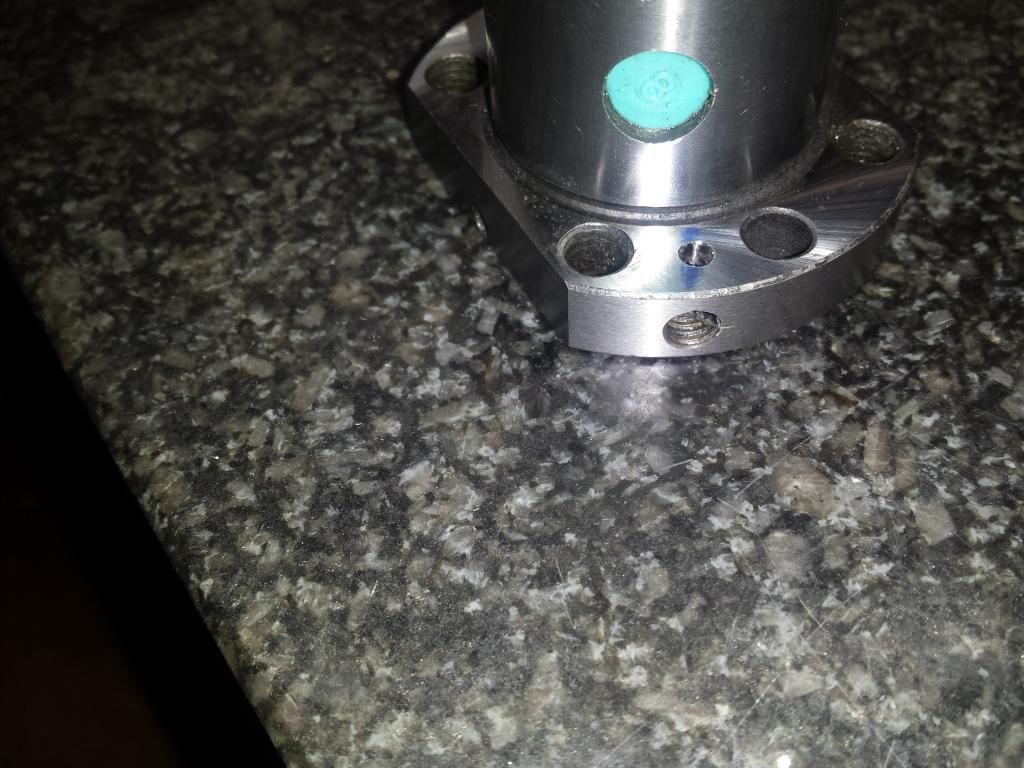
Z ballnut: for this one I put a setscrew in the threaded hole. then cut a hole in from the flange, drilled a hole thru ballnut, tapped one end and put a spot face on the other for an oring.
e line
The line for the z ballnut comes in thru the hole from the handle, then goes done the inside of the column and back up to the nut.
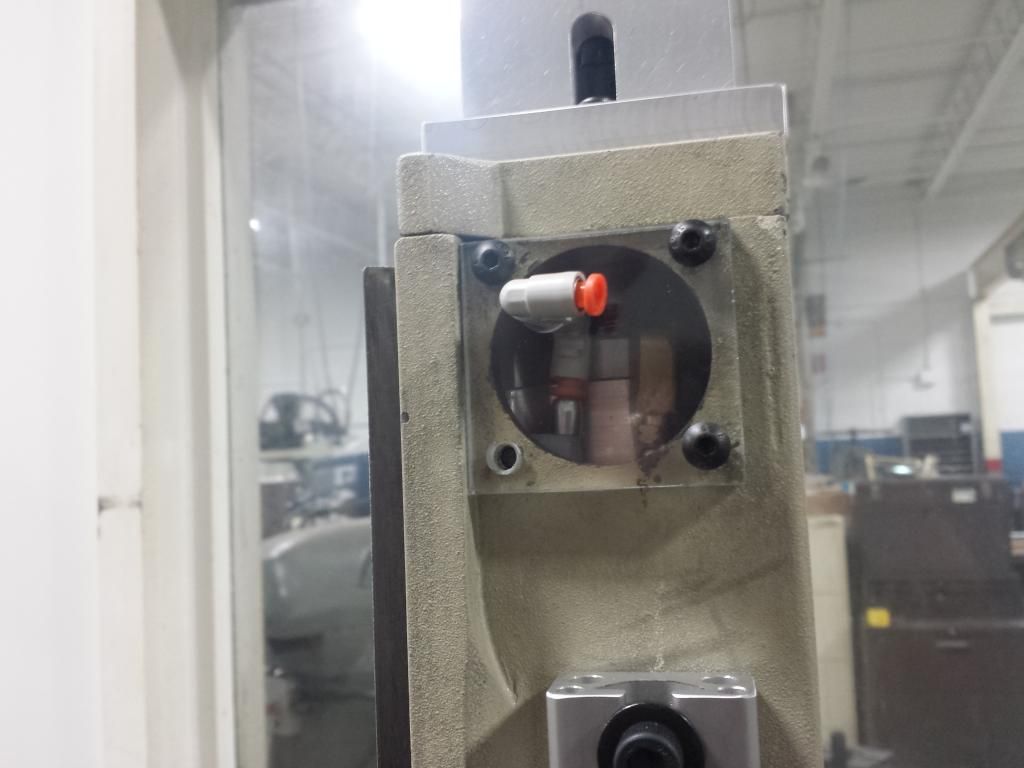

for the X & Y I modified fittings. not really sure if they will work. X on top, Y on bottom. the black one was the wrong size
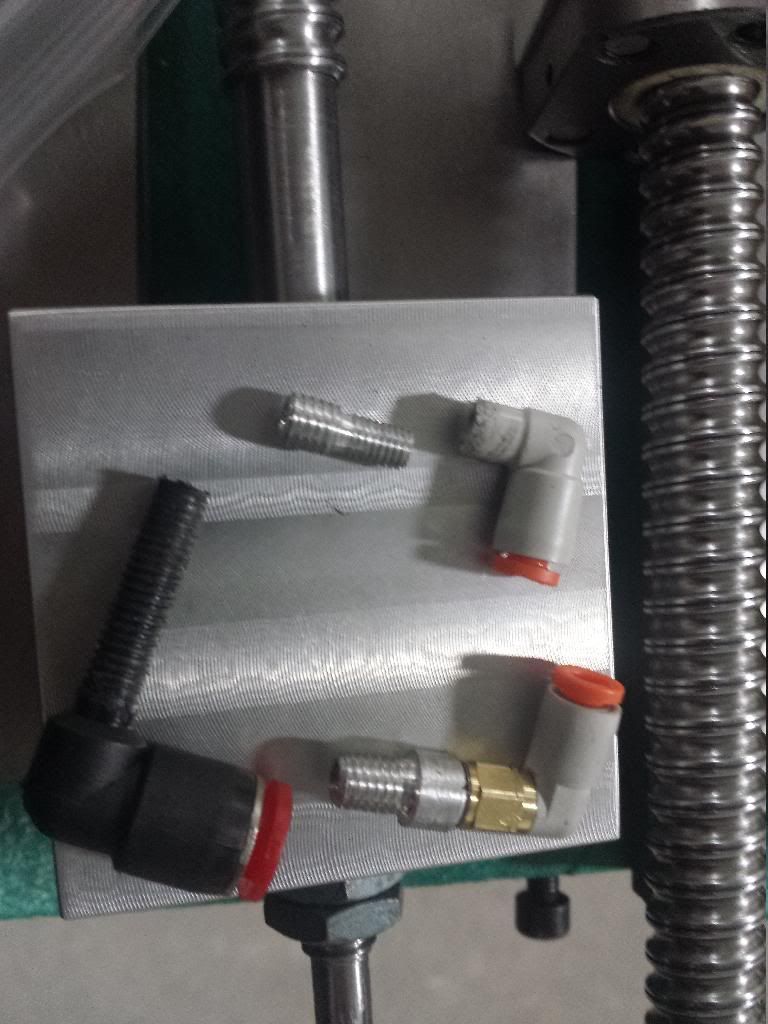
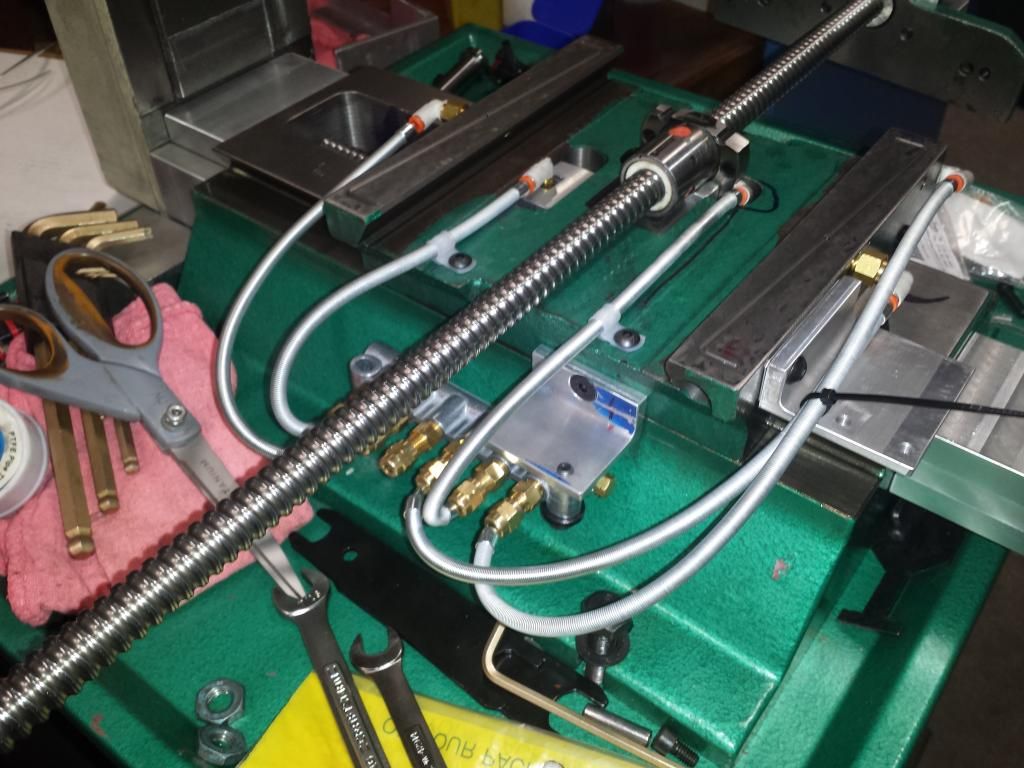
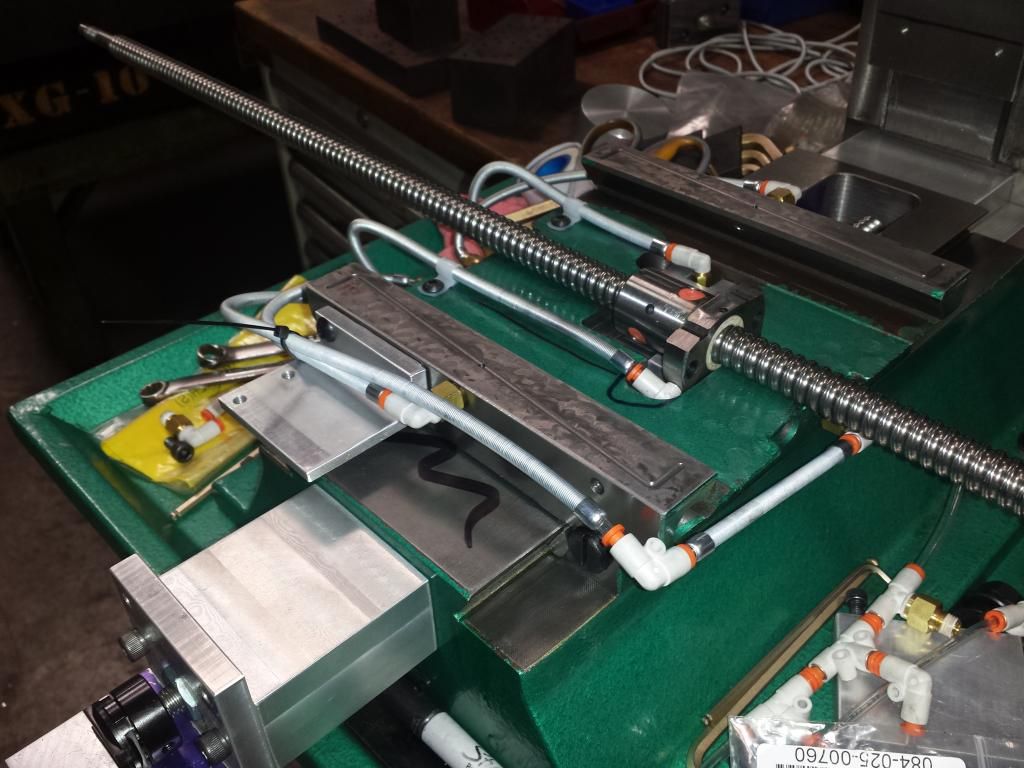
The Z saddle is not done yet either, but it will be similar to how the X&Y saddle is.
Andrew
-
03-28-2015, 07:47 PM #197
Registered
- Join Date
- Sep 2012
- Posts
- 323
Re: Andrew's G07040 build
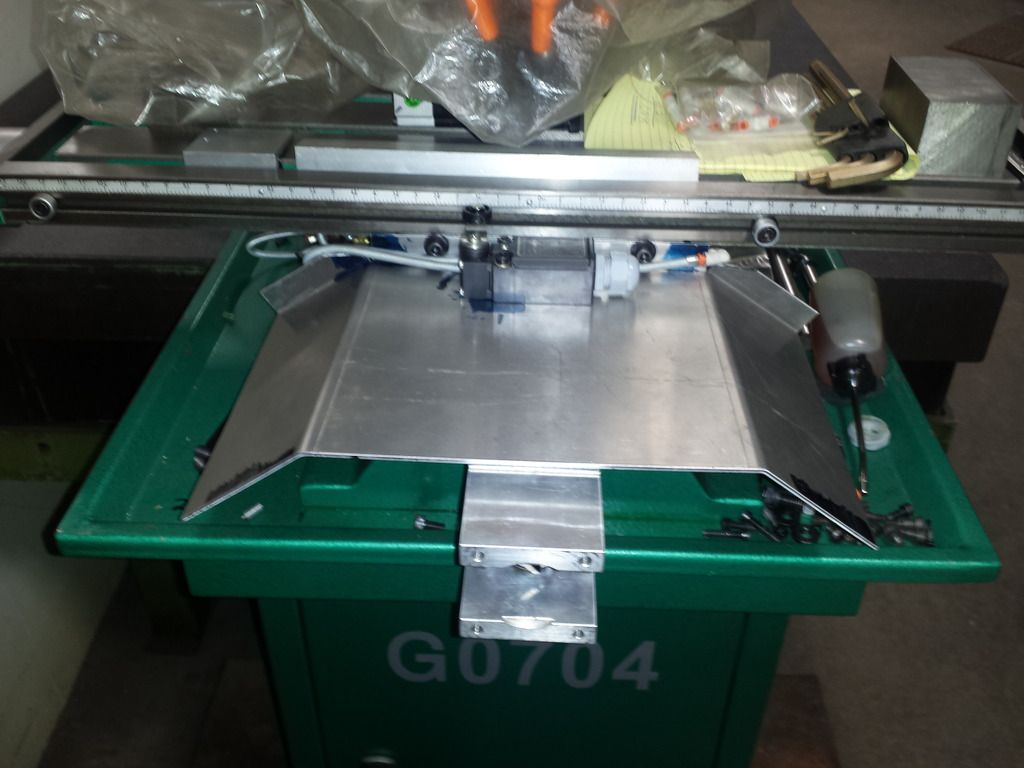
While I'm waiting for my replacement driver boards from Leadshine, I decided to focus on covering the ways. Ordered 2 rear bellows for a 770 PCNC from Tormach. Also ordered their TTS Electric edge finder.
Started off fitting the bellows to the rear of my G0704. It fits nicely. But I had to remove my oil fitting. I'm thinking I will drill and tap a hole from the end of the saddle and plug the old hole.
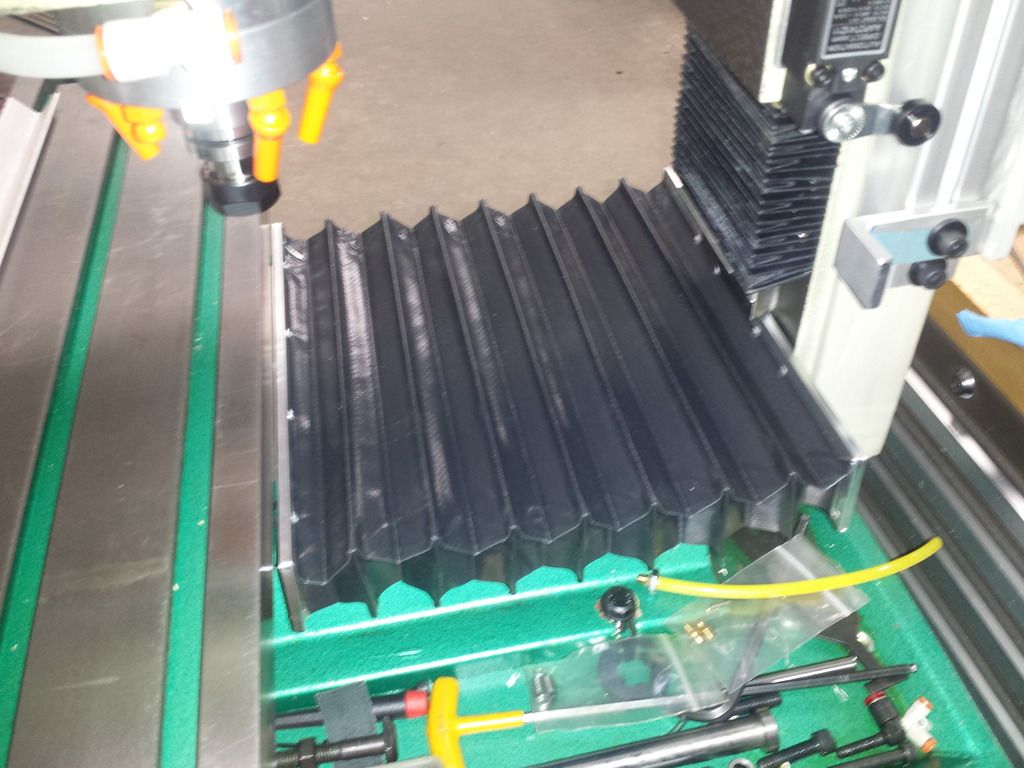
I used the 2 holes from the rubber that comes on the rear of the saddle. on the column side i drilled a new hole for a single m5. You'll also notice i milled a portion of the Z dovetail to clear an oil fitting. This helped greatly when the saddle is all the way back.
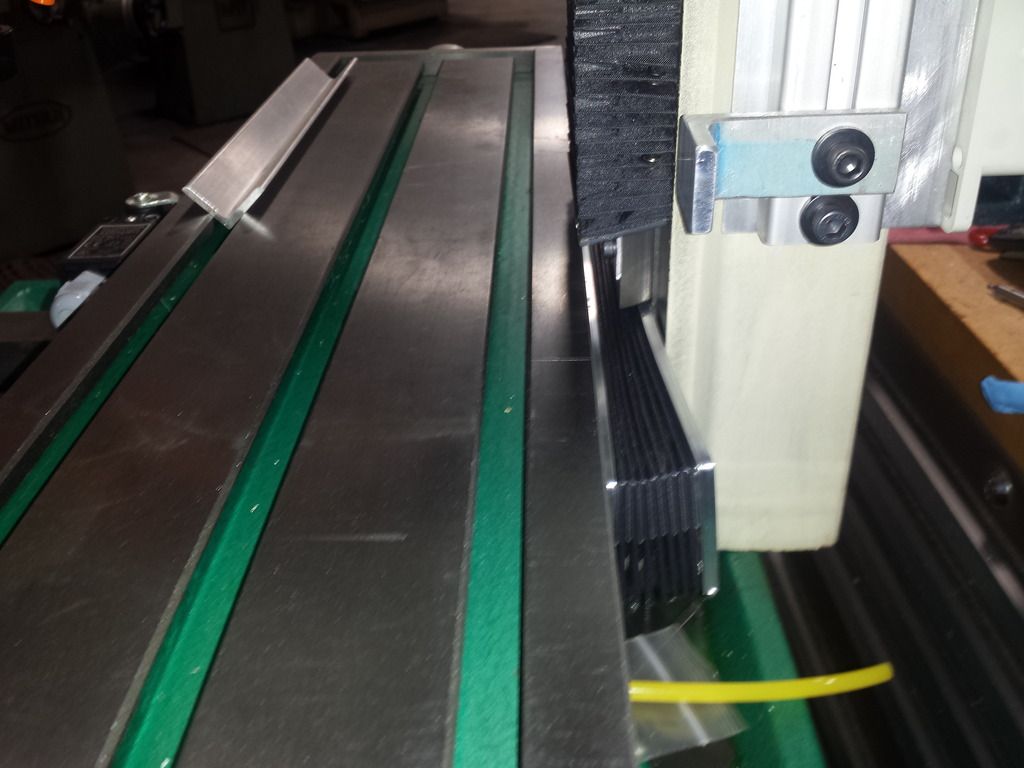
I wanted to put the second bellows on the front, but could not come up with a good way to do it with the limit switch I am using. So I decided to make a fixed shield to mount to the front of the saddle.

All I had on hand was .090" aluminum. Wanted to use .125". Still need to add a bend to the left and right side.
Andrew
-
03-30-2015, 08:31 AM #198
Registered
- Join Date
- Sep 2012
- Posts
- 323
Re: Andrew's G07040 build
Bent up the front chip guard
Turned out better then I thought it would!
Andrew
-
05-05-2015, 06:10 PM #199
Registered
- Join Date
- Sep 2012
- Posts
- 323
Re: Andrew's G07040 build
Well, I've made some more progress since my last post.
I got the MX3660 running again with the replacement driver board. Figured out how to set up the machine to run a program. At first I was having a hell of a time getting it to run using G54. Turns out I was being a dumb ass and didn't home the machine! At that point I didn't know that and got extremely aggravated! M was still able to get a test program to cut
This is to go on a coworkers moly rod dresser for super abrasive grinding wheels.
So after a few days of figuring out what I did wrong on the setup, I was able to setup a 2 tool part (face & engrave). The engraving had to be broken up into 5 programs because I'm still running under the demo version.
Here are some videos I shot with my GS4, they are in no way steady and may make you fell sick if you watch them! You have been warned!!!
Facing before engraving - YouTube
Engraving - YouTube
Finished part
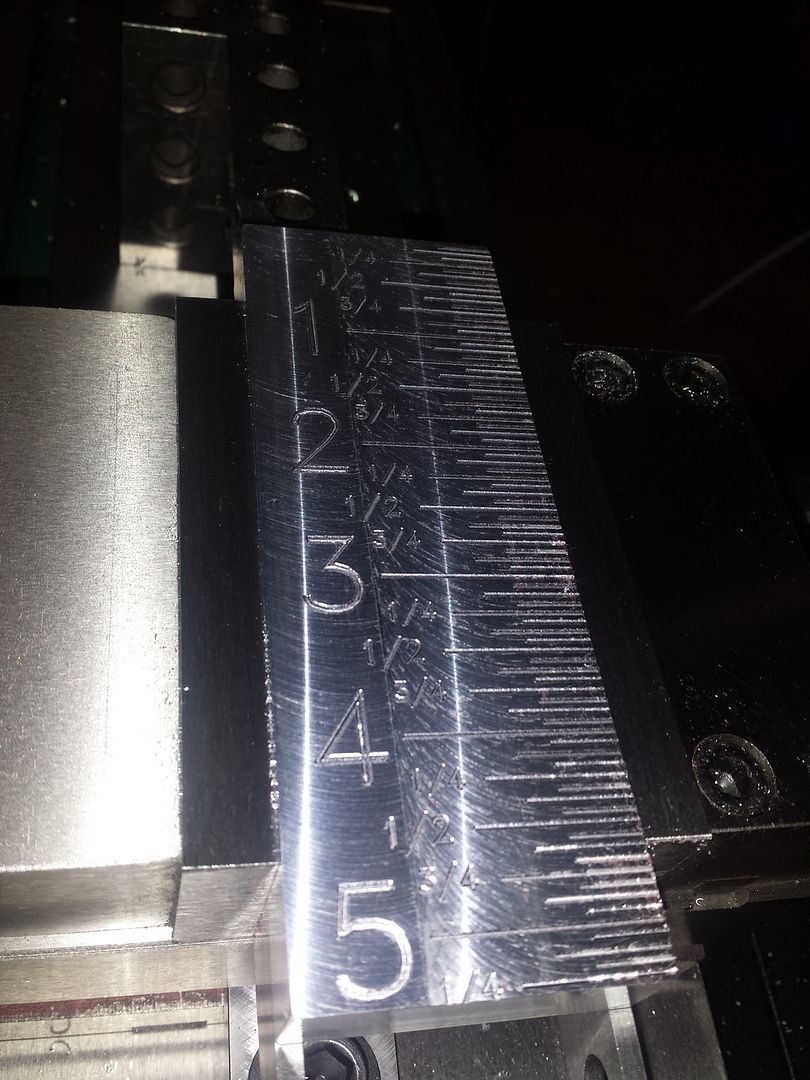
I still have to get the steps per set properly. Using my 12" caliper, it looks like I am about .025" off (longer) over 5". But I really had to get a program run. It's been over 2 years and these were the first chips the machine has made...... ever :banana:
Andrew
-
12-13-2015, 07:50 PM #200
Registered
- Join Date
- Sep 2012
- Posts
- 323
Re: Andrew's G07040 build
Time for an update........
Machine has been sitting in the corner mostly, waiting for me to work on it!
I have been figuring out the stand \ enclosure. Got to do a test fit on my modular stand design.
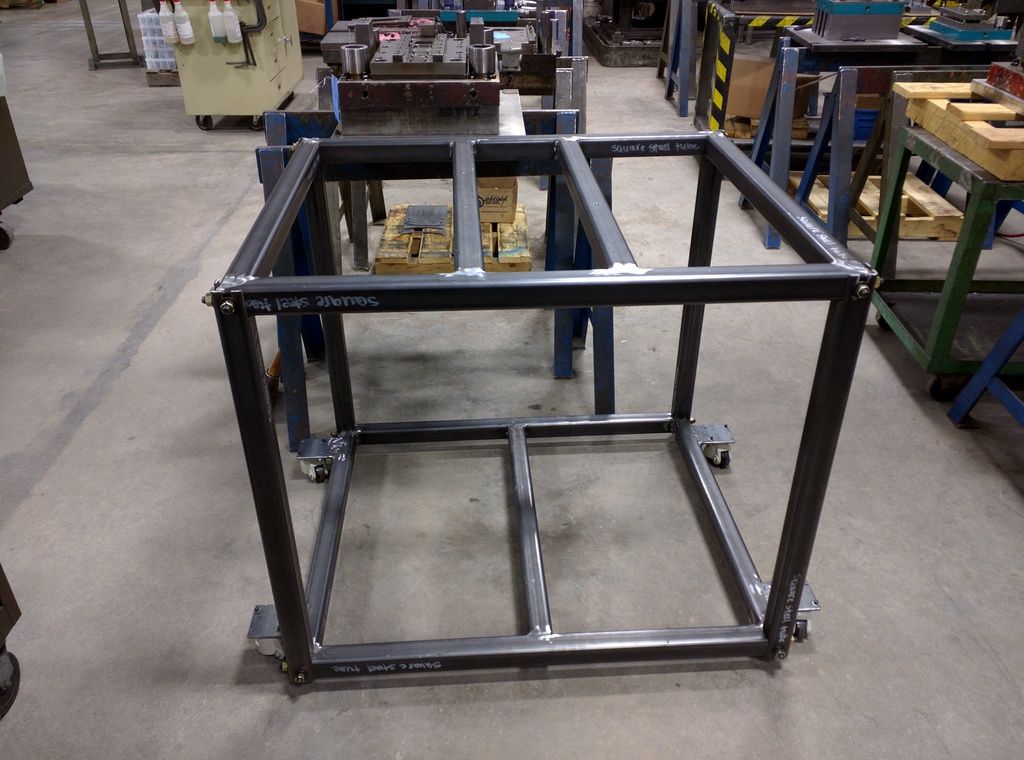
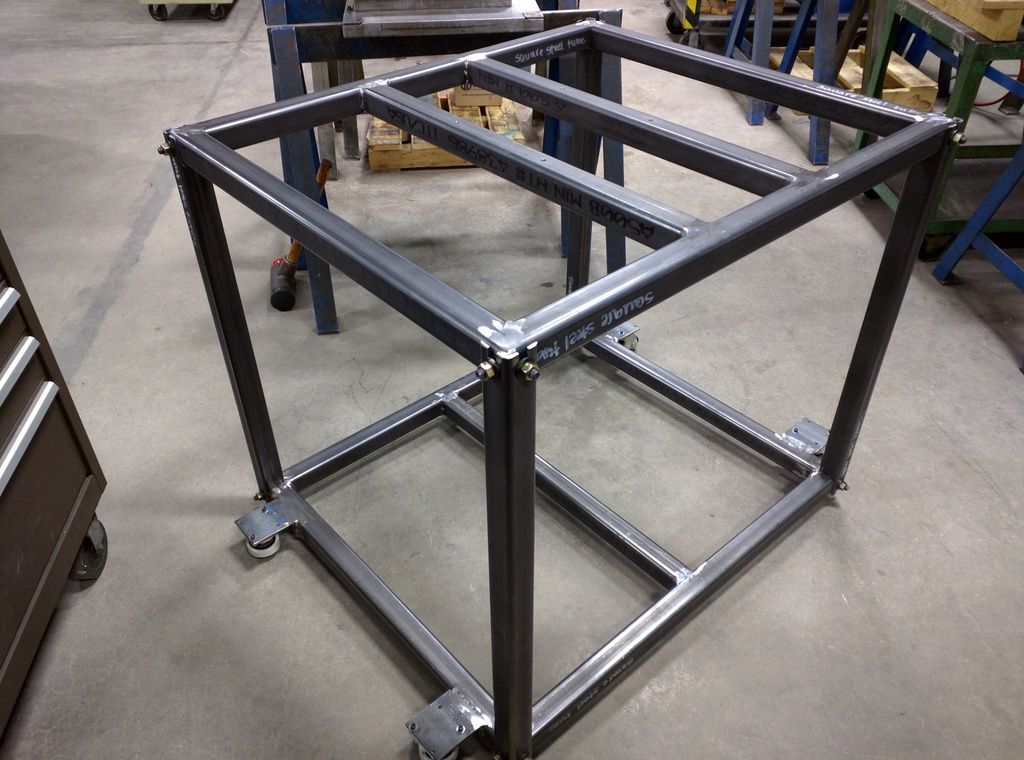
2" x 2", 3/16 wall tubing........ went a little over board, I think! base seems heavier than the machine.
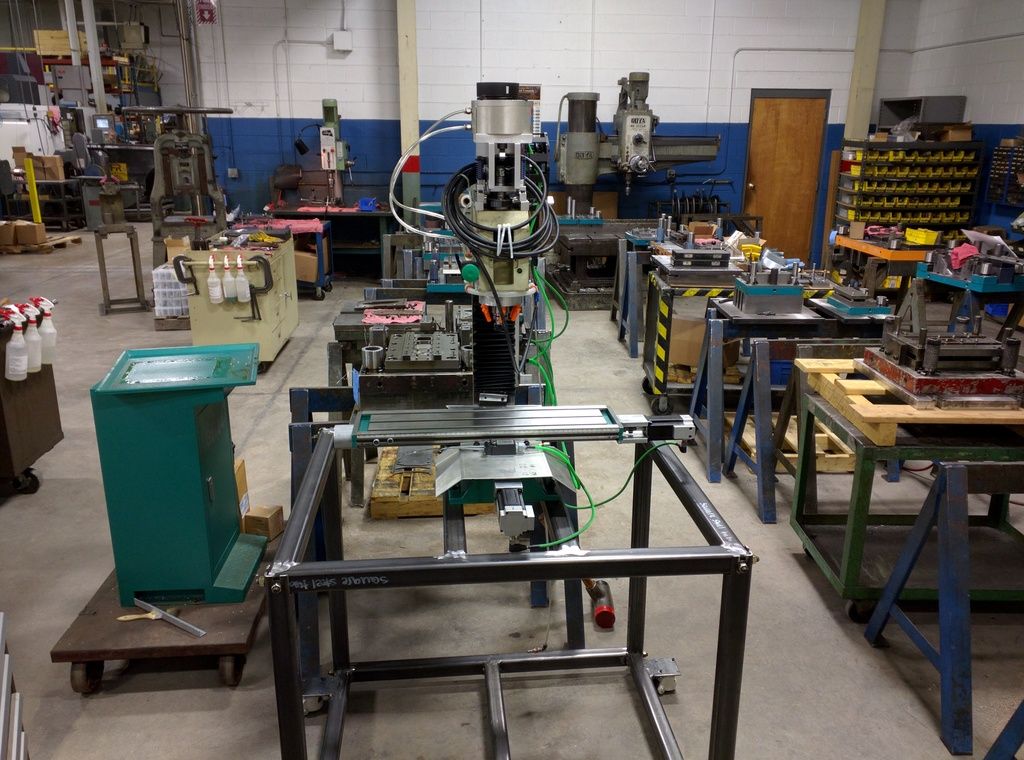
Now I need to figure out the pan of the enclosure. I want to make it so the chips and flood coolant is are funneled to the center and have a pull out tray to remove chips.
Andrew

 Reply With Quote


Similar Threads
-
Andrew's G0704 CNC Conversion
By andrew2085 in forum Benchtop MachinesReplies: 12Last Post: 01-21-2013, 06:04 PM -
Mint's Build Aluminum/Steel Build thread.
By FreshMint in forum Maintenance DIY DiscussionReplies: 0Last Post: 10-31-2011, 04:18 AM -
Newbie - To build or not to build Router/Plasma Table
By dfranks in forum Waterjet General TopicsReplies: 10Last Post: 04-08-2011, 05:16 AM
