


Not a huge update but I stitch welded some 10x65 flatbar to the top of the base to provide a solid mounting for the rails.
By a huge stroke of luck I've found some 25mm profile rails and carriages at work leftover from a previous project but they have some corrosion on the tracks. Is this something I can just scotchbrite off? What would be the best method for removing the rust without damaging the rails? In places there is no rust and elsewhere it looks pretty bad. I may be able to just chop out good sections to get what I want.
Thread: Welded steel frame router build
Results 21 to 40 of 97
Hybrid View
-
09-06-2018, 10:08 AM #1
 Registered
- Join Date
- Oct 2005
- Posts
- 74
Re: Welded steel frame router build
-
09-07-2018, 01:36 AM #2
 Gold Member
- Join Date
- May 2005
- Posts
- 3920
Re: Welded steel frame router build
You most certainly can scotch bright or maybe better yet a chemical rust remover. I look at it this way, If you get a year or two out of them have you lost anything at all? Rust will only be a problem if it has resulted in deep pitting, in that case the rials may be useless. However don't throw out the carriages, you might get lucky and find them protected by grease. Given that the rails are a common size you might be able to find new or used ones that fit the carriages fine on E-Bay. Originally Posted by jones

In the end it really comes down to how bad is the rust. Rust will most certainly impact rail life and maybe make the rail unusable but you will not know for sure unit the rails are cleaned up.
-
09-11-2018, 05:12 AM #3
Registered
- Join Date
- Oct 2005
- Posts
- 74
Re: Welded steel frame router build
That's a very good point, thanks. I've had a look and it appears that there are 6 carriages and there should be a couple of metres of rail that look untouched by rust so I'll see if the boss will let me have it and I'll make it work on the gantry. I'll still have round rails on the table and Z-axis but they can be upgraded at a later date. I'm hoping that after plug welding the gantry will be flat enough to work with the profile rails; if not, I can probably work out a way to machine it here at work. Originally Posted by wizard
-
09-11-2018, 11:34 AM #4ericks Guest
Re: Welded steel frame router build
I like your build! What size steppers are you going to use? Originally Posted by jones
-
09-11-2018, 01:21 PM #5
Registered
- Join Date
- Oct 2005
- Posts
- 74
Re: Welded steel frame router build
Thanks! I've got a set of 3 - 440 oz-in bipolar 3.5A Nema 24 steppers for the project, though I also have a 180 oz-in Nema 23 that I was going to use for the Z axis when I was building a plasma cutter... I think I'll just go with the 440 oz-in motors all round and save the little one for another project. Originally Posted by ericks
I also have a Gecko G540 and Ethernet Smoothstepper to control it all. I wanted to get as close to plug-and-play as possible after my last CNC build used chinese drives and a cheapy parallel breakout board. It worked but I eventually upgraded to Gecko's and it was a big improvement, I'm hoping the smooth stepper will make it even better.
-
09-20-2018, 11:17 AM #6ericks Guest
Re: Welded steel frame router build
You are doing great work mate!!
-
09-13-2018, 10:59 AM #7
Registered
- Join Date
- Oct 2005
- Posts
- 74
Re: Welded steel frame router build
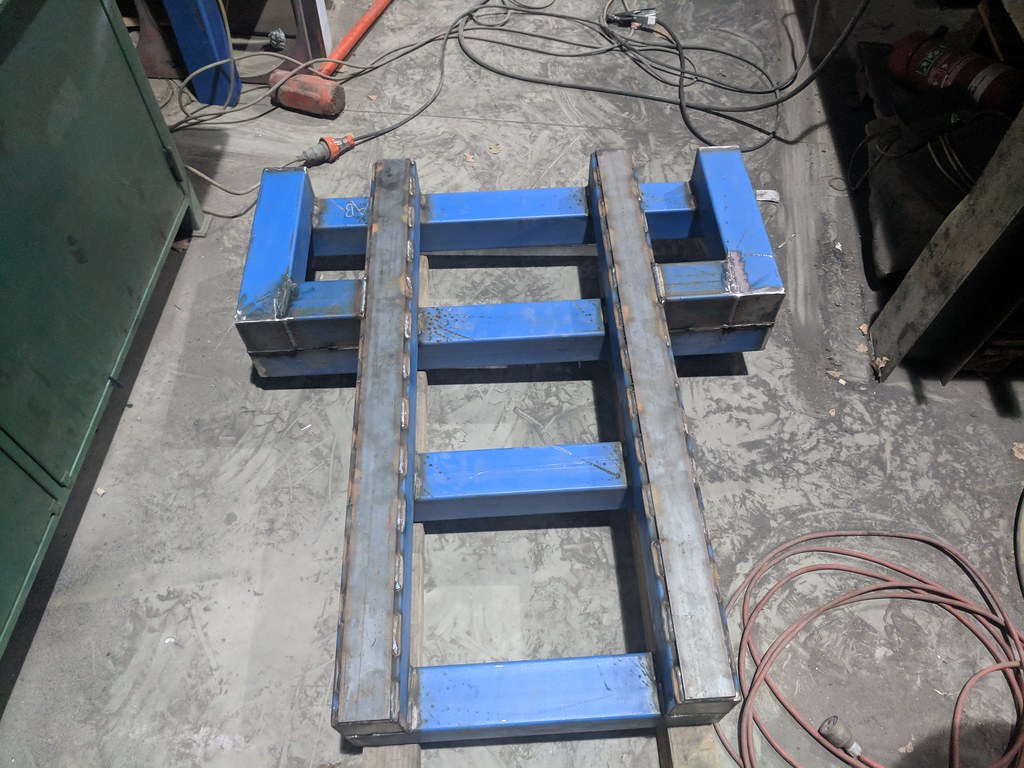
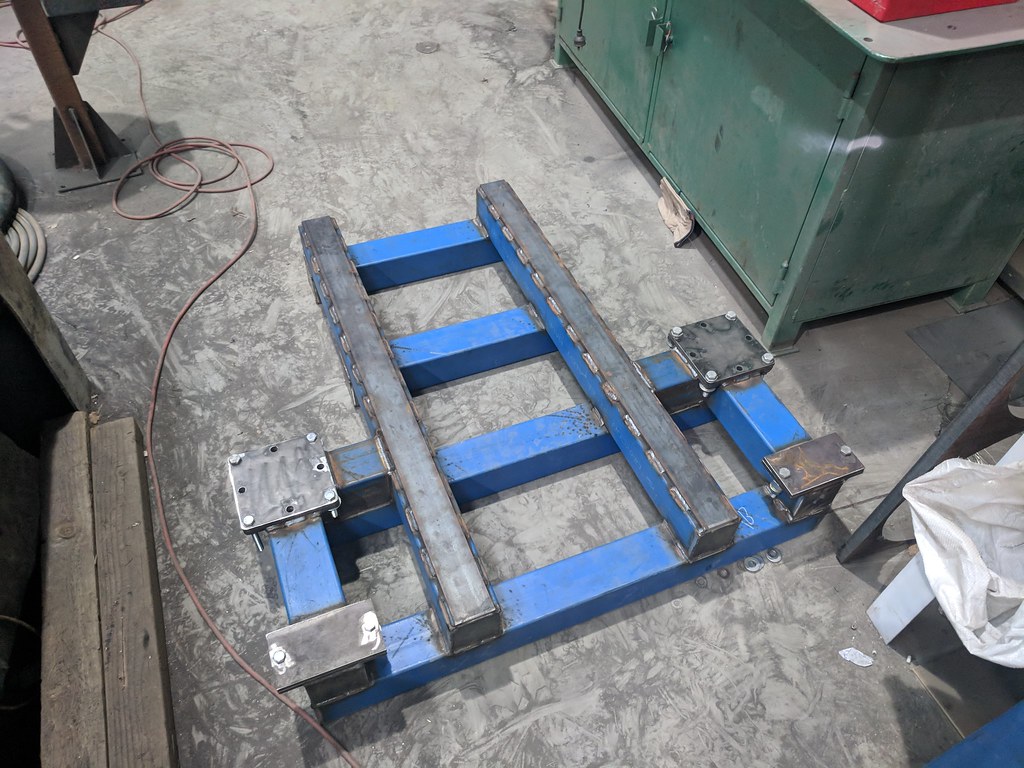
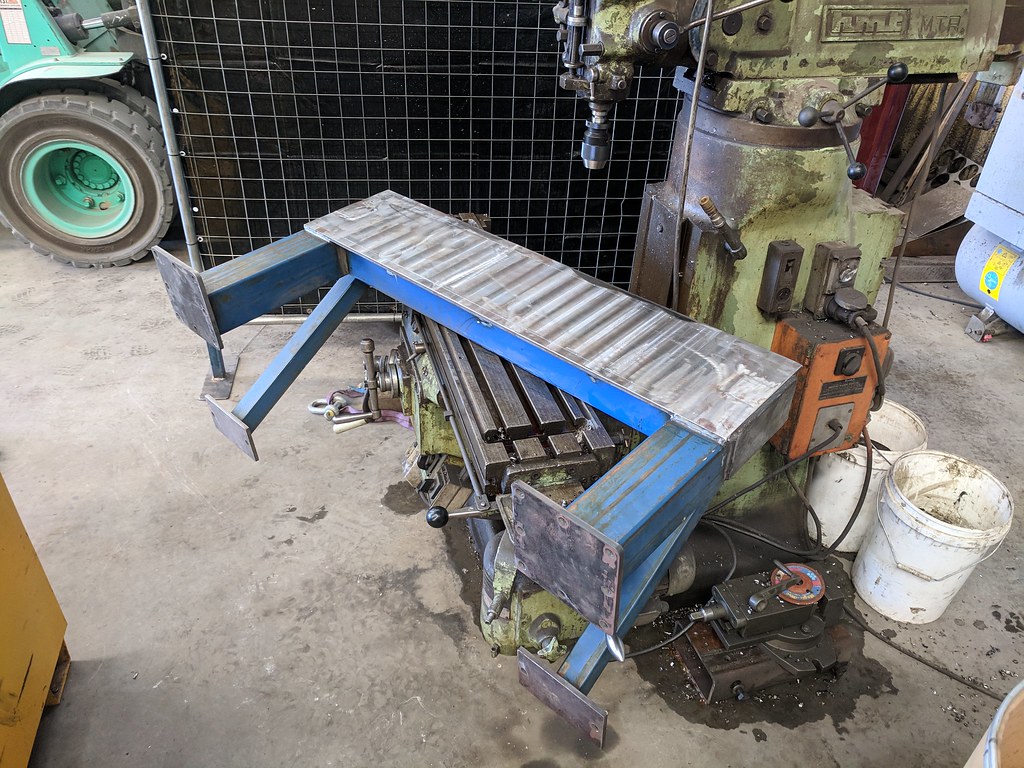
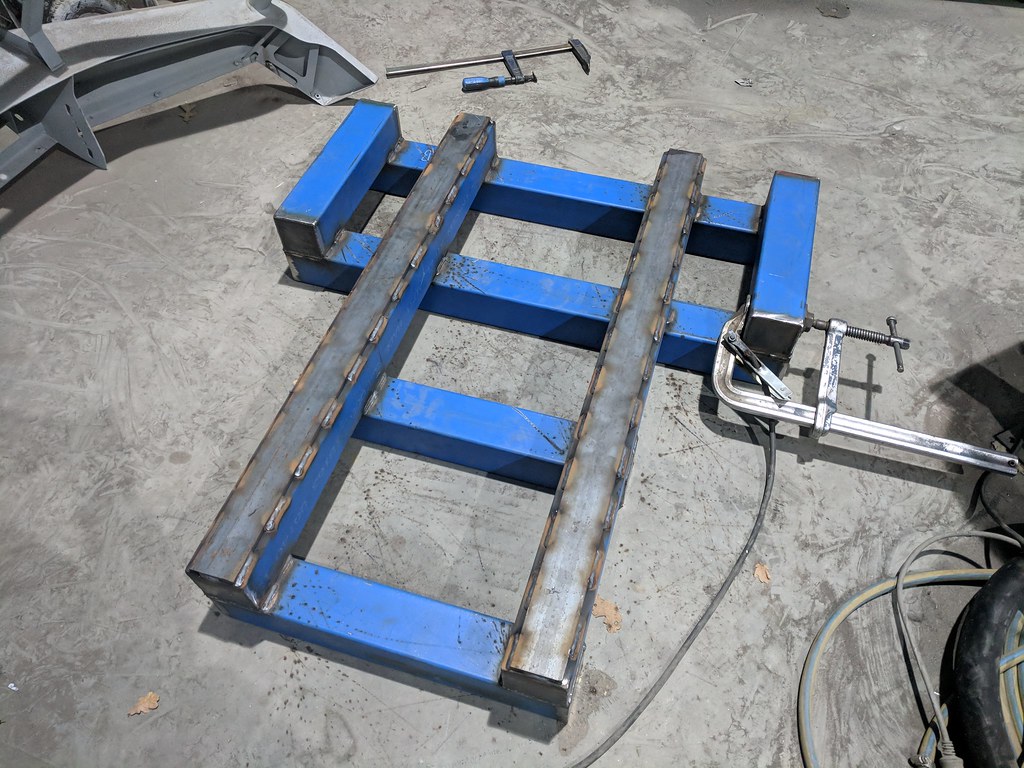
Little bit of progress this afternoon - I welded a reinforcement into the base frame and attached the gantry mounting plates
 IMG_20180913_165448 by jones_fli, on Flickr
 IMG_20180913_180000 by jones_fli, on Flickr
These little suckers should stiffen the gantry mounting points and the main rail pieces.
 IMG_20180913_180003 by jones_fli, on Flickr
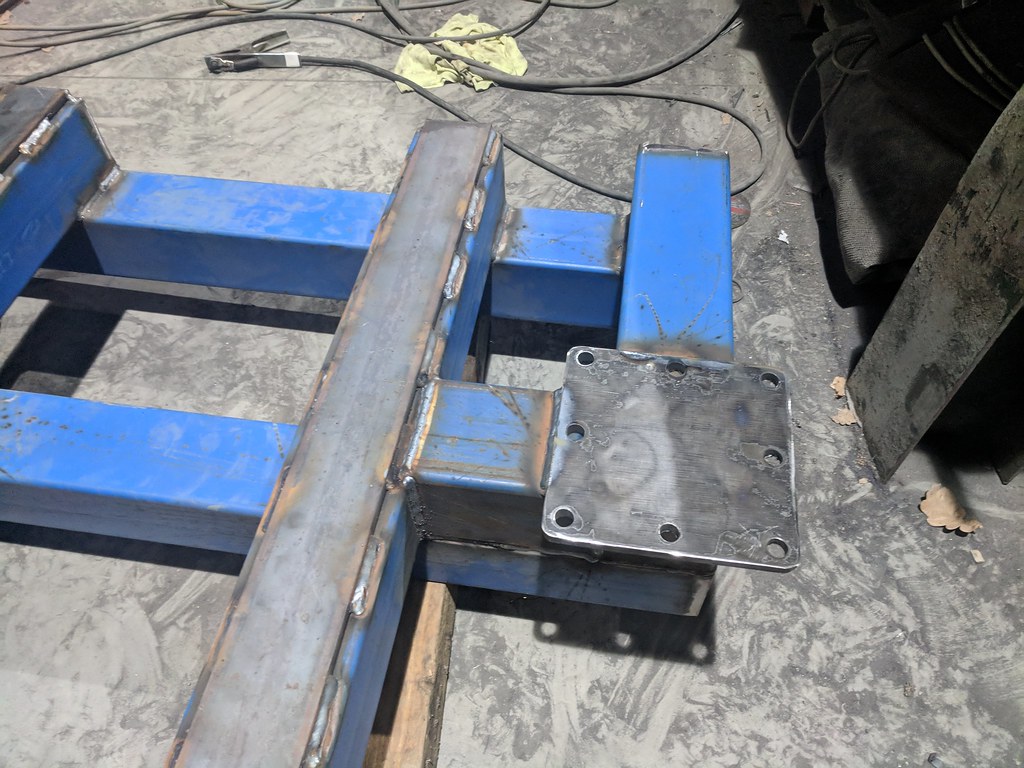
Mounting plates all in
 IMG_20180913_183618 by jones_fli, on Flickr
 IMG_20180913_183607 by jones_fli, on Flickr
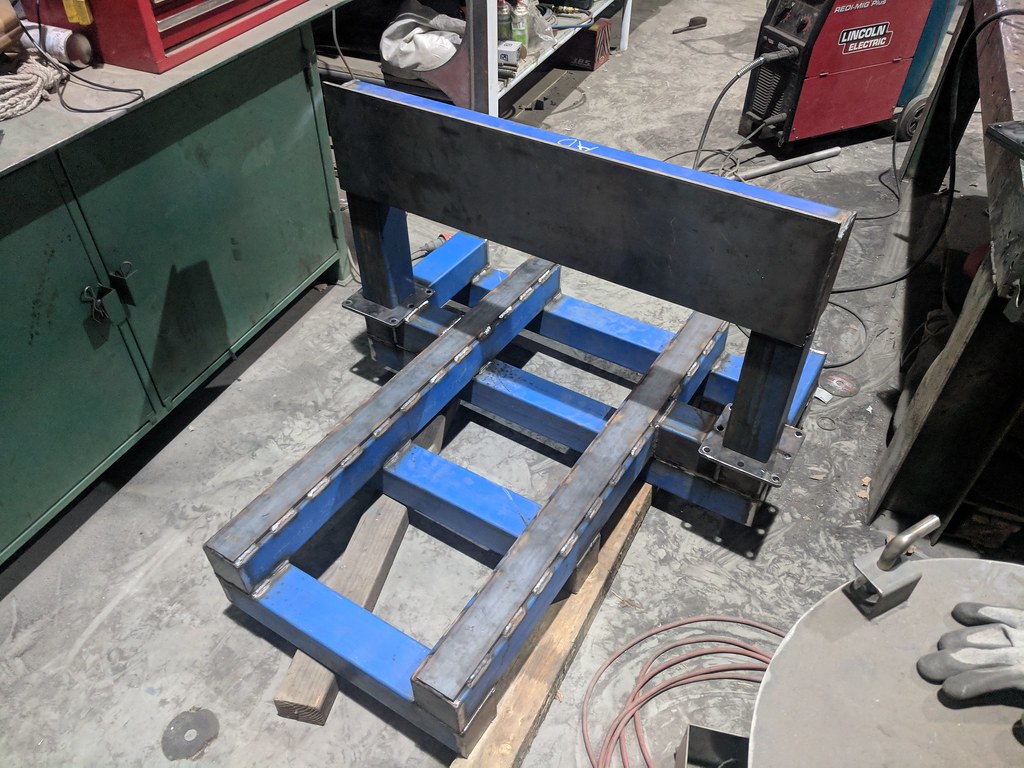
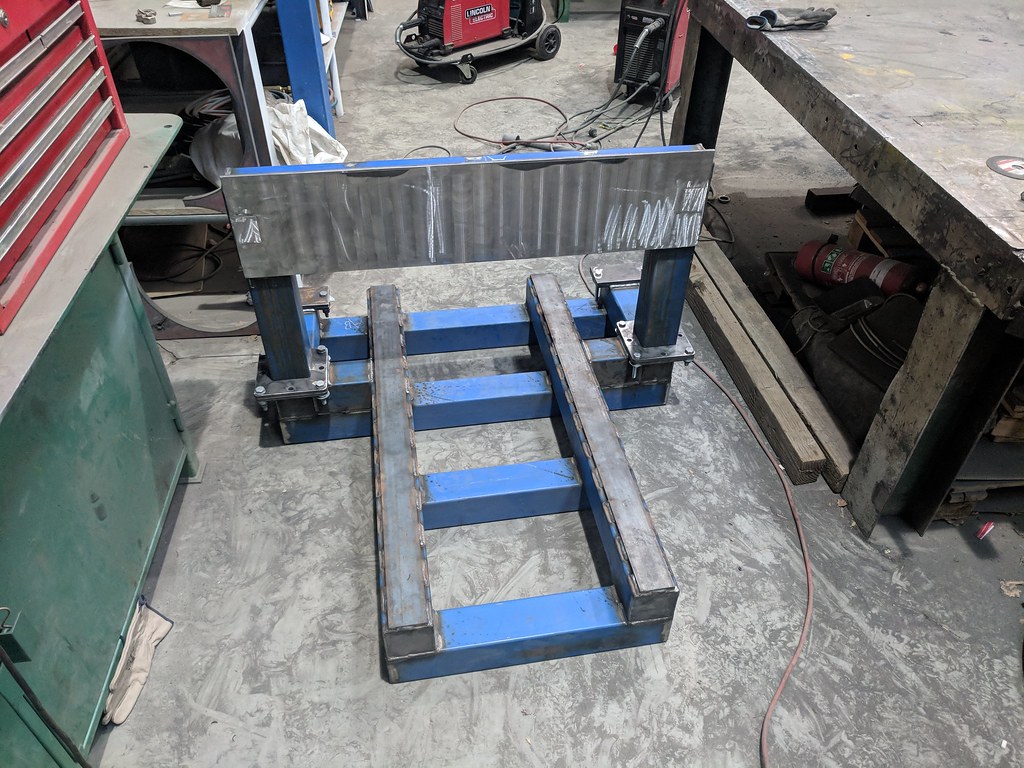
Then I just sat the gantry on the frame to get an idea of what it will look like
 IMG_20180913_183925 by jones_fli, on Flickr
Just for giggles I checked how square the legs are on the gantry
 IMG_20180913_184059 by jones_fli, on Flickr
Pretty much spot on, except I noticed there is definitely a bow in the 10mm plate from top to bottom. I'll definitely have to get it machined in order to use the profile rails... round as a temporary measure is looking more and more appealing.
 IMG_20180913_184349 by jones_fli, on Flickr
Things left to do before I can take the frame home to finish: plug weld the 10mm plate onto the gantry tube, weld reinforcing bars into the gantry tube, weld feet onto gantry, make back diagonal pieces... and I think that's pretty much all the major steel fabrication required!
-
09-19-2018, 11:09 AM #8
Registered
- Join Date
- Oct 2005
- Posts
- 74
Re: Welded steel frame router build
woops double post
-
09-19-2018, 11:12 AM #9
Registered
- Join Date
- Oct 2005
- Posts
- 74
Re: Welded steel frame router build
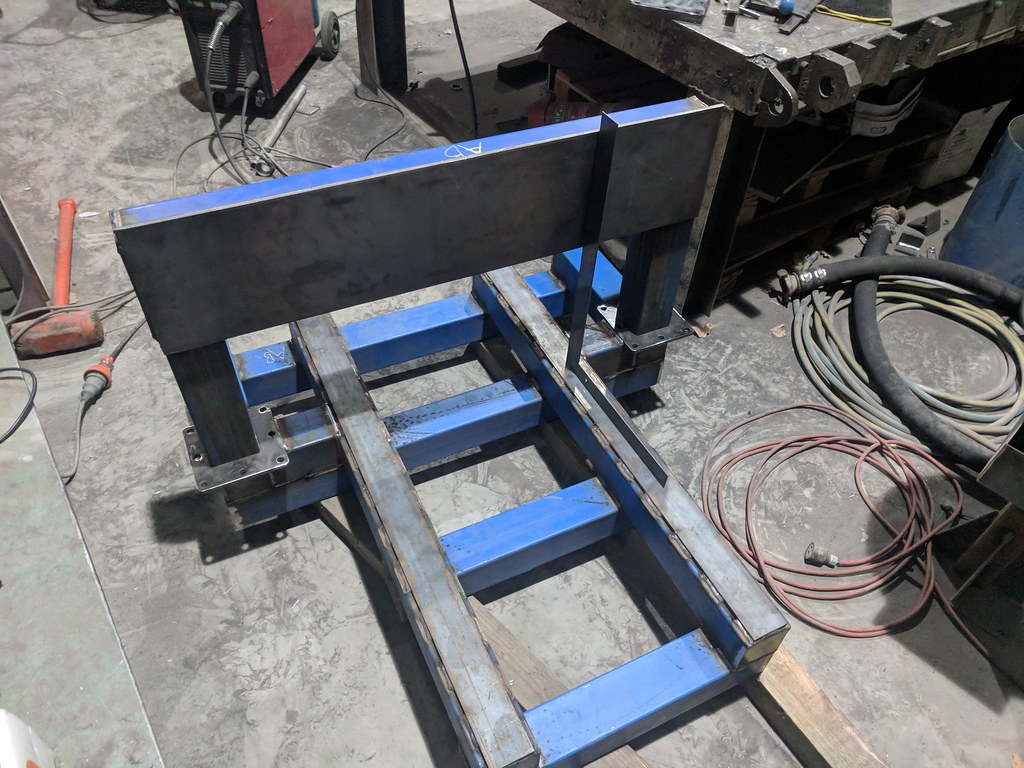
This afternoon I bolted the plates onto the frame
Sat the gantry in position
Clamped some RHS perpendicular to the X axis rails

Then once I'd assured myself the gantry was square and in position I tacked it in place and made the rear stays
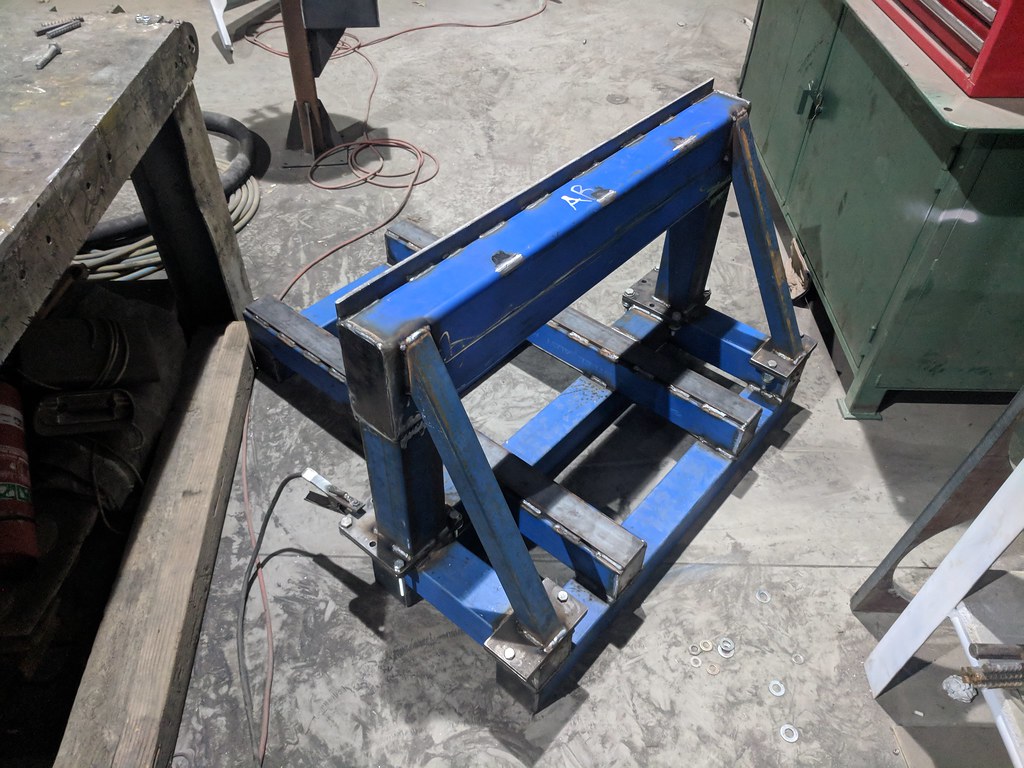
Once fully welded that brings us to this!
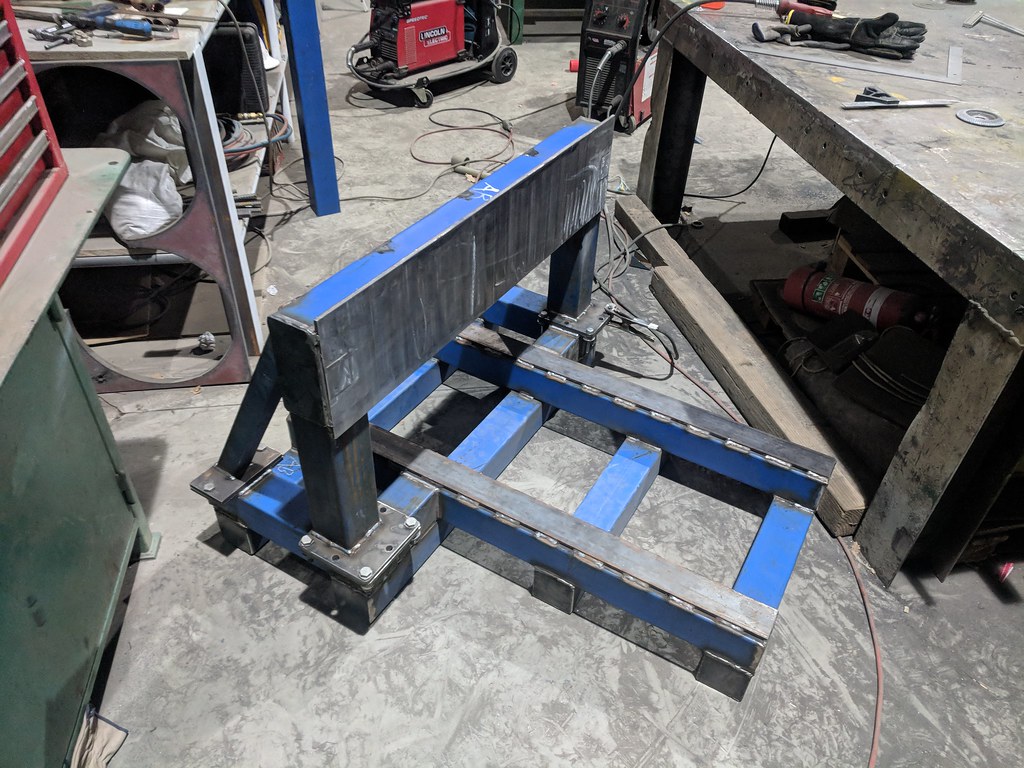
I'll need to shim the gantry or Z axis a little bit to make it perfectly perpendicular to the main rails, or maybe the main rails are warped slightly meaning I'll have to get them machined... either way that's a problem for another day!
I'd also like to put some little triangle braces at the front of the gantry legs. I made a slight miscalculation when I placed the footings on the main frame but luckily it won't significantly affect the rigidity of the finished product.
Next up is drilling and tapping the holes for the X and Y axis rails. It won't be long before this actually looks like a CNC machine rather than some weird, abstract scrap metal artwork.
-
09-20-2018, 11:13 AM #10
Registered
- Join Date
- Jan 2008
- Posts
- 1543
Re: Welded steel frame router build
Nice work!
7xCNC.com - CNC info for the minilathe (7x10, 7x12, 7x14, 7x16)
-
10-25-2018, 04:30 PM #11
Registered
- Join Date
- Dec 2014
- Posts
- 640
Re: Welded steel frame router build
It should survive a nuclear blast!!
-
12-05-2018, 11:48 PM #12
Registered
- Join Date
- Oct 2005
- Posts
- 74
Re: Welded steel frame router build
Haha thanks mate, it is pretty heavy duty! Originally Posted by fretman_2
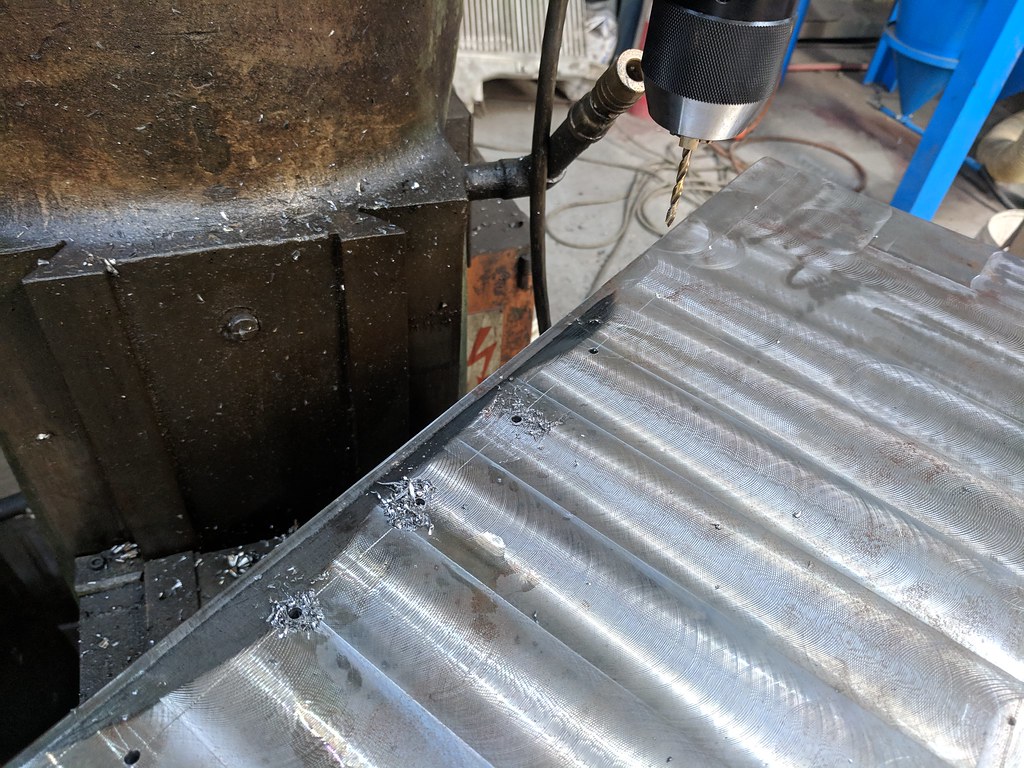
I can't believe it's been so long since I updated this thread but I've been making excuses to put off drilling and tapping all the holes in the gantry. It's way too heavy to lift comfortably and I've been wondering how I'm going to drill all the holes.
 IMG_20181205_163003 by jones_fli, on Flickr
We recently bought a drill chuck for our mill which gave me a perfect way of doing it.
 IMG_20181205_172047 by jones_fli, on Flickr
 IMG_20181205_180522 by jones_fli, on Flickr
I'll be tapping all those holes tonight; In the mean time the CAD model has progressed to a point where all the important details have been nutted out and have dimensions, so next week I'll make a start on the X and Z axis pieces.
-
12-06-2018, 09:53 PM #13
Gold Member
- Join Date
- May 2005
- Posts
- 3920
Re: Welded steel frame router build
Some nice work on the gantry. You highlight a common problem with working with steel - it gets heavier everytime you weld something to it. ??????. I strained by back recently working on a press weld up so all I can say is be careful! Get help either human or mechanical when needed otherwise your build will get delayed by weeks as you recover.
By the way it is likely too late but you only really need to machine the gantry where stuff is mounted. On a wide beam like that it would have saved a lot of work. I like the way you welder in the stiffeners though. It is always good to see yet another way of doing it.
Edit:
It just occurred to me, with all of that powder blue paint on the steel you could call it the first Smurf CNC.
-
12-11-2018, 09:52 PM #14
Registered
- Join Date
- Oct 2005
- Posts
- 74
Re: Welded steel frame router build
Haha thanks wizard, I am always careful when moving the thing. Luckily as soon as I drill and tap the holes on the base for the rails that *should* be every operation that I need to actually take the machine over to the tool. Originally Posted by wizard
You're absolutely right with regards to machining the gantry, but I also need a bit in the middle machined down to provide clearance for the ballnut mount, so I figured I'd do the whole thing.
Smurf CNC... I LIKE IT!
Another small update, got all 34 holes on the gantry tapped M5x0.8.
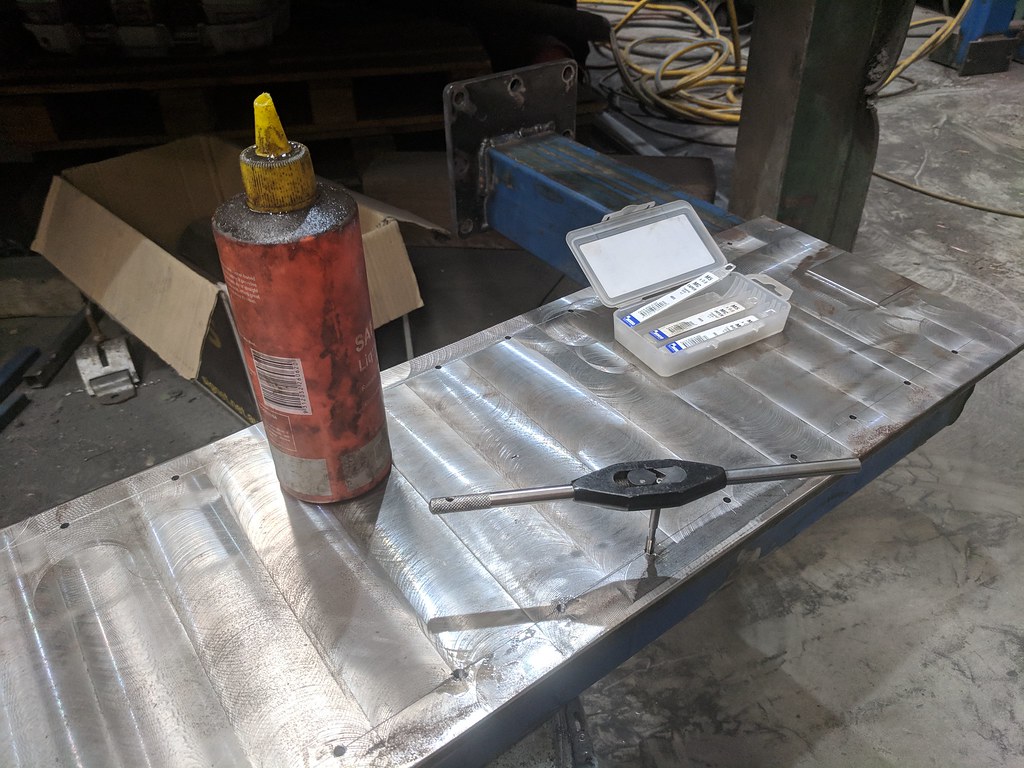
What a painful process! Now to do it all again for the Y axis...
-
07-14-2020, 11:59 PM #15
Registered
- Join Date
- Oct 2005
- Posts
- 74
Re: Welded steel frame router build
Thread resurrection!
After moving from Bathurst back to Sydney and spending a year at an apartment with no real garage to work in, I'm now almost in a position to finish off (haha) my CNC router project.

Not ideal, but there is a lot more room behind me that's not visible in the pic.
Progress so far is I've drilled and tapped the main structure for the long axis rails and I've bought new profile rails for the gantry and z axis. I'm still keeping the round rails on the long/table axis as I can't get the base ground flat anywhere, and frankly I just want the machine up and running !
Next step is to make the Z axis as a separate module and go from there.
-
07-27-2020, 12:47 PM #16
Registered
- Join Date
- Oct 2005
- Posts
- 74
Re: Welded steel frame router build
Since I don't really have access to my mill-drill I've been trying to make do with this ancient drill press I've got.


With all screws tightened down it doesn't bind at all! Very excited, next up is the Z axis plate.
-
08-03-2020, 12:04 AM #17
Registered
- Join Date
- Oct 2005
- Posts
- 74
Re: Welded steel frame router build
Ancient drill press strikes again - the Z axis plate now has rails!

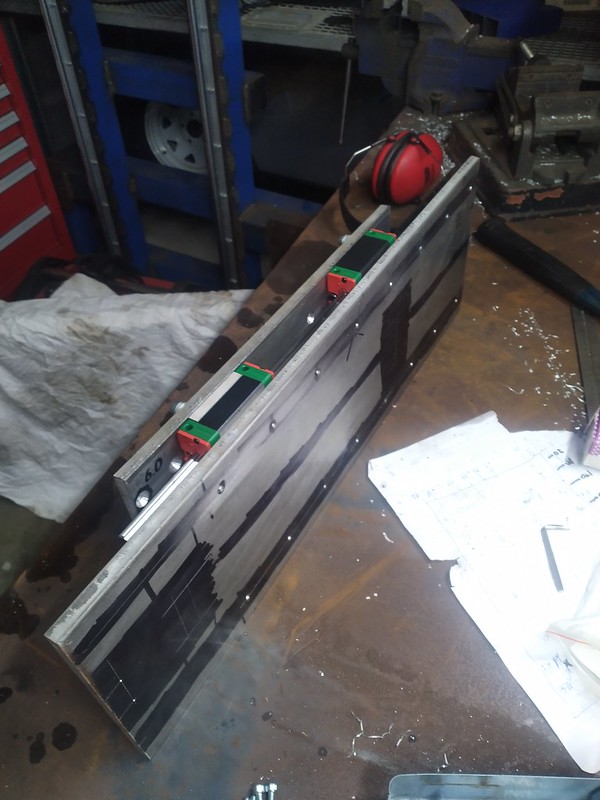
Next up is some 20mm thick spacer blocks for the linear rail carriages to make more room for the ballscrews, then ballscrew and stepper mounts on the Z axis, then Y axis ballscrew mounts, side-plates to reinforce the whole Z-axis assembly, spindle mount, X-axis table, X-axis ballscrew mounts and... that's the bulk of the motion control stuff out of the way :P
-
08-03-2020, 03:03 AM #18
Member
- Join Date
- Jul 2018
- Posts
- 6532
Re: Welded steel frame router build
Hi Jones - Great to see this on the move again. Peter
-
08-06-2020, 12:54 AM #19
Registered
- Join Date
- Oct 2005
- Posts
- 74
Re: Welded steel frame router build
Thanks Peter, I'm enjoying having a project to tinker on in the garage after work again. Originally Posted by peteeng
Small update - the Z axis ballscrew assembly is now mounted
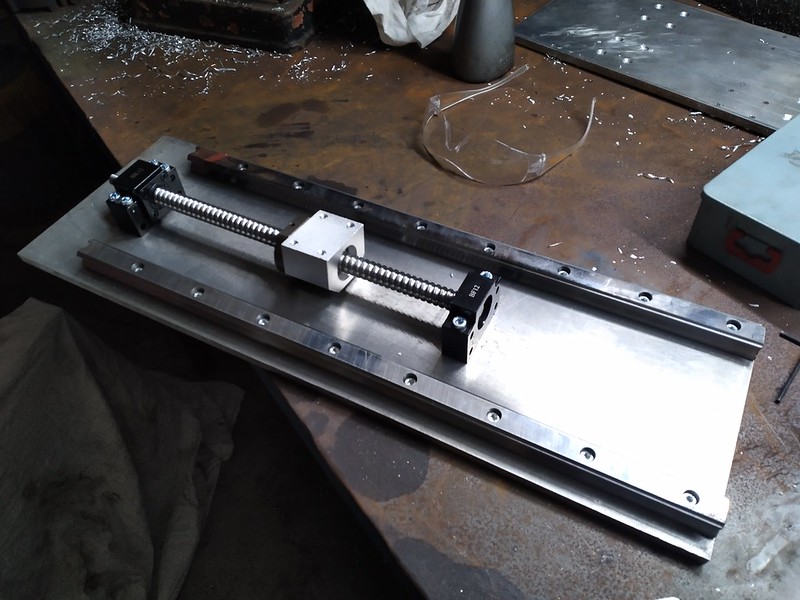
Looks like ~230mm total Z travel, probably ~210mm after I add limit switches and give it a bit of clearance.
I also sorted out the Spindle mounting:

I originally drilled those holes down the side visible in the image, but later discovered it would interfere with the rails on the other side (this bit was never modelled in CAD). I've since drilled and tapped 6 x M8 holes underneath the spindle mount and I'll cut off the ears with the outer mounting holes.
-
08-31-2020, 09:43 AM #20
Registered
- Join Date
- Oct 2005
- Posts
- 74
Re: Welded steel frame router build
Not a big update but I've made 8 x 20mm thick spacers required to get the correct ballscrew/linear slides spacing for the machine.

One of the first projects for the machine once I get it working and dialed in will be to make new X and Z axis plates from 30mm thick material, rather than the 10mm with 20mm spacers. I'll also be making 6mm thick side plates to reinforce the whole assembly.

 Reply With Quote
Similar Threads
-
Steel Frame Router Build
By trailerparkboys in forum CNC Wood Router Project LogReplies: 1Last Post: 03-08-2016, 01:53 PM -
Steel frame Ganrty router build
By matth in forum CNC Wood Router Project LogReplies: 172Last Post: 10-30-2014, 08:32 PM -
My First All Welded Steel Router Design
By widgitmaster in forum CNC Wood Router Project LogReplies: 9Last Post: 10-18-2008, 03:07 PM
