


Hey John!Originally Posted by Boogiemanz1

Yes it is. You asked me about the mockup of the drive that I had on the workbench. Do you remember?
Thank you...You do nice work.......jb
Thread: My PlasmaBot
Results 21 to 40 of 48
-
01-25-2011, 12:21 PM #21
 Registered
- Join Date
- Mar 2008
- Posts
- 195
My Blog
http://www.needfulthings.net/tulsaturbo/myblog/index.php
-
01-28-2011, 06:16 AM #22
Registered
- Join Date
- Oct 2008
- Posts
- 95
yes, I remember, pretty slick. I have gotten more parts in, soon the work will begin.................jb
-
02-20-2011, 09:15 PM #23
Registered
- Join Date
- Mar 2008
- Posts
- 195
Hey John, Originally Posted by Boogiemanz1
I made a new control box yesterday to keep the THC together with the rest of the electronics. Cut some metal this morning to test out the THC and everything worked great!
 My Blog
http://www.needfulthings.net/tulsaturbo/myblog/index.php
-
02-27-2011, 05:08 PM #24
Registered
- Join Date
- Feb 2011
- Posts
- 0
awesome stuff! Mailed you...
-
03-10-2011, 05:45 AM #25
Registered
- Join Date
- Mar 2011
- Posts
- 0
Try this link, look to the left and click on air tab, also many other items for machine building Originally Posted by tulsaturbo
https://www.universalsewing.com/tek9...=default&s=yes
Also a company called Airdraulics the have anything you can think of for what you are doing.
I am planning a build myself using the plasma bot kit gathering info right now.
-
03-11-2011, 12:06 AM #26
Registered
- Join Date
- Mar 2008
- Posts
- 195
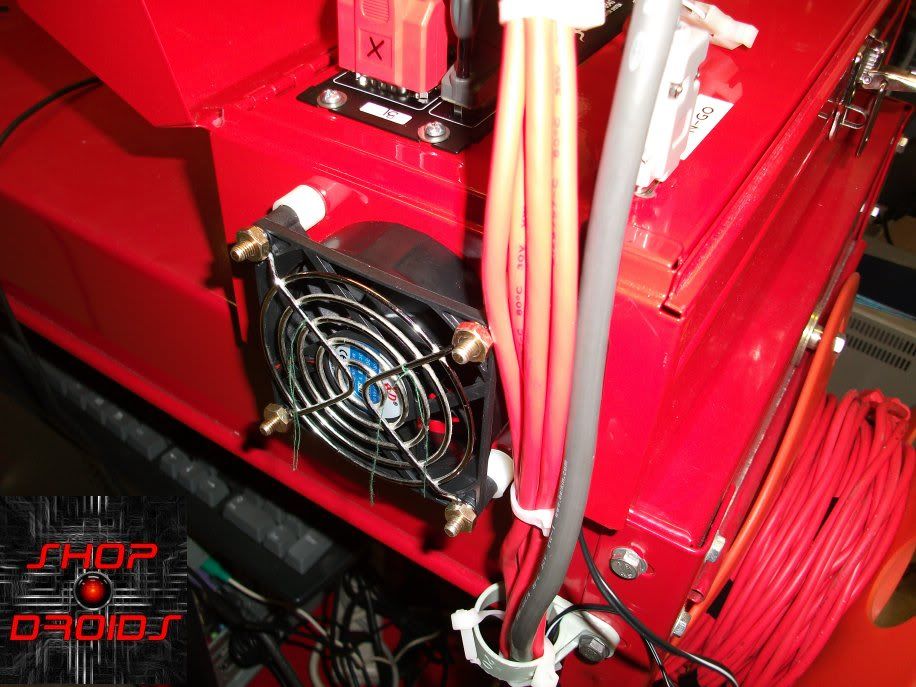
Since I did not have anywhere to put my big 4.5" fan within this new box, I had to find an alternate method for cooling.
So here is my recent upgrade to the control box which now includes an aluminum heatsink plate with fan cooler on the G540 controller and an externally mounted heat exhaust fan for the box itself.

 My Blog
http://www.needfulthings.net/tulsaturbo/myblog/index.php
-
05-15-2011, 07:34 PM #27
Registered
- Join Date
- Mar 2008
- Posts
- 195
Plasma Spark Curtain
After testing it out this weekend, I am very satisfied with the results. All that is left to do now is to mount it permanently...
[nomedia="http://www.youtube.com/watch?v=4pH_hrrVpaw"]YouTube - Plasma Spark Curtain[/nomedia]My Blog
http://www.needfulthings.net/tulsaturbo/myblog/index.php
-
05-16-2011, 01:28 AM #28
Registered
- Join Date
- Jan 2011
- Posts
- 0
Looks like a good solution--what kind of fabric is it?
Carl
-
05-16-2011, 01:40 AM #29
Registered
- Join Date
- Feb 2011
- Posts
- 0
JB that is exactly what I need in my limited space to stop errant sparks from lighting something up

-
05-16-2011, 10:33 AM #30
Registered
- Join Date
- Mar 2008
- Posts
- 195
It is a Flame-and Water-Resistant Cotton Fabric Originally Posted by I Lean
Link: McMaster-CarrMy Blog
http://www.needfulthings.net/tulsaturbo/myblog/index.php
-
12-12-2011, 05:30 AM #31
Registered
- Join Date
- Mar 2008
- Posts
- 195
I wanted a simple 4th axis for pipe cutting so I opted to make this simple direct drive unit rather than the traditional gear reduction drive unit. Shown below mounted on my RouterBot for testing purposes...
[ame="http://www.youtube.com/watch?v=vCyGqhx0Pbw"]YouTube - Broadcast Yourself.[/ame]My Blog
http://www.needfulthings.net/tulsaturbo/myblog/index.php
-
01-13-2012, 03:38 AM #32
Registered
- Join Date
- May 2010
- Posts
- 0
THC update
Hey Tulsa Turbo, any more comments since you installed the torch height control? How is it working? are you happy with it? If I understand it correctly, it replaces your touch and go right? Have the cuts been much cleaner?
-
01-13-2012, 04:37 AM #33
Registered
- Join Date
- Feb 2011
- Posts
- 0
was just poking around your site i saw: DIY EZ CNC Ver.2 PlasmaBot 4.0 Gantry Kit.
Seems way easier than the aluminum rails.
Cons?
-
01-13-2012, 06:36 PM #34
Registered
- Join Date
- Sep 2007
- Posts
- 64
tulsaturbo,
Do you have a parts list for the rotary axis components? Mainly where did you get your bearing, chuck and the motor to chuck shaft?
Thanks!
-
01-14-2012, 02:39 PM #35
Registered
- Join Date
- Mar 2008
- Posts
- 195
I am very happy with it once I got certain parameters set correctly. The touch-n-go is still required. Cut quality depends to a high degree on the distance between the torch tip (nozzle) and the surface of the sheet being cut. By maintaining the correct cut height with the THC, it has virtually eliminated beveled edges. Originally Posted by johnny v
My Blog
http://www.needfulthings.net/tulsaturbo/myblog/index.php
-
01-14-2012, 02:54 PM #36
Registered
- Join Date
- Mar 2008
- Posts
- 195
PROS: A simple alternative to building a cnc machine and get it up and running quickly. Just as accurate as its aluminum v-rail counterpart. Originally Posted by vdubjim
Cons: Since the tubing cannot be supported anywhere except at the ends, table lengths of 5 feet or less is recommended because of the possibility of the tube rail itself sagging at longer lengths under the weight of a heavy gantry especially if the recommended tubing thickness used by the builder is less than recommended.My Blog
http://www.needfulthings.net/tulsaturbo/myblog/index.php
-
01-14-2012, 02:57 PM #37
Registered
- Join Date
- Mar 2008
- Posts
- 195
Not offhand but If I can find the time I will see about making this information available over at the ShopDroids forum... Originally Posted by HakBot
My Blog
http://www.needfulthings.net/tulsaturbo/myblog/index.php
-
06-16-2012, 06:21 PM #38
Registered
- Join Date
- Mar 2008
- Posts
- 195
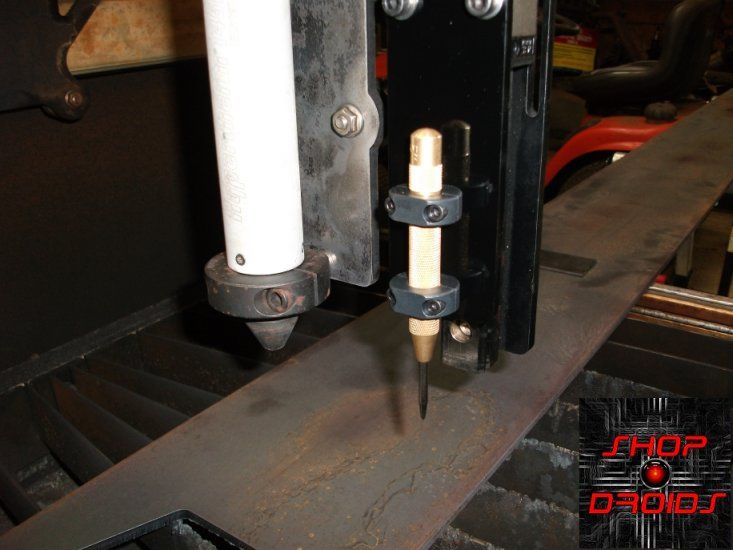
Started work on my plate marker that I started to build a year ago. I did change the design a bit. The plate marker base mount is sandwiched between the Z drive and the X axis carriage with ear mounts that are offset to the right as shown below:
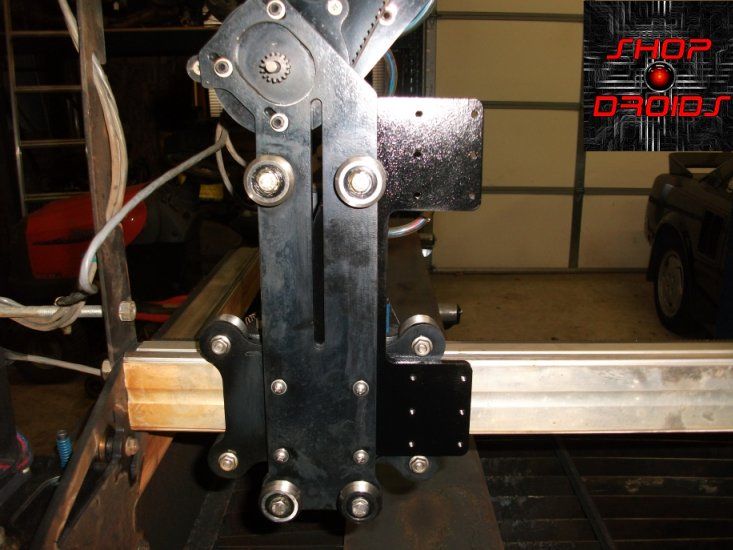
The plate marker assembly will mount to the base ear mount and is height adjustable as required. I'm still waiting on some of the pneumatic components to arrive but for the most part the main unit is finished.
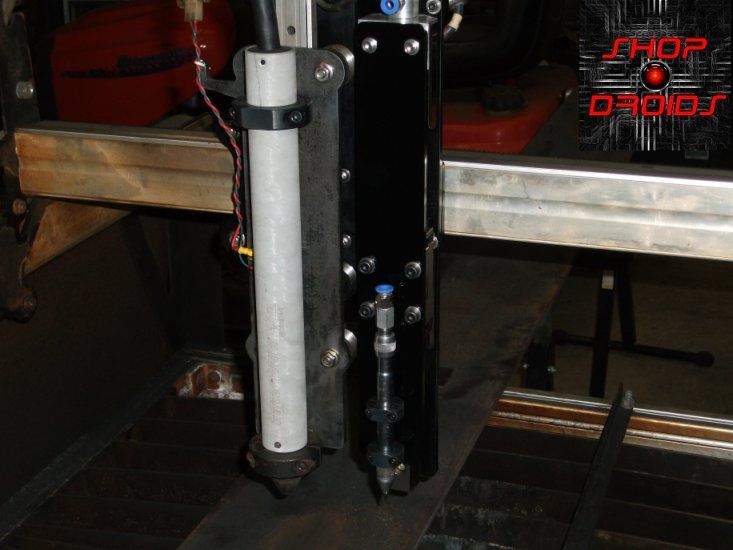
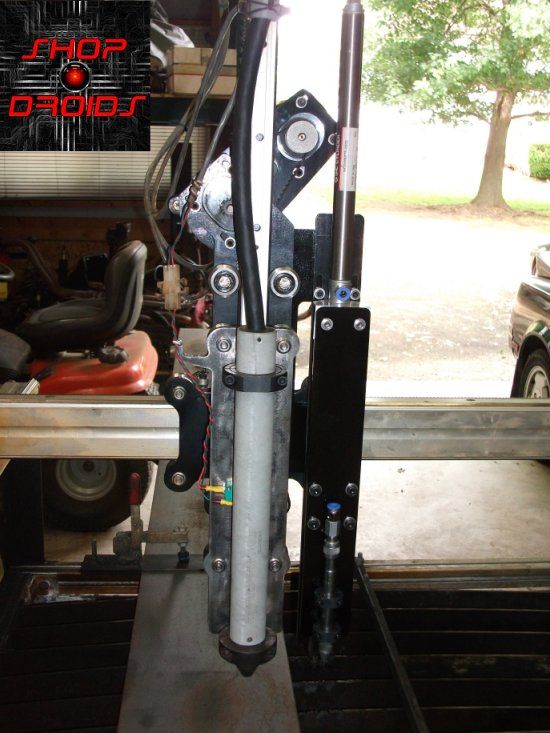
Although I have a pneumatic scribe mounted, I may go with a spring loaded center punch instead as my main interest with this tool is to center punch metal plates for drilling purposes.
 My Blog
http://www.needfulthings.net/tulsaturbo/myblog/index.php
-
07-01-2012, 05:40 PM #39
Registered
- Join Date
- Mar 2008
- Posts
- 195
Going through the motions testing the code for the plate marker attachment. Test was a success!
[ame=http://www.youtube.com/watch?v=Y99Uxgg3v3s]My CNC PlateMarker Attachment - YouTube[/ame]My Blog
http://www.needfulthings.net/tulsaturbo/myblog/index.php
-
07-02-2012, 07:43 PM #40
Registered
- Join Date
- Feb 2012
- Posts
- 69
You going to add these to your line of products John? Very Nice!!


 Reply With Quote