


Awesome work Garry!
This is most interesting, what about solid bodies, planning them too or done them before?
Results 41 to 60 of 89
-
08-16-2011, 09:45 AM #41
 Member
- Join Date
- Dec 2007
- Posts
- 2134
It's rumoured that everytime someone buys a TB6560 based board, an engineer cries!
-
08-16-2011, 10:36 AM #42
Registered
- Join Date
- Apr 2011
- Posts
- 0
This is my first CNC use, everything below by hand. Originally Posted by aarggh

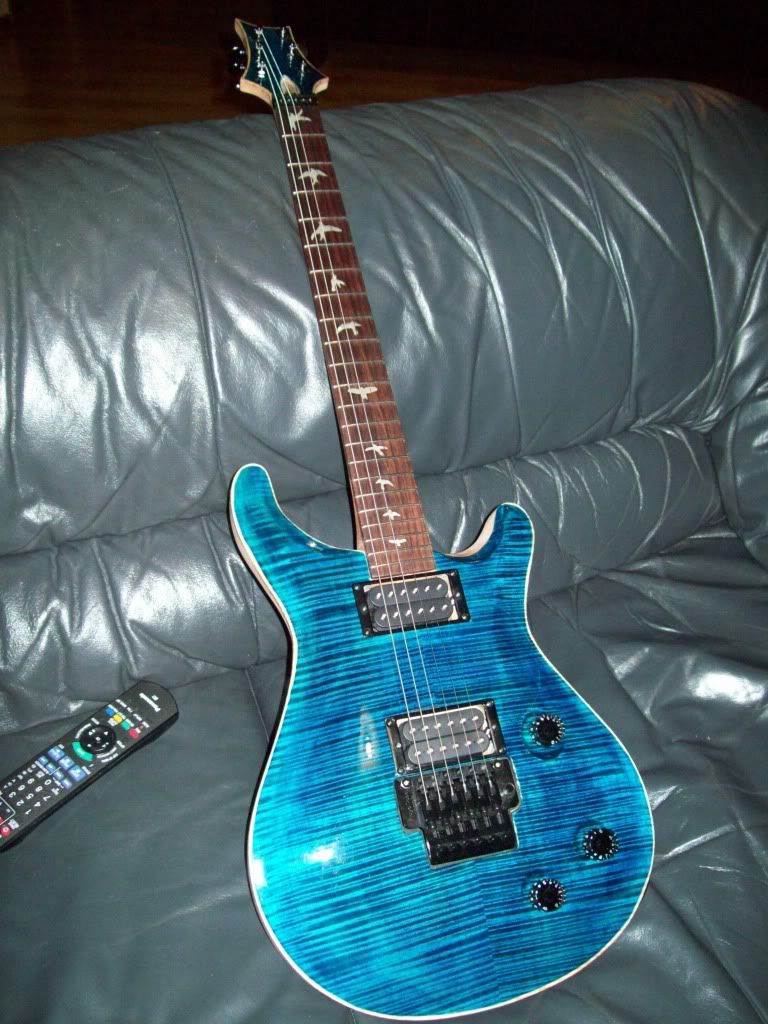
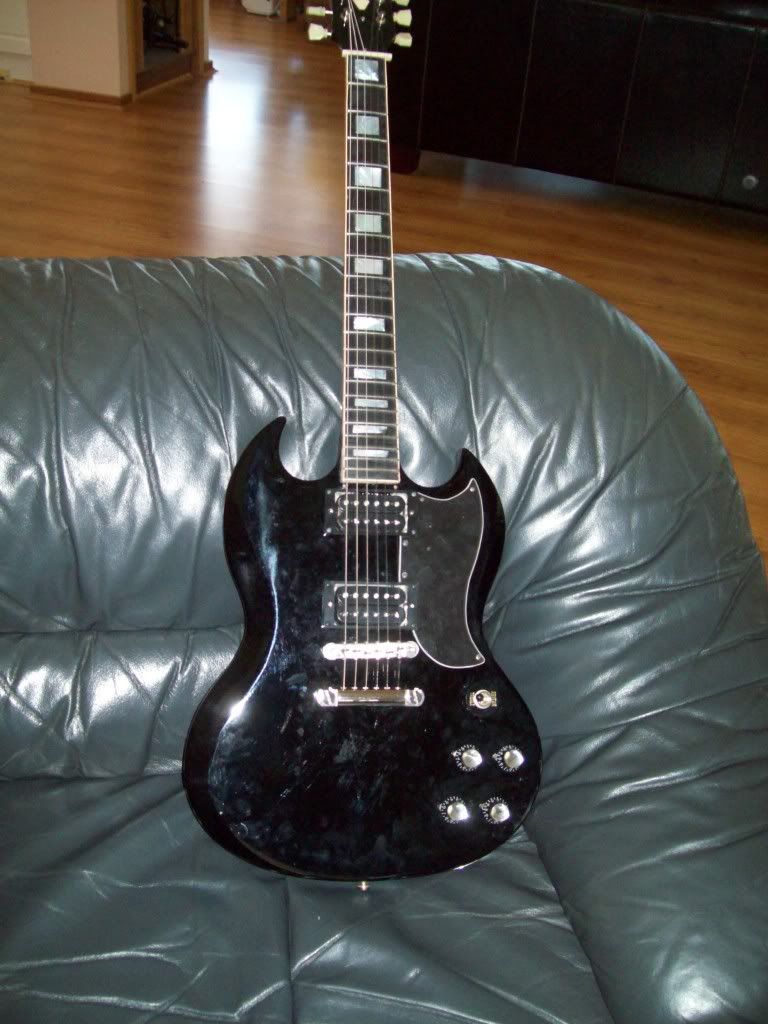
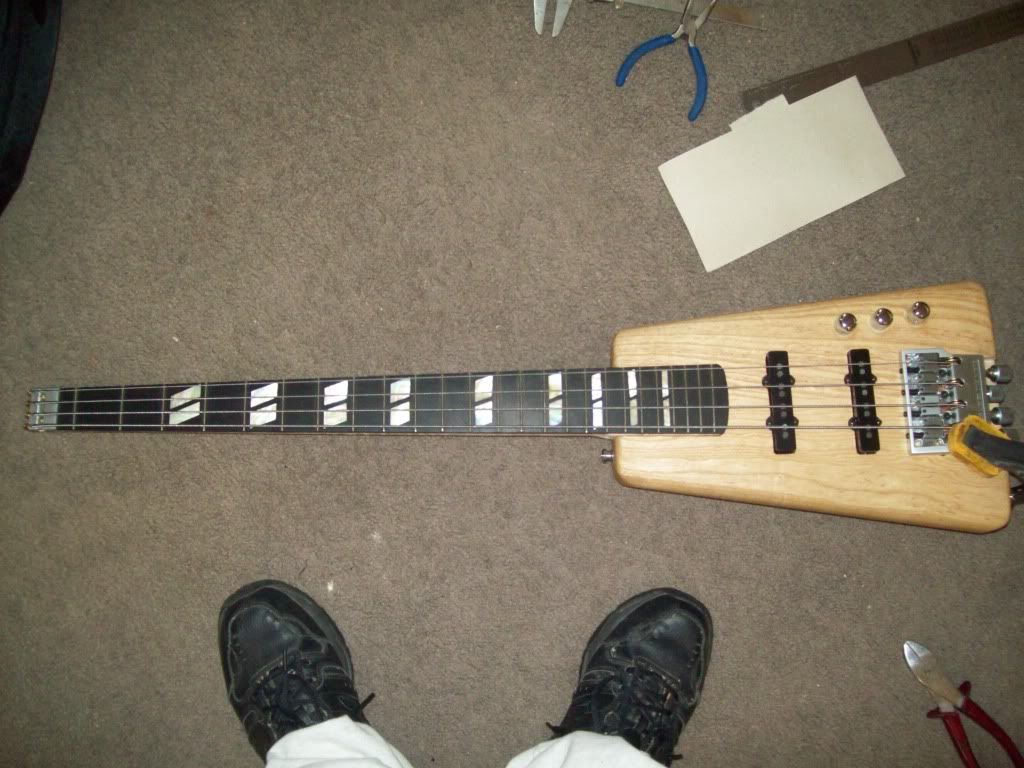
I have done three solid bodies:
PRS clone:
an SG:
A 30" Headless Bass for a friend:
And two martin OM Acoustics.

I am improving my techniques slowly.
Garry
-
08-17-2011, 08:08 AM #43
Registered
- Join Date
- Apr 2011
- Posts
- 0
Back Plate Roughed Out.
All glued together and ready to thickness:
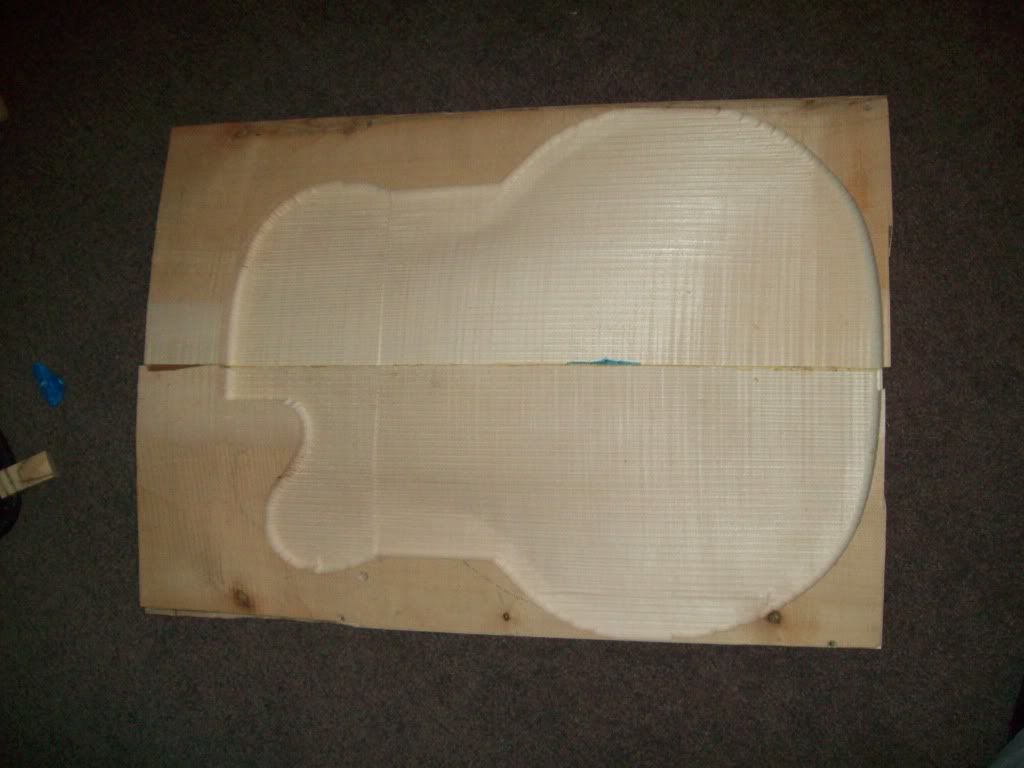
I traced the jig around the underside and cut out slightly oversize.
Rough sanded the join up the middle and very happy with it. The wood even has some tiger stripes!
Garry
-
08-17-2011, 09:52 AM #44
Registered
- Join Date
- Mar 2011
- Posts
- 0
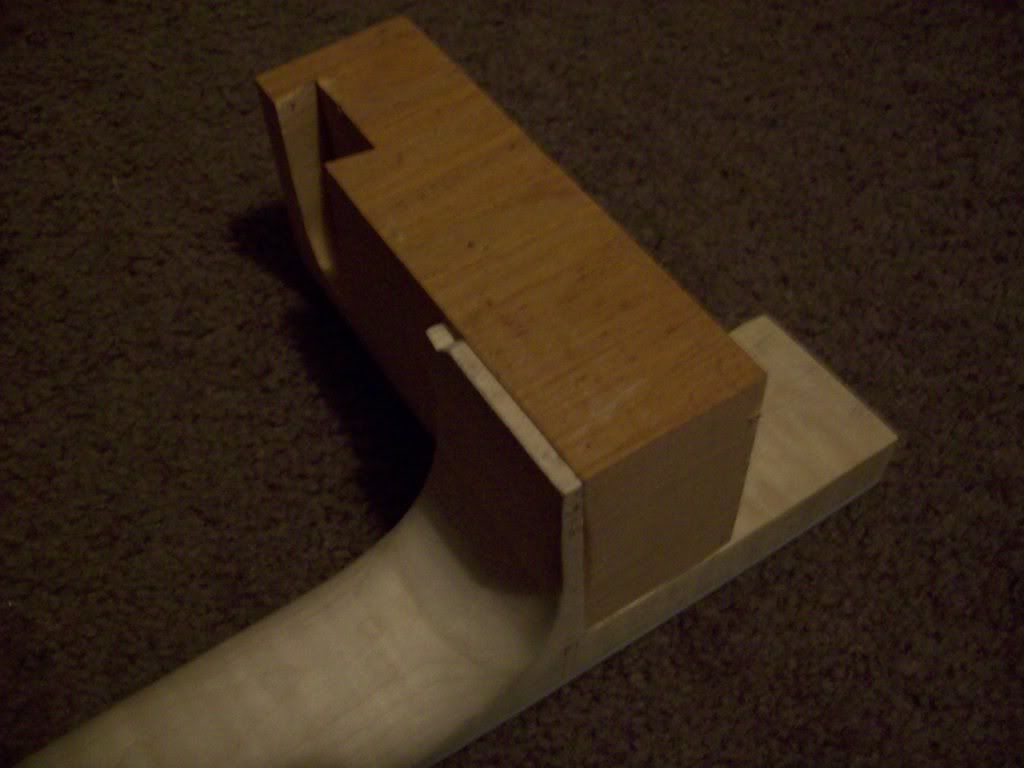
How were you able to achieve the small curve at the tip of the arm?
-
08-17-2011, 10:13 AM #45
Registered
- Join Date
- Apr 2011
- Posts
- 0
The tightest curve was the hardest (obviously). Originally Posted by jagoro
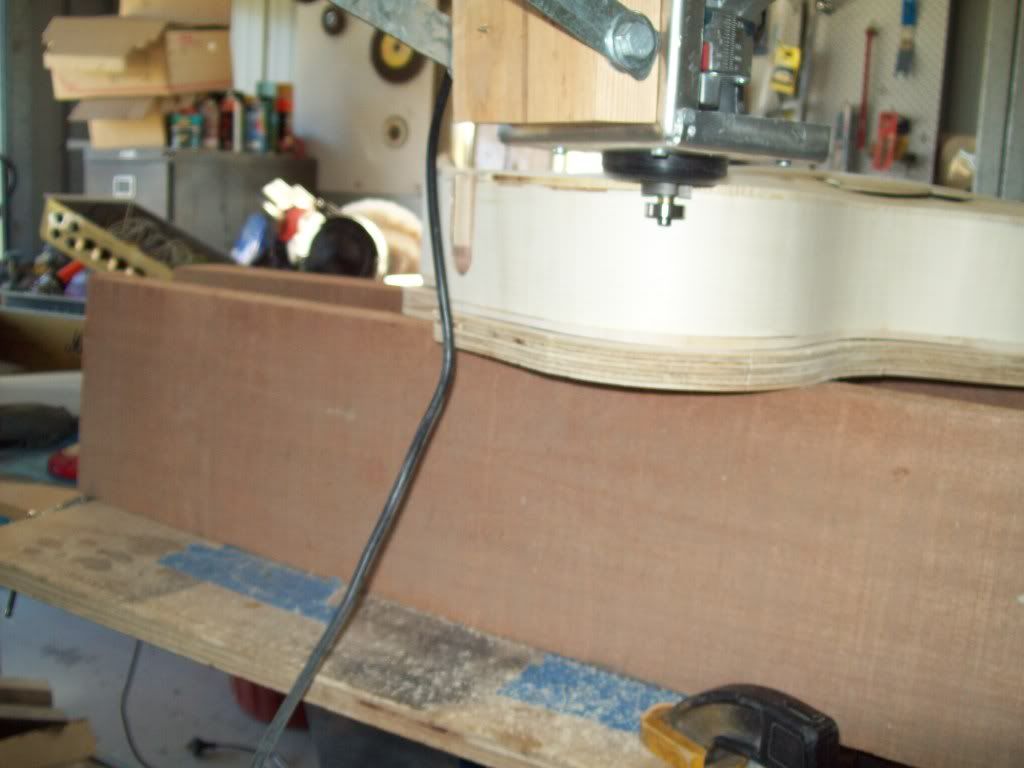
I soaked the sides in warm water (with antimould added) for 30 minutes.
I used a bending iron with a flexible metal plate on top to keep the heat and steam in. You can see it here in the background. I bought it from StewMac.
I used a setting of 6:
You need to keep the surface wet. I use a spray bottle.
You put pressure on the bend and move the wood slowly around over the iron. You will 'feel' the wood 'give' and bend. Take your time.
Garry
-
08-18-2011, 10:24 AM #46
Registered
- Join Date
- Apr 2011
- Posts
- 0
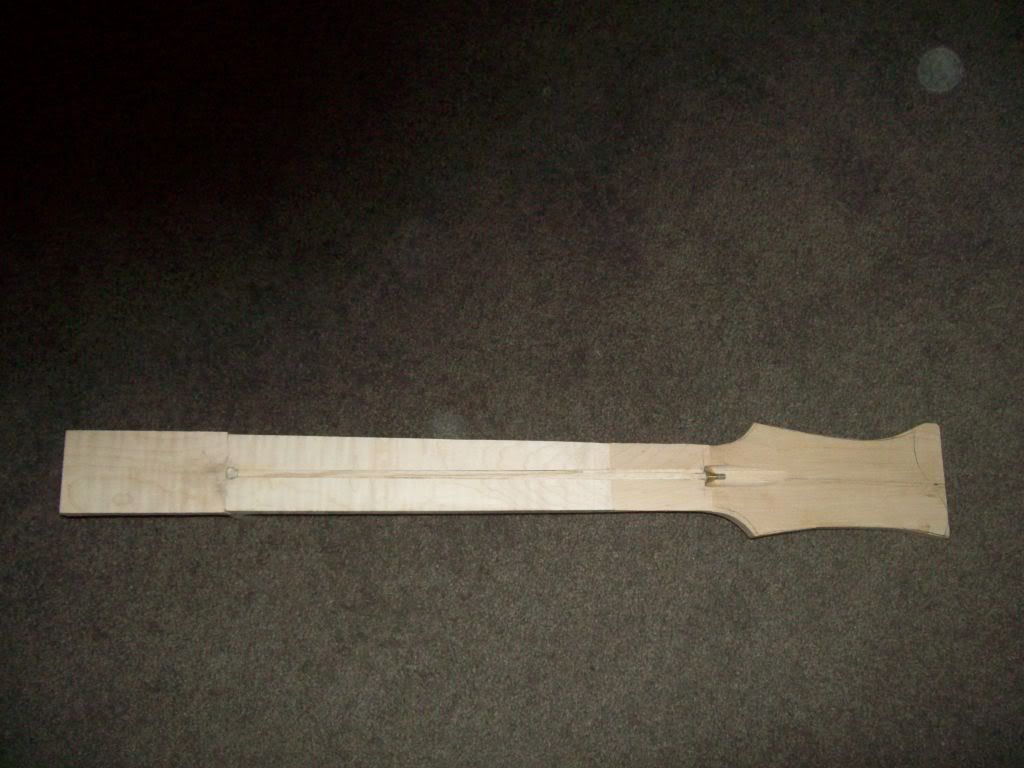
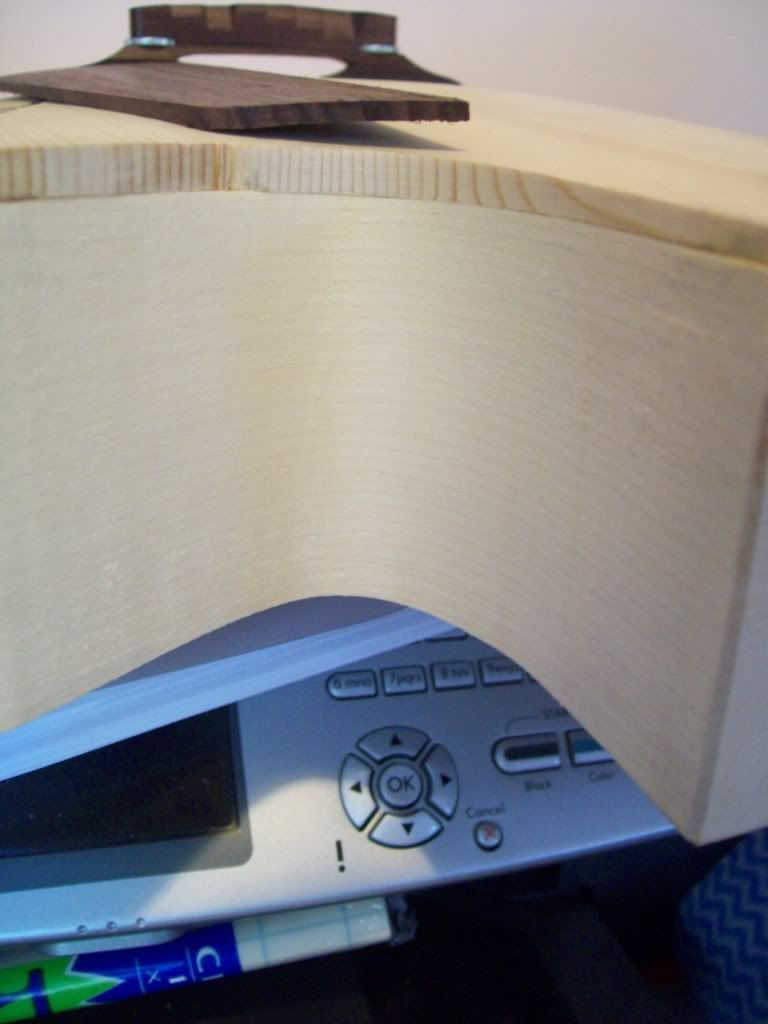
New Cutaway to Body Joint and Mockup
I made the join under the cutaway wider on the Maple bottom plate. The milling is slightly misaligned for each side, but the outside surfaces lines up. I will fix it all up when I thickness:
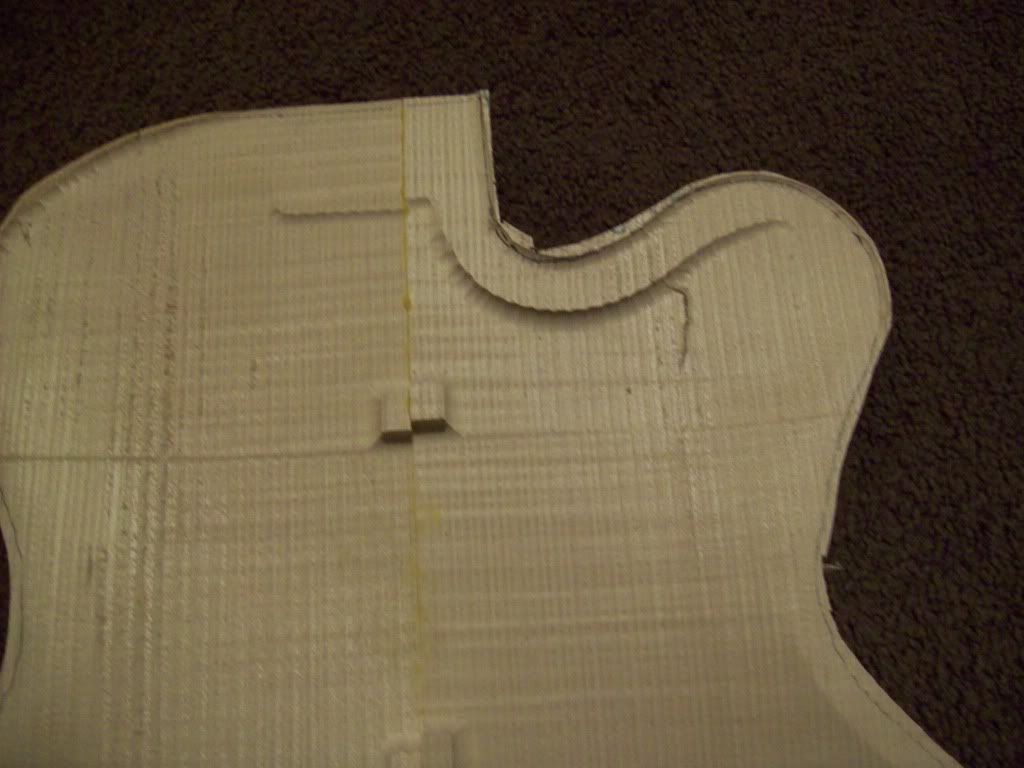
I have decided to go with all Rosewood (or some similar coloured wood at least) for the finger rest and tailpiece. I think it will look much better. Also the bridge is rosewood.
Mockup. You can see the scorch marks that I will sand/scrape off on the sides. I had the bending iron hotter than normal as the wood is pretty stiff and hard to bend:
Should get the top plate thicknessed and onto the sides on the weekend.
Garry
-
08-18-2011, 01:02 PM #47
Registered
- Join Date
- Apr 2011
- Posts
- 0
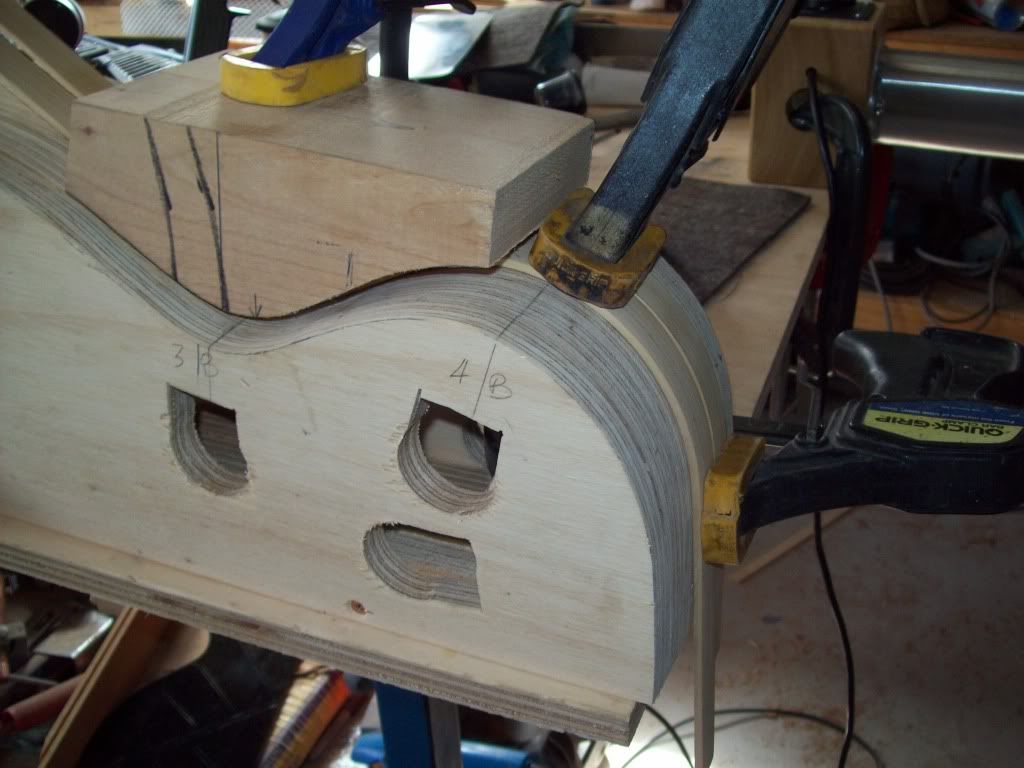
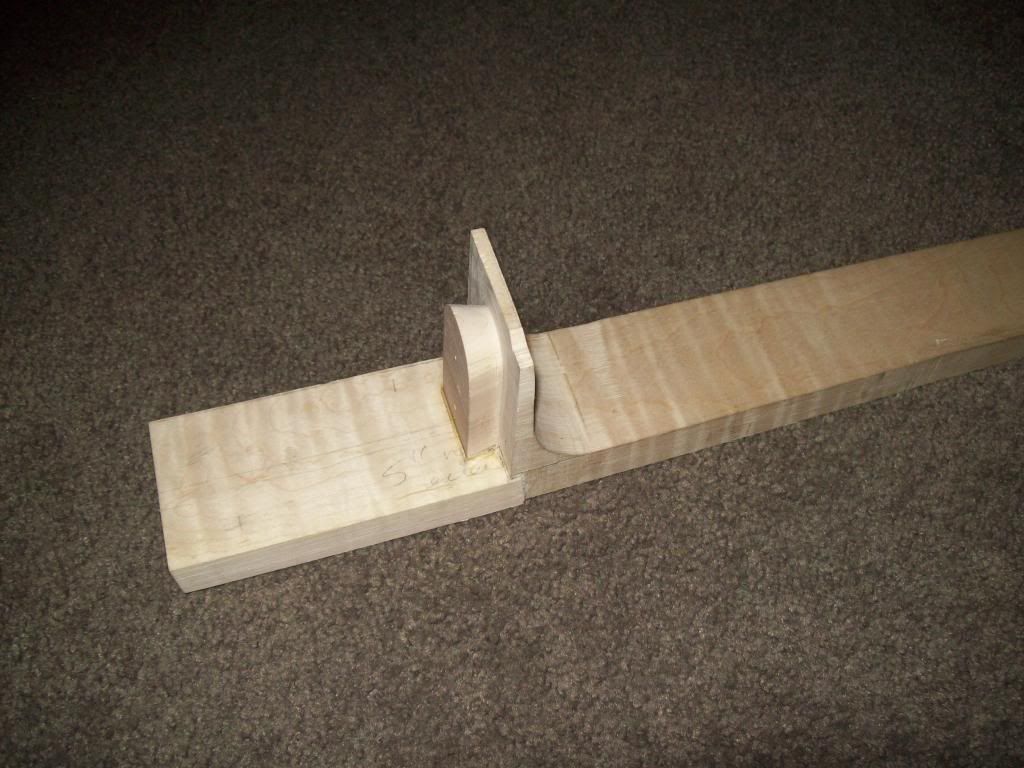
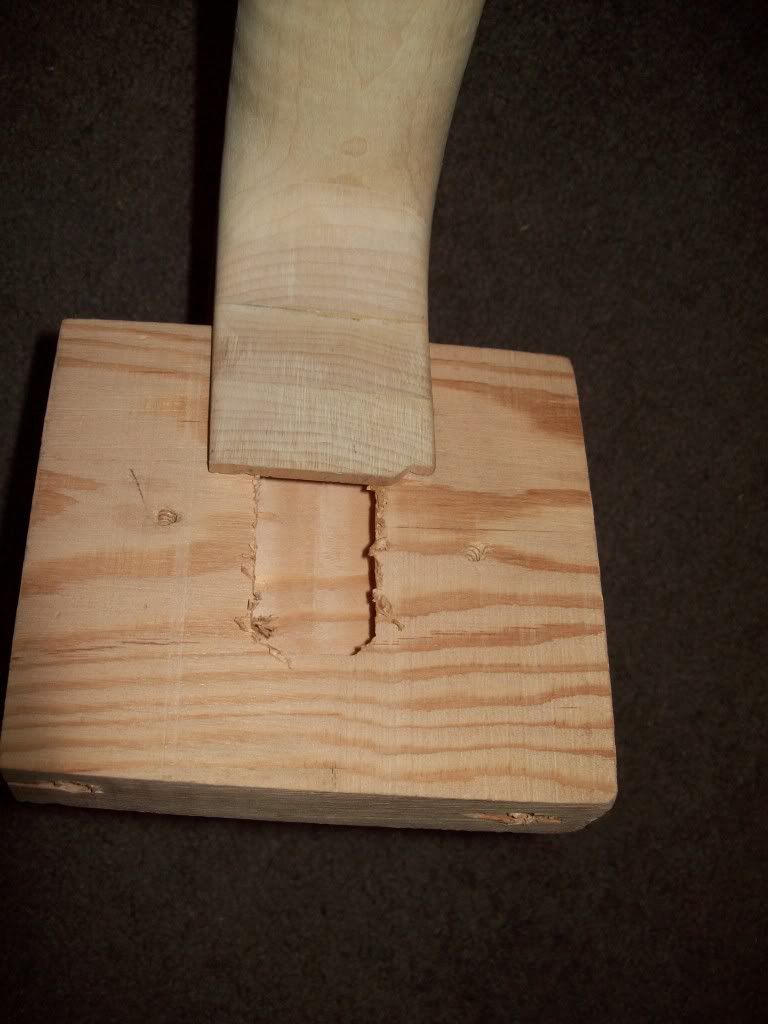
Neck Dovetail Jig
I thought you might like to see how the neck dovetail was done.
Here is the jig. The neck is angled (in this particular instance) at 4.5 degrees by a simple wedge that the flat top surface of the neck contacts. There is a raised strip up the middle that locates into the truss rod rout:
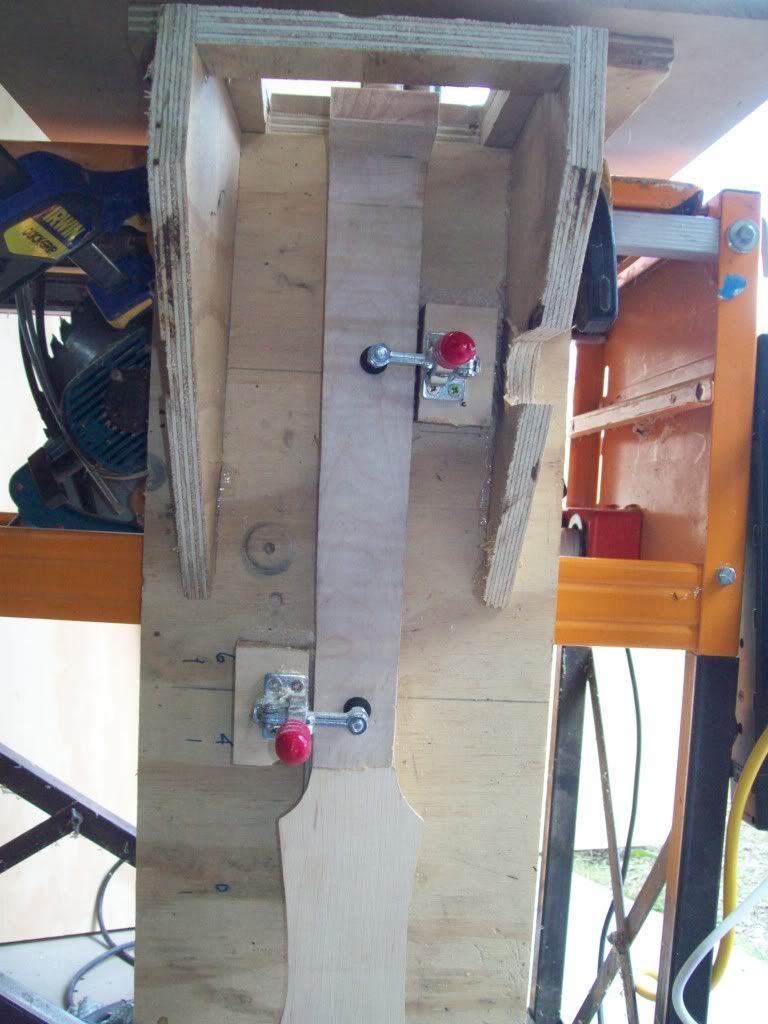
There is another jig surface so that that the end of the heel is surfaced level at the 4.5 degrees:
I inserted brads to ensure that the routing guide did not move:
You then add on the extension:
Garry
-
08-20-2011, 08:33 AM #48
Registered
- Join Date
- Apr 2011
- Posts
- 0
Another Quick Tool and Got Further on The Guitar
Needed to make a tool to push the sides into the bending jig for when I attach the front.
There is probably a name for it, it uses a turnbuckle. I simply routed the shape of the turnbuckle loop into some scrap wood and screwed them together:
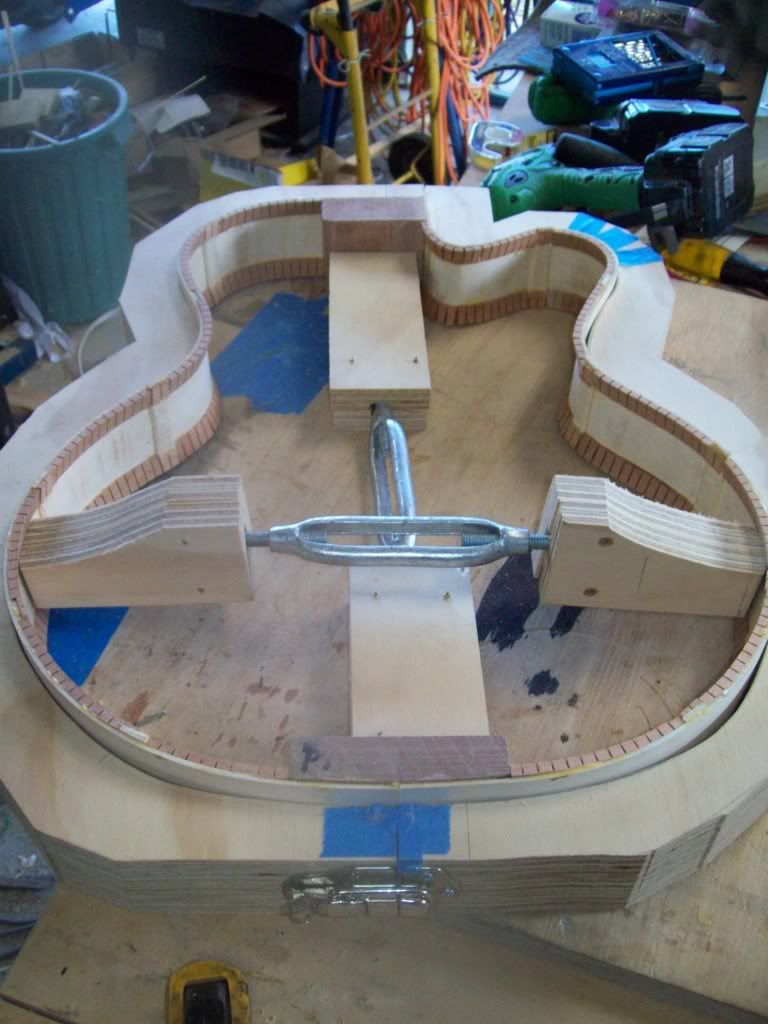
Made up the parallel braces. Pic shows how I made a wedge and slid the pencil along with it to transfer the curve onto the brace:
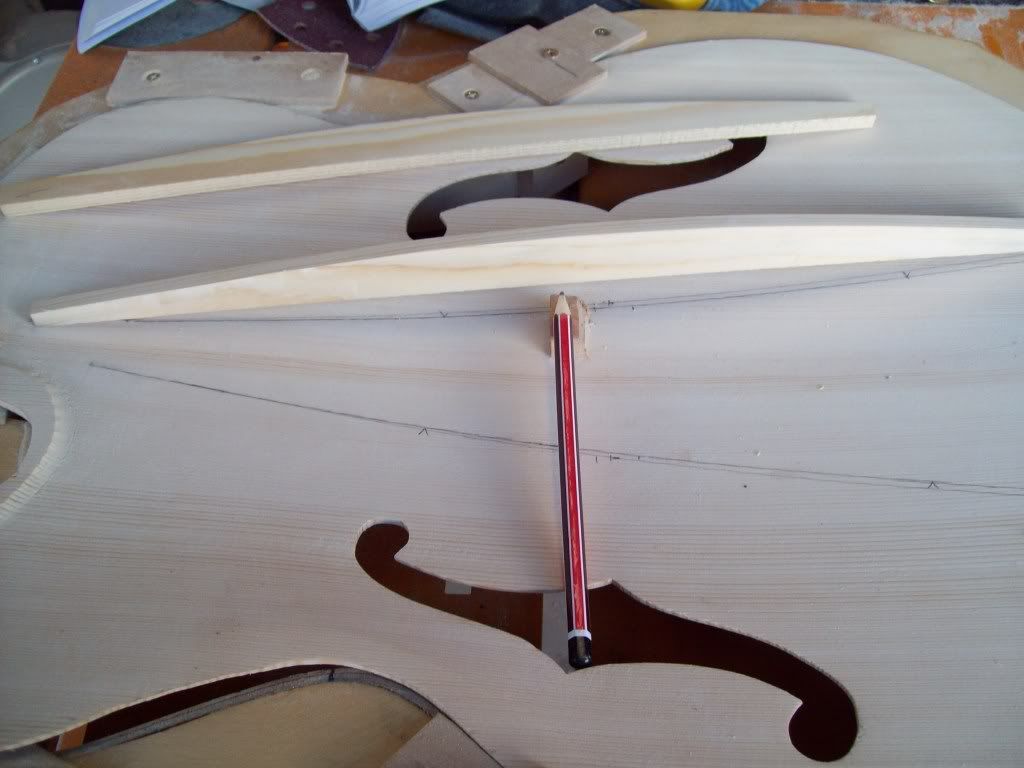
My high tech 'go bars' (I supported underneath):
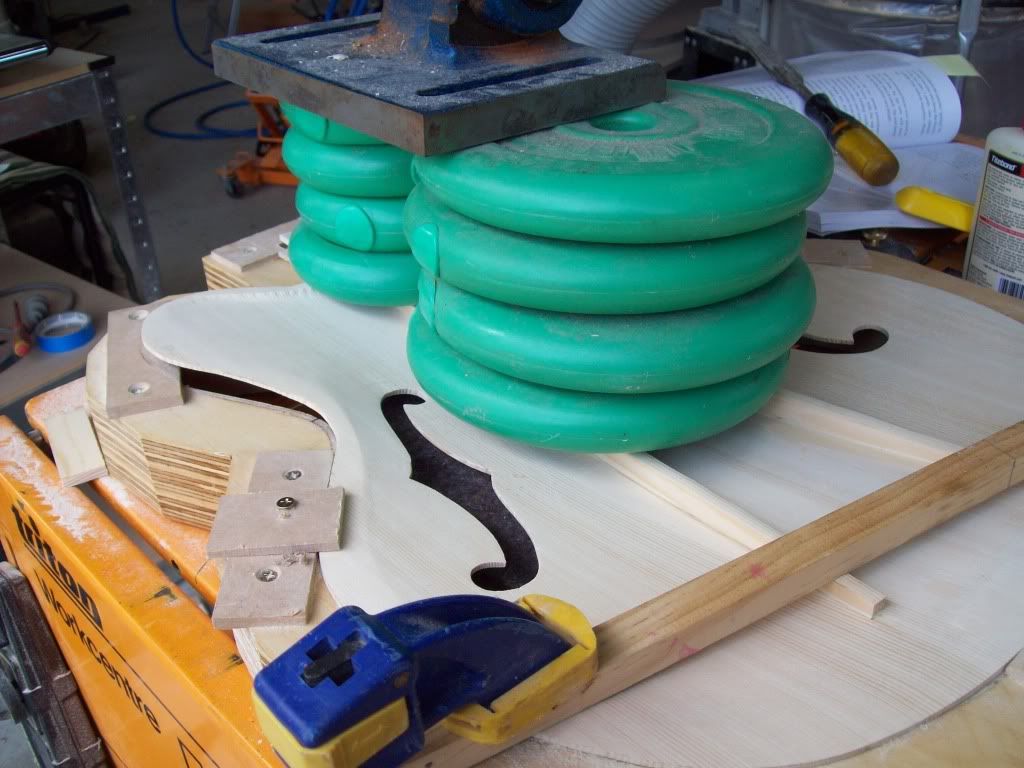
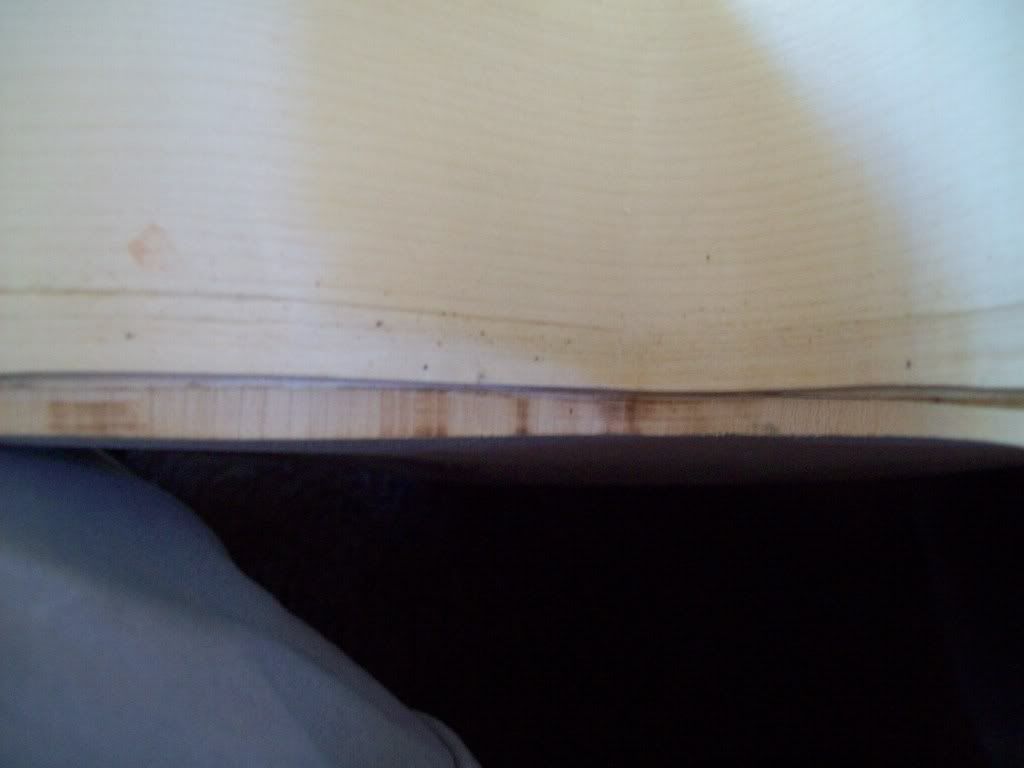
Got the first of the F Hole binding on:
Got the surface of the Back Plate roughed in:
Should get the front on tomorrow. Then need to thickness the Back Plate.
Garry
-
08-21-2011, 03:09 AM #49
Registered
- Join Date
- Apr 2011
- Posts
- 0
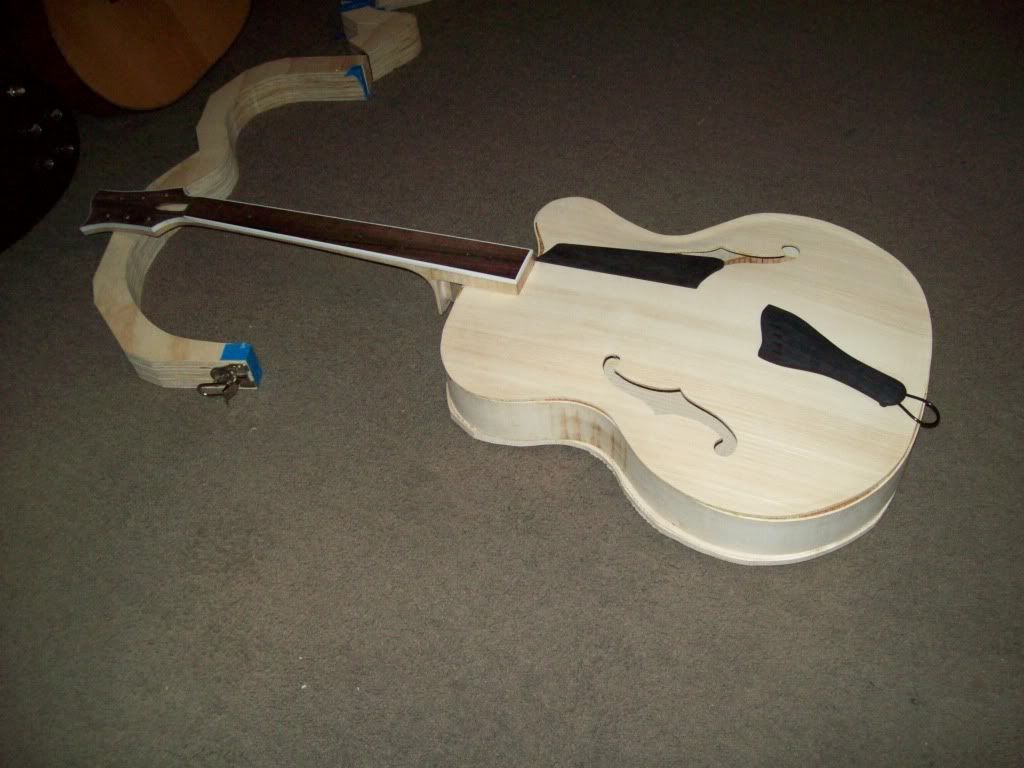
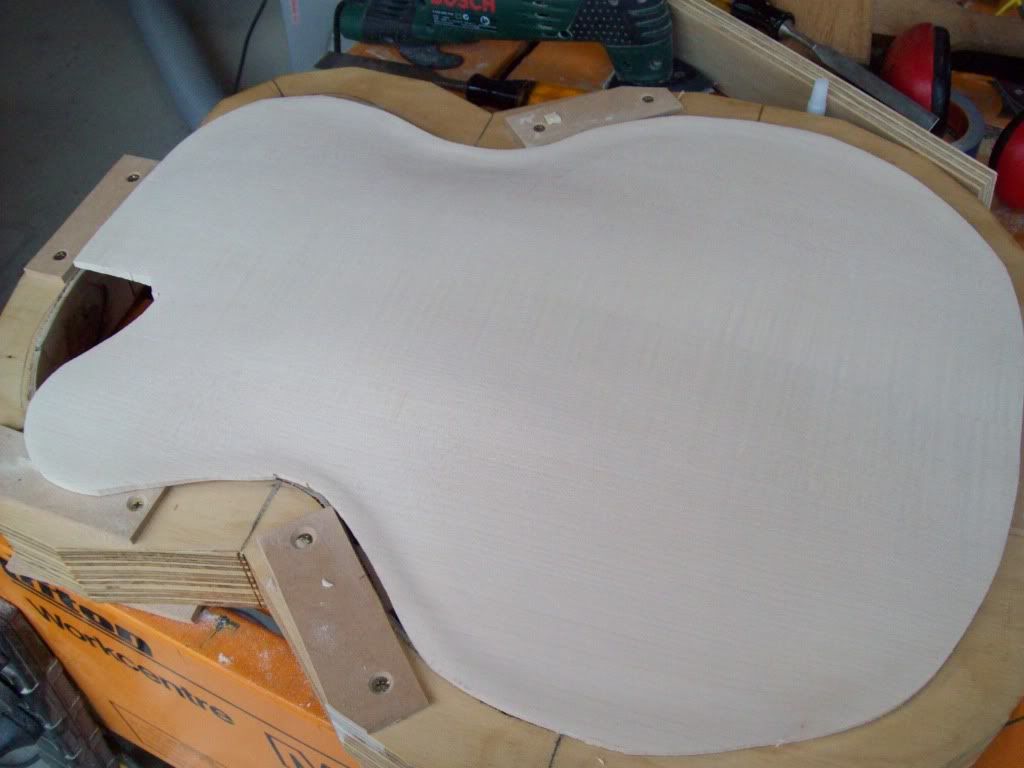
Binding On and Top Plate On
Got the binding finished (well super glued on) and the Top Plate on:
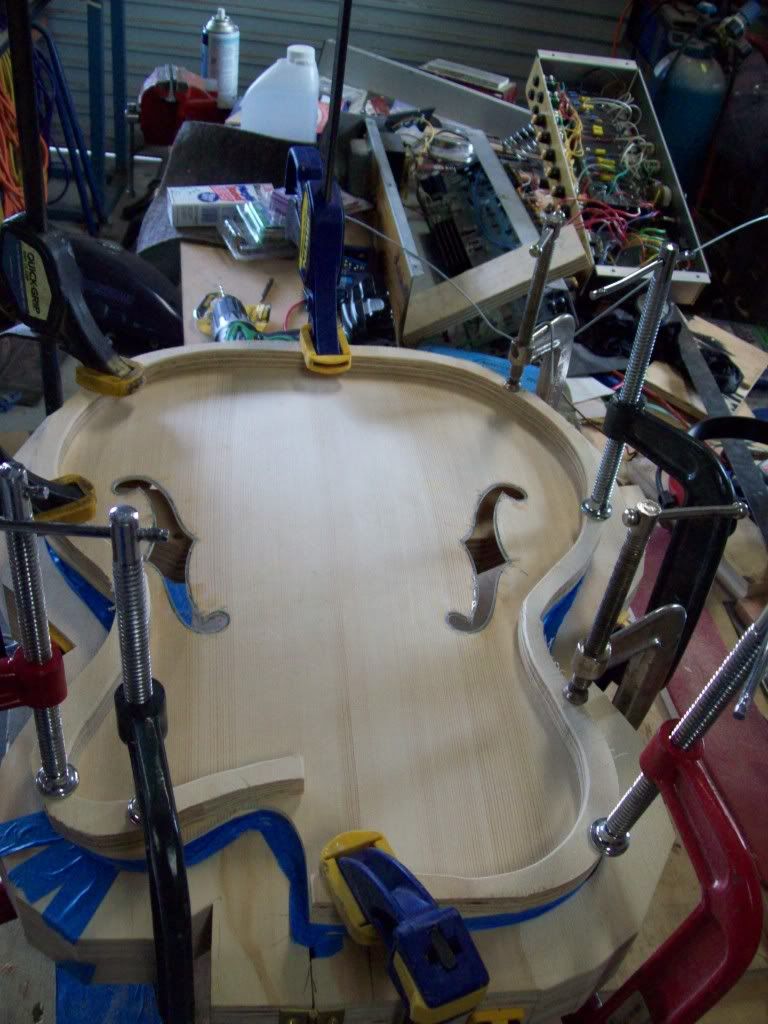
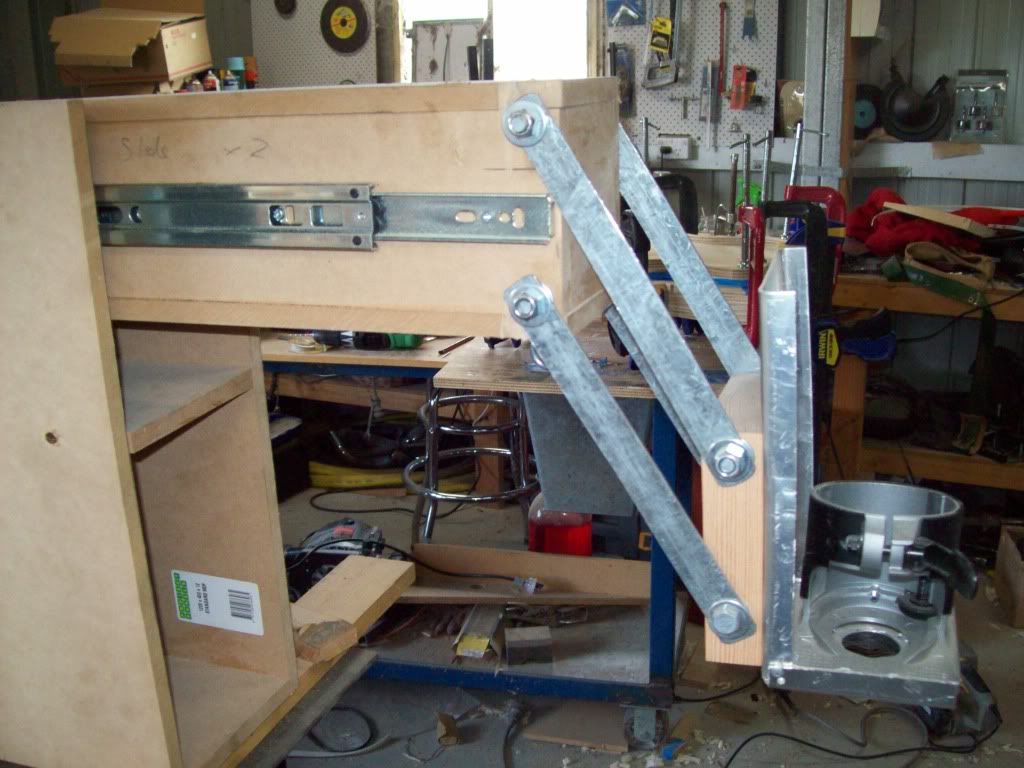
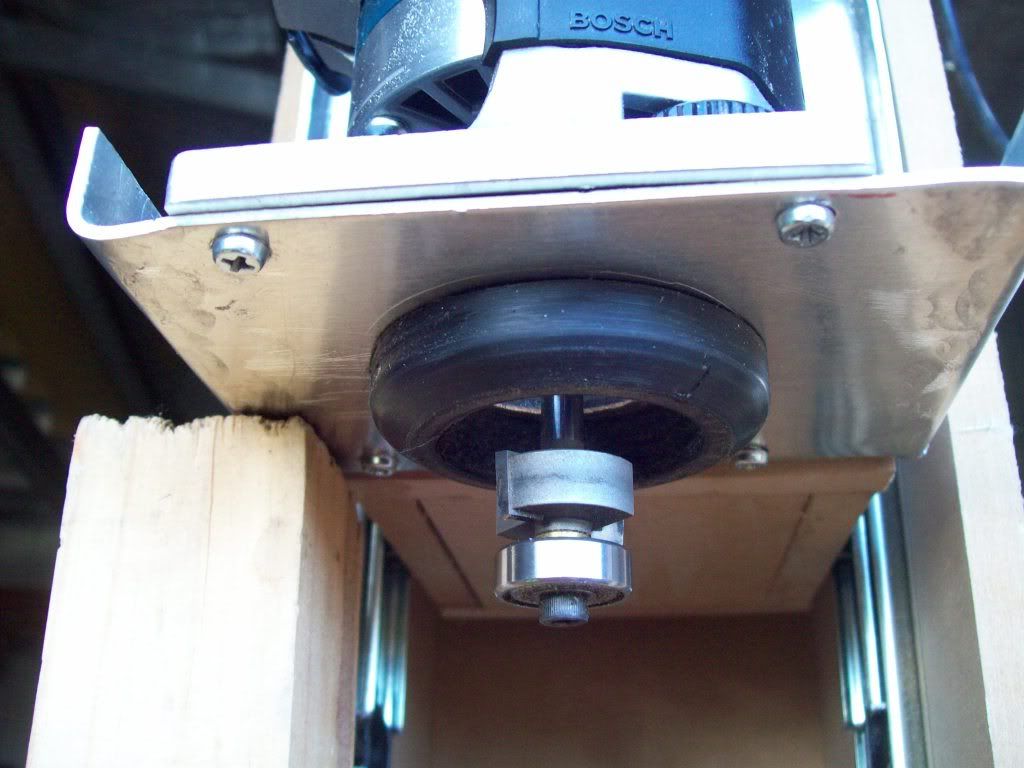
Also pics of my binding router setup I made after my 2nd acoustic. I was not happy with the binding and purfling on the acoustics. It uses the bosch router I also have on my CNC and sits on a VERY heavy duty turntable I made to bend metal to made 'filigrees? Curly steel strips' for metal pergolas and garden arches etc. Router can move up and down, in and out and swing as well. All whilst staying at right angles to the table and guitar:
My thinking is to now do the neck dovetail while the back is flat without the back plate on. Will make for a simpler routing jig and if I stuff it up, I will not lose the back plate as well. :violin:
Garry
-
08-21-2011, 05:06 AM #50
Registered
- Join Date
- Apr 2011
- Posts
- 0
Front Plate On
Top glued on:
Got about a 3rd of the way through thicknessing the back plate.
Need to make a dovetail jig for the body, so not much will happen until next weekend.
BTW, I tend to leave most surfaces alone until final finishing (where I can). This means that I do not continually correct knocks etc and make the surfaces VERY thin. A hard lesson I have learnt!
Garry
-
08-22-2011, 09:45 AM #51
Registered
- Join Date
- Apr 2011
- Posts
- 0
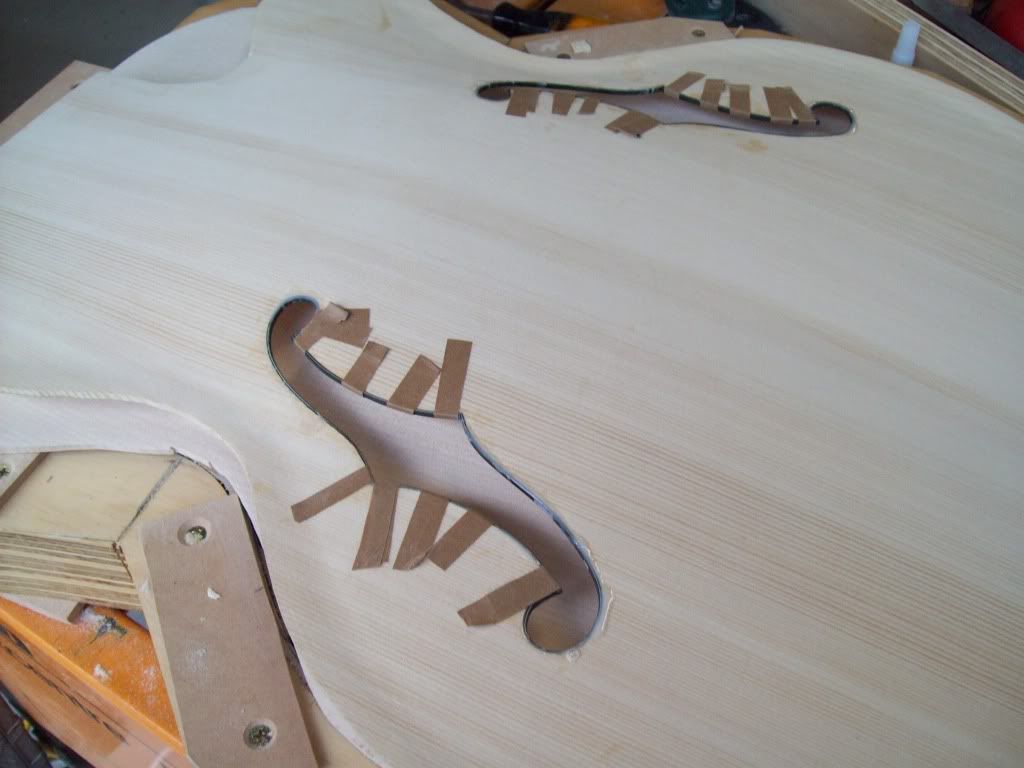
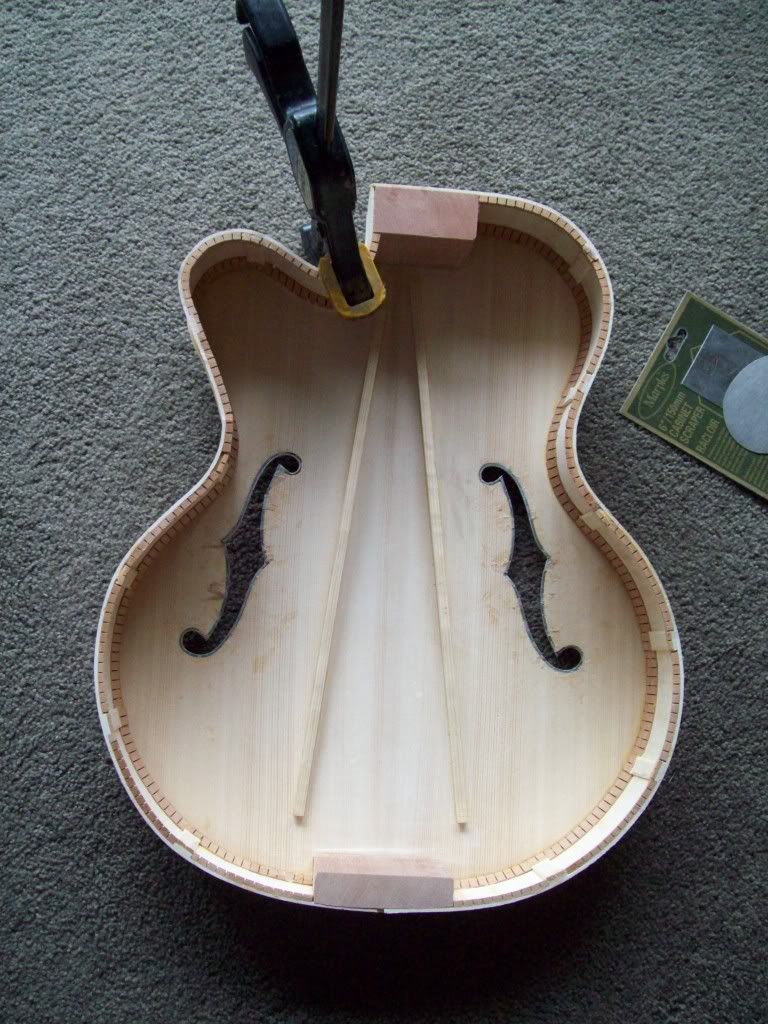
Scraped the F Hole
Cleaned up the F Holes a bit. Very happy with my first attempt at 'tight bending' binding/purfling. Trick is to spray the binding with water and keep it moist, or it will break a layer at least. I used a heat gun:
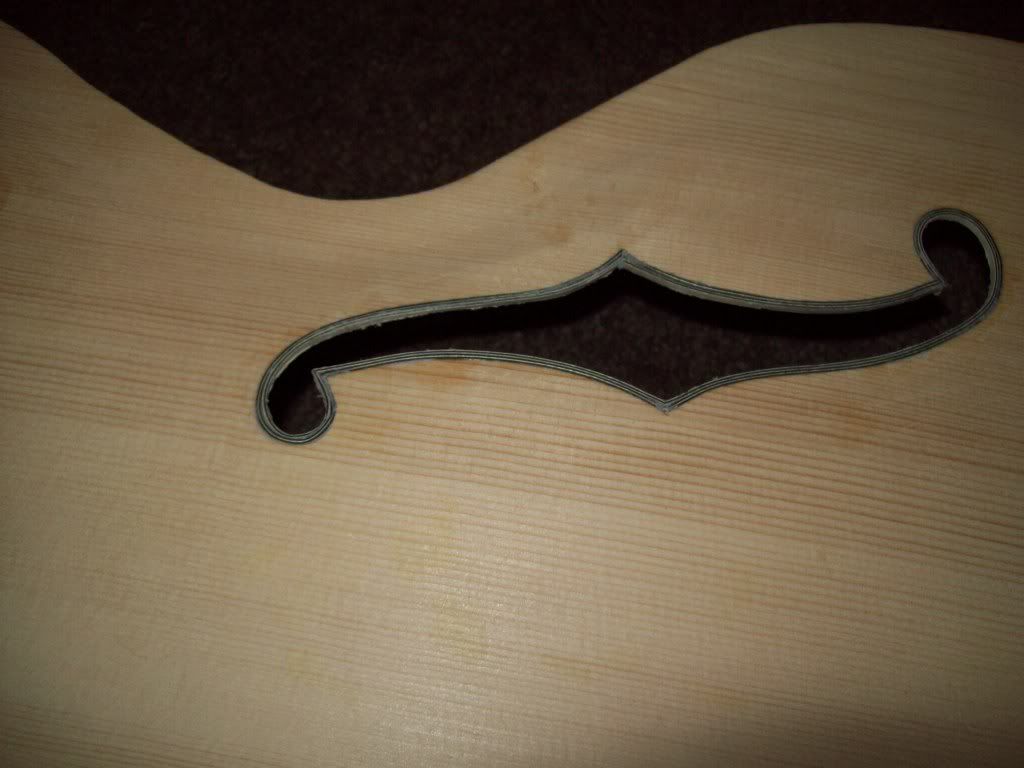
You do the '2 curls' that stop at the centre 'v', then you do the other 2 bits.
I think you should do all layers (if more than one. I did 2 layers - BWB then WBW) of the 'curls' first, then do the other layers. This will allow you to do a good, even, mitre joint. Remember to leave the ends of the curls long, so you can do the mitre at the sharp 'point' of the curl.
-
08-23-2011, 09:38 AM #52
Registered
- Join Date
- Apr 2011
- Posts
- 0
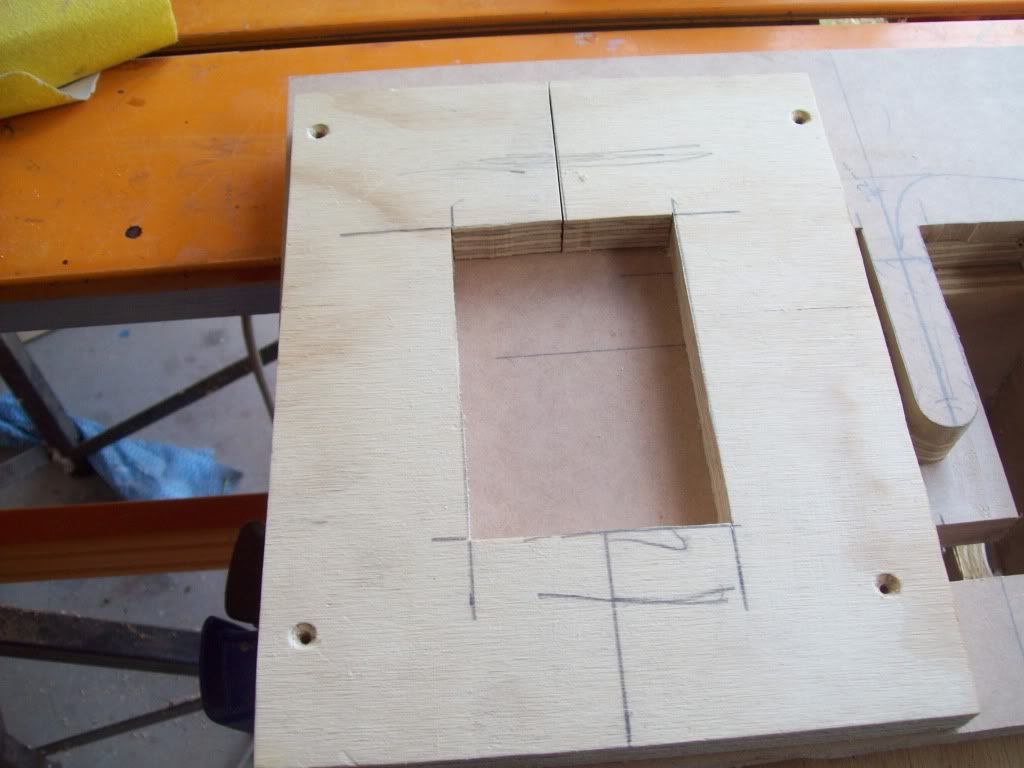
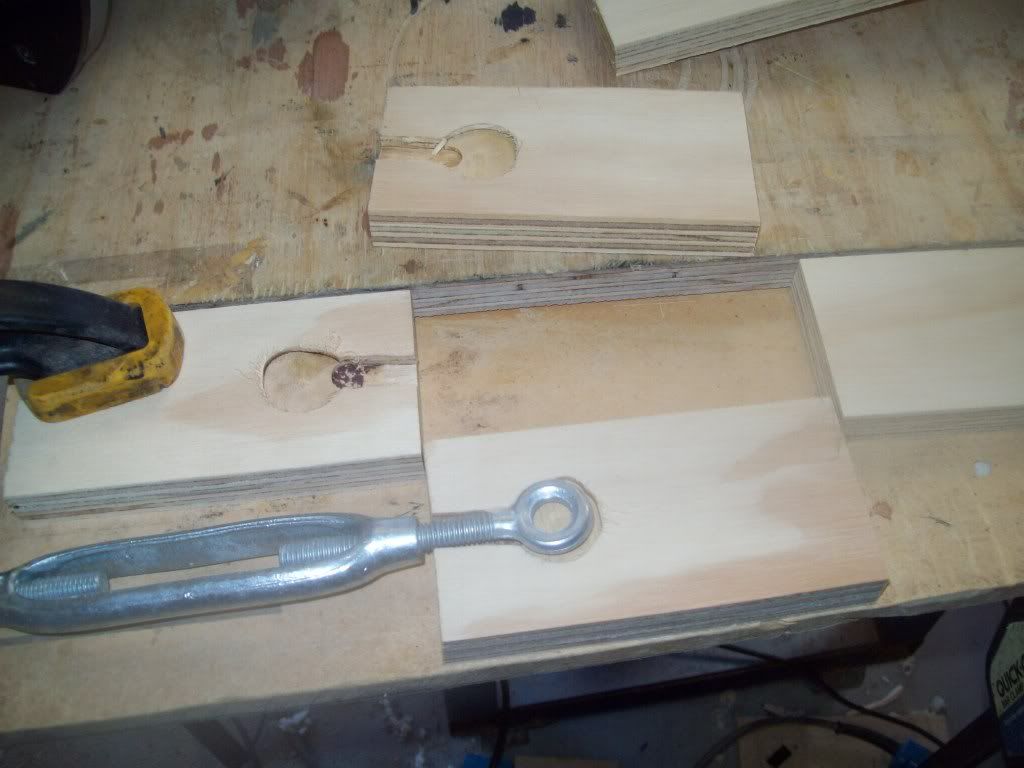
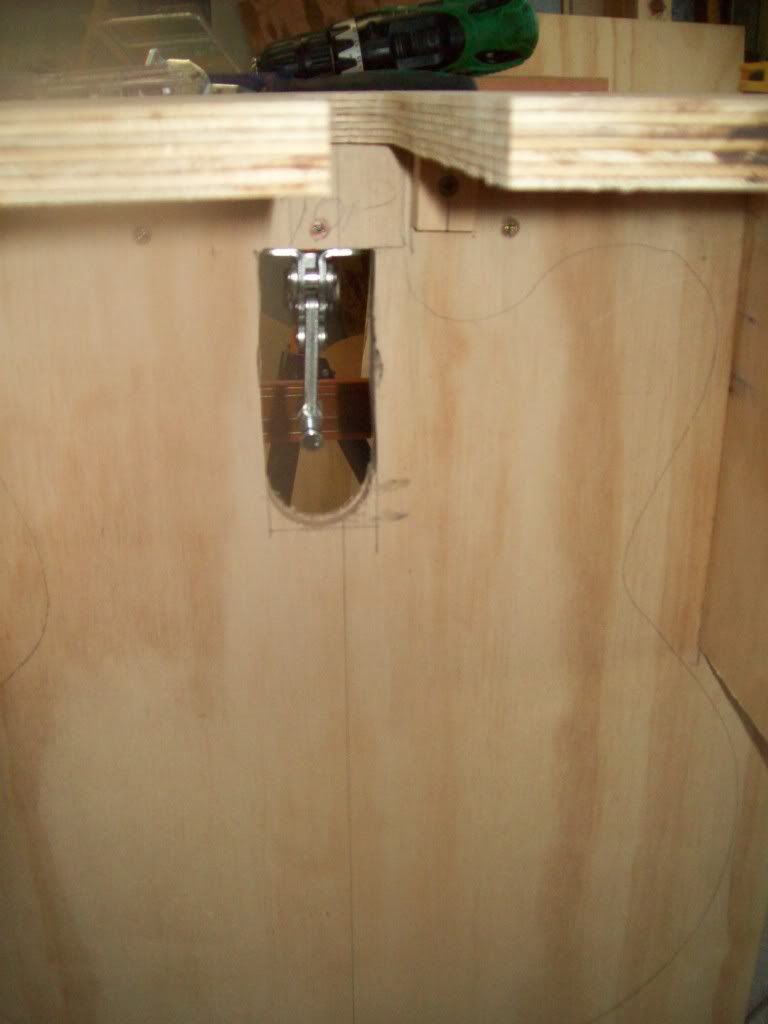
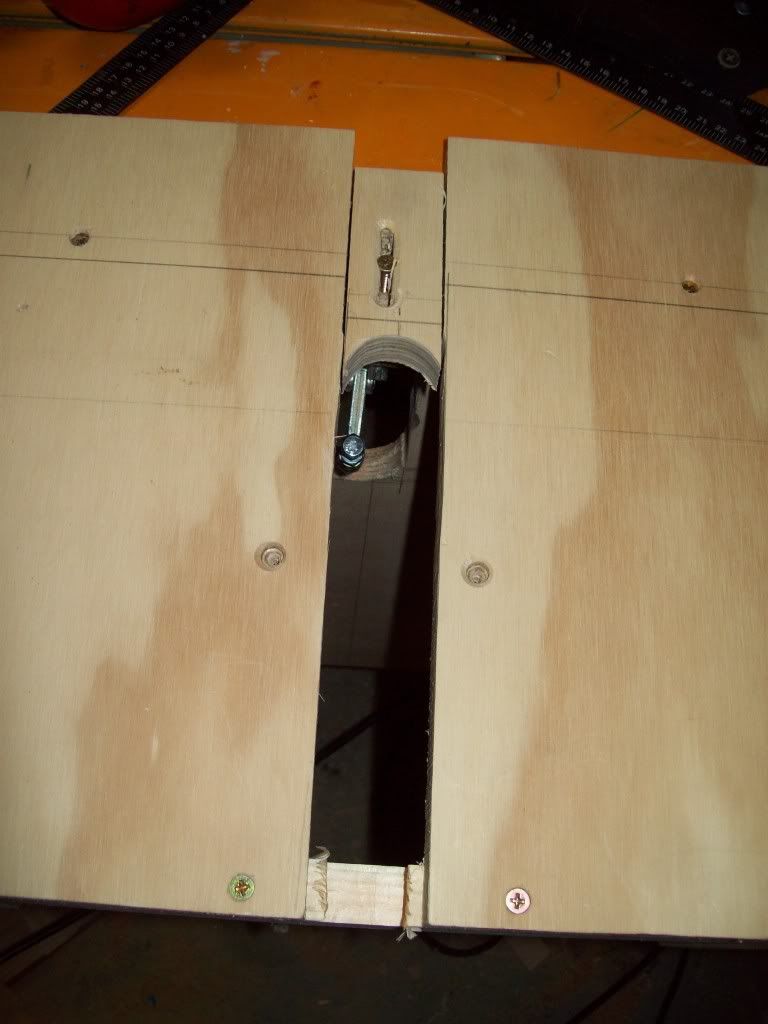
Started the Body Dovetail Jig
I like to make things as simply as possible. Squared up the top and sides of some ply and glued/screwed the sides on.
Made a slot slightly undersize in the top of the jig (only clampled on as yet) and screwed some scrap onto it. Did a test cut and widened the slot until I had a tight fit on the neck:
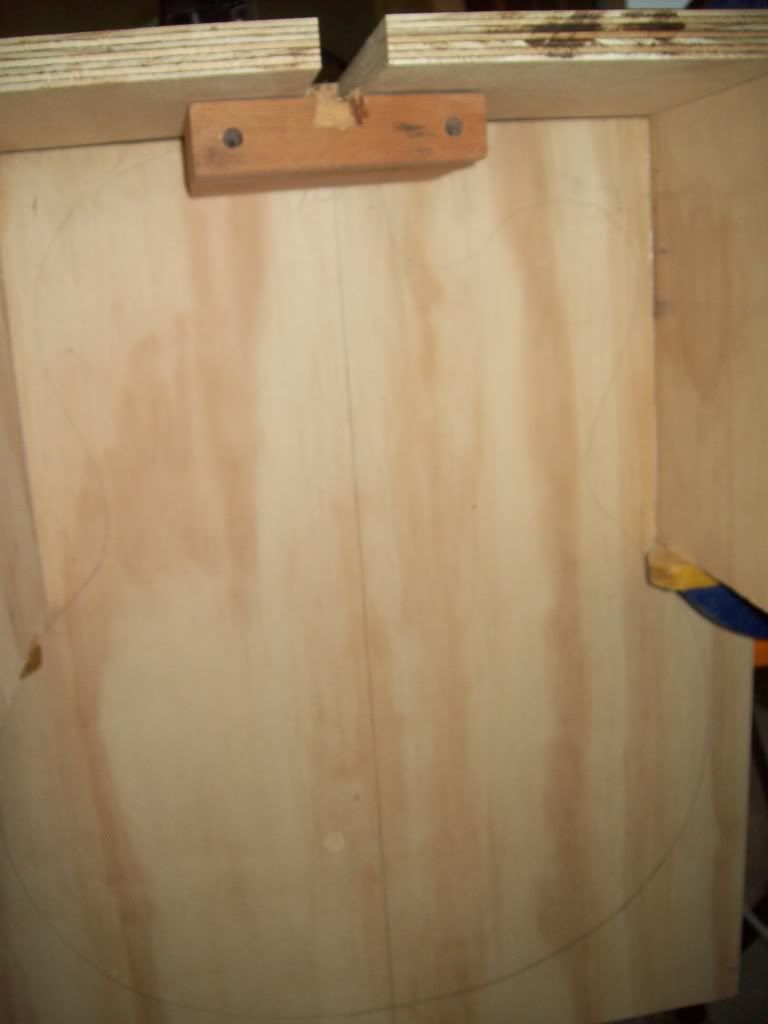
I will now round off the end of the slot and put a batten across the front edge for strength.
Will then position the top of the jig so that I get the correct depth and position of the dovetail in the body.
Will also make up some clamping, positioning arrangement for the guitar body.
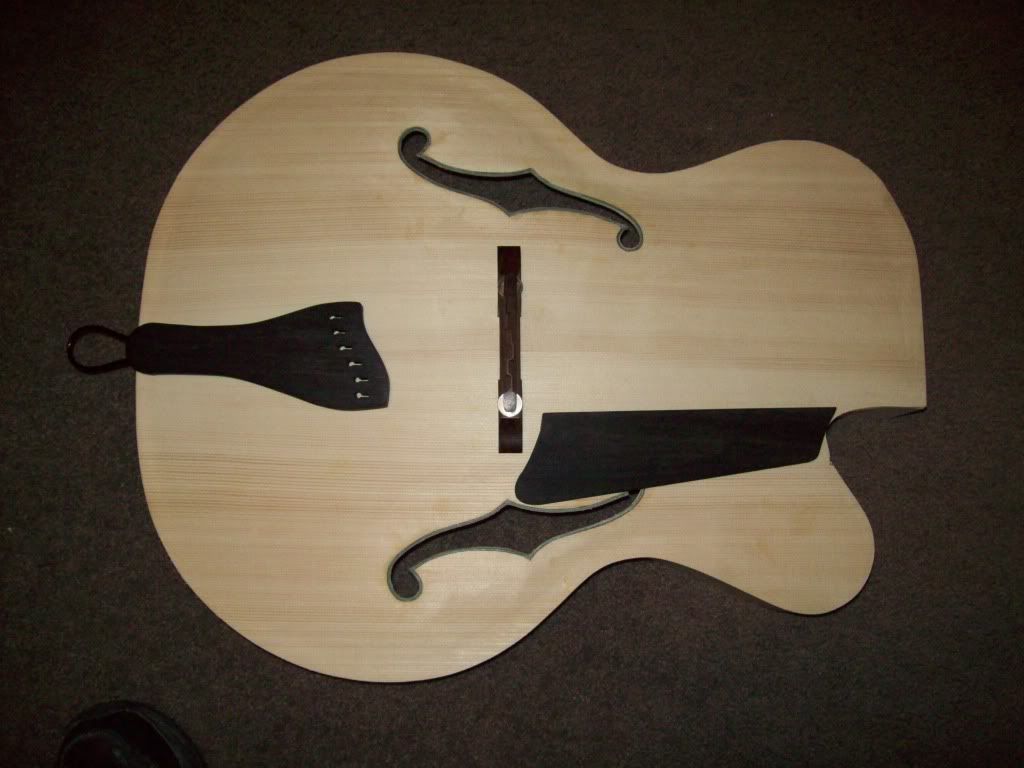
Update: Also trimmed the edges of the top plate to get an idea of the final shape. VERY happy.... I will use all rosewood though, instead of ebony mixed in:
Garry
-
08-24-2011, 09:54 AM #53
Registered
- Join Date
- Apr 2011
- Posts
- 0
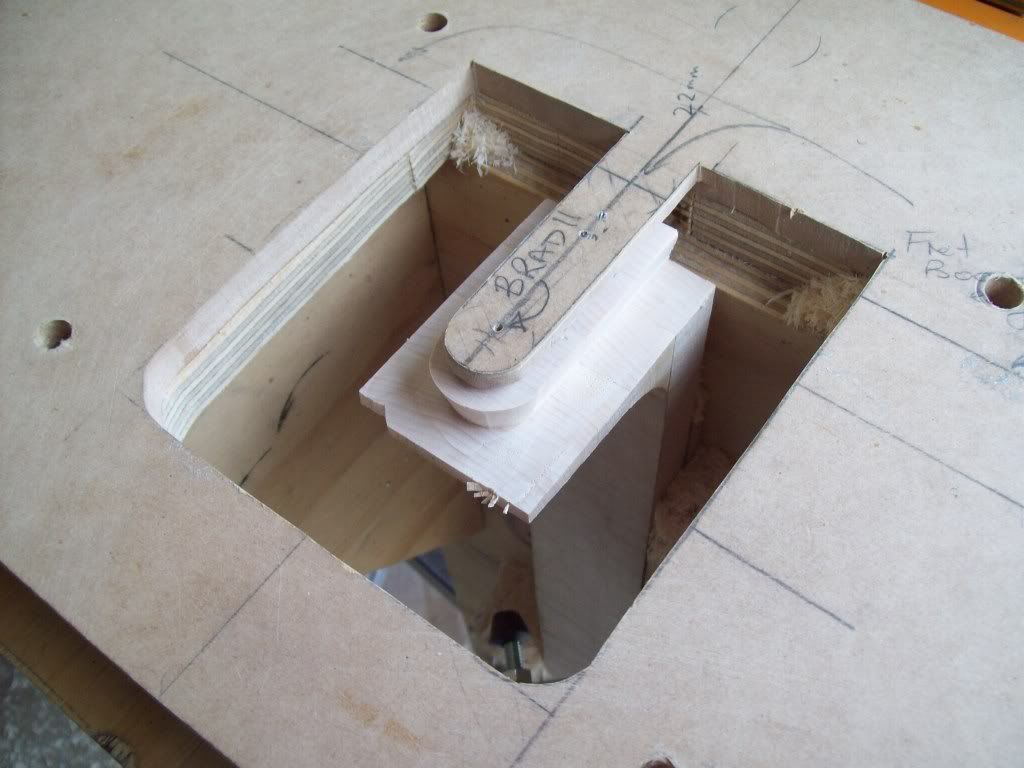
Got the Body Dovetail Jig Adjusted
Located and adjusted a 'stop' that locates the edge of the guitar and aligns it with the edge of the neck so that I get perfect alignment.
Also made the jig slot longer and rounded it off, so that I can just get the neck to the bottom of the dovetail slot and added a integral clamp:
Have a few more additions to the jig - to hold the body in perfect alignment - before I try it in anger...
Then will mark the neck extension and work out whether I need to go deeper into the body (or more likely, shorten the neck's dovetail) to:
1. Get the neck down onto the body, and
2. Get the correct action height of the neck
Edit: Just realised that I need to go shallower as the body is wider than my test piece! Decided I will make the slot adjustable in length (ie depth).
Also will buy a rebating plane and do a better joint on the neck next time...
Garry
-
08-24-2011, 11:29 AM #54
Registered
- Join Date
- Apr 2011
- Posts
- 0
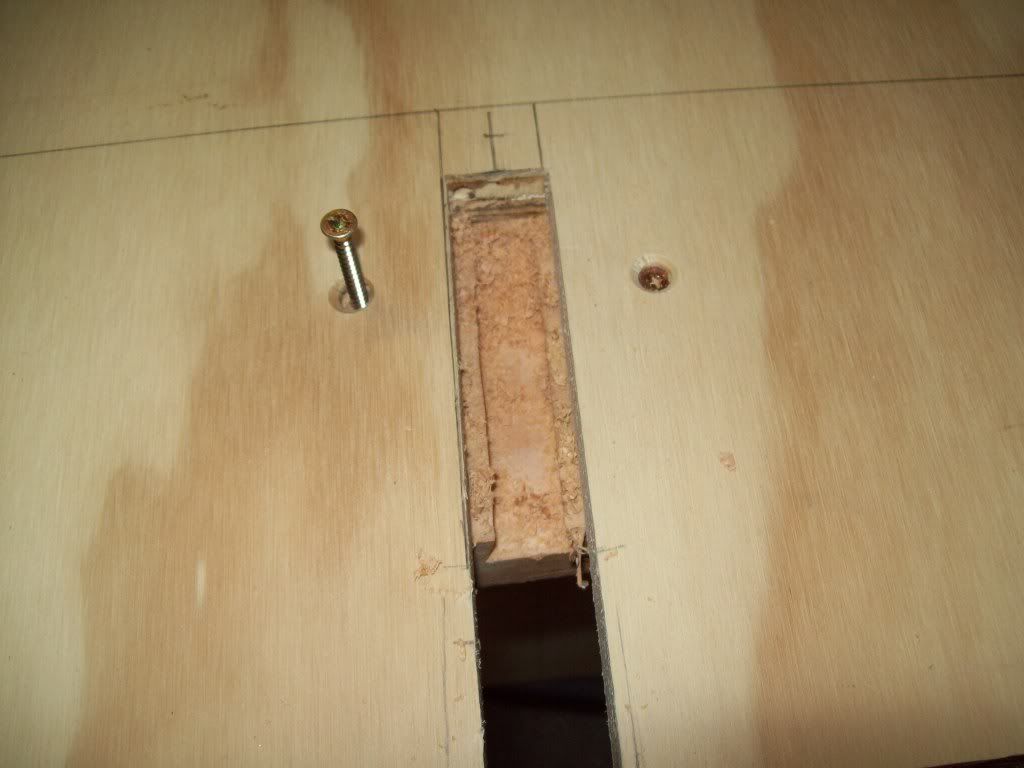
Adjustable Depth Jig
Added a front batten, quick run through the bandsaw, and now adjustable:
The cut in the batten gives me a starting depth for the dovetail bit on the router when I reuse the jig.
Garry
-
08-25-2011, 09:38 AM #55
Registered
- Join Date
- Apr 2011
- Posts
- 0
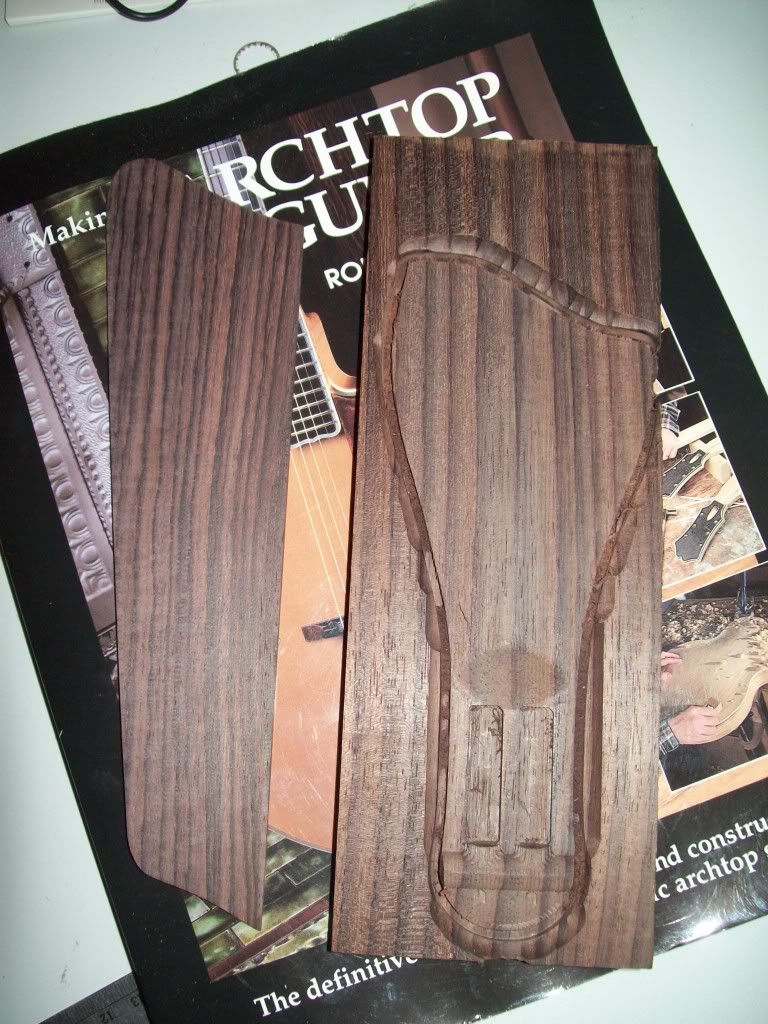
Indian Rosewood Tailpiece
I like to do a little bit every night. It is my hobby and lowers my blood pressure (normally!). I do not profess to be a luthier, as I am still trying to improve my joints etc. I do not sell my work.
I received some rosewood and milled up the underside of the tailpiece:
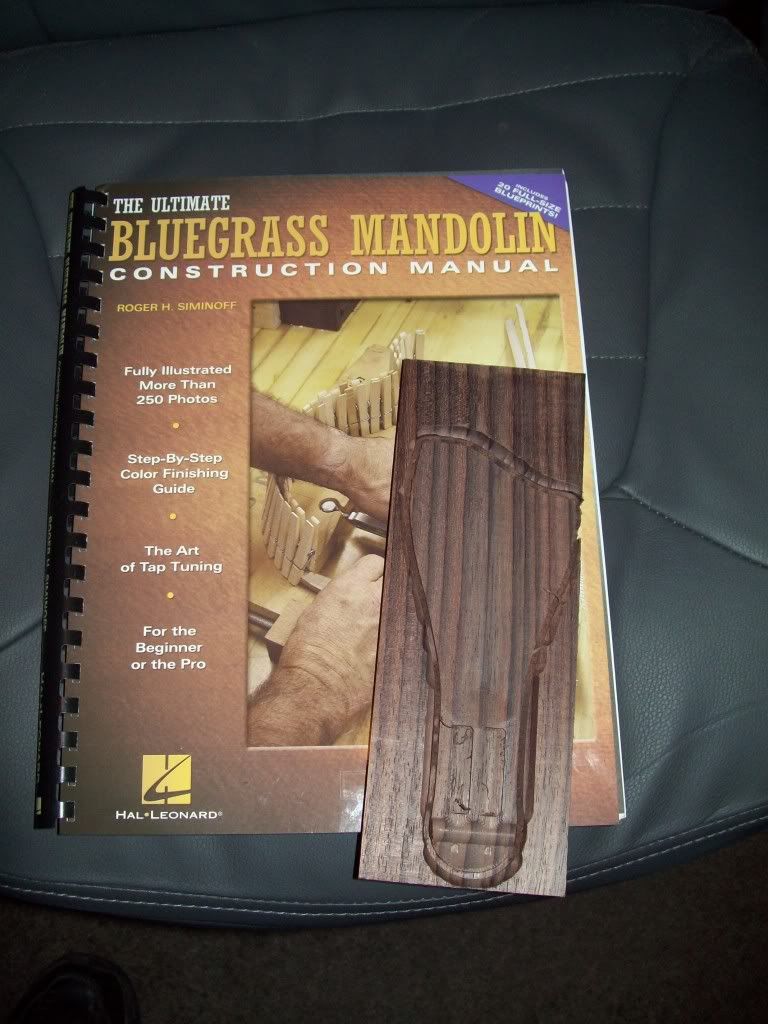
I also received a book on what may become my next project. I want to use my mill more....
Garry
-
08-26-2011, 08:42 AM #56
Registered
- Join Date
- Apr 2011
- Posts
- 0
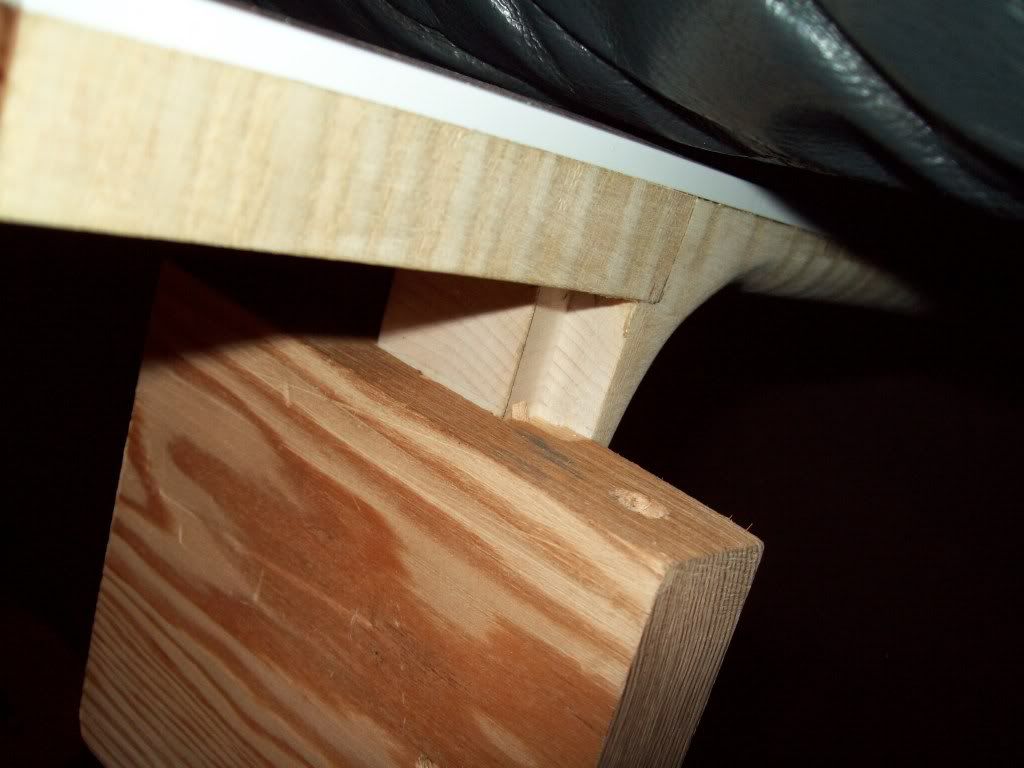
Body Dovetail Done
After test cuts, actually cut the body. I sanded the front edge to 120 grit before this to get rid of some marks.
The adjustable depth worked beautifully, as I need to go down 5mm to get the neck extension onto the body:
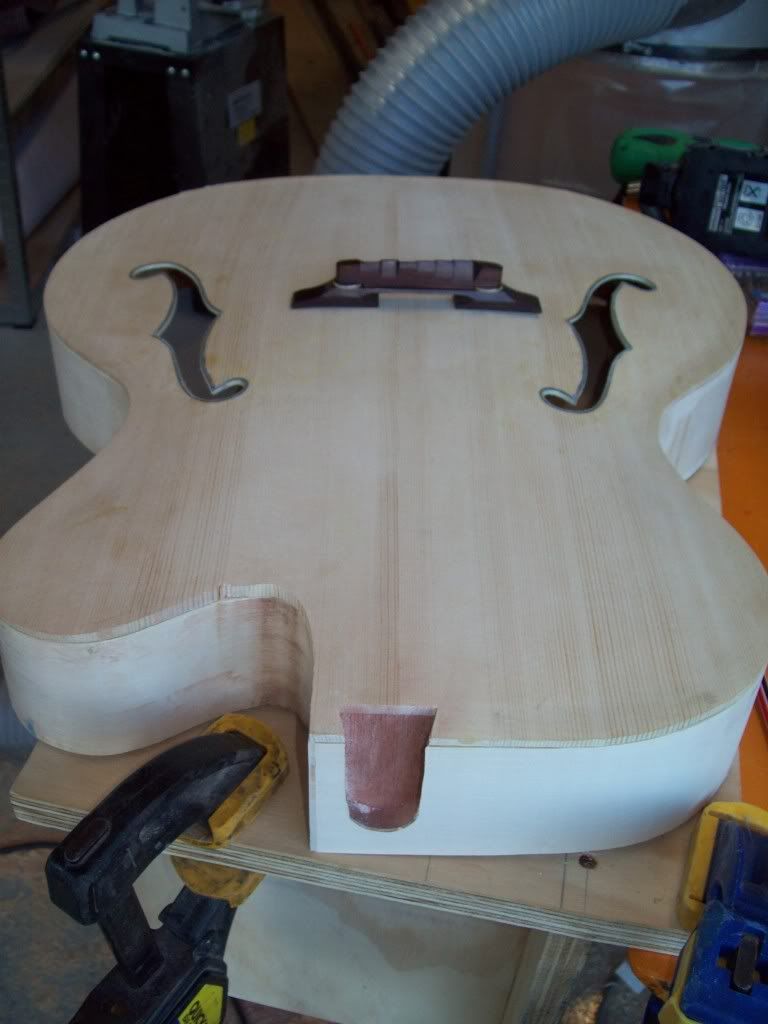
5mm difference from fretboard to bridge (without frets). Decided to take it down 3-4mm to allow a bit of cleaning up of the top surface to neck joint:
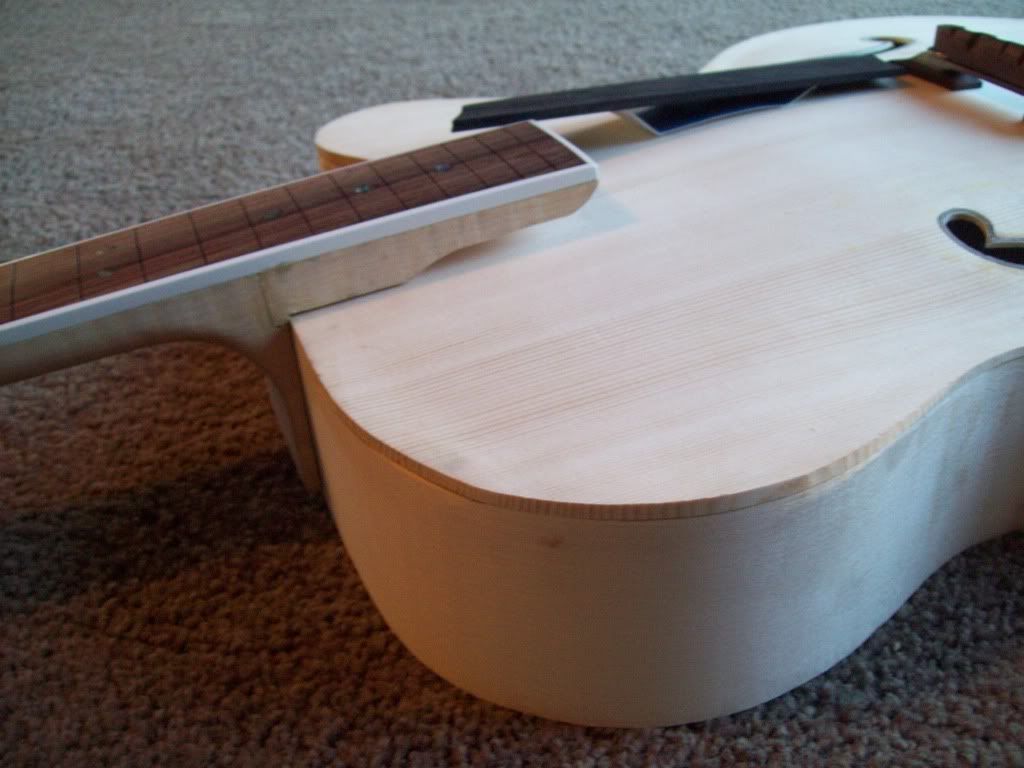
Mock Ups:
Back to the back plate thicknessing tomorrow. If everything works out well, I will do something about the crap joint in the neck extension (Abalone/Pearl inlay? Rosewood inlay? )
Garry
-
08-27-2011, 07:53 AM #57
Registered
- Join Date
- Apr 2011
- Posts
- 0
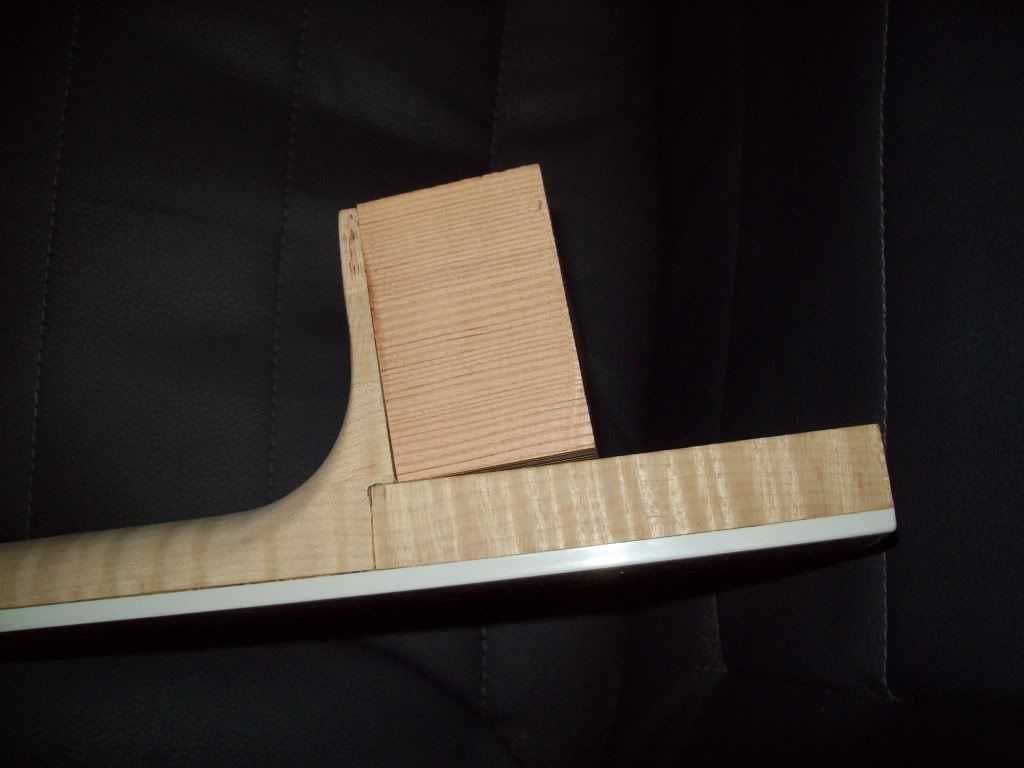
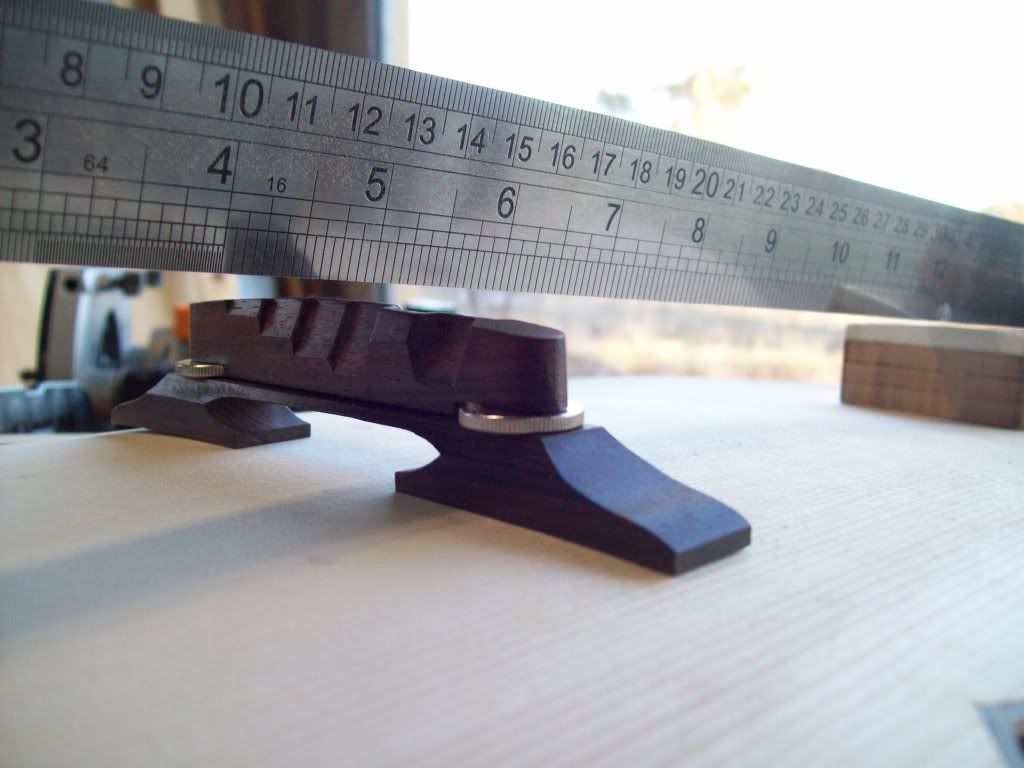
Rosewood Accessories
Whipped up a rosewood fingerrest and had already started the tail piece. I will do the top of the tail piece when I have ensured that the position of the string holes is correct. I will use the maple (now black from stain) tail piece for setting up. These are straight off the mill:
Before I adjusted the neck to body dovetail, I cleaned up the very tight curve on the cutaway as I can easily get at it now and it needed me to use a small drum sander on a drill press. The lack of the back plate and the current flat surface made the sanding vey easy.
The rest I will do when I get the back plate on and I will use a large belt sander:
Garry
-
08-28-2011, 04:56 AM #58
Registered
- Join Date
- Apr 2011
- Posts
- 0
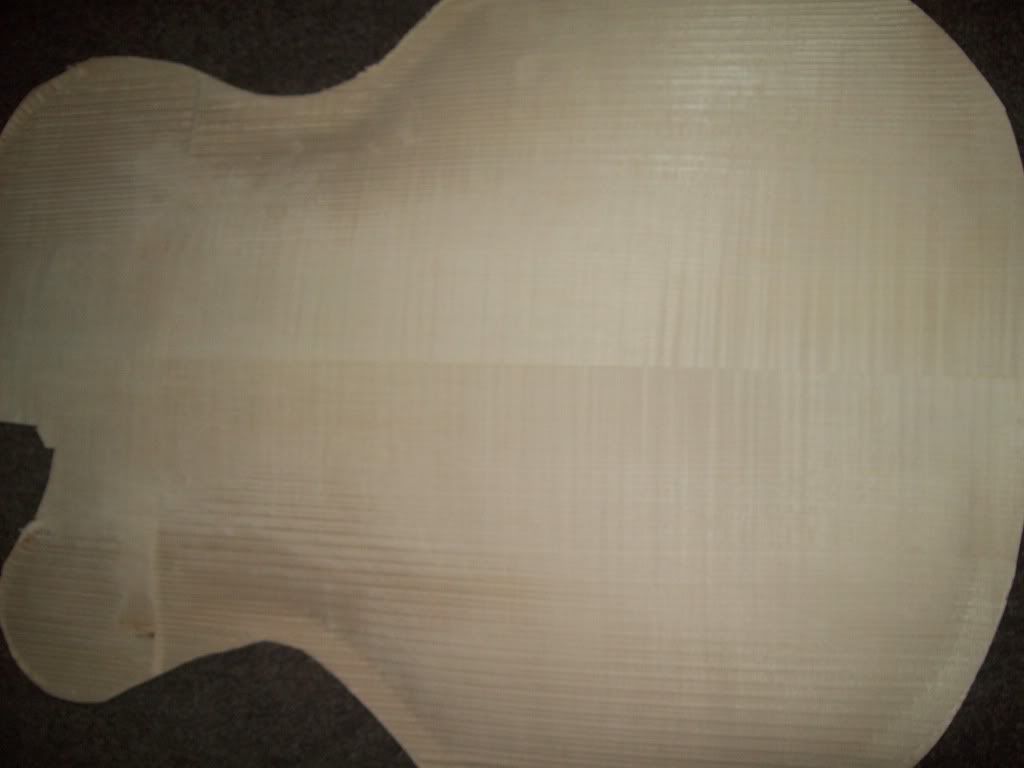
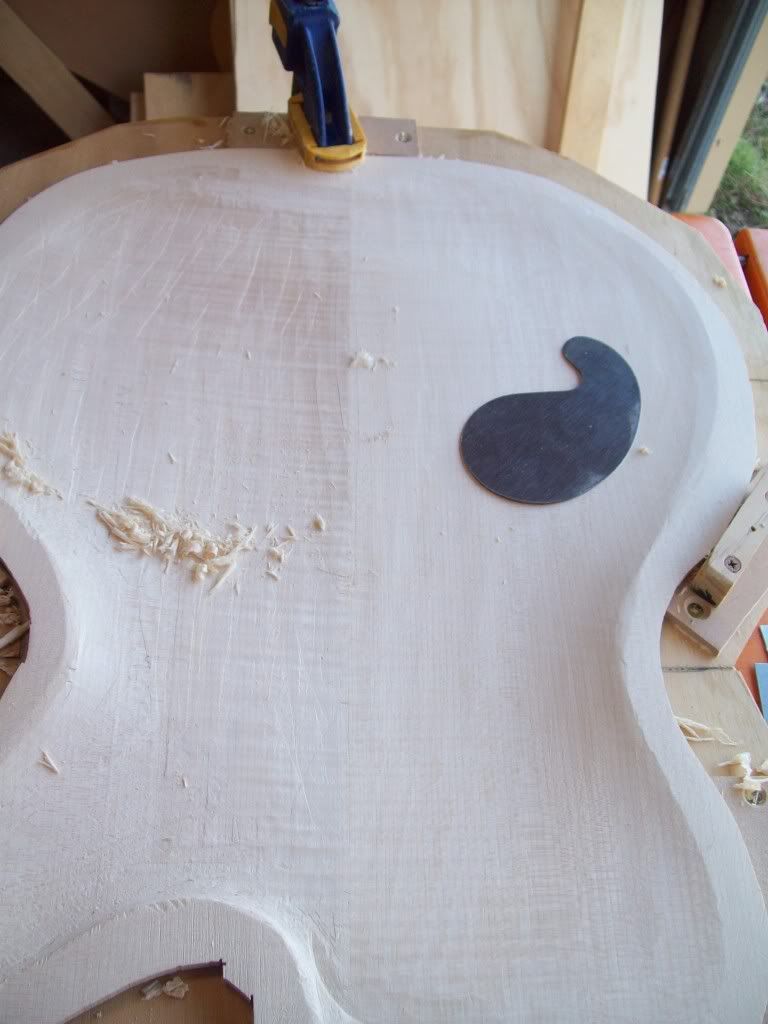
Back Plate Thicknessing
Nothing beats the small Ibex plane for thicknessing:
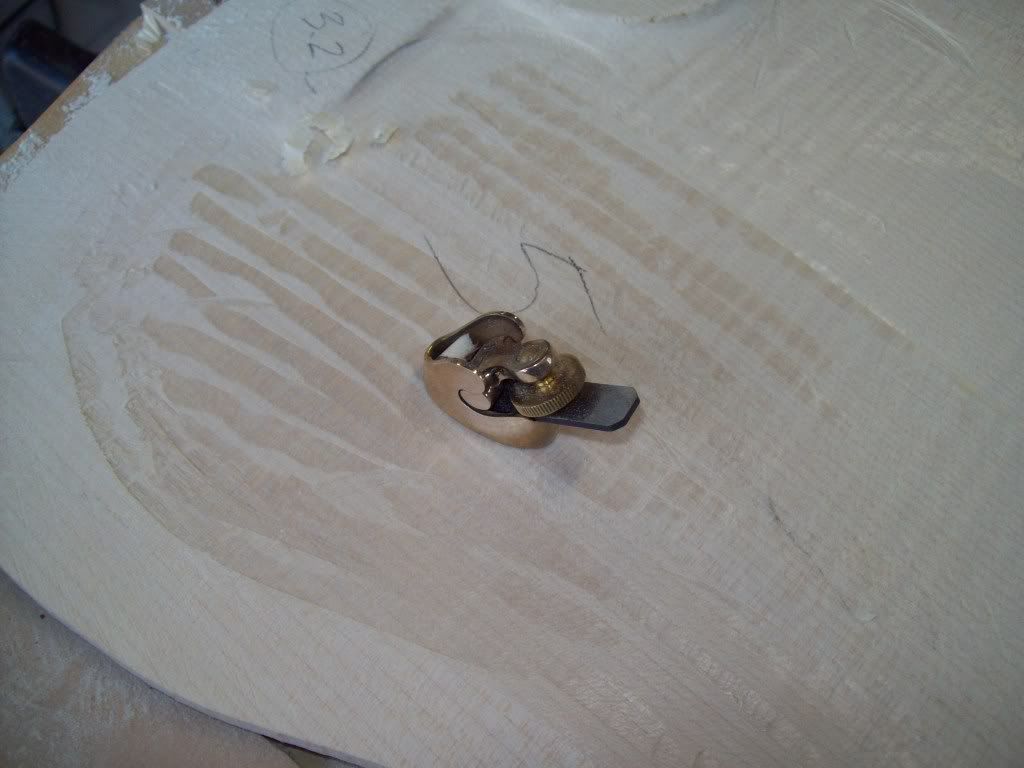
I left the back plate at 6mm. Needs to be 4.7mm in the centre to 3.2mm at the recurve, then 4.7mm at the edge.
I measure a number of spots on a micrometer and go for it:
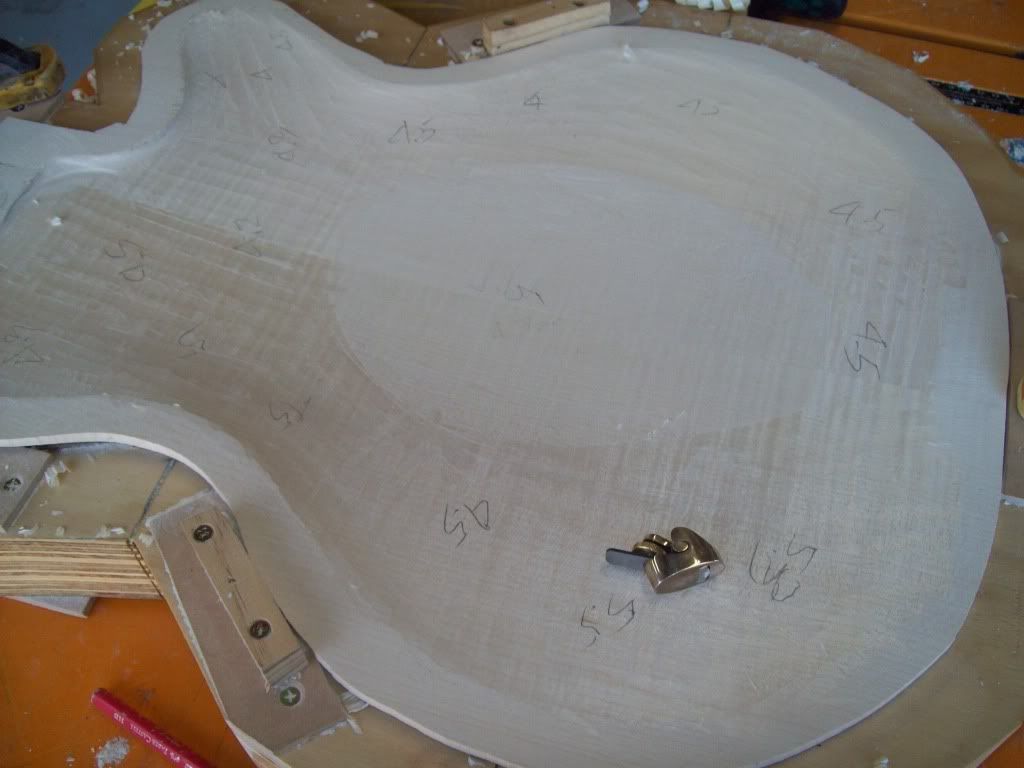
Then scrape with a flat and curved scrapers. The side on the right of this pic has been scraped:
Nearly ready to glue on the body. Will get it on in a few hours later today.
Update
Got the back plate on and just realised I wanted to install the Fishman Switchjack endpin jack and wiring first...
Anyway, the jack is made to be retrofitted and you pull it (already wired) through the F Holes and can tighten from outside.
The 2 groove button is made to take archtop tailpiece 'wire', plus a strap.

Garry
-
09-01-2011, 02:37 PM #59
Company Representative

- Join Date
- Jun 2003
- Posts
- 446
This is another great example of what you can do with BobCAD. Nice.
CNCdude
-
09-03-2011, 07:51 AM #60
Registered
- Join Date
- Apr 2011
- Posts
- 0
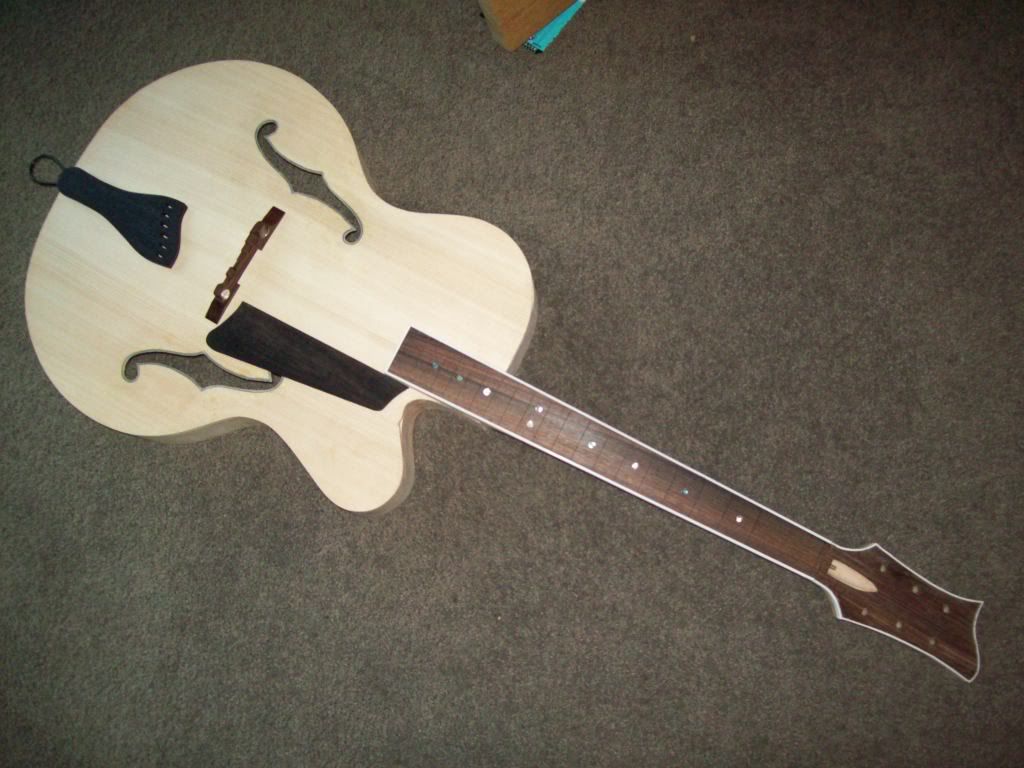
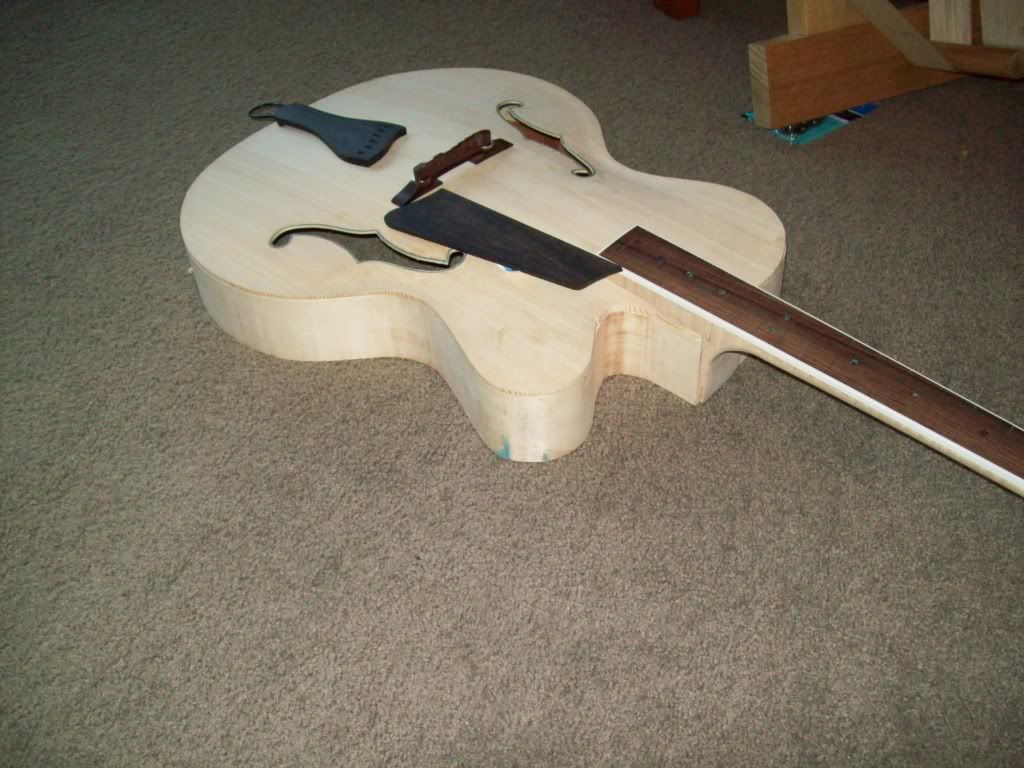
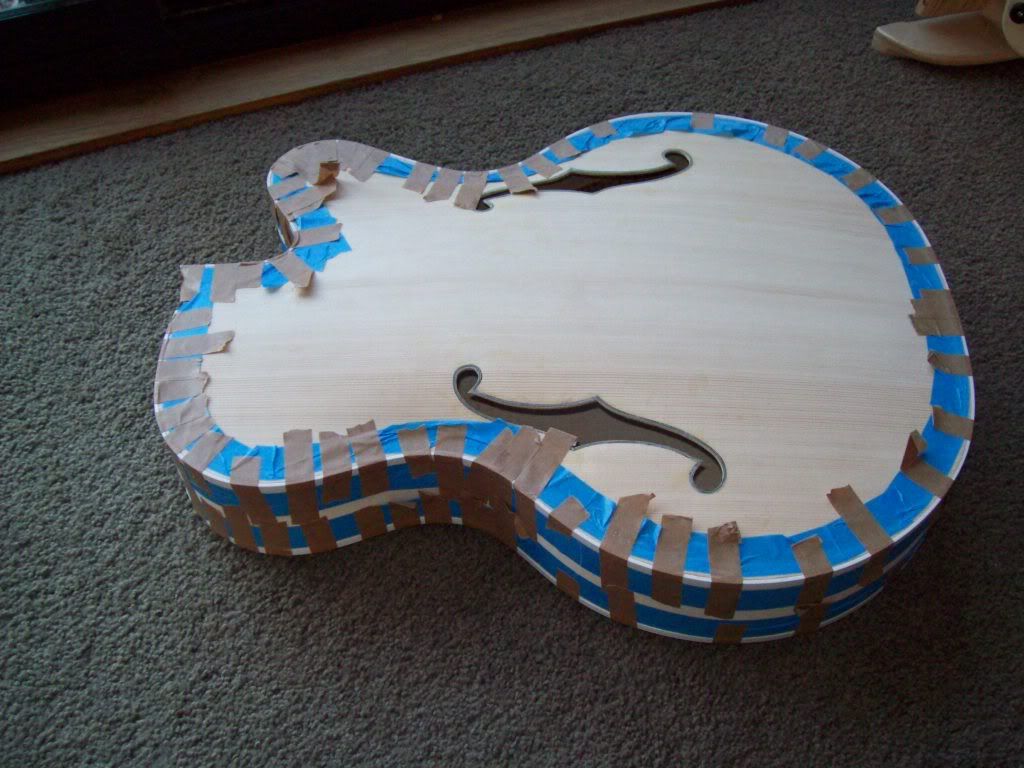
Binding
After sanding the sides smooth and vertical, I did the binding using my binding setup:
I found that I had left the top and bottom plates slightly thick at the cutaway, as it left a bit of the plate there after routing, so I scraped the plates down until I routed into the sides correctly:
All bound. I wipe the various tapes onto my skin to take some of the tackiness off them. I have lifted wood before:
Garry

 Reply With Quote
Similar Threads
-
Complete Newbie But Motivated Guitar Builder
By pdaddy in forum Musical Instrument Design and ConstructionReplies: 17Last Post: 04-29-2011, 08:24 AM -
using touch probe for scanning guitar surface
By awe_indo in forum Musical Instrument Design and ConstructionReplies: 4Last Post: 10-21-2010, 11:34 AM -
X4+ slideway surface quality - Missing finish grind on vert post
By MadMax in forum Syil ProductsReplies: 8Last Post: 04-16-2009, 01:39 AM -
Solidworks Guitar/Surface question
By CyborgCNC in forum SolidworksReplies: 17Last Post: 05-17-2007, 08:40 AM -
Irregula Guitar Surface on Rhino
By NCN in forum Rhino 3DReplies: 15Last Post: 03-24-2006, 06:20 PM
