


I debated in which forum to post this, but since Misumi doesn't seem to get a lot of discussion, it seemed warranted to put a build log here to show what their products look like and what the US company can do when ordering almost exclusively over the web.
Note: I am not affiliated with Misumi or Misumi USA in anyway, shape or form. I am merely a satisfied customer.
First-off, the basics:
Machine Type: 2.5D router, primarily for wood
Cutting dimensions: 1400mm x 1000mm x 150mm
Total Footprint (LxWxH): 2310mm x 1290mm x 1400mm
Construction: Aluminum with some steel
Budget: Let's not go there ("around $5k" before software)
The Design
I have read a ton of build threads, bought plans from Joe, and taken copious quantities of notes over about 18 months of planning and procuring. Not to be modest, but I would say that there is absolutely nothing that is interesting or new about my build other than I am using a less well-known supplier for most of my mechanical parts (Misumi). Granted, I've got some high-end parts scavenged via the eBay gods, but the design can be summed up this way: moving gantry, underslung screw drive using ball screws and linear guides. However, since I placed this thread in the T-slot forum, a critical question worth answering: why did I choose Misumi instead of 80/20 or even Bosch, well, that may be an interesting divergence.
I originally started with the idea of using 80/20 and going the typical eBay route for procurement. However, 80/20 does not offer any machining services on its eBay products, so I spent a fair bit of time trying to find good deals on pieces that looked to be about the right size for the machine I wanted (I was/am targeting being able to machine a half-sheet of Baltic Birch plywood - approx. 60"x30").
While scanning eBay for good deals on stuff, I happened to find, in rapid succession, a 1500mm NSK class 5 ballscrew, a Hirata linear actuator with 1000mm of travel, a Parker Daedal linear actuator with 150mm of travel, and two THK SR30 rails that are 2100mm long. This was a big haul of high-end parts for a shade over $1500. Now to keep looking for that aluminum...
I ended up finding a Texas company with a load of Bosch Rexroth 4590 "heavy" extrusions at approximately 7' lengths (really a bit short of that, it turns out). I did some quick sketches to be sure that I knew about how much I would need, and I placed the order, plus I got some gussets for connections and some 45" long lengths to act as posts and stringers. Good so far?
I was on a hunt for a nut bracket housing when my Google skills led me to Misumi's website. I did not find a ball nut housing that was compatible with my NSK screw, but I did find a promotion for 30% off your first order up to $150. Figuring that I knew a decent deal when I found it, I ordered up some of the pieces that would require greater precision than I was really capable of producing with a table saw, circ saw and a drill driver, and I waited for delivery.
Since this post is getting long and is short on pictures, let me cut to the chase on the Bosch: being unwilling to use my table saw to cut the aluminum meant that I made a hash of several of my pieces of stock. Given the quality of what I was getting from Misumi, I shifted my focus to procuring from Misumi and selling my Bosch Rexroth extrusion after the build was done. Now let's have some pictures of that mess (be gentle).
One thing of note in the first picture: I bought the "H" or heavy Bosch Rexroth 4590 extrusion. It is made from 6063-T6 aluminum and weighs 4.15kg per meter. The two Misumi pieces in the picture are Misumi's GFS extrusion, which is 6061-T6 aluminum, and they weigh 5.22kg/meter, or about 25% more than the Bosch ones. If you bought both new, the Misumi extrusion would also be a few dollars cheaper per meter than the Bosch. Misumi's "standard" extrusion, the HFS series, weighs 4.14kg per meter, or basically the same as Bosch's "Heavy" extrusions, and they use 6005-t5 aluminum (similar to what 80/20 uses).
Here are some thoughts from ALCOA on 6063-T6 vs. 6005-T5 and 6105-T5:
http://www.alcoa.com/adip/catalog/pd...y_60056105.pdf
Results 1 to 20 of 56
Hybrid View
-
06-18-2011, 11:04 PM #1
 Registered
- Join Date
- Apr 2010
- Posts
- 0
Aluminum T-Slot Build Using Misumi Extrusion
-
06-19-2011, 12:13 AM #2
Registered
- Join Date
- Apr 2010
- Posts
- 0
Bringing the Gantry Together
My first order from Misumi was a bunch of GFS8-4590 (the HEAVY kind) chopped up into little pieces to make up my gantry. Lots of people go with a heavy beam of some sort for the main structure of the gantry (the 3" x 6" 80/20 extrusion is popular) since the support arms of the gantry need to clear the cutting area of the Y-axis fully.
For me, I am starting with a Hirata MB-202AP, which is essentially a 20-10 ground ball screw, linear guides, a mounting table and a motor mount all wrapped in a heavy aluminum extrusion. Because I don't think this was the version designed specifically for mounting vertically, I added an extra reinforcing extrusion on the back. The rest of the frame, then, looks a lot like a chair or a lower case "b".
What I like about the Misumi extrusion and machining service is that I can specify cuts to 0.5mm and get tolerances to 0.2mm (with an upcharge, of course!). When using the "blind joints", this stuff comes together very, very tight. There is no play in any direction with just a few of the screws tightened up. Seriously, I had to use a mallet to move the center support bars into position.
Also visible in the photos are the extrusions I am using to adapt the Y-axis table so that it will mate with the Z-axis table ("dipping" style Z-axis). More on that later.
-
06-19-2011, 12:37 AM #3
Registered
- Join Date
- Apr 2010
- Posts
- 0
Access Casters Rock!!
I came across Access Casters in a few builds (e.g., MRM RC Models Build), so I went searching for them on The 'Bay. While they list for close to $80/ea. in the size I needed (one with a 16mm threaded insert), I quickly found them for $29/ea. I ordered 6 of them, and they arrived within a few days, factory-fresh from Korea.
The hardest part about getting them installed was finding a source for a M12 20mm socket cap screw. However, living in a heavy manufacturing city meant that I just needed to look a bit to find someone with them in stock. The third and fourth pictures show both the two M12 SHCS that attach the end-plate to the extrusion and the 16mm all-thread that connects the end-plate to the caster itself. This stuff is beefy, and with the brass nut cinched tight to the threading in the end-cap, the all-thread isn't going anywhere.
I think the pictures will be relatively self-explanatory for getting these things together. The only real trick was in setting up the corner posts so that I could put in the support beams for the X-axis linear guides. For that, I used an idle piece of extrusion as a spacer, and a spare 4545 gusset so that I knew approximately where the lower beam will go - the one on which the rails sit (Picture #2). More on that in a bit.
-
06-19-2011, 12:39 AM #4
Community Moderator
- Join Date
- Dec 2003
- Posts
- 24221
I have bought a few things off of Misumi and have mentioned them here before.
Their catalogue and DXF/DWG CD is a great resource.
For Canadian customers, the import brokerage is paid for on shipping.
Al.CNC, Mechatronics Integration and Custom Machine Design
“Logic will get you from A to B. Imagination will take you everywhere.”
Albert E.
-
06-19-2011, 12:42 AM #5
Registered
- Join Date
- Apr 2010
- Posts
- 0
I absolutely agree with this. It was a little bit of a learning curve getting used to their part numbering and ordering system, but having on-demand rendering of the part as you configure it is an amazing help. Combine that with being significantly cheaper (at my volume level) than Bosch, and you can sense why I am so pro-Misumi. Originally Posted by Al_The_Man

-
06-21-2011, 03:42 PM #6
Registered
- Join Date
- Apr 2010
- Posts
- 0
It's been over 100 degrees here, and I am waiting for a few more parts (connectors!) that were backordered. So, since my copy of AutoCAD isn't playing nice right now, I did a quick mock-up of the frame design in FrameDesigner from FramExpert (FrameXpert | Custom Industrial Aluminum Furniture). It's similar to Sketchup, but solely focused on 8020 and Maytac framing components right now. It also has a very limited selection of which profiles it supports. In other words, it produces some pretty pictures, but it's not useful to make a real BOM for my frame design. In theory a new version will be coming soon, so it may overcome these limitations shortly.
I should have a large amount of parts arriving tomorrow, so hopefully I can get the basic mechanical build finished by the end of the weekend.
-
06-23-2011, 06:12 AM #7
Registered
- Join Date
- Apr 2010
- Posts
- 0
I had a great coincidence today. As luck would have it, a large shipment of backordered parts arrived on the same day that we had our first significant rainstorm in several months. With temperatures not breaking much above 80, I was able to put in several hours in the garage.
Motor Mount and Drive Axis
Several of the key parts that arrived today were ones I needed for the structure to support the X-axis ball screw and other drive mech. This involved installing the center-line extrusions plus the motor mount and beginning to square the resulting structure in a more meaningful way than just going by feel.
The idea for the motor mount and the interface between the motor and the screw came straight from the CNC Router Parts and Fine Line Automation 2'x3' aluminum router concept. The only real difference is scale. Rather than being limited to a 3' X-axis and an ACME screw, I am using a 25mm ball screw with 5' (1500mm) of threading. Assembly required a specific order since the heads of the socket cap screws that attach the motor mount would be occluded by the extrusion where the screw attaches, but that was really the only trick.
So, first I used some "high precision" 45x45mm aluminum extrusion to act as a spacer to center the longitudinal extrusion and attach it to the "far" (inboard) joist using double-blind joints. I then attached the motor mount (it's a NEMA 34, by the way) to the end joist and attached that to the frame. Then I brought the free end of the longitudinal extrusion into place, using another 45x45 extrusion to check center, and then I tightened the blind joint on that end a bit. A quick check with a 6" machinist's square and some light taps with the dead blow (rubberized) hammer, and it was in place.
You can see how it all came together in the fifth picture. It's starting to look like a CNC frame, finally.
Given that I paid extra to have everything that matters "precision" cut (tolerance: +/- 0.2mm vs. +/- 0.5mm), the extrusions are fit very tightly. Even before adding tension from the joining hardware, the extrusions are hard to move. The dead blow hammer is a must-have piece of equipment for this build, though the tightness of the fit does give me confidence that final squaring of the critical angles won't require too massive of changes once everything is in place. Also, I'll know more about how accurate Misumi's machining is once I get the motors, screw and coupler installed and aligned, but I have been very impressed with the quality, fit and finish of the stuff they've done for me so far. A few odd scratches here and there on the extrusions, but beyond that, the alignment of the stuff that matters has been spot-on to date.
-
06-24-2011, 08:50 PM #8
Registered
- Join Date
- Apr 2010
- Posts
- 0
Misumi Deflection Calculator
With only one commenter, I'm not sure anyone else is really reading this thread. However, search might eventually lead someone to it. As a result, here is a down-and-dirty deflection calculator I worked up in Excel. It is only focused on the "8-45" extrusions from Misumi that have been of interest to me. These are the larger structural extrusions with a 10mm wide slot, targeted to work with M8 screws. These can get to be pretty beefy (e.g., the 100mm x 200mm extrusion is over 20kg/meter), so if you need bigger, I want pictures of what it is you are building.
Note 1: I did cross-check the results I was getting for the HFS series extrusions versus the calculator I have from Bosch for its 45 heavy series extrusions. The results closely correlate as one would expect when the materials and geometry are similar and they are within 10g/meter of the same weight.
Note 2: For improved accuracy, one would want to model the deflection inherent in the beam under its own weight as well as the deflection that results directly from the load (inherent deflection will be a continuous load, evenly distributed). I did not do that, so these numbers will be a touch optimistic for deflection.
For those looking for Imperial/English measurements, I invite you to research the CONVERT function in Excel. Since basically everything I've been dealing with has been metric, I am doing all of my design and build in metric.
-
06-25-2011, 12:11 AM #9
Registered
- Join Date
- May 2011
- Posts
- 14
No worries, I'm sure other forum members are watching this thread. :wave:
-
06-25-2011, 04:22 AM #10
Registered
- Join Date
- Apr 2010
- Posts
- 0
Fair enough! (group) Originally Posted by Spotswood
-
06-25-2011, 11:06 PM #11
Registered
- Join Date
- Apr 2010
- Posts
- 0
Ball Screw
I spent the better part of the morning on a bicycle, so there's not much progress to report today. I did get the X-axis ball screw (or is it ballscrew?) mounted and found an unfortunate design oversight. The center line extrusions where the BF plate attaches is too short versus where I need it. It's not a huge expense to replace it with a longer part (<$50), but it is sure annoying. This is the downside of doing most of my design and clearance-checking in 2D, I guess.
Today's efforts also pointed out just how much I hate stooping and how useful a mechanics trolley would be when having to work from the floor. Of course, I would have almost no use for it afterward, but one can fantasize while one is sitting on one's rear end squeezing into too small of a space trying to work.
That being said, the steel plates that Misumi manufactured for me to mount the BK (fixed) and BF (simple) bearing housings are turning out to be fantastic. The fit seems to be basically spot-on and everything screws in with that nice final "locking" feel to it. It also helps that they were half the price, delivered, versus what local shops were wanting.
Note: according to the packaging, these are actually being made in Japan and shipped back to the US. I'm not sure how the logistics costs make that feasible, but I bet that there's a fair bit of software and very little human interaction to get these parts made. Machines making machines. Very cool.
Oh, yeah, for anyone who has yet to learn this lesson: clamps. It's all about having the right clamps. Sometimes I forget or get stubborn, and things don't go as quickly or as well as I thought it might in my (optimistic) mind's eye. Then, I look at the wall and think of just the right one for a task, and it goes so, so much more easily.
Also, regarding the Access Casters: I wish they had a locking mechanism, as well as the leveling, so I didn't have to chock them. Beyond that, they work really, really well -- even on our rough-pour garage floor. They are a great bargain.
Two more major tasks to do on the mechanical build: mount the linear guides and then mount the gantry. The first isn't as easy as it seems since the rails have picked up some "gunk" along the way, so I really need to clean them first. However, that is a task for another day. On to pictures.
-
07-01-2011, 02:36 PM #12
Community Moderator
- Join Date
- Dec 2003
- Posts
- 24221
Shows 381 views so far! Originally Posted by Bear5k
Al.CNC, Mechatronics Integration and Custom Machine Design
“Logic will get you from A to B. Imagination will take you everywhere.”
Albert E.
-
07-01-2011, 05:00 AM #13
Registered
- Join Date
- Apr 2010
- Posts
- 0
Some progress to report, but not a lot. My last set of parts from Misumi should arrive next week, the ones to fix my oversight above plus a few goodies I wanted to play with (swank locating pins!). With temperatures hitting upwards of 100 degrees, progress has definitely been slow and sweaty, rather than slow and steady.
I had a 10lb bag of powdered citric acid arrive from Amazon today (ironically, supplied by a company here in Houston), so with luck, tomorrow should be rail cleaning day. Once the rails are clean, I can get them re-mounted and the support extrusion bolted into the machine base. At that point, I can start squaring the base frame before the last few parts arrive for the gantry. Then comes the fun task of really squaring everything that matters and leveling the full assembly. My target for basic construction completion is mid-July. After that, electronics time!
-
12-28-2011, 01:30 AM #14
Registered
- Join Date
- Apr 2011
- Posts
- 43
Recomendation for Misumi
Esteemed Bear5k: I read your post with the same interest I would read a good book. Your detailed information and recomendations are noted. I can only hope the weather gets real hot or cold where you live so that you may have additional time to continue writing about your project the way you do.
I'm also building a 3 axis machine. I have machined the parts, purchased the ballscrews/linear bearings and converted an old paper cutter for the support.
However, I'm still trying to decide what to do for the tool-holding table which is 381mm x 920.75. I was considering the 8020 extrusions until you recomended the Misumi. I'll look into that. Thank you and give us more!
-
12-29-2011, 12:01 AM #15
Registered
- Join Date
- Apr 2010
- Posts
- 0
The sun shone brightly through the window. Outside, the gentle winter sun bathed each verdant shoot of grass with its gentle warmth, encouraging it, nurturing it to strive harder in its quest to to break through the bitter crust of decaying leaves. Inside, harsh light of the monitor clashed with the gentle sunbeams, fighting to control the illumination in the cloistered confines of the Bear's cave. Ignoring the resultant chiaroscuro as the conflict raged around him, the inquisitive Bear5k pondered at his writing task, "I hope he actually likes to read?" Originally Posted by EKFER
The weather here is, to put it mildly, nearly perfect for project work this time of year. Today was a brisk 38F in the morning, but warmed up to 65F this afternoon. If it weren't for my daughters, I would have little excuse not to be out in the garage. Give me a few more weeks of minimalist progress, and I should be back in the swing of things once the girls break through to the mythical "sleeping through the night" phase of their lives.Your detailed information and recomendations are noted. I can only hope the weather gets real hot or cold where you live so that you may have additional time to continue writing about your project the way you do.
For a tool-holding table, I have heard stories of some brands having mixed reviews for flatness/straightness and twist in some extrusions that might be popular candidates for making tables. I have no way to judge such aspersions. Misumi does offer the option for some of its pieces to be "milled flat", which I have used reasonably extensively (e.g., the X-axis support for the linear guides). The milling was at a slight premium over a standard length of extrusion. For the size of table you have, that might not be a prohibitive expense. That being said, if you have someone who can cut a "keyway" into MIC-6 Aluminum Tooling Plate, then that's probably a cheaper and better way to go.I'm also building a 3 axis machine. I have machined the parts, purchased the ballscrews/linear bearings and converted an old paper cutter for the support.
However, I'm still trying to decide what to do for the tool-holding table which is 381mm x 920.75. I was considering the 8020 extrusions until you recomended the Misumi. I'll look into that. Thank you and give us more!
:cheers:
-
01-03-2012, 07:30 PM #16
Registered
- Join Date
- Apr 2011
- Posts
- 43
Selection of cnc bed
Esteemed Bear5k, Not only you are a good machinist/engineer? but also a consummated poet. I researched my options and I opted for selecting the Rockler MultiTrack for my machine bed. The track provides clamping on both sides and has a lower profile with more holding material. Since they are out of stock, Rockler reduced the price to $24.99 per track (3/4x3x36 inches) for preorders:violin:.
-
01-03-2012, 10:25 PM #17
Registered
- Join Date
- Apr 2010
- Posts
- 0
People have reported good results using the stuff from Orange Aluminum. It looks to be cheaper than Rockler. Originally Posted by EKFER
T-Track - T-Track
-
10-07-2016, 11:17 PM #18
Registered
- Join Date
- Apr 2015
- Posts
- 12
Re: Aluminum T-Slot Build Using Misumi Extrusion
there are cheaper t-slot rails ..orange aluminum etc. however i find all of rockler's t-slot and t-slot clamp downs top notch...one thing i learned working on vintage cars...do it right the first time..it will last forever.
-
07-02-2011, 03:23 AM #19
Registered
- Join Date
- May 2011
- Posts
- 14
No worries. I post build logs of custom PC cases that I'm building, which often don't get too many responses/replies as well:
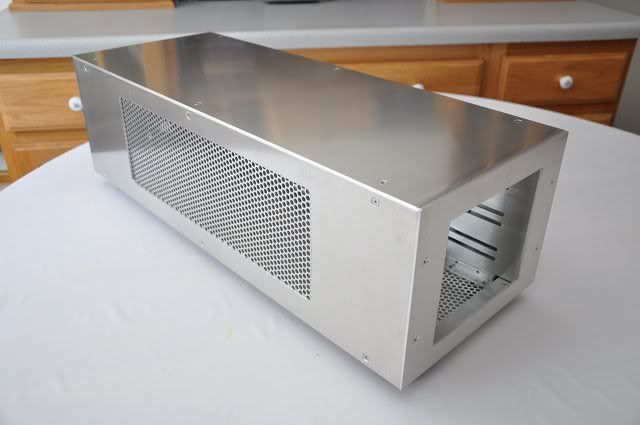
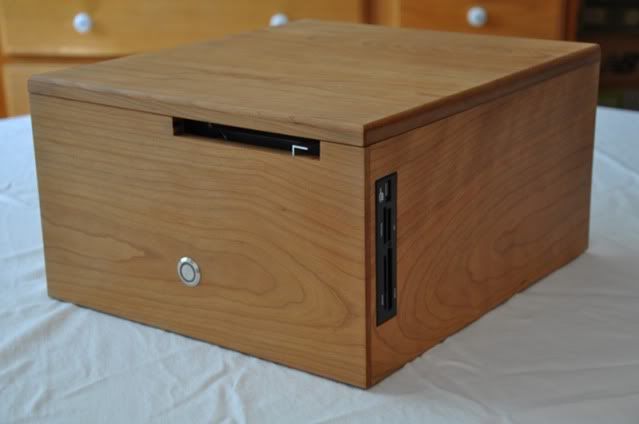
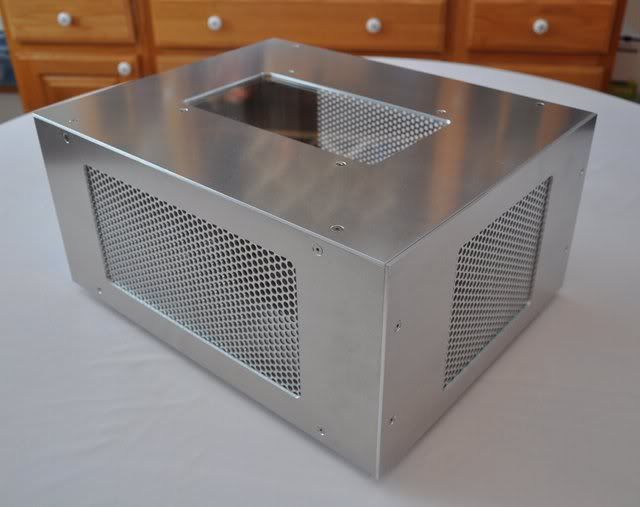
(group)
Build on! :banana:
-
07-04-2011, 08:46 PM #20
Community Moderator
- Join Date
- Dec 2003
- Posts
- 24221
Nice work Originally Posted by Spotswood

Do you have anything in a Honduras Mahogany or Burl Walnut?
Al.CNC, Mechatronics Integration and Custom Machine Design
“Logic will get you from A to B. Imagination will take you everywhere.”
Albert E.

 Reply With Quote
Similar Threads
-
Referral for Type III class I Anodize 6' long T-slot extrusion
By owen hooker in forum Material Machining SolutionsReplies: 0Last Post: 04-14-2014, 03:45 PM -
Misumi Site Extrusion Prices
By newpatch in forum DIY CNC Router Table MachinesReplies: 15Last Post: 08-21-2012, 10:10 PM -
Looking for 8020 T Slot Aluminum Extrusion in Canberra
By bradeyk in forum Australia, New Zealand Club HouseReplies: 1Last Post: 08-04-2011, 11:58 PM -
Anyone used Polythene pad slides for T slot extrusion
By cweeks in forum Laser Engraving / Cutting Machine General TopicsReplies: 3Last Post: 05-10-2009, 12:29 PM -
T-slot Router Bed Extrusion
By gotswrv in forum Want To Buy...Need help!Replies: 7Last Post: 07-11-2008, 02:16 AM
