


Well, it is possible. But neither my machine not myself are good enough for that challenge ;-)Originally Posted by louieatienza

Results 581 to 600 of 645
-
04-12-2015, 06:19 PM #581
 Registered
- Join Date
- Aug 2011
- Posts
- 999
Re: Big Bamboo - New Machine Project Started
Box Joint and Dovetail CAM software here: WWW.TAILMAKER.NET
-
04-12-2015, 06:26 PM #582
Registered
- Join Date
- Aug 2011
- Posts
- 999
Re: Big Bamboo - New Machine Project Started
I considered BB in the beginning and opted for Bamboo more out of aesthetic reasons. You could make gears out of thinner bamboo but not in that size. I have a 1/4" sheet and that is all but flat. I would guess up to 3" is the limit for that thickness. Originally Posted by cyclestart
An advantage of bamboo is that it cuts extremely clean without surface fuzz that may create friction.Box Joint and Dovetail CAM software here: WWW.TAILMAKER.NET
-
11-17-2015, 05:22 AM #583
Registered
- Join Date
- Jan 2008
- Posts
- 1529
Re: Big Bamboo - New Machine Project Started
Jerry,
I'm very interested in replicating your method of increasing your work area (extended table moved with pulleys). Can you give any more description or even a diagram of the cables and ratios?
I've built a 4x2' machine, and even 4x4' for some cabinets would make a huge difference.7xCNC.com - CNC info for the minilathe (7x10, 7x12, 7x14, 7x16)
-
11-17-2015, 06:24 AM #584
Registered
- Join Date
- Aug 2011
- Posts
- 999
Re: Big Bamboo - New Machine Project Started
Embarrassed to say, but I only have some 3-D cad files that I can find. Not sure if I kept the dwg and .crv files but I can not find them anymore. If the cad files are of any help please PM your email and let me know which format you can use. Originally Posted by pippin88
In short....
- if you only want to double your reach it is easier because you just need to run cables from the gantry around pulleys at both ends of the fixed table (machine base) to the opposite side of the moving table.
- if you want to triple the reach like I did it becomes a bit more complicated with a pulley on the gantry and 4 reversing pullyes on the table, doubling the cable movement (which makes tripling if you include the gantry movement itself). I did not do a diagram, just winged it...The ratio is exactly 3:1 and I have an alternate controller configuration file for the steps/unit.
- my table is a lightweight Masonite door with 90 degree aluminum extrusions glued/screwed to the edge. These run in hard 99 durometer skateboard wheels (whole wheel, not only the bearing), see the pictures in my post long time ago. Whatever you use, the table must be rigid but light. A sandwich with thin plywood sheathing or even aluminum skin would be O.K.
- the cables must be tensioned well to avoid slack and optimize rigidity
- work holding becomes an issue. You can not screw well into the moving table surface or attach clamps. My preferred method is using several double sided vacuum pods (4"x4").Box Joint and Dovetail CAM software here: WWW.TAILMAKER.NET
-
02-20-2016, 09:25 PM #585
Registered
- Join Date
- Aug 2011
- Posts
- 999
Re: Big Bamboo - New Machine Project Started
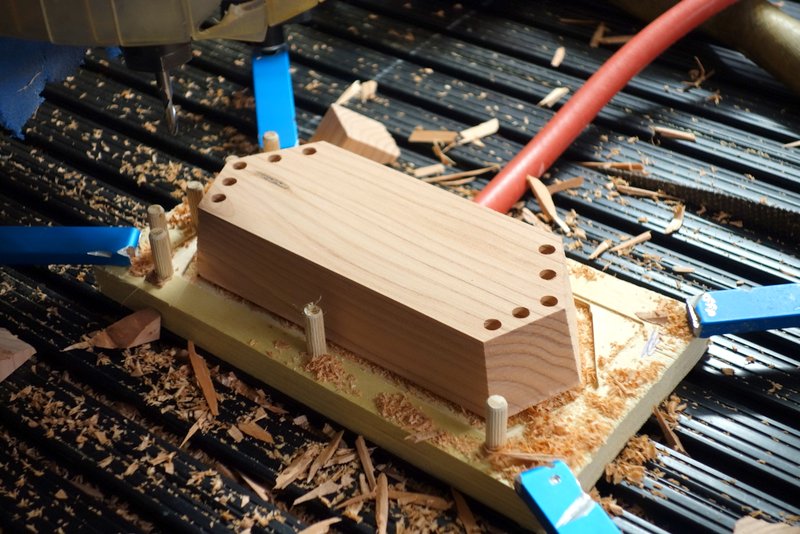
Not much changed with the machine but lately I improved my vacuum setup a bit:
Since I have that full surface t-slot table (from 80/20 brand extrusions) I used to bolt my vac pods onto that table. That worked O.K., but the pod surface was not always as parallel to the table as needed and it had to be bolted down hard to avoid slipping on the slick anodized table surface. It also made disposable cut-to-shape pods more difficult than necessary.
So I modified the table to actually use the T-slots as vacuum line. I plugged the extrusion end openings and connected the vacuum hoses to the plug strip. Now I have 6 separately controlled vacuum sections and can put simple pods anywhere on the table. I have standard size 4x4" or 4x12" pods and can cut custom pods to shape quickly from scrap lumber (see pics). The open sections of the active t-slots are covered with thin aluminum flashing that is held and sealed with electrical tape. The pods have 2 dowels that locate the y-direction in the slot while there is an end stop for the x-direction. Minor disadvantage it gets a little more difficult to fish bits and other stuff out when they fall into the slots. But a magnet helps.


 Box Joint and Dovetail CAM software here: WWW.TAILMAKER.NET
-
02-24-2016, 05:39 PM #586
Registered
- Join Date
- Jan 2014
- Posts
- 3
Re: Big Bamboo - New Machine Project Started
Very nice setup wondering if your still using the supercharger vacuum system and what type of spring pressure you settled with?
-
02-25-2016, 12:54 AM #587
Registered
- Join Date
- Aug 2011
- Posts
- 999
Re: Big Bamboo - New Machine Project Started
As mentioned in the other thread on the work holding subsection, I am not using that supercharger system. It works actually very well but I just can not allow for the noise in my neighborhood (even with the muffler box). Originally Posted by chuckeroocharle
If somebody needs a 3hp roots blower vac machine and lives in the SoCal area, I would sell this thing. Unfortunately too heavy to ship.Box Joint and Dovetail CAM software here: WWW.TAILMAKER.NET
-
02-28-2016, 02:50 AM #588
Registered
- Join Date
- Aug 2011
- Posts
- 999
Re: Big Bamboo - New Machine Project Started
Getting the vacuum pods to work....
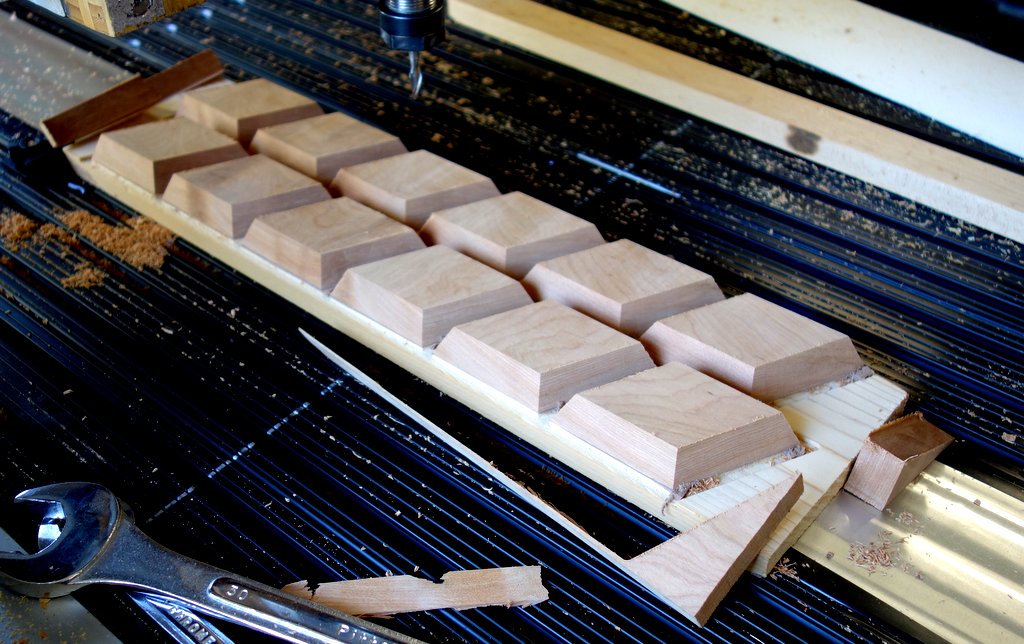
I believe it is quite apparent hat I have a knack for math in general and specifically geometric designs. Accordingly my last project was a faceted box (commonly known as a rhombic tricontahedron).
It is made from 30 diamond shaped faces with 144 degree miter angles. 20 of them make the "bowl or bottom part and 10 make the lid.
A) Cutting the faces on my new and improved vacuum pod system with a 1/4" ball nose end mill bit.

B) Cut out elements (Walnut and figured Birch)

C) Glued together and "turning" the inside with a 1/2" ballnose end mill. Machining 6" deep with a 6" long bit was a challenge on my small machine with 8" z-travel. I had to cut the top 2 inch with a stubby bit and switch to the long bit for the bottom of the bowl.

D) Both parts oil finished and wax polished, outside.

- - - Updated - - -
Some more pics...
E) Both parts inside view

F) Lid close-up

G) Box closed
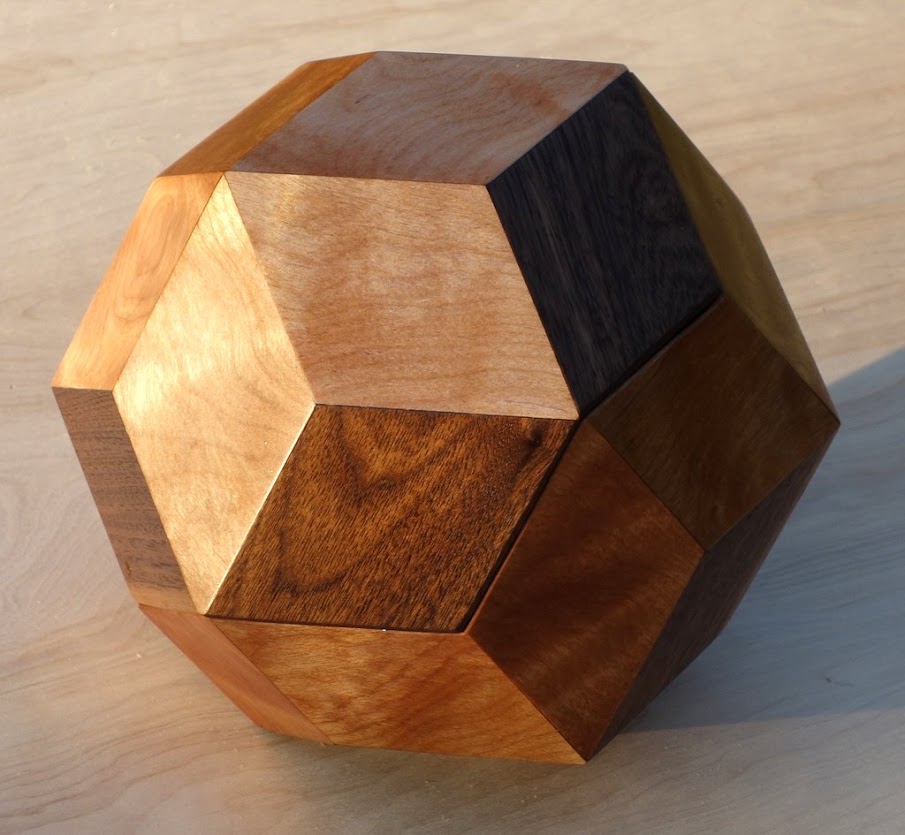
Now i just need to fill it with cookies.
- - - Updated - - -
Some more pics...
E) Both parts inside view
F) Lid close-up
G) Box closed
Now i just need to fill it with cookies.Box Joint and Dovetail CAM software here: WWW.TAILMAKER.NET
-
02-28-2016, 04:37 AM #589
Registered
- Join Date
- Jun 2012
- Posts
- 817
Re: Big Bamboo - New Machine Project Started
You are one hell of a woodworker!
-
02-28-2016, 05:43 AM #590
Registered
- Join Date
- Jan 2008
- Posts
- 1529
Re: Big Bamboo - New Machine Project Started
Awesome!
You cut the mittens miters with a ballnose? How long did that take? I just bought some 60°, 90°, 120°, and 150° bits to allow cutting of some different miters.7xCNC.com - CNC info for the minilathe (7x10, 7x12, 7x14, 7x16)
-
02-28-2016, 04:56 PM #591
Registered
- Join Date
- Aug 2011
- Posts
- 999
Re: Big Bamboo - New Machine Project Started
Thanks guys!
Yes the miter was done with a ballnose. There is really no choice since the miter angles are given by the geometry and can end up with very odd numbers. Calculating the tool path It is another one of my software projects. When optimized, the cut does not take that long. A set of twelve of the box faces on the vac pod (as shown in the other post further down) takes about 30-50 minutes, depending on the chosen surface smoothness.
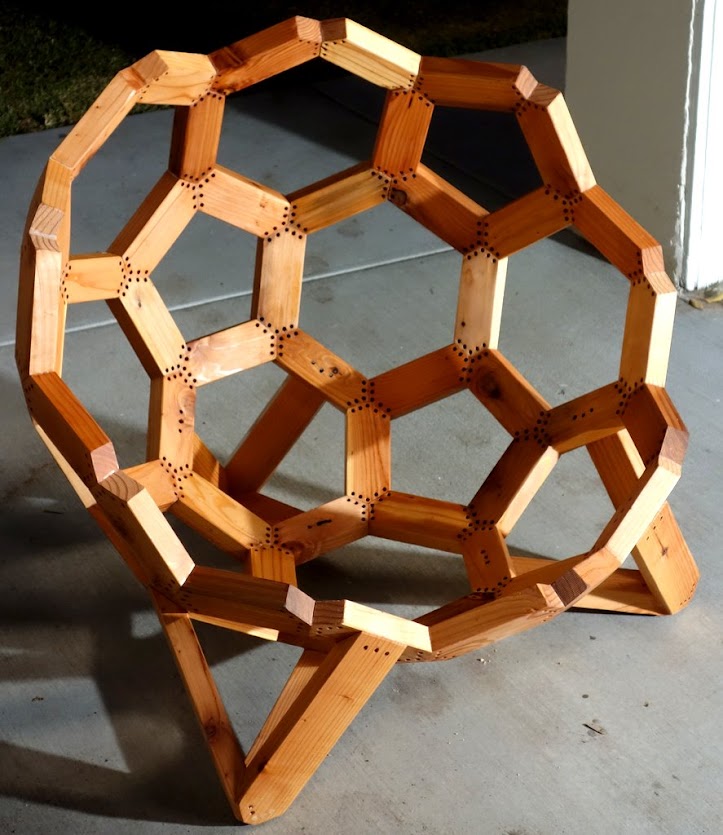
Below are pics of another project using the same software tool, this is a spherical chair with a skeleton frame. Cutting one of the about 8" long frame elements with a ballnose took approx. 5 minutes.
 Box Joint and Dovetail CAM software here: WWW.TAILMAKER.NET
-
02-28-2016, 05:45 PM #592
Registered
- Join Date
- Jun 2012
- Posts
- 817
Re: Big Bamboo - New Machine Project Started
Those huge dinosaur eggs are really cool...
-
02-28-2016, 06:03 PM #593
Registered
- Join Date
- Nov 2007
- Posts
- 2151
Re: Big Bamboo - New Machine Project Started
First class design and fab work!
Over time I have pilfered some cool ideas from this thread!
-
03-01-2016, 09:16 PM #594
Registered
- Join Date
- Apr 2006
- Posts
- 1016
Do you have a sketch of this or cad drawing how the pulley configuration is layout Originally Posted by JerryBurks
I like to implement this idea where can I get more info on it
Great idea
-
03-02-2016, 04:51 PM #595
Registered
- Join Date
- Aug 2011
- Posts
- 999
Re: Big Bamboo - New Machine Project Started
Sorry, no separate drawing. I do have a 3D design file of the relevant components if that is any help. Originally Posted by eloid
Box Joint and Dovetail CAM software here: WWW.TAILMAKER.NET
-
03-03-2016, 09:36 AM #596
Registered
- Join Date
- Apr 2006
- Posts
- 1016
Re: Big Bamboo - New Machine Project Started
Can you pm me... I send you my email for the cad file..I'm trying to visualize in my head....the pulley path and over view of your set up.
Sent from my SM-T810 using Tapatalk
-
03-12-2016, 11:13 AM #597
Registered
- Join Date
- Apr 2006
- Posts
- 1016
Send you a pm Originally Posted by JerryBurks
Can you send me those 3d design files
Thanks
-
03-30-2016, 04:57 AM #598
Registered
- Join Date
- Aug 2011
- Posts
- 999
Re: Big Bamboo - New Machine Project Started
Well, an important birthday is coming up. I kind of like the result of this mini project. It is cut from 0.2" thick Mountain Mahogany with a 1mm end mill and a 60 degree v-bit and the whole set took only an hour or so. This is a local wood (brush) species that is extremely hard and dense but somewhat brittle. The growth rings are so narrow you need an eye loupe to see them. But pretty good for such detail work. The slimmest parts of the earrings are only 0.03" thick. The green eyes are crushed turquoise chips with a dome of CA glue. Pendant is 60mm x 40mm and the earrings are 45mm x 30mm.
Box Joint and Dovetail CAM software here: WWW.TAILMAKER.NET
-
04-20-2016, 04:25 PM #599
Registered
- Join Date
- May 2010
- Posts
- 93
Re: Big Bamboo - New Machine Project Started
That turned out great, and looks awesome! What were the feed and speeds? Originally Posted by JerryBurks
Sent from my SM-G925V using Tapatalk
-
04-21-2016, 10:50 PM #600
Registered
- Join Date
- Aug 2011
- Posts
- 999
Re: Big Bamboo - New Machine Project Started
- for the v-bits, 13krpm and 80 ipm Originally Posted by ecurb5
- for the tiny 1mm endmill 20krpm, 40 ipm and 1mm depth of cut. I probably could have increased the endmill speed a bit or go deeper but did not want to risk it. The cut for such a small part does not take that long, anyway (15-20 min IIRC)Box Joint and Dovetail CAM software here: WWW.TAILMAKER.NET

 Reply With Quote
Similar Threads
-
7 x 10 project started
By blades in forum Mini LatheReplies: 125Last Post: 01-25-2017, 05:27 AM -
CNC Project Started
By NotSqueaky in forum CNC Wood Router Project LogReplies: 8Last Post: 09-10-2014, 12:41 AM -
New Project Started
By Rumblebelly5 in forum Joes CNC Model 2006Replies: 1Last Post: 09-15-2012, 10:50 PM -
My 4x8 project has started
By MetalHead6263 in forum Plasma, EDM / Other similar machine Project LogReplies: 37Last Post: 01-31-2012, 07:30 AM -
Started new project
By rustamd in forum DIY CNC Router Table MachinesReplies: 55Last Post: 05-31-2009, 04:12 AM
