


Yea I agree that cut 3d is lacking in features I want. I may have to try Desk proto some time.
Great work on your part! I love seeing stuff like that! Too bad you painted it black it looked cool the way it was lol
Results 421 to 440 of 645
-
07-01-2013, 01:48 PM #421
 Registered
- Join Date
- Mar 2011
- Posts
- 584
My CRP 48 x 48 build http://www.cnczone.com/forums/open_s...3-crp_4x4.html
-
07-01-2013, 07:25 PM #422
Registered
- Join Date
- Aug 2011
- Posts
- 999
DeskProto has a lot of features but the learning curve is steeper than with 3dCut. Originally Posted by vtx1029

I had planned to leave the plywood visible but got concerned that the plies split apart with the engine heat cycling. Therefore I put a layer of glassfiber/epoxy on the outer surface and after that it did not look as pretty anymore. Then I spackled and painted it black. But the plywood is still visible from the inside ;-)Box Joint and Dovetail CAM software here: WWW.TAILMAKER.NET
-
07-01-2013, 07:30 PM #423
Registered
- Join Date
- Aug 2011
- Posts
- 999
As for longevity see the last post. I hope the glass fiber will take care of it. Originally Posted by Devastator
I don't think it will make much of a difference how the car runs. The velocity stacks are moderately extended and a bit more flared than before but the resulting differences are not an exact science and lots of opinions around. If any it would only be measurable at full throttle and since I don't go to the track anymore with this car I probably will not notice.Box Joint and Dovetail CAM software here: WWW.TAILMAKER.NET
-
11-02-2013, 09:26 PM #424
Registered
- Join Date
- Aug 2011
- Posts
- 999
I have not posted much lately, mainly because I consider the machine complete. Little mods here and there but mainly I just use the machine for my funky projects.
I did one the last couple of days that came out quite nice. I wanted to make a rather large Lazy Susan (21.5" diameter) with the bearing races cut directly into the wood. To prevent the wood from warping and cupping I designed a jigsaw puzzle or quilt pattern that allows a circumferential grain direction. Besides being functional, IMHO it also looks pretty. Then I cut the ball channels into the plate with a ball end/plunge bit (not a ballnose bit), separated the inside from the outside and filled the channel with red glass marbles. My wife already noticed it may have some practical issues with food spills into the bearing but it sure looks good
BTW, it is poplar and cherry. I like how the grain lights up in the sun when turning in different orientation.


Box Joint and Dovetail CAM software here: WWW.TAILMAKER.NET
-
11-05-2013, 01:30 AM #425
Member
- Join Date
- Feb 2005
- Posts
- 829
that is a neet lazy susan jerry!
-
11-05-2013, 02:54 AM #426
Registered
- Join Date
- Jun 2012
- Posts
- 817
very pretty......
-
11-09-2013, 06:27 AM #427
Member
- Join Date
- Feb 2005
- Posts
- 829
oops, wrong thread.
-
11-24-2013, 01:00 AM #428
Registered
- Join Date
- Aug 2011
- Posts
- 999
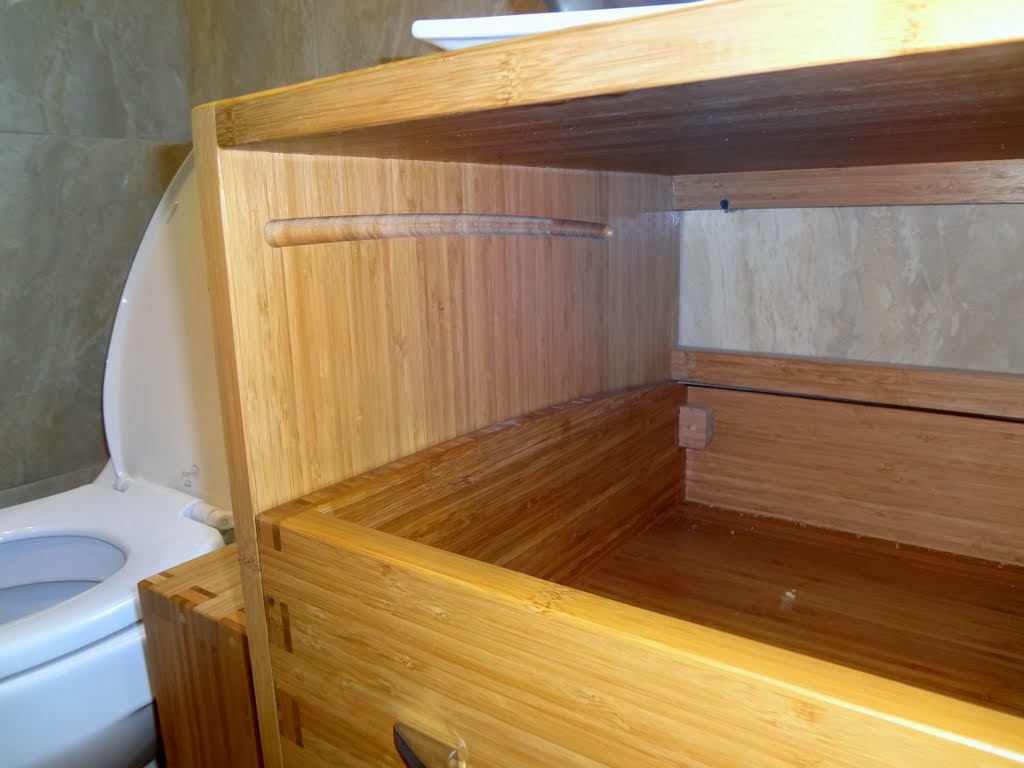
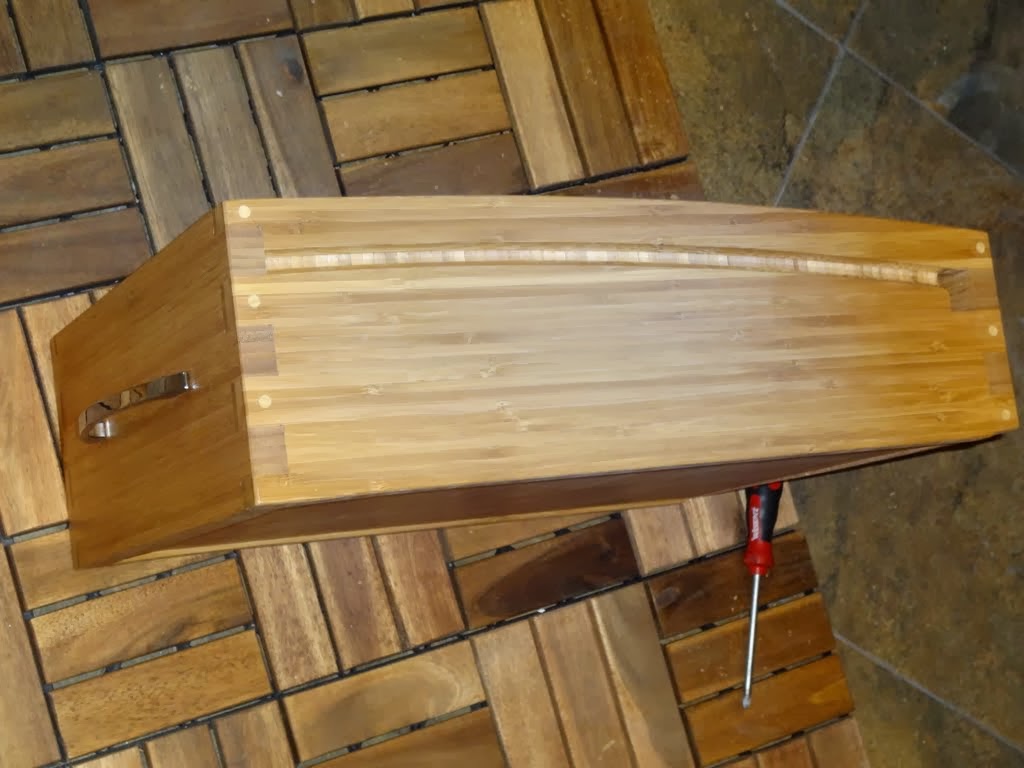
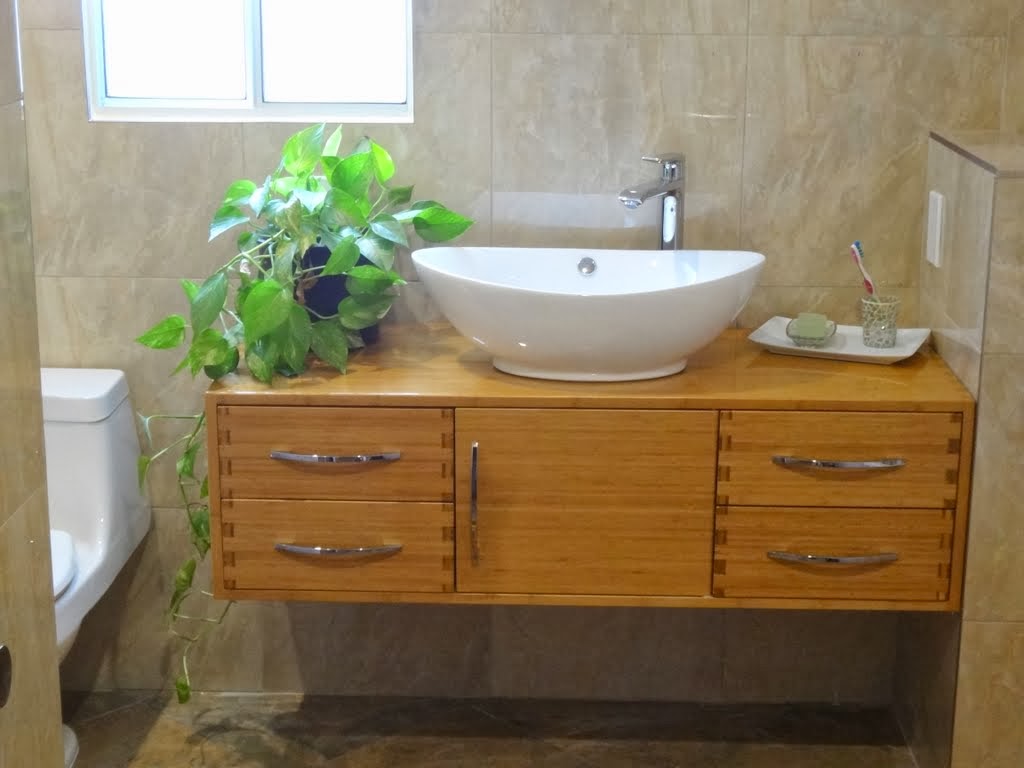
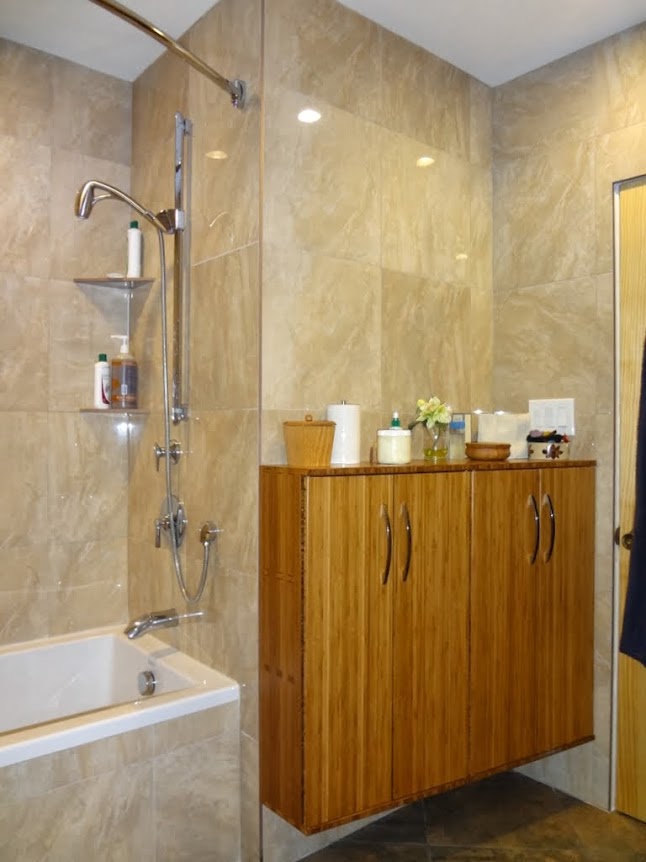
O.K., it is not a Paradise Box but it is a box nonetheless . I put the Big Bamboo machine to good use for our remodeled bathroom. And, no question it is made of Bamboo

 Box Joint and Dovetail CAM software here: WWW.TAILMAKER.NET
-
11-24-2013, 07:24 AM #429
Member
- Join Date
- Apr 2007
- Posts
- 8082
Wow Jerry, that looks nice.
CarveOne
http://www.carveonecncwoodcraft.com
-
11-24-2013, 07:49 AM #430
Registered
- Join Date
- Aug 2012
- Posts
- 621
I've been puzzling over your drawer slides. Did you use marbles, and are those loading slots/marble retainers/stops at the rear of the drawers? 'Cause, damn. that's slick!
Luke"All I'm trying to find out is the fellow's name on first base" -- Lou Costello
-
11-25-2013, 07:12 AM #431
Registered
- Join Date
- Aug 2011
- Posts
- 999
Not marbles (they are not very accurate) but 1/2" bearing balls. Yes the slots at the rear are for loading and the little block keeps the balls from falling out (can be removed to take the drawers out). Originally Posted by Trotline
It works reasonably well. But this is my first attempt and it surely can be improved. Right now the balls are loose in the channel and when some aggregate on the wrong end there is a bit of unwanted friction. The curved channel was supposed to make the drawers self closing but that does not work reliably due that. For practical daily use it is good enough and better than solid slider bars.Box Joint and Dovetail CAM software here: WWW.TAILMAKER.NET
-
11-28-2013, 09:50 PM #432
Registered
- Join Date
- Aug 2011
- Posts
- 999
I have been experimenting with vacuum clamps and built at one point a roots blower pump that was way too powerful for my small part holding purposes and too noisy for the residential neighborhood.
Lately I used a smaller dual rocking piston 3/4 hp pump (like the Gast pumps) with good success. Not only very quiet but also great holding power with two or more 4x4" pods. However, getting the initial grab before the seals are compressed seems to be a well known issue with such small pumps.
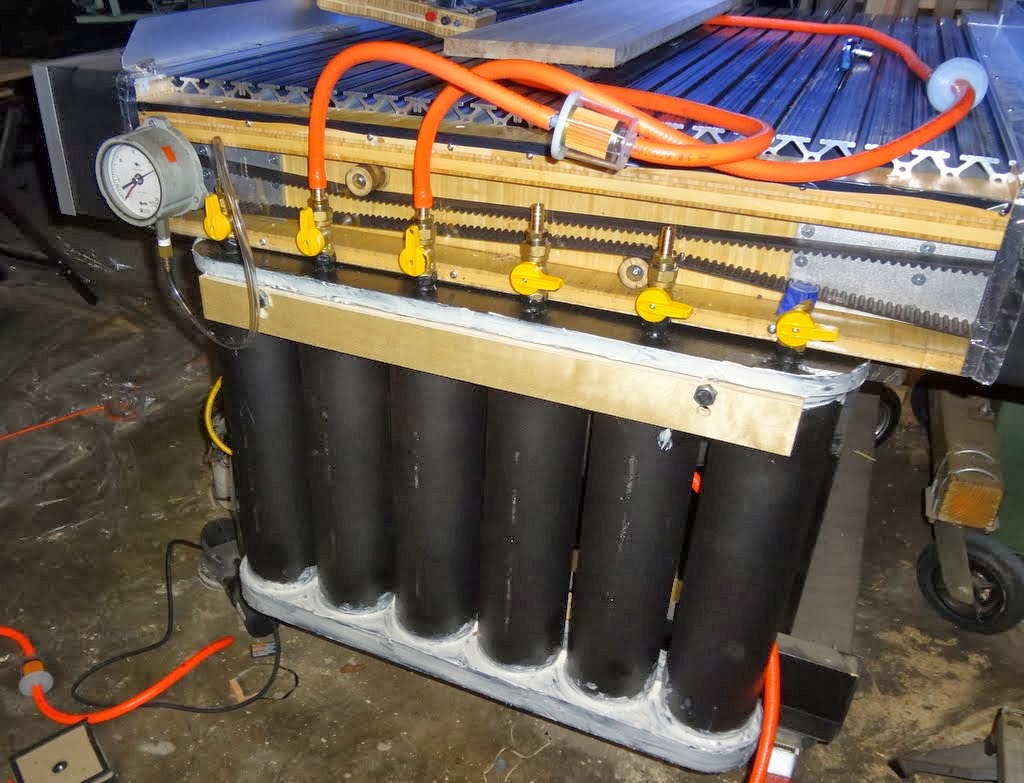
Today I installed a combined manifold/storage tank that I made from a 10' section of black 4" ABS drainage pipe. Cut into six 20" sections it is compact and tucks in neatly under the CNC table. One mistake was to machine the end caps from MDF. Even after coating with 2 thick layers of acrylic paint it still leaked around the joints. It took a generous smear with silicone sealant to get it to hold tight. It would be much better to make the caps out of ABS or PVC, too.
I wanted to make the distance between the storage and the pods as short as possible and with good sized 1/2" fittings/tube to allow for a serious "suck" event when the ball valve (natural gas valve) is turned on. The filters in the lines to the pods are 3/8" universal fuel filters from Autozone. They are transparent and will show when I need to blow them out (cheap, too).
In Action:
Interesting effect: I managed to cut into the area of the vacuum pods by mistake but I did not lose vacuum completely. The fine chips clogged the gap between the work piece and the pod. While a bit reduced, the vacuum held up to the end of the cut:
 Box Joint and Dovetail CAM software here: WWW.TAILMAKER.NET
-
11-29-2013, 02:09 AM #433
Community Moderator
- Join Date
- Mar 2003
- Posts
- 35538
Vacuum is a great thing.
Gerry
UCCNC 2017 Screenset
http://www.thecncwoodworker.com/2017.html
Mach3 2010 Screenset
http://www.thecncwoodworker.com/2010.html
JointCAM - CNC Dovetails & Box Joints
http://www.g-forcecnc.com/jointcam.html
(Note: The opinions expressed in this post are my own and are not necessarily those of CNCzone and its management)
-
11-30-2013, 04:45 AM #434
Registered
- Join Date
- Aug 2011
- Posts
- 999
Yes! I wasted 2 years with my CNC and messing with hold-down clamps. The vacuum won't work for all jobs but for me it is probably 80% and on such jobs it is much more precise and reliable. Dead flat and like bolted to the table. Originally Posted by ger21
Box Joint and Dovetail CAM software here: WWW.TAILMAKER.NET
-
12-09-2013, 02:56 AM #435
Registered
- Join Date
- Aug 2011
- Posts
- 999
I expanded the vacuum setup for my range extender table (I posted about that one a while ago). That table is just a flat sheet (actually a Masonite slab door) and vacuum is the only reasonable way of holding down a part. With the pods cut from 3/4" plywood and sealed with some wood glue the 4 pods hold 24" vacuum with my little pump. I also experimented with gasketing tape and found the 3/8 wide and 3/16 thick black Frost King weather strip works best for me. Seals just as well and much easier to use than the expensive gasket tape that needs a groove to be cut.
Extension table with separate vacuum lines.

Pods:
 Box Joint and Dovetail CAM software here: WWW.TAILMAKER.NET
-
12-16-2013, 06:04 AM #436
Registered
- Join Date
- Aug 2011
- Posts
- 999
That is what I needed the vacuum pods for. Finally I am finishing my bathroom remodel project.
Vanity mirror with back light (actually the light in the pic is just the flash reflection, not the LED behind it):
 Box Joint and Dovetail CAM software here: WWW.TAILMAKER.NET
-
12-24-2013, 12:44 AM #437
Member
- Join Date
- Nov 2013
- Posts
- 12
Hi Jerry ,
your mashine is very impressive and i have learned a lot reading the thread. One quick question ,what is the diameter of the rails you are using and did you noticed any play from the linear bearings? I´m planning on using the same type for a machine i´m designing ,mainly because of the cost.
Thanks.
-
12-24-2013, 01:22 AM #438
Registered
- Join Date
- Aug 2011
- Posts
- 999
Well, the linear bearings are probably the weakest link in this machine. I used regular 20mm supported rails that I bought from Glacern.com, I spaced them generously and used a dual screw x-drive. Not to say that these are bad bearings and they are good enough for most of the stuff I am doing. But given the open shell of the bearing sleeve they have some measurable flex. Accuracy is surely better than what you can achieve with CRS rails and skate bearings but I wish I had spent the extra bucks for THK style bearings. My heavy bamboo machine is super rigid and the Kuroda ball screws are the dog's bollocks. But the bearings limit the rigidity quite a bit.
If you are planning to do the usual light mid-size woodworking jobs you should be fine with the round supported rails (or even unsupported for a small machine). But if you need very high accuracy or high loads (or if money does not matter) you should look for better linear bearings.Box Joint and Dovetail CAM software here: WWW.TAILMAKER.NET
-
12-26-2013, 07:15 PM #439
Member
- Join Date
- Nov 2013
- Posts
- 12
Thanks for the reply. One more question, does the housing of your linear bearing permit adjustement? I´m asking because i saw on ebay some linear bearings like yours which have a lateral screw for adjusting the play. Something similar to this photo.
Attachment 215490
-
12-27-2013, 05:18 PM #440
Registered
- Join Date
- Aug 2011
- Posts
- 999
The first set that I bought from Glacern did have the adjustment screws. The second set under same part number and otherwise identical did not. Originally Posted by dedeer
I think the little adjustment screws are kind of useless. They put a point load on the bearing shell that holds the balls and if a little overtightened the bearing will bind. They would need some threadlocker anyway of they will work loose easily.
The bearing in your picture looks a little different and the screw may actually do something.Box Joint and Dovetail CAM software here: WWW.TAILMAKER.NET

 Reply With Quote
Similar Threads
-
7 x 10 project started
By blades in forum Mini LatheReplies: 125Last Post: 01-25-2017, 05:27 AM -
CNC Project Started
By NotSqueaky in forum CNC Wood Router Project LogReplies: 8Last Post: 09-10-2014, 12:41 AM -
New Project Started
By Rumblebelly5 in forum Joes CNC Model 2006Replies: 1Last Post: 09-15-2012, 10:50 PM -
My 4x8 project has started
By MetalHead6263 in forum Plasma, EDM / Other similar machine Project LogReplies: 37Last Post: 01-31-2012, 07:30 AM -
Started new project
By rustamd in forum DIY CNC Router Table MachinesReplies: 55Last Post: 05-31-2009, 04:12 AM
