


I have had stuff repaired under warranty in the past, and I can tell you from experience, that it's a crap shoot when things get shipped across the border. On one occasion, I was charged almost $50 in brokerage fees for something I had repaired.Originally Posted by Torchhead

My unit has the MOD A label, so I'm good to go. Nice unit BTW, I had no issues getting everything to run. Nice quality stuff !!
Dan
Results 21 to 40 of 51
-
12-07-2011, 01:26 AM #21
 Registered
- Join Date
- Aug 2008
- Posts
- 303
The one that dies with the most tools, WINS !!
www.dantechfabricating.com
-
12-07-2011, 05:20 PM #22
Registered
- Join Date
- Sep 2007
- Posts
- 64
Hey Danno,
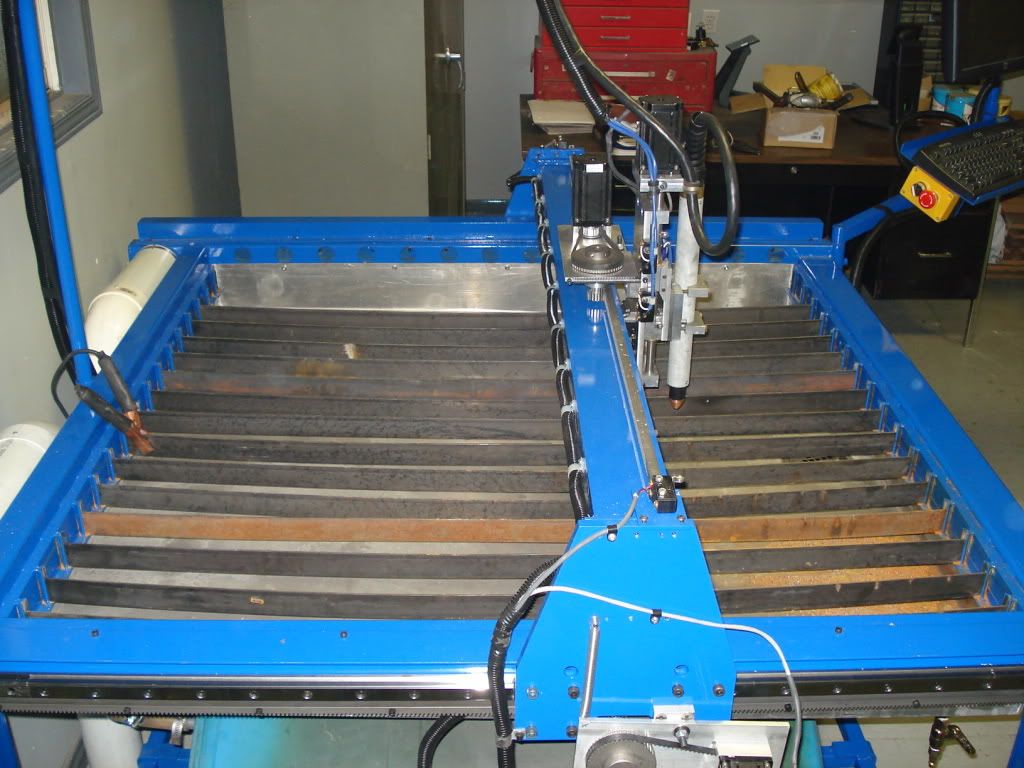
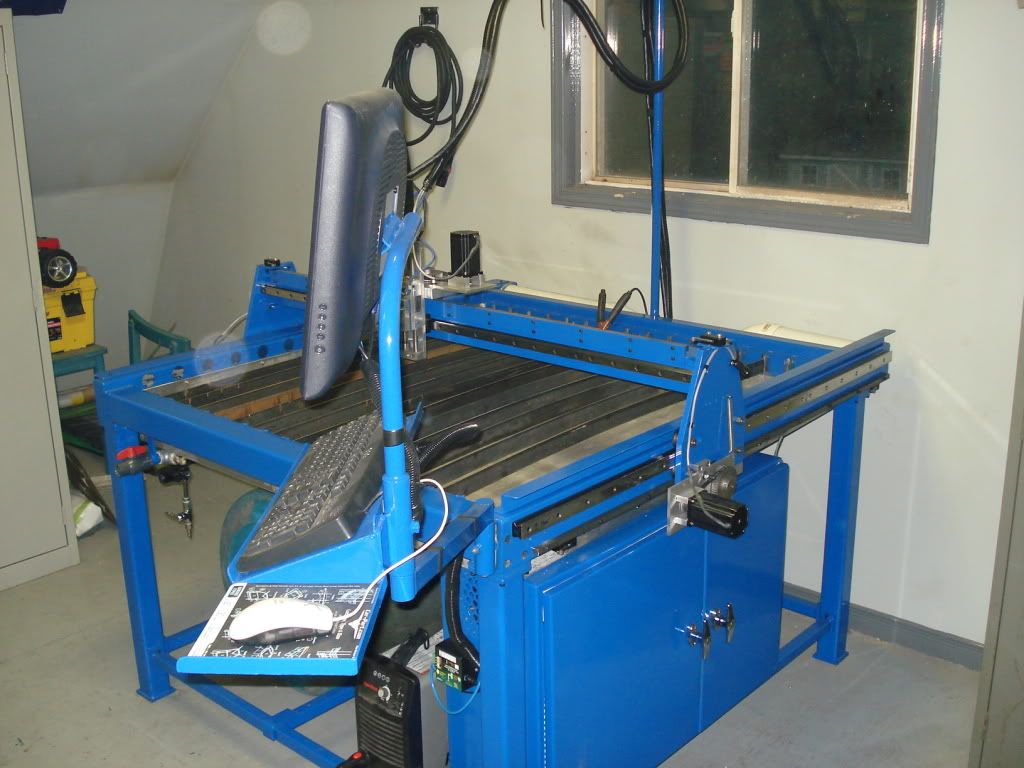
I'm currently at the stage of my build where I need to start thinking about the slats and water table. I want to build my slats in a similar way as you so that when they get worn they are easy to replace. From your images it looks like your slats are 1.5"x1/8" flat stock with anywhere from 2-3" from the bottom of the slats to the bottom of the water table. My first question is why did you build the water table at an incline? Also what is your water depth? I cant seem to find much info about how much water to put in.
Second your slats appear to be just held in by gravity and the pressure of the slight bend. What I'm curious about is do the slats sag any when material is placed on them? There isnt anything other than the sides holding them up. I probably wont be cutting anything more than 1/8" mild steel with my table, max of a 4'x4' sheet so I'm not too worried about this but just curious.
Thanks!
-
12-08-2011, 02:05 AM #23
Registered
- Join Date
- Aug 2008
- Posts
- 303
I built the water table at an angle so that all the water would drain to one point, and also to empty the table faster. The water at the back (which will rarely be used is 3 inches deep. At the front it's 4" deep. Originally Posted by HakBot
I was always planning on having a support for the slats at mid point. If I don't need it, I won't bother.
If you look closely, you'll see that the slats fit into 1/2x1/2x1/8 angle pieces about 2 inches long. This locates the slats nicely.
I put a slight curve to the slats for 2 reasons. One is to hold them firmly, the other is in case I happen to cut a straight line allong the "y" axis, and didn't want to be directly above a slat.The one that dies with the most tools, WINS !!
www.dantechfabricating.com
-
12-10-2011, 06:05 PM #24
Registered
- Join Date
- Nov 2011
- Posts
- 0
hey, the machine looks great.
I have a question. I also use Powermax and I'm planning on building a water table. Hypertherm doesn't recommend using Powermax with water tables. Have you experienced any problems with the consumables of the nozzle while using the Powermax? At what water level do you cut? Below or above the plate?
Thanks!
-
12-10-2011, 11:16 PM #25
Registered
- Join Date
- Aug 2008
- Posts
- 303
My table is just getting finished, so there's not much running time on it yet. Originally Posted by C Bad
To use, or not to use water has it's pros and cons.
If you talk to Jim Colt (Hypertherm), he'll tell you to keep the water a least 4 inches away from your workpiece for better results. I agree with him, but on the other hand, I don't want plasma dust all over my shop or in my lungs. Time will tell how I run my table, but I am willing to sacrifice a bit of quality for a cleaner shop, so I will most likely run the water just below the workpiece.
As far as longevity of the consumables, I'm not sure if the water will shorten their life or not. Time will tell !!The one that dies with the most tools, WINS !!
www.dantechfabricating.com
-
12-16-2011, 03:09 PM #26
Registered
- Join Date
- Aug 2008
- Posts
- 303
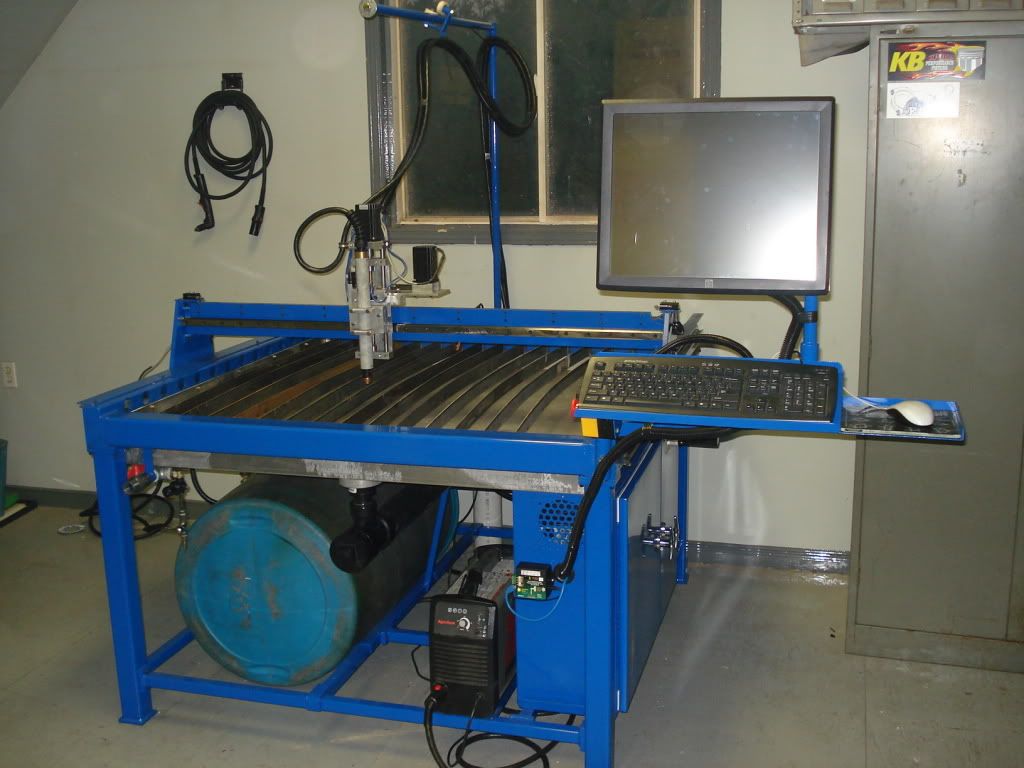
Machine is completely done !! It works great, and took me about 8 weeks working on and off to get it done. This will be the last batch of pictures I will be posting, but may throw up a video when I get a chance.
Good luck with your table build.


 The one that dies with the most tools, WINS !!
www.dantechfabricating.com
-
12-16-2011, 06:15 PM #27
Registered
- Join Date
- Aug 2008
- Posts
- 303
Here's a video of one of the first parts being cut.
 The one that dies with the most tools, WINS !!
www.dantechfabricating.com
-
12-16-2011, 08:15 PM #28
Registered
- Join Date
- Aug 2008
- Posts
- 303
OK, here might be the last uploads on this build.
This just shows the water being filled and emptied. Not very exciting, but I haven't seen it posted before, so here goes.
Dan
 The one that dies with the most tools, WINS !!
www.dantechfabricating.com
-
12-16-2011, 08:25 PM #29
Registered
- Join Date
- Jan 2011
- Posts
- 0
HAHAHA, I've cut out that same file, complete with dropping out the O's and the middle Harley-Davidson part.

Question for you--is your DTHC working? I saw 152 in your preset volts, and actual volts at 118-ish. The THC On light is blinking, but it should have been lifting the torch way too high with that 152 in there.Carl
-
12-16-2011, 10:31 PM #30
Registered
- Join Date
- Aug 2008
- Posts
- 303
Good eye !! I've only cut a few parts so far with good results and didn't notice that.
What's a good way of testing it?The one that dies with the most tools, WINS !!
www.dantechfabricating.com
-
12-17-2011, 02:13 AM #31
Registered
- Join Date
- Oct 2007
- Posts
- 61
You have great skills!!!! Fantastic!
-
12-17-2011, 12:41 PM #32
Registered
- Join Date
- Nov 2011
- Posts
- 0
The new pics are great. I'm trying to get my head around the whole water system under the table. I have another question. Although this is a small table and the problem with slag might be easier to coup with, how do you deal with the slag? Does it also go down the drain and lay in the horizontal tubing? Where then you open the side and pull it out? Or does it somehow return to your tank? Or do you simply have some sort of strainer at table level? Thanks.
-
12-17-2011, 04:00 PM #33
Registered
- Join Date
- Aug 2008
- Posts
- 303
I haven't done much cutting on it yet, but I designed it so that heavy particles that went down the drain would collect in the 4" dia drain tube, which acts like a large "P" trap. Originally Posted by C Bad
Cleaning it is just a matter of unscrewing the large "nut", and scooping the junk out.
In actual fact, not much slag goes down the drain, so after the water has drained, I use a shop-vac to clean the bottom of the table.The one that dies with the most tools, WINS !!
www.dantechfabricating.com
-
12-17-2011, 04:01 PM #34
Registered
- Join Date
- Aug 2008
- Posts
- 303
Thanks Mick !! I appreciate the comment. Originally Posted by Mick40
DanThe one that dies with the most tools, WINS !!
www.dantechfabricating.com
-
12-18-2011, 03:30 AM #35
Registered
- Join Date
- Sep 2004
- Posts
- 35
Thanks much for sharing, ..... it's an inspiration and a great help !!
-
12-18-2011, 10:06 PM #36
Registered
- Join Date
- Aug 2008
- Posts
- 303
The table as far as movement is working great. I'm having major issues however with the torch height control. I'm using the latest equipment from CanCNC, but something is messed up. I will call Tom tomorrow to try and get this fixed up.
The one that dies with the most tools, WINS !!
www.dantechfabricating.com
-
12-19-2011, 04:55 PM #37
Registered
- Join Date
- Sep 2010
- Posts
- 0
water system
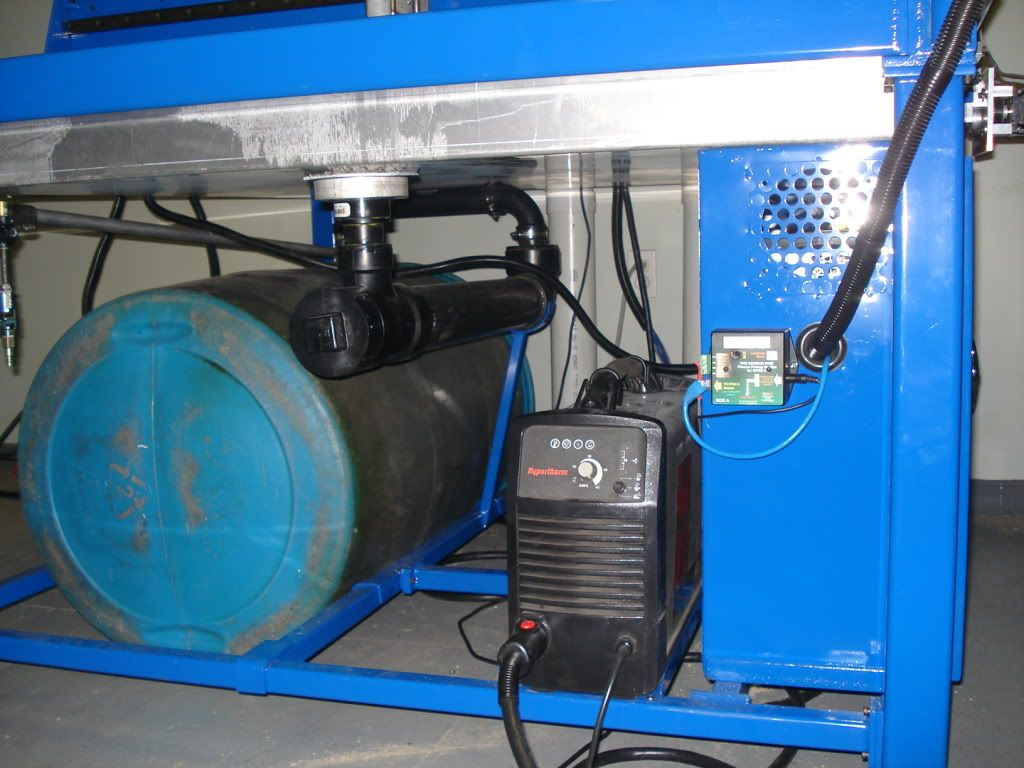
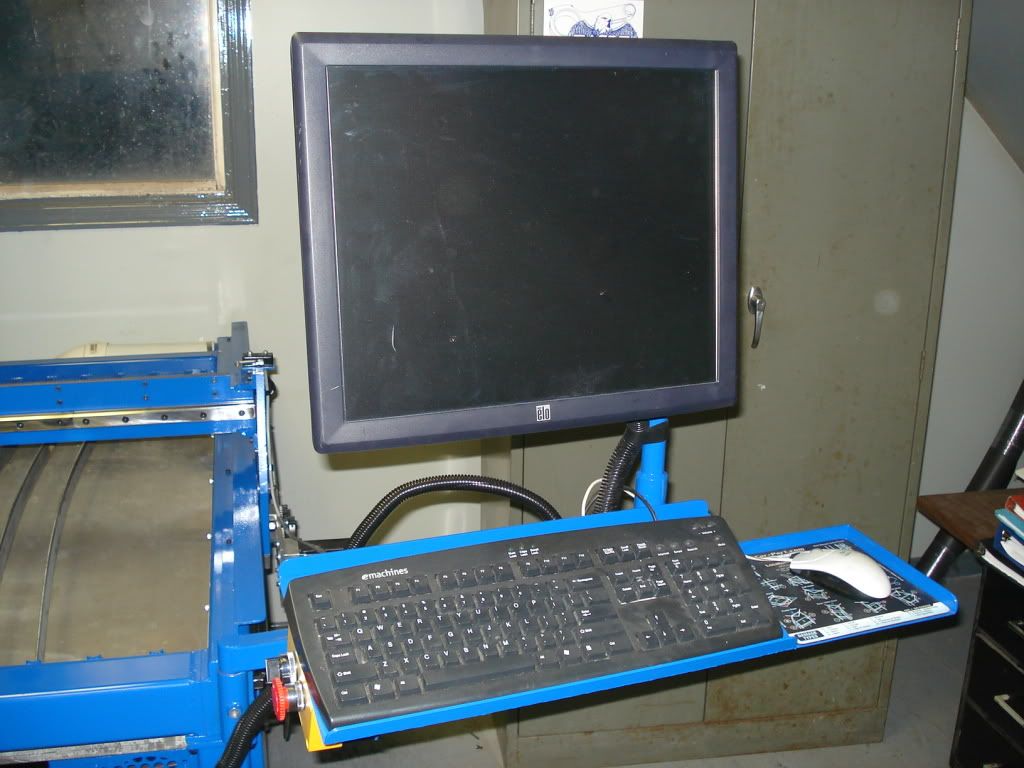
Your build looks great. I am in the process of building a table too and you have given me some new ideas for my table. I am interested in your water system. I am not sure how it works and why the barrel. Does the water drain into the barrel and then is stored there when not in use and then pushed back into the tray when in use? I am not sure of the whole concept. If you could explain the whole water system to me I would appreciate it. I may want to incorparate it into my table. I really like the boxes you made for the bladerunner and computer and your mounting for the keyboard and monitor. I started making a separate table for my stuff but space is very much a problem in my shop and I like your design and may abandon my extra table and use a system like what you did. Very nice job on the whole thing. I just received my package from CandCNC and hopefully will get things worked out too. My head is swimming from reading all the manuals. Let me know about the water system. Thanks.
G & S Fabricating
-
12-19-2011, 07:29 PM #38
Registered
- Join Date
- Aug 2008
- Posts
- 303
Building one of these is definitely overwhelming !! It's like anything though, after a while you'll get comfortable with everything and things will look much simpler. Originally Posted by grgmsn
I built a CNC mill a couple years ago, so thankfully I have the concept partially known, as well as I now know how to draw stuff in CAD. That was the biggest challenge !
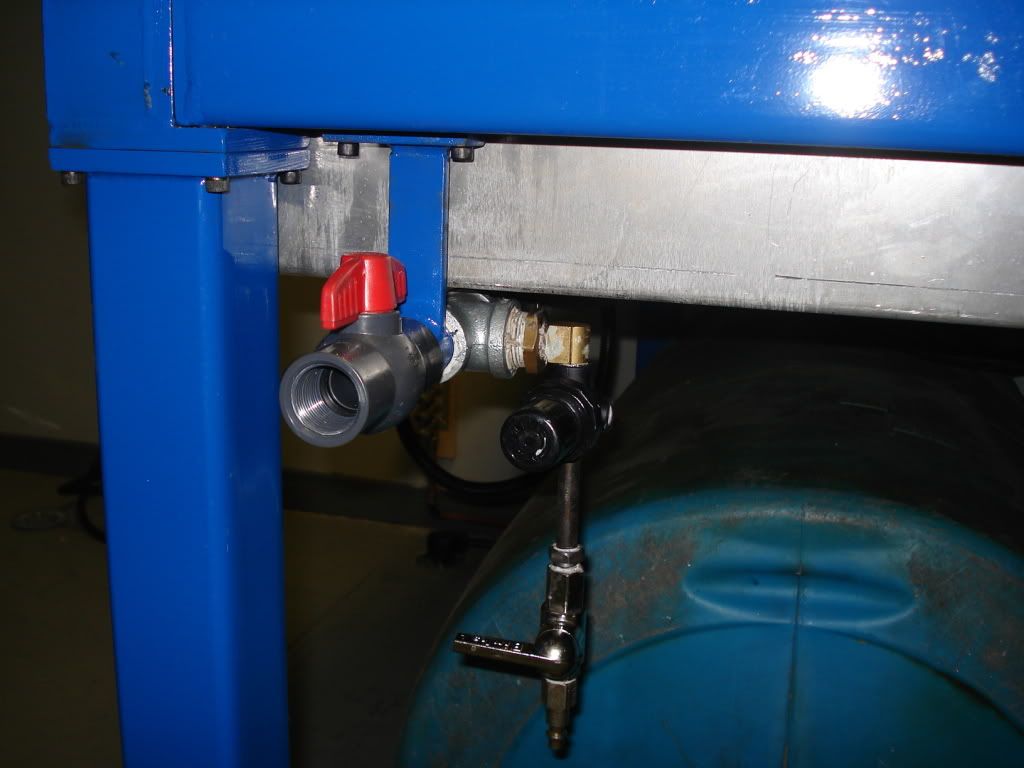
My water table is pretty simple, and you seem to have figured it out. I don't want a tablefull of water sitting out in the open, so when not in use it all drains back into the drum under the table.
Check the 2 videos I posted on how the table fills and empties.
It's all controlled with air and a couple of ball valves.
Like I said, watch the 2 videos, and if you're not clear about something, let me know and I'll try to help you out.
I guess it's hard to tell that they are videos, but the 2 pictures dated 12/16/2011 @2:15 pm are actually links to the videos.DanThe one that dies with the most tools, WINS !!
www.dantechfabricating.com
-
12-21-2011, 07:24 AM #39
Registered
- Join Date
- Dec 2011
- Posts
- 0
How is that downdraft system working out? I'm at the point with my table that I might go that way so let me know.
--John
-
12-21-2011, 02:24 PM #40
Registered
- Join Date
- Aug 2008
- Posts
- 303
I had to send my THC circuit boeard back to CandCNC to get the firmware updated. I won't be able to try the vaccuum system till I get it back.
The one that dies with the most tools, WINS !!
www.dantechfabricating.com

 Reply With Quote
Similar Threads
-
Question About Old CNC Plasma Table with pics
By Chestrockwell in forum Waterjet General TopicsReplies: 8Last Post: 07-15-2012, 06:09 AM -
Can I Build A Cnc Table Out Of These Parts?? Pics
By douglasco in forum Open Source CNC Machine DesignsReplies: 12Last Post: 11-04-2008, 12:34 AM -
new plasma table buildup with pics
By timmyb199 in forum Plasma, EDM / Other similar machine Project LogReplies: 44Last Post: 12-17-2007, 02:59 AM -
Starting Plasma Table Pics Added
By MMT in forum Plasma, EDM / Other similar machine Project LogReplies: 11Last Post: 11-23-2005, 08:07 AM
