


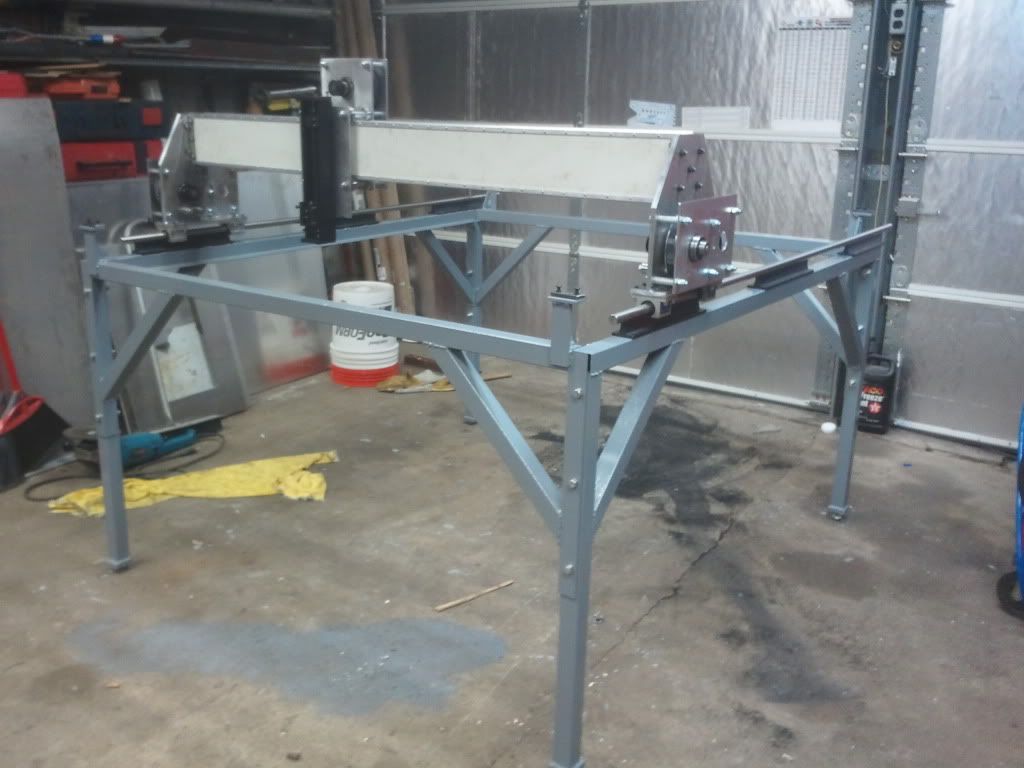
I started a CNC plasma table build about 6 weeks ago Here's what I've done so far. I wanted to be able to cut a 4x4 sheet edge to edge, so my table has a slightly larger footprint. The table will be completely dismantleable so I can stash it away when I'm not using it. At this point I don't think I'll be using a water table. But a downdraft would be pretty easy for me to implement since I already have negative air machine capable of 2000cfm air movement .
Results 1 to 20 of 81
Hybrid View
-
04-15-2012, 03:42 PM #1
 Registered
- Join Date
- Mar 2012
- Posts
- 140
4x4'6" CNC plasma table build, Xalky...
-
04-15-2012, 03:42 PM #2
Registered
- Join Date
- Mar 2012
- Posts
- 140
Here's a link to the Negative air machine.I can either exhaust to outside or just filter the air with the built in hepa filter.
Novatek Novair 2100 Negative Air Scubbing Machine
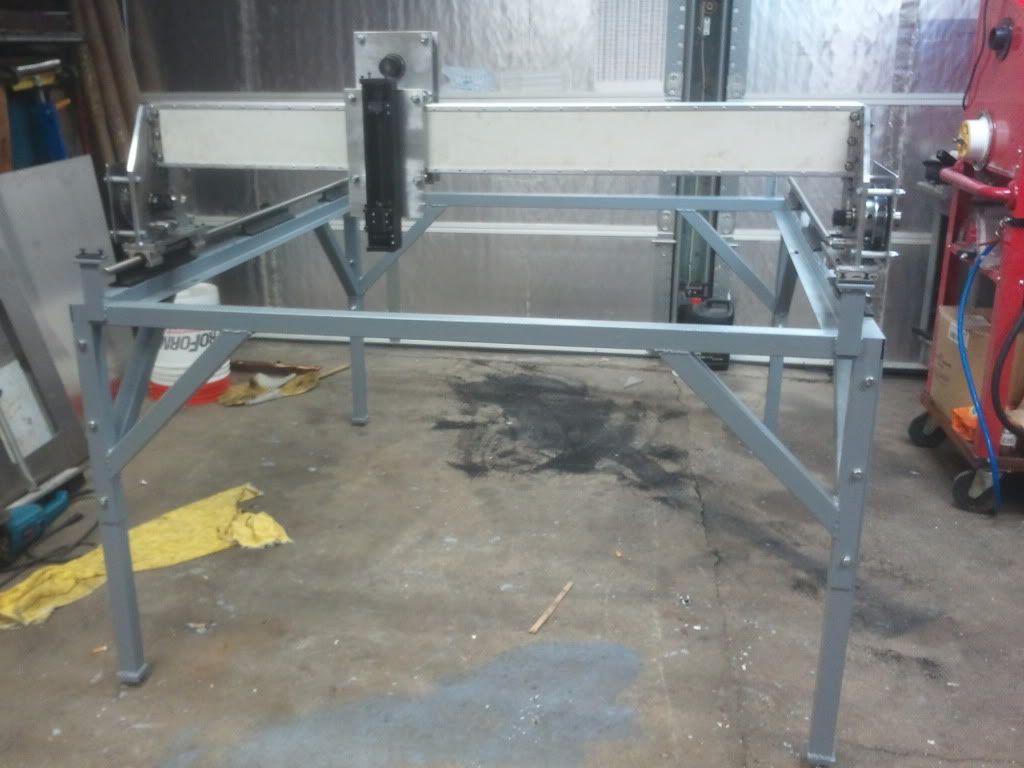
The frame base is built and I'm in the process of painting it now. I'll post pictures of it once it's painted and reassembled.
-
04-15-2012, 07:10 PM #3
Registered
- Join Date
- Mar 2012
- Posts
- 140
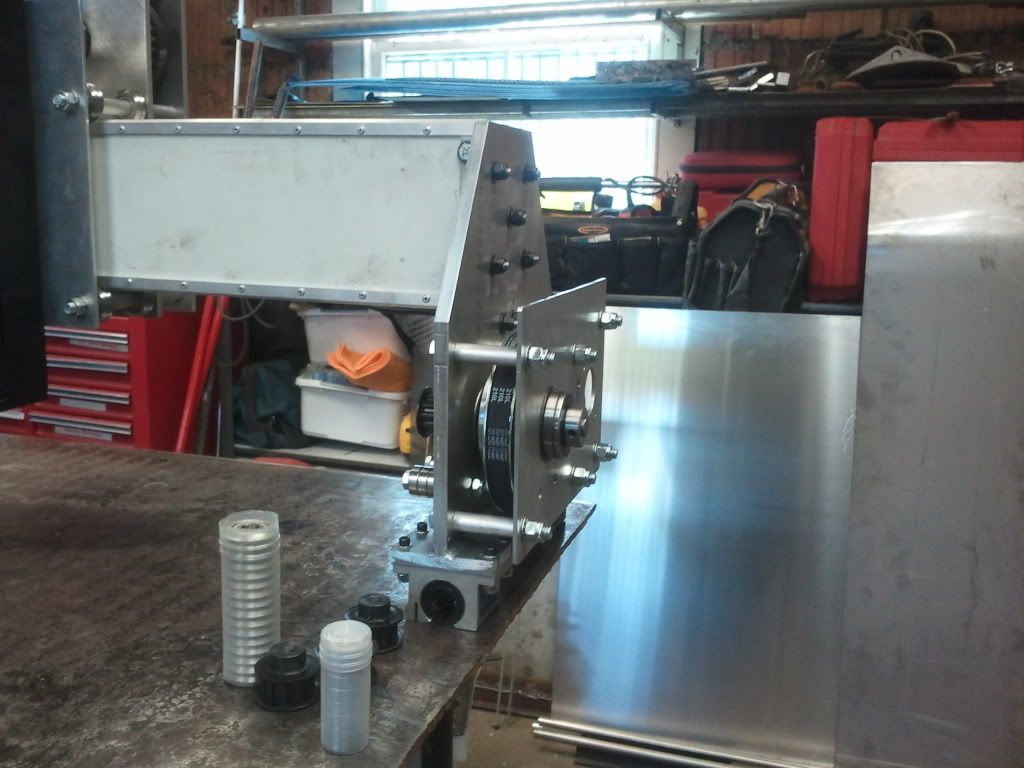
It will be using a belt drive system with a 4 to 1 belt reduction. I'm using 3/8" pitch x 1/2" wide "L" timing belts.
I'm going with the CandCNC setup with THC and the 620oz/in motors. I'm still waiting on that stuff to arrive. I'm hoping it'll be here by 4/20 so I can get this hooked up to my PC next weekend.
If anyone can point me to a thread with a nice simple torch touch off. that would be great.
Thanks
-
04-16-2012, 02:01 AM #4
Registered
- Join Date
- Mar 2012
- Posts
- 140
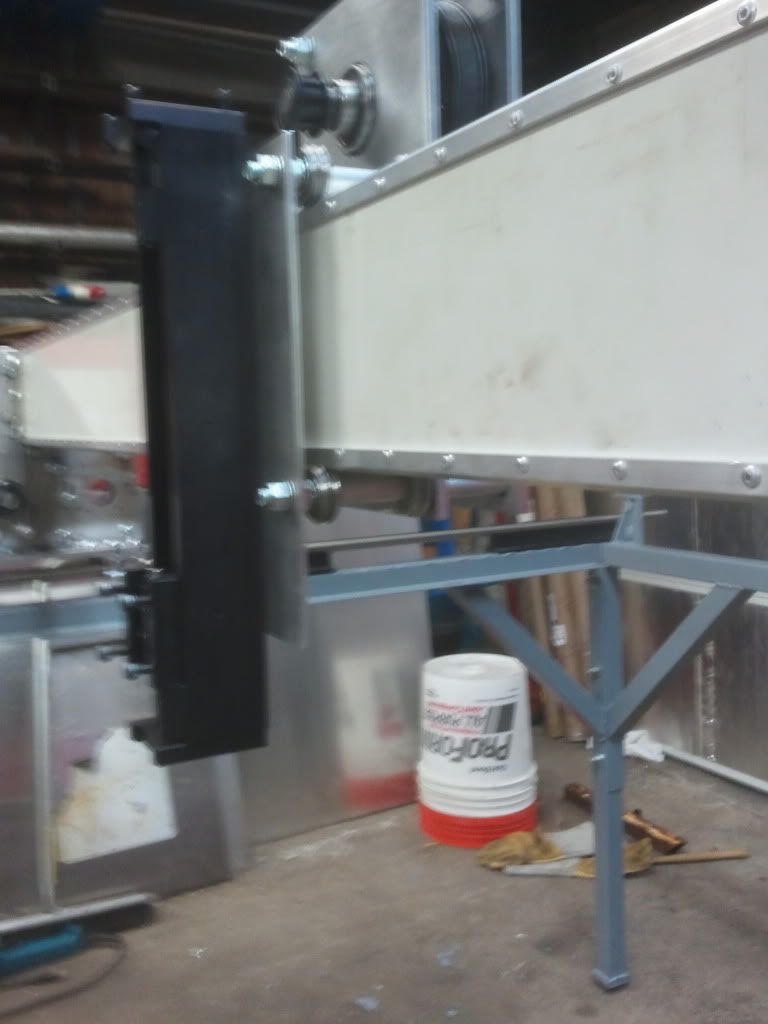
I welded up the frame this week and painted it this weekend and reassembled. The steel is all recycled stuff picked up over the years. Some of it had to be scraped and it all had to be blasted to remove rust and loose paint. I was gonna go out and buy new stuff but I had this and the price was right.
All painted in my favorite designer color....Battleship Grey.
-
04-16-2012, 02:19 AM #5
Registered
- Join Date
- Nov 2007
- Posts
- 250
Hello,
Your off to a good start that's for sure.
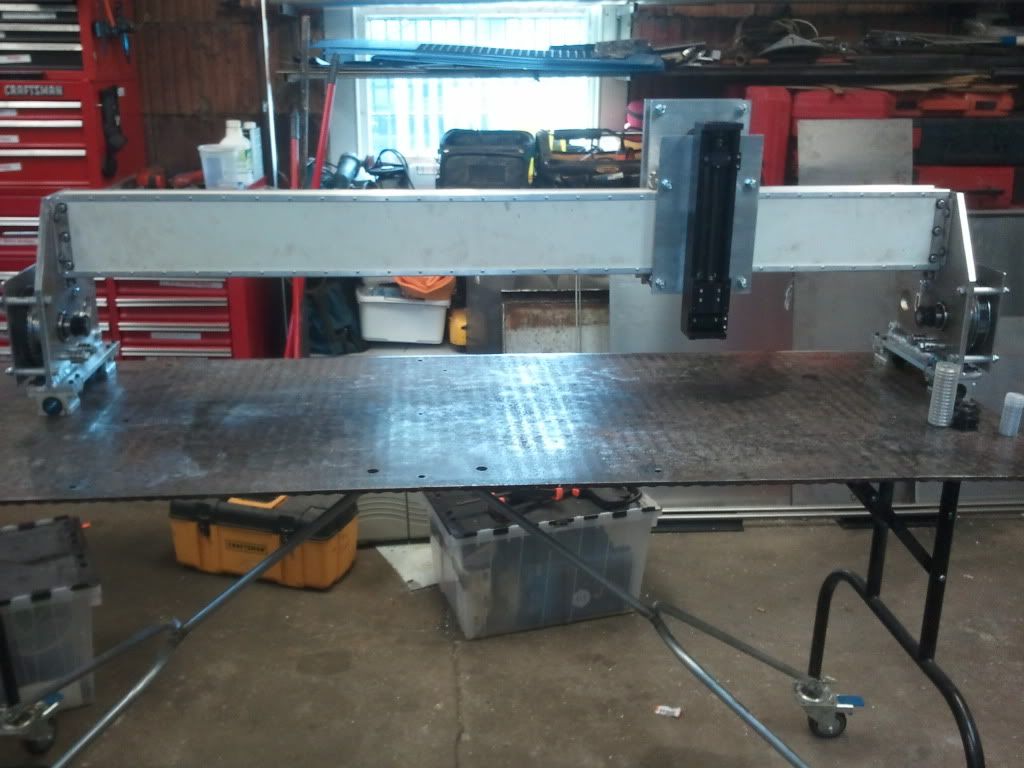
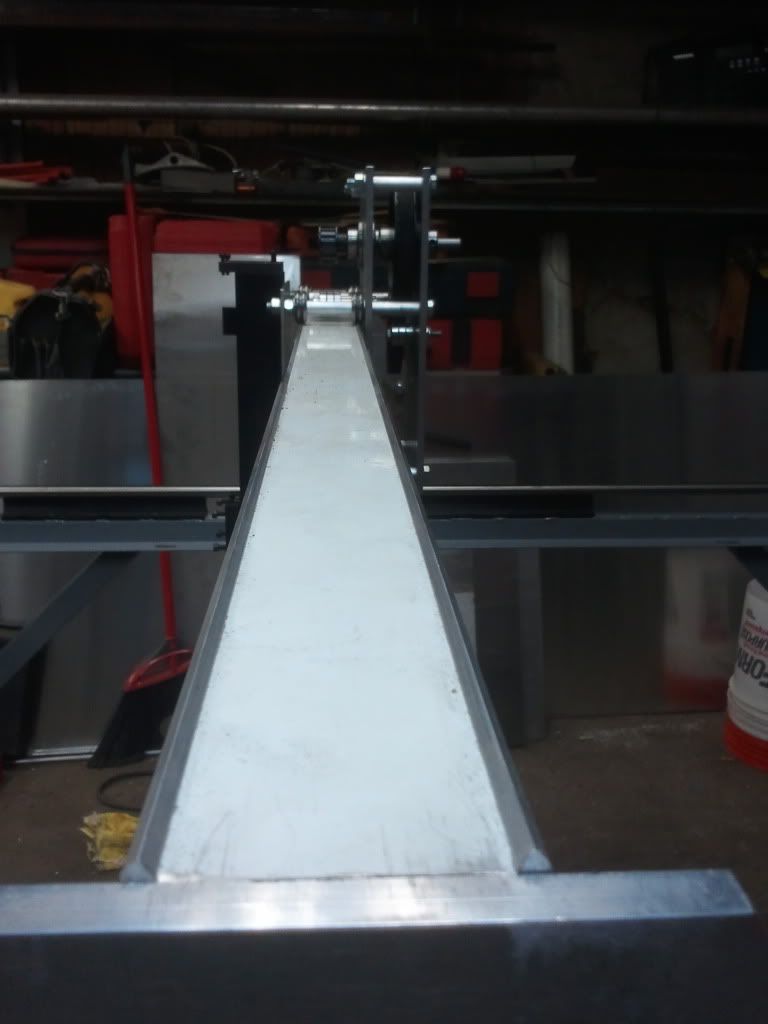
What did you build the gantry box out of? I can make out vee rollers, you have them on all for corners?
If you have time, shoot a pic from the end so we can see what you did there.
Be thinking of how your going to keep your rails clean. That dust is a problem to say the least.
aj
-
04-16-2012, 03:11 AM #6
Registered
- Join Date
- Mar 2012
- Posts
- 140
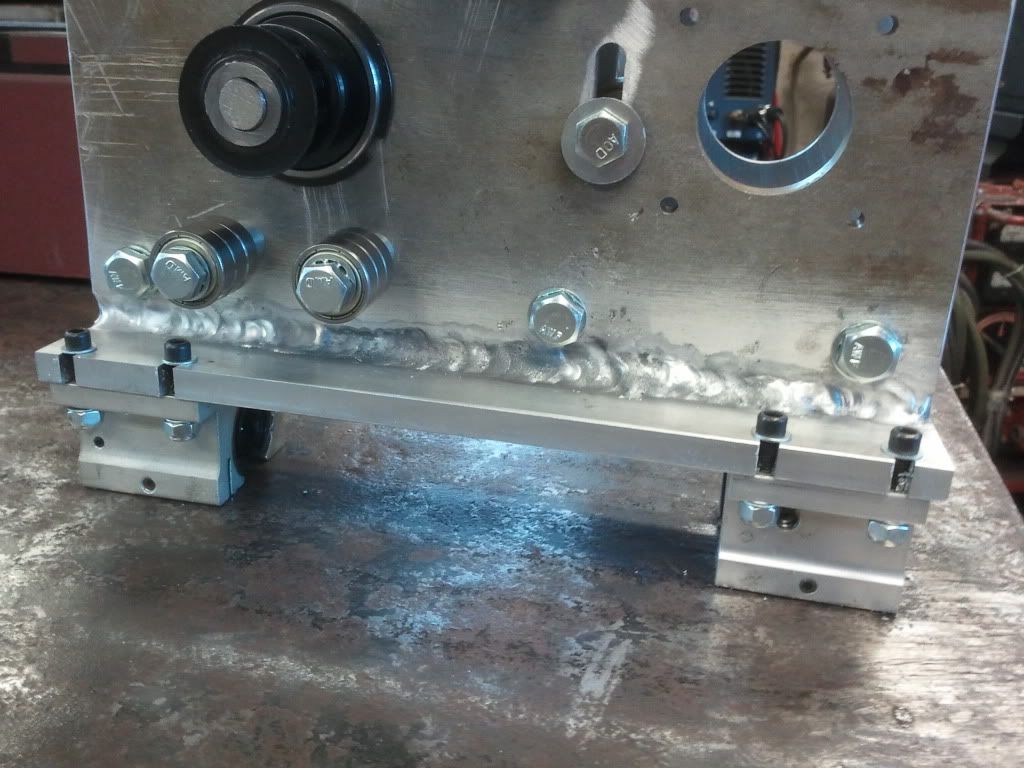
The Gantry box is a piece of 2x5 aluminum extruded tubing that I got from a dismantled aluminum sun room. There are aluminum v-rails riveted on all 4 corners. Right now as it sitd the gantry weighs under 50lbs. I'm guessing with the motors attached, it'll weigh around 60lbs. Originally Posted by ajclay

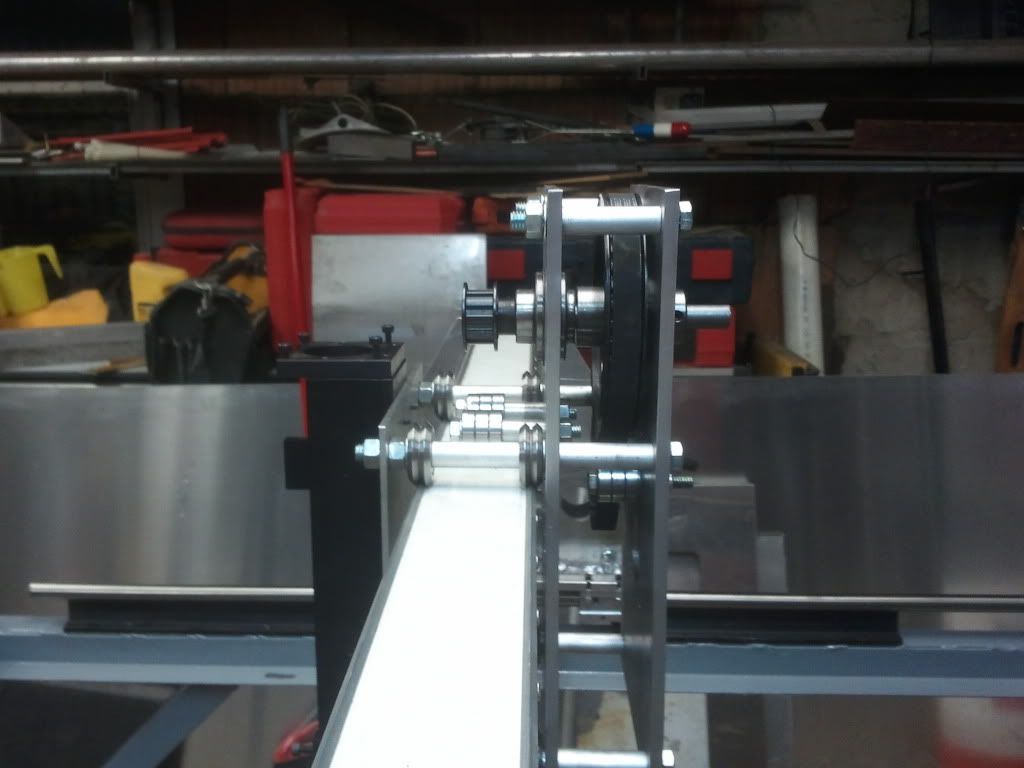
The v rails will be cleaned with a rag,.... my high tech solution.
The linear rails have wipers built in to the pillow blocks.
-
04-16-2012, 11:34 AM #7
Registered
- Join Date
- Nov 2007
- Posts
- 250
You did good on getting your hands on that piece of tubing. That's what I wanted to use for mine, but just couldn't find a short piece... Originally Posted by xalky
One thing that I'd change for sure is... get rid of the pop rivets. They are good for light sheet metal projects but not for things like this. Of course that's something that could always be corrected, if and when it becomes a problem..
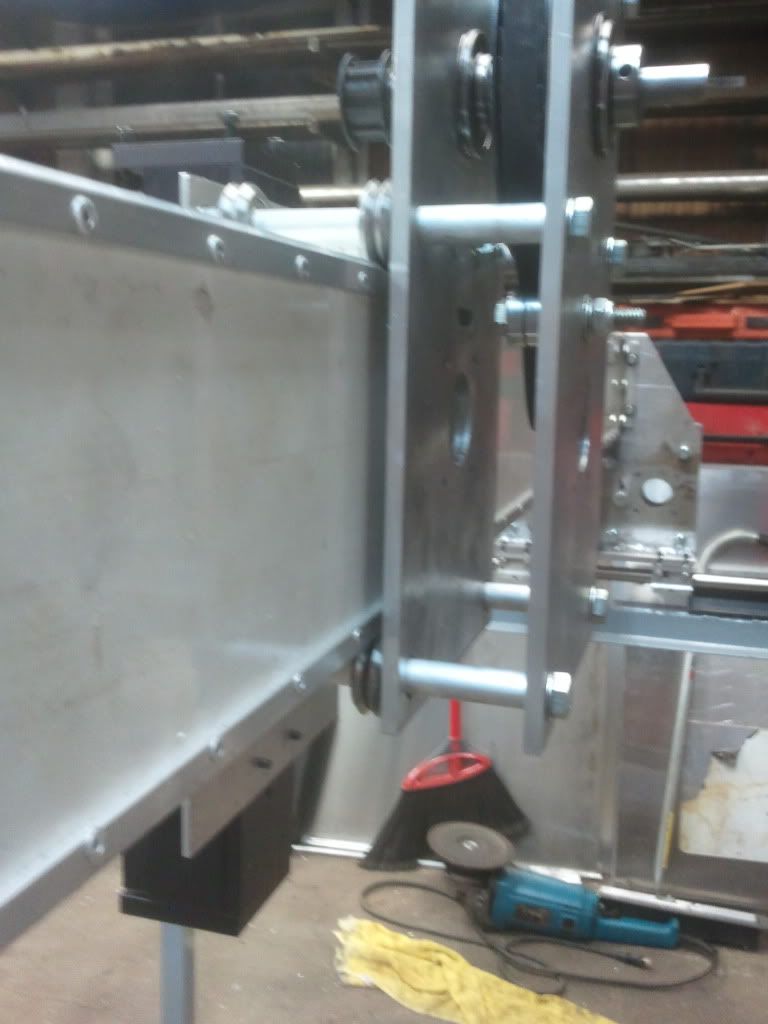
The Z axis set up, where did that come from? You made it or bought it?
AJ
-
04-16-2012, 03:18 AM #8
Registered
- Join Date
- Mar 2012
- Posts
- 140
here's a couple more shots of the rollers on the v rails.
-
04-16-2012, 11:40 AM #9
Registered
- Join Date
- Nov 2007
- Posts
- 250
The vee rails will work under the worst possible conditions.. They are the rollers to use for sure.
The linier rails will no doubt have to be maintained. Wipers or no wipers.....
Are they the bushing type or roller bearing type?
AJ
-
04-17-2012, 12:25 AM #10
Registered
- Join Date
- Mar 2012
- Posts
- 140
They're the roller bearing type linear bearings. Hey if pop rivets can hold an airplane together, I think they'll be fine for my gantry. They're every 2 inches. They hold better than a screw will threaded into aluminum. I tried it on a piece of scrap. Like 4 times the holding power of a 10/24 screw in aluminum.
-
04-17-2012, 12:54 AM #11
Registered
- Join Date
- Nov 2007
- Posts
- 250
Yep, those roller bearings aren't going to tolerate any dust or trash particles. You'll have to stay on top of the wipers to keep them working 100%. Originally Posted by xalky
Aj
-
04-18-2012, 12:59 PM #12
Registered
- Join Date
- Mar 2012
- Posts
- 140
I missed that part: The z-axis is an item i bought on e-bay it's a THK linear actuator. Actually most of the parts came from e-bay, the v-rollers and track, skate bearings, linear rails and linear pillow blocks, and the pulley bearings all came from ebay. The timing pulleys and timing belts came from an online source...can't remember the name off hand, but the prices were good and shipping was really quick.
-
04-22-2012, 04:50 AM #13
Registered
- Join Date
- Mar 2012
- Posts
- 140
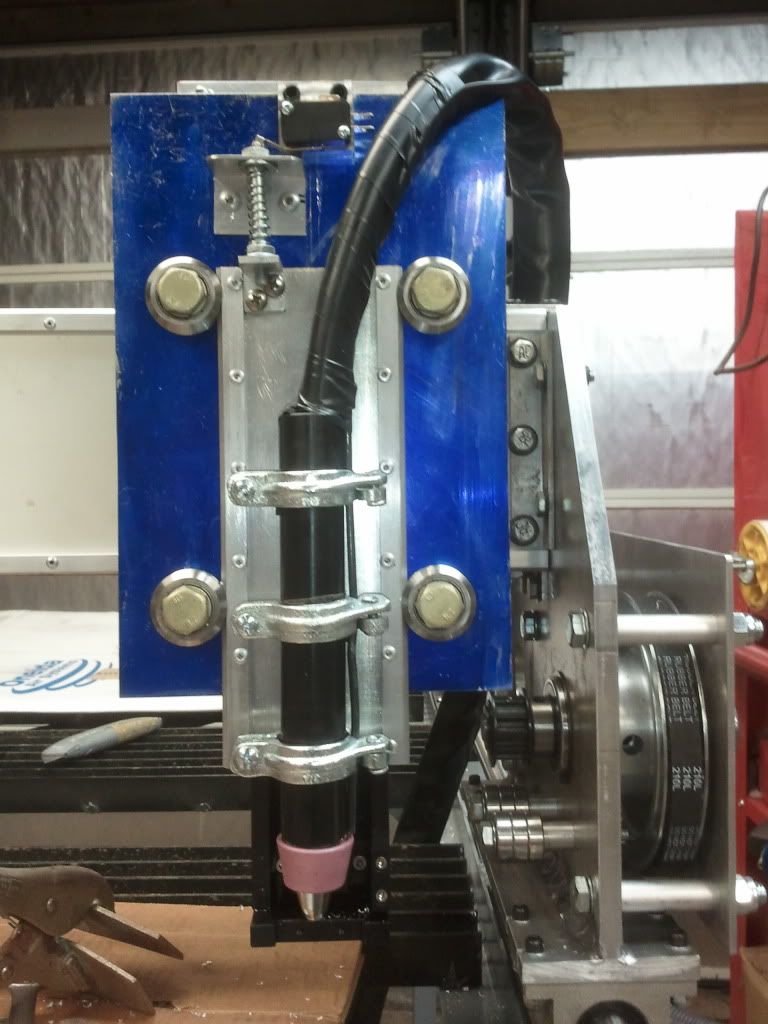
I just completed my floating torch holder...man that was a lot of work for such a small thing. Right now, I'm concentrating on plasma cutting, but at some point I'd like to try some light routering with it. I believe the gantry and table are stout enough to handle it on wood and plastic.
-
04-28-2012, 07:22 PM #14
Registered
- Join Date
- Mar 2012
- Posts
- 140
I recieved my CandCNC bladerunner system on wednesday It's all hooked up and running. I'm still calibrating and fine tuning. This table is capable of some awesome acceleration. I can't say enough good things about the Bladerunner system. and I'm not even completely running yet. Following the CandCNC user manuals makes this pretty painless.
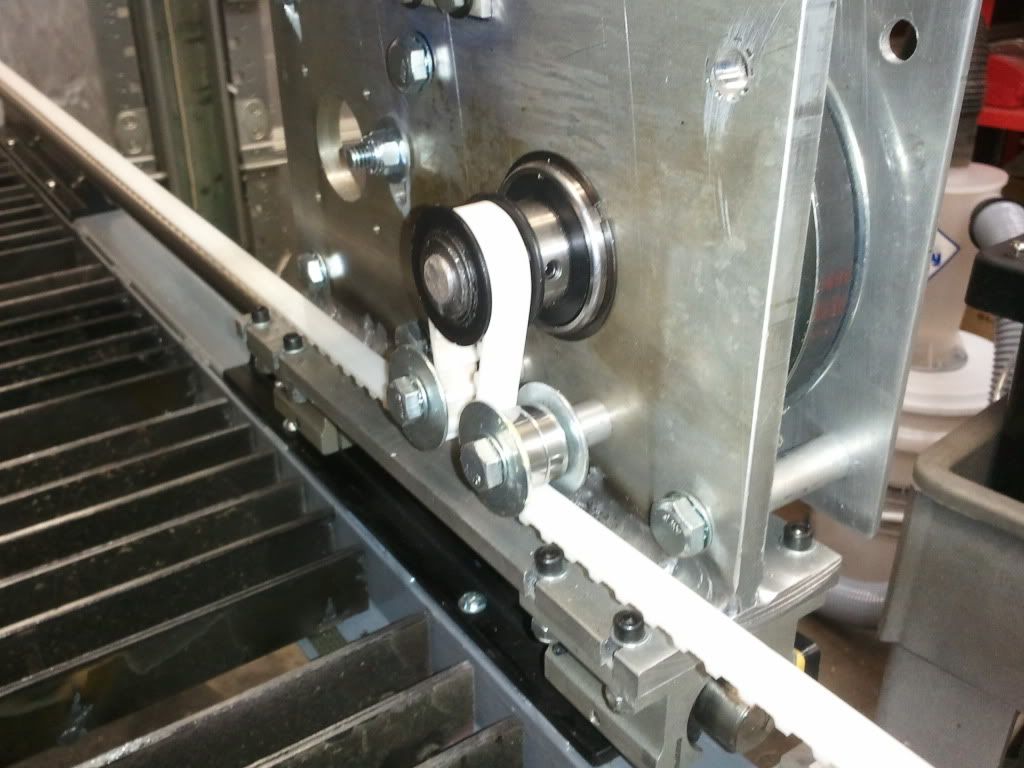
I'm having a few problems that I have to rectify with my timing belt drive. I'm having a problem keeping the timing belts from running off the idlers. I'm gonna have to make some flanges on the idlers to guide the belts and keep them inline.
-
04-29-2012, 02:48 AM #15
Registered
- Join Date
- Mar 2012
- Posts
- 140
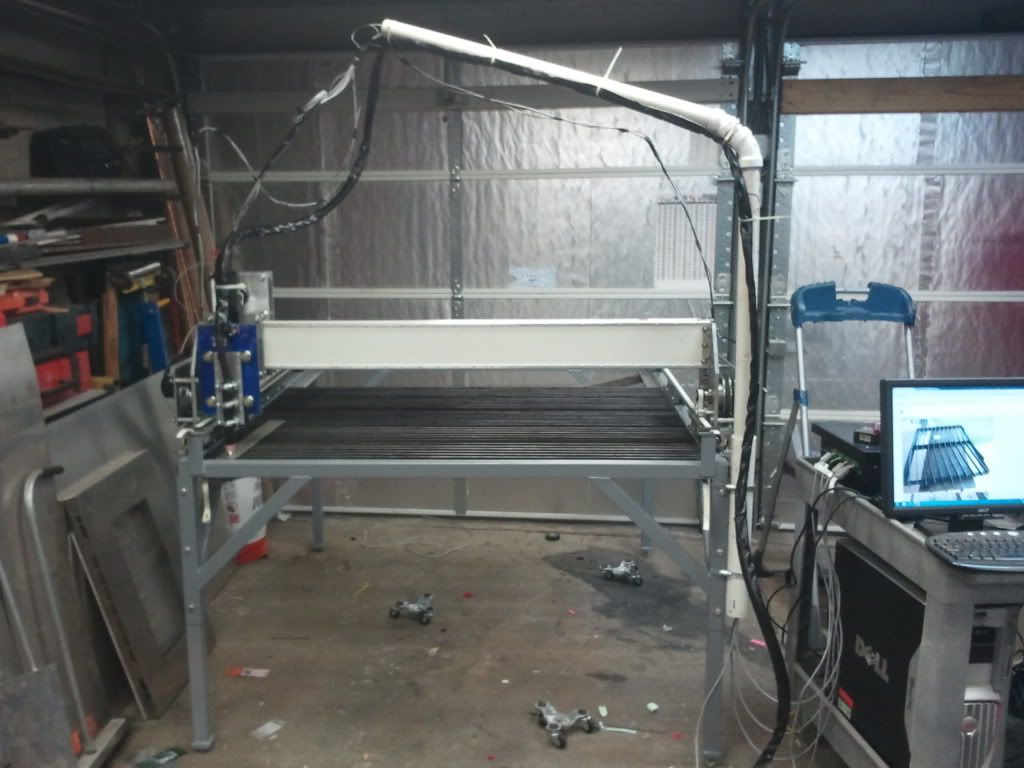
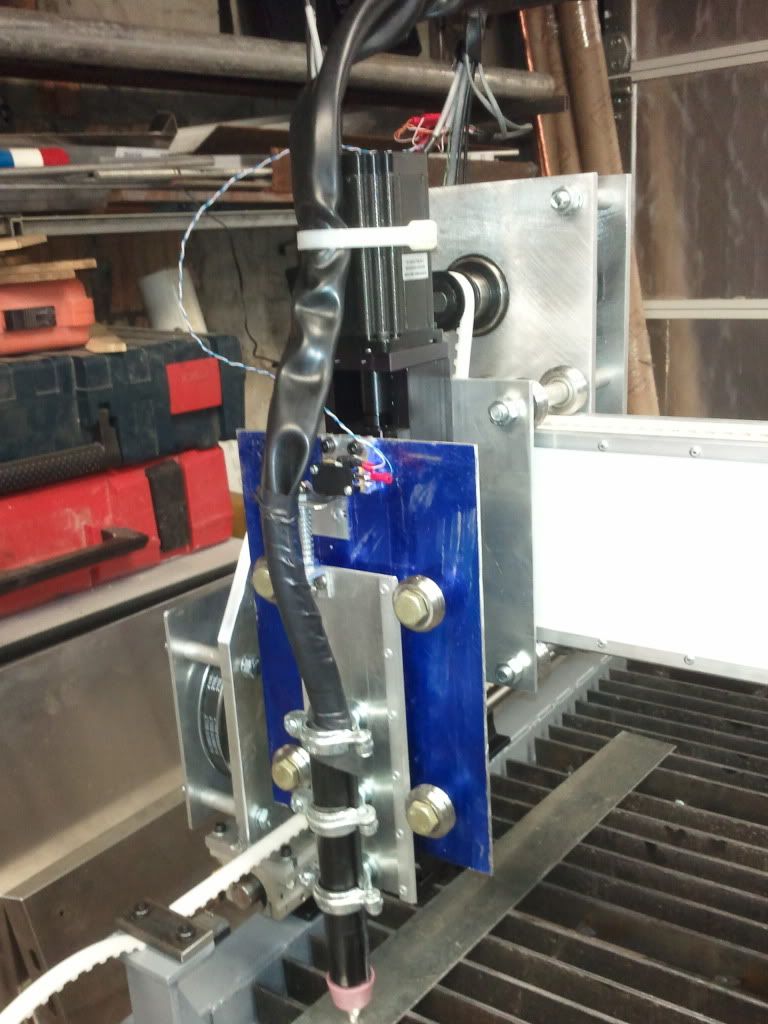
A few more pics. I made an overhead cable support arm out of PVC pipe. It rotates freely aloowing it to move with the gantry. I had to install some semi ridgid upright cable stands to keep the wires up out of the way so they don't get tangled up as the gantry moves. I had a kite that i cannibalized to get these fiberglass rods out of it. They work well. Eventually I'm gonna go with a cable chain track for wire management but this works for now.
Heres a picture of the guides I had to make on the idlers to keep the timing belts on. Just some 1/4" fender washers drilled out to 5/16" and spaced away from the bearing with a smaller washer. Ended up being a simple fix.
Here's a picture of the torch mounted up to the floating head:
So far I've set all my home positions in Mach3 and calibrated and dialed in the table travel in x y z.
next up: setup and test DTHC module.
-
05-18-2012, 11:27 PM #16
Registered
- Join Date
- Mar 2012
- Posts
- 140
Well thanks for the compliment. That's a very nice table you bought. What size did you get and how much did that set you back? Just curious as, I'm wondering if all the time I've put into mine has been worth it. Originally Posted by CncMan22

-
04-29-2012, 09:07 PM #17
Registered
- Join Date
- Mar 2012
- Posts
- 140
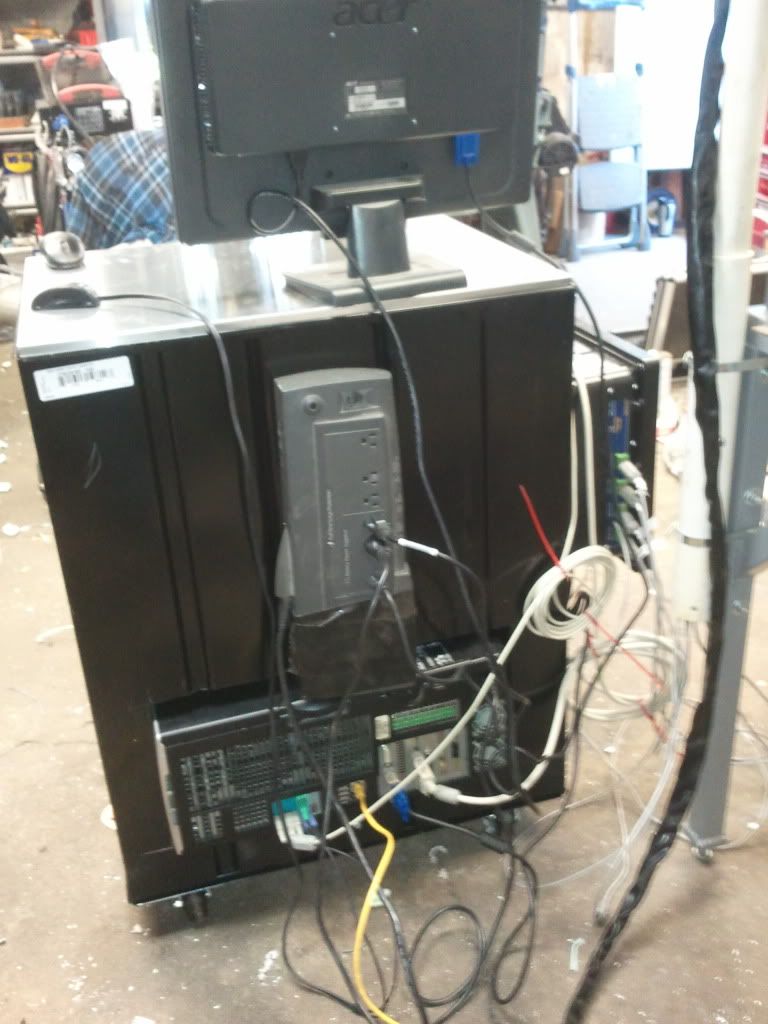
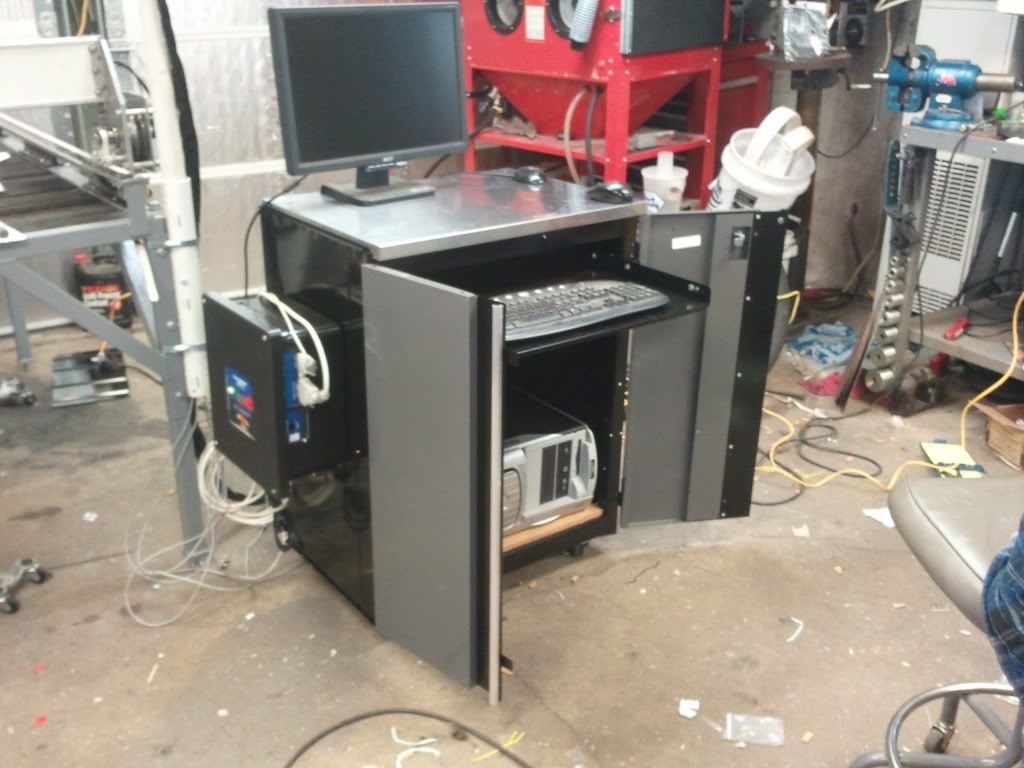
Here we go...more pictures of my new electronics cabinet:
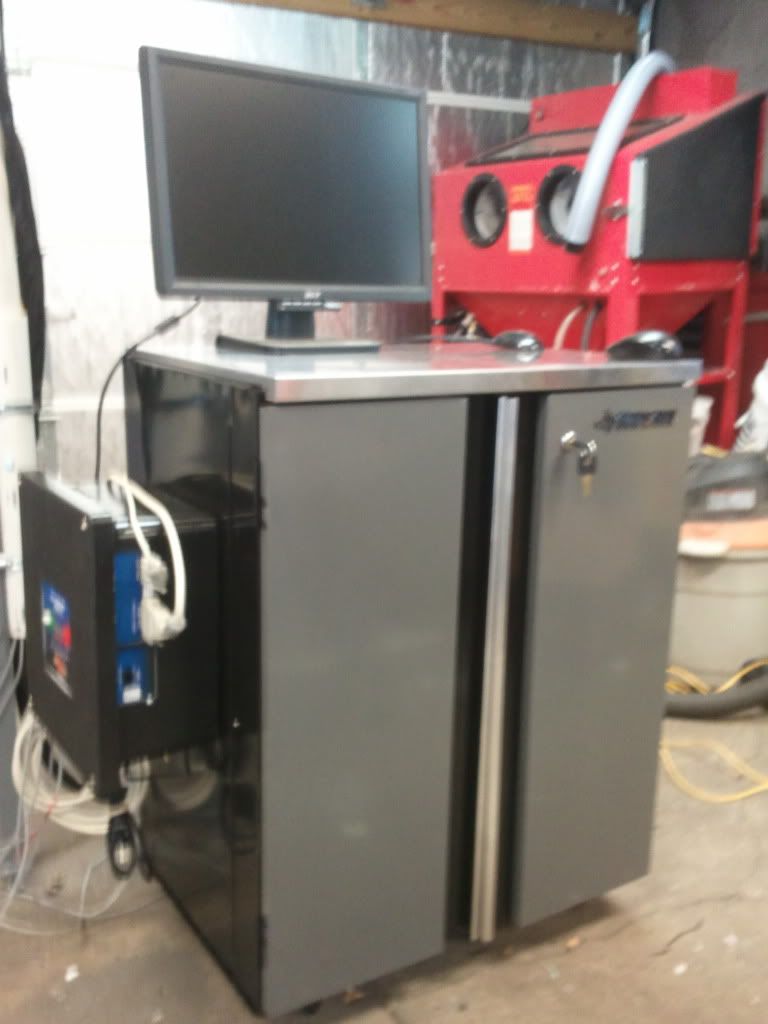
I had to cut out the back to allow easy access for connections, but also my PC with its giant tower case wouldn't fit so I made some alterations.
It has a pullout keyboard shelf:
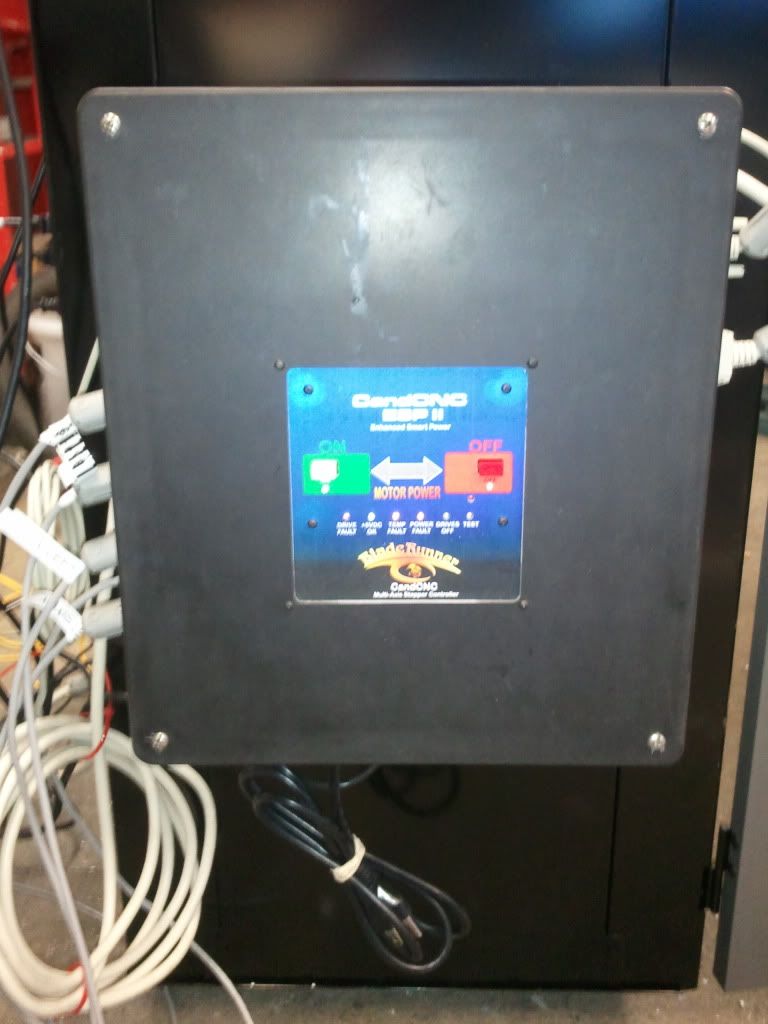
Heres a picture of The CandCNC control panel. All the electronics are in there, except for the PC of course.
-
05-04-2012, 09:56 PM #18
Registered
- Join Date
- Mar 2012
- Posts
- 140
I'm a little frustrated with the electronics on this table...Who am i kidding..... I'm downright disgusted right about now. I got all my motors and limits hooked up. I've spent about a week getting everything talking to each other, configuring travel speeds, Trying to get my serial port working. I'm on computer #3 now and still having problems with serial port communications for the THC. I think I just fried the THC board and my garage is a freakin mess.
If I didn't have so much time and cash into this project, I'd scrap it.
The mechanicals are the easy part...the electronics and software on the other hand are frustrating the hell outta me.
It's not like I'm a complete computer idiot either. I build all my own computers and debug them and straighten out software problems all the time.
I was so close I could taste it and then the sledgehammer of Murphy smashed up my parade.
I'm gonna contact Tom over at CandCNC to see what the hell is going on here.
Sorry Guys ,OK, I'm done venting.
-
05-05-2012, 03:36 PM #19
Registered
- Join Date
- Mar 2012
- Posts
- 140
I think I fried the thc module, when I attempted to use the internal voltage divider on the longevity. I should have ordered my system over the phone. When I ordered it online. I thought I ordered the rav01, but being a cnc noob, when it didn't come in the box, I followed the instructions for using the cnc connections and screwed it up. Tom at CandCNC took pitty on me and is sending me a new moddule and a Rav01. After pouring thru that manual at least 3 times now, I would say that I'm not such a noob anymore.
While I'm waiting for parts to come in ,I'm gonna spend some time shielding and grounding.
Sent from my SPH-D700 using Tapatalk 2
-
05-10-2012, 03:35 AM #20
Registered
- Join Date
- Dec 2005
- Posts
- 173
Thats one of the reasons I ordered my kit from CandCNC, outstanding support for their products even when it isnt their fault. Originally Posted by xalky
Brad

 Reply With Quote
Similar Threads
-
Starting my "PlasmaBot" 4x4' table build!!!
By winegar in forum Plasma, EDM / Other similar machine Project LogReplies: 340Last Post: 01-28-2013, 10:53 PM -
Newbie - To build or not to build Router/Plasma Table
By dfranks in forum Waterjet General TopicsReplies: 10Last Post: 04-08-2011, 05:16 AM -
Question on using "plasma" table for routing
By Red Earth in forum Waterjet General TopicsReplies: 1Last Post: 04-09-2007, 06:04 AM
