


Hey guys! New poster, long time reader. I'm a newbe/ wannabe hobbie machinist, in colledge now earning an undergrad degree in mechanical engineering. I am pretty good/ and love to build things from scratch, very "hands on" kind of person. And After several months of pondering and researching, I purchased a mill and lathe, so I finally bought the Harbor Freight 8"x12/14" lathe and the Harbor Freight Mini mill (44991). I just ordered it last friday along with a little machine shop.com/lathemaster.com order for accessories. I live in Wisconsin and awaiting the delivery of these two machines. I CAN'T WAITWhat is the usual delivery time? im thinking 10-14 days.
Any tips for setting these machines up? I have read fignoggle.com's web site along with several others, and they are really informative. I'll post some pics when i get them.
Results 1 to 20 of 21
-
05-08-2006, 04:23 PM #1
 Registered
- Join Date
- Dec 2005
- Posts
- 430
Harbor Freight Lathe and Mill (56k death!!)
-
05-17-2006, 06:20 AM #2
Registered
- Join Date
- Dec 2005
- Posts
- 430
ok wednesday is the big day!! they will be delivered between 12-3pm. if all goes well, the machines won't be damaged and i'll be making things in no time. i have a few plans for the lathe(dc variable drive) and for the mill(belt drive conversion, air spring conversion) so ill be busy tweeking before i start to use them :cheers:
-
05-17-2006, 06:59 AM #3
Registered
- Join Date
- Sep 2005
- Posts
- 5
I'm in a similar situation. What tooling, hold-downs, etc did you get to start your collection?
-
05-17-2006, 03:06 PM #4
Registered
- Join Date
- Dec 2005
- Posts
- 430
most of what i got came from LittleMachineShop.com, their starter set, an AtoZcnc quick change tool post, DRO kit, boring bars, indexable tools, ect... a few things I got from lathemaster, like an 8 piece collet set, a nice dial indicator with magnetic base a rotary table, and a boring head.
-
05-21-2006, 11:58 PM #5
Registered
- Join Date
- Dec 2005
- Posts
- 430
well, they arrived wednesday at exactly 12:00pm from Yelow Freight. This huge semi pulled up in front of my house and we unloaded the lathe and mill. the 2 crates looked very tiny way in the back of the trailer! I looked at the lathe crate and saw that it had a huge hole in the top of it. I opened it up and saw that the lathe had some scratches on the back of the control panel box, nothing too serious, but other than the belt drive cover being loose, nothing was damaged, even the tool/accessory box was in place.
the mill was also in a crate, but after taking off the cover i saw that it was also in a styrofoam shell, so i figured it wasn't damaged. so i signed for the shipment and wrote a check for the liftgate, now i finally have my lathe and mill!!!!!! after further inspection it was in great shape.
i took soms pics of the disassembly of the lathe and some of the mill all set up:
naked

almost together

belt drive

parts
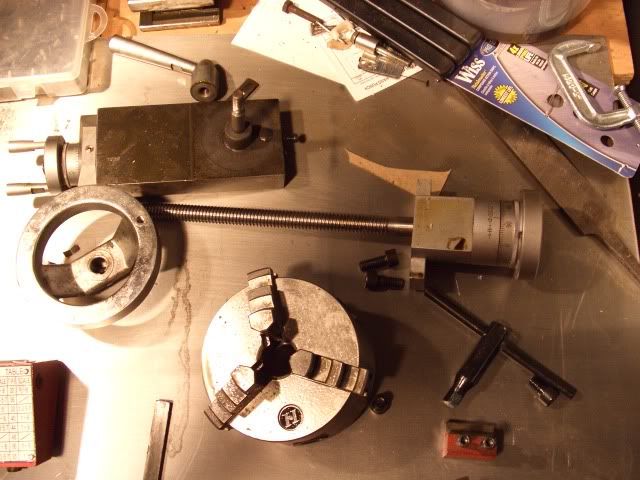
more parts (i have orange paint!!)
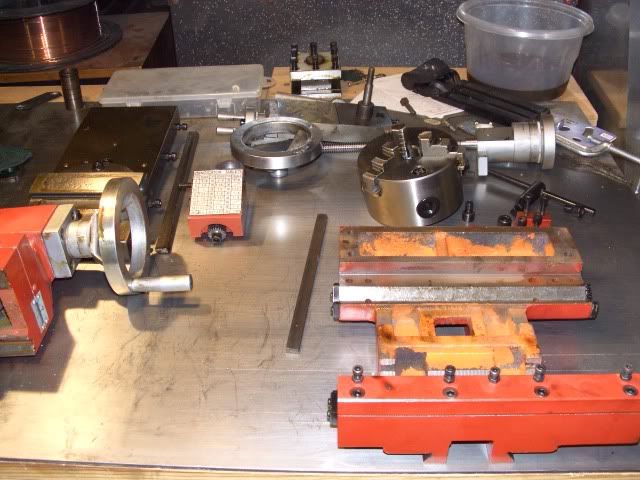
rust!!

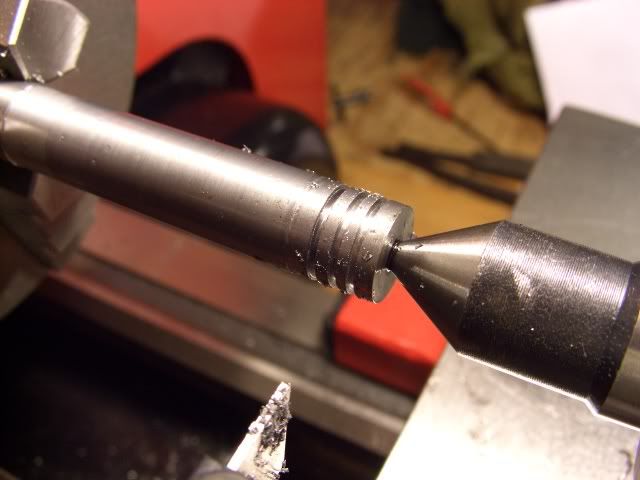
seeing if centers are aligned
uh oh!

better

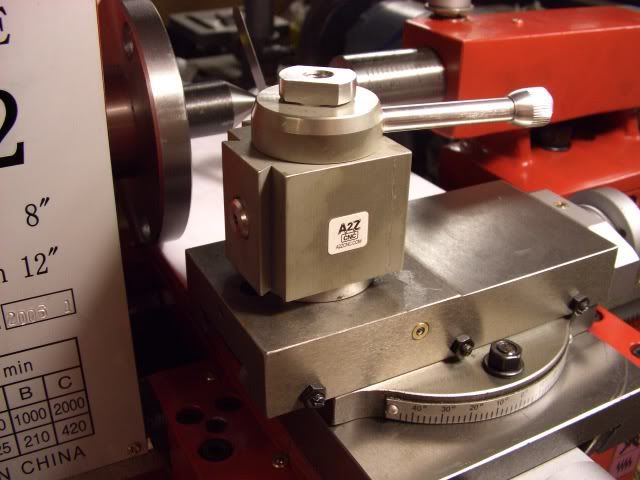
mmmmmm QCTP
some tests
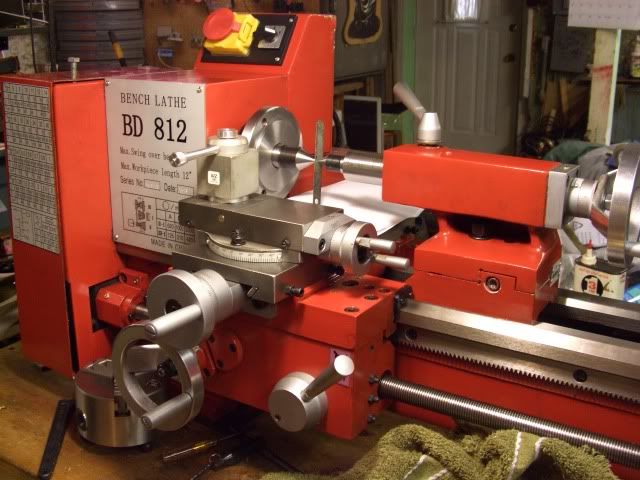
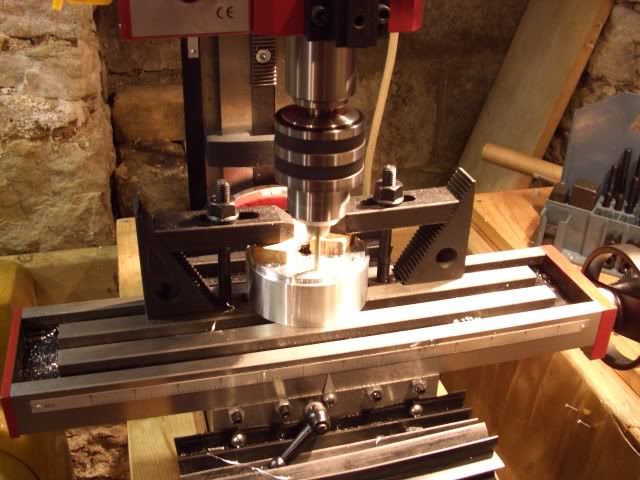
mill setup with belt drive

sexy belt drive

a project im already working on
-
05-22-2006, 01:43 AM #6
Registered
- Join Date
- Jan 2006
- Posts
- 179
Why didn't the lathe centers align and what did you do to fix it?
-
05-22-2006, 01:49 AM #7
Registered
- Join Date
- Feb 2006
- Posts
- 1187
Hey on the mini mill, did you take out the shaft that holds the plastic gears to get that belt drive pulley on?
-
05-22-2006, 02:23 AM #8
Registered
- Join Date
- Dec 2005
- Posts
- 3319
If the view showing the tailstock misalignment is/was TOP view, a simple in/out adjustment of the tail stock is probably all it took to fix.
If the tail stock was low/high, that would require CAREFUL shimming of either the tail stock or the headstock.
You probably need to treat the machines as 'works in progress'. They work but with a bit of TLC and tuning, they can be turned into pretty accurate small machines well suited to learning how to machine stuff. Actually MAKING stuff will serve you quite well in your subsequent engineering endeavors....
The rust needs to be STOPPED ASAP. Suggestion: careful etch with muriatic acid to get the "deep" rust after you sand off surface rust. Neutralize with baking soda and dry quickly and carefully. Wipe down with metal prep ASAO and paint with self etching primer.
Coat with epoxy or polyurethane. You can also spend a it more and have the machine lightly bead blasted and then powder coated - pricey but nearly bullet proof.
Just be sure to make the powder coating place mask off any machine slide surfaces VERY carefully and well.
Parts that can't be painted need slightly more care. If you can find a plating shop, they can pickle them and then either nickel plate or flash chrome (both pricey). A less expensive yet effective protection can be achieved with black oxide and light oil (use Dexron ATF, cheap and effective).
Keep it oiled and clean and don't let people with clammy hands touch any non-plated, non-painted metal surfaces.
The "clammy" feeling is due to an acidic condition in the body oils and this will rust the machine and/or leave indellible finger pringts almost immediately. Protect the machine or make them wear rubber gloves...
Have fun, wear eye and hearing protection and make nice chips...
-
05-22-2006, 03:42 AM #9
Registered
- Join Date
- Dec 2005
- Posts
- 430
i did not take out that shaft, i followed the instructions and everything went together flawlessly, i had to remove a white plastic gear and put a clear tube on the shaft to hold it in place. i moved the lever in such a way to disengage the gears inside the head as the instructions said.
the tailsock did not line up because it was sitting too high, so i carefully sanded down the bottom where the two halves come apart with my 6" disc sander, taking off a few thousandths and checking, it sits right, now, but it scared me when i first saw it!
-
05-22-2006, 04:15 AM #10
Registered
- Join Date
- Jan 2006
- Posts
- 179
Hrrm, makes me think maybe I should check mine. (I have the exact same lathe). Did you have any issues removing or reinstalling the chuck? My chuck runs nice right now. I want to make sure it stays that way.
-
05-22-2006, 09:22 AM #11
Registered
- Join Date
- Dec 2005
- Posts
- 430
the chuck fits pretty tightly, mine has some runout and i might get a bison sometime soon. the spindle has an immeasurablely tiny amout of runout, and i used a 0.0005" dial indicator to test it. i have a 4jaw that i still have to mount, one of these days
")
-
06-01-2006, 12:20 AM #12
Registered
- Join Date
- Dec 2005
- Posts
- 430
2 week evaluation...
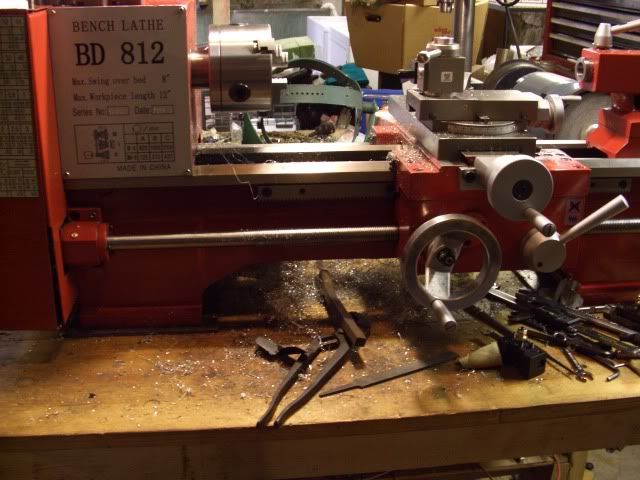
So, i have had the lathe and mill for 2 weeks. and after not a lot of tweeking, began to do some cutting. the lathe is a very solid piece of machinery, although i have no experince with other bench lathes. the only things i had to do was clean off all the grease, tighten the synch belt, fix the tailstock (i'm sure it was just a defect, not on all lathes) which wasnt too hard to fix, and adjust the gibs. at first the belt was very tight and hard to change, but after some wear it is a little easier to change (still a pain in the butt though), maybe eventually i will put a d.c. motor in it and use a speed controller. The chuck is one issue i need to touch on; it has a lot of runout. at least 0.01" from 2 inchces away from the chuck (i may be exagerating a 'little'). so i bought a Bison, and currently it is sitting next to me as i type
 , ill mount it later. and yes i have been working on a small project, see pics below. all in all, i am glad i made this purchase (on sale too!), and will look forward to other projects i have in mind.
the mill is also fairly solid too, but adjusting the gibs on the y axis is a little tricky, the x axis gets in the way. and the y axis gets tougher to move as the y axis comes closer to you, maybe i need to do some adjusting. there is a lot of backlash in the leadscrews, maybe ill make some antibacklash nuts (like fignoggle did). the belt drive is niiiiice, very quiet and i dont have to worry about stripped gears. it was easy to install with the included instructions. i have not had to change the belt for different speeds yet. most of the speed i need is in the lower setting, which is nice. hey and it also looks awesome! i have not been using it as much as the lathe (yet) but i will as more projects come to mind. this is a very nice machine for the money (also on sale), although the X3 would have been nice, it would be too big, heavy, and expensive for me (at this time!).
ok enough of the talk, lets see some pictures!
nice facing opperation (very smooth)
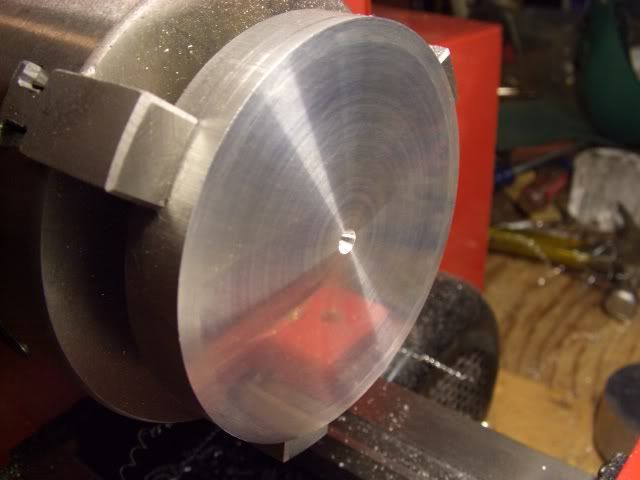
flat, too

oh yes, i have been cutting!

more chips
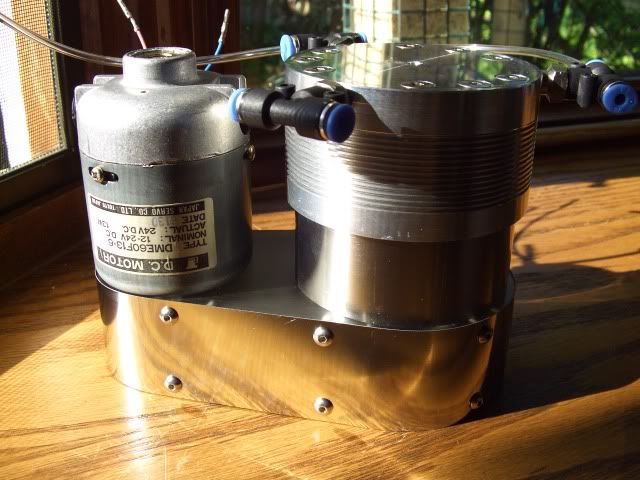
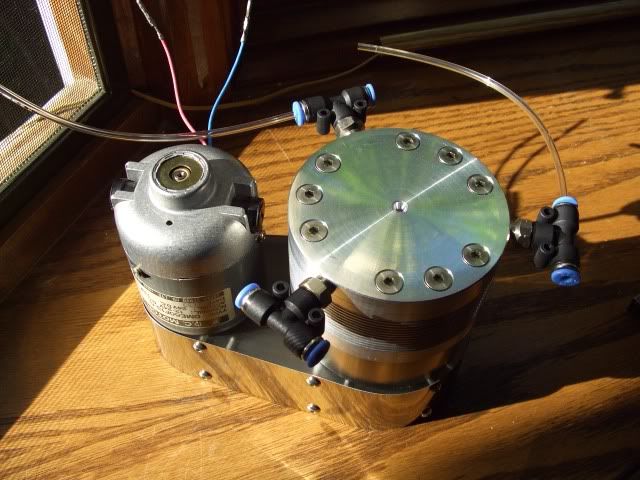
project, mini compressor, almost finished


ill take some pics of the Bison when i get it mounted (and when the battery in my camera recharges!)
-
06-01-2006, 09:35 PM #13
Registered
- Join Date
- Dec 2004
- Posts
- 185
SKmetal, Since nobody else did, i'll have to rap you over the knucles for putting that spanner on top of your vernier! enjoy your tools and look after them well.
Pieter
-
06-01-2006, 09:53 PM #14
Registered
- Join Date
- Dec 2005
- Posts
- 430
oops (chair) well its a cheap harbor freight caliper, but honestly i do take care of the rest of my tools

-
06-02-2006, 01:55 AM #15
Registered

- Join Date
- Dec 2003
- Posts
- 768
Nice looking compressor!
Proud owner of a Series II Bridgeport.
-
06-03-2006, 10:45 AM #16
Registered
- Join Date
- Dec 2004
- Posts
- 185
There used to be an old intrument maker of the old school who used to walk into my workshop every once in a blue moon. He would touch nothing but i always knew he was gonna spot something silly that i've done with my tools. Because i never knew when i would next see him and i had emense respect for him as a craftsman and person, i really started thinking of what i did with my tools so that he would'nt catch me out. He's gone now, but i've grown into a habit of treating all my tools with respect. Even if it's a cheap steel rule, if it's buggered, so is everything you measure with it and your reputation if you produce bad work as a result.
NOT a speach, just a comment :cheers:
How does your compressor work and did you design and build from scratch?
Pieter
-
06-17-2006, 11:59 PM #17
Registered
- Join Date
- Dec 2005
- Posts
- 430
thanks or the replies!
the compressor works great, or better than expected!! im getting a more powerful motor i won off of ebay. (a $90 GLOBE motor i got for 9 bucks, i love ebay) ill start a new thread about it later.
i just got my DRO for my mill and installed it, what a great accessory, but im having problems with the wires, they dont make a good contact on the scales or they fall out (especially on the z-axis). is there anything i can do other than solder the leads directy to the scales?
and a question about the lathe. how do i cut 13 tpi? i think i have the gear setting right but where do i engage the leadscrew?
-
06-18-2006, 07:54 PM #18
Registered
- Join Date
- Oct 2005
- Posts
- 278
would that compressor be fit too air-brush ??
if so.....can i get the scetches somewhere??
pretty please
-
06-18-2006, 09:54 PM #19
Registered
- Join Date
- Dec 2005
- Posts
- 430
post all compressor topics here: http://www.cnczone.com/forums/showth...745#post170745
-
06-18-2006, 11:50 PM #20
Registered
- Join Date
- Jun 2005
- Posts
- 866
There should be a lever on the carriage to engage the half nuts. ALso there should be some chart on or included with the lathe that mill tell you which # to engage at. Threading on a lathe works well, is fun, but requires more brain than using a dye. Originally Posted by skmetal7

 Reply With Quote