Hello All!
Its been a while and now that the weather is finally warming up I have been able to spend longer hours in the garage in more comfort. From this I have now upgraded my momus to FULL belt drive. Sourcing ACME rod is somewhat of a burden in my location so I wanted to experiment and see how well a belt drive would hold. I've decided to break this into a new thread as its easier to find via a google search...not many belt driven Z axis machines out there...I've looked.
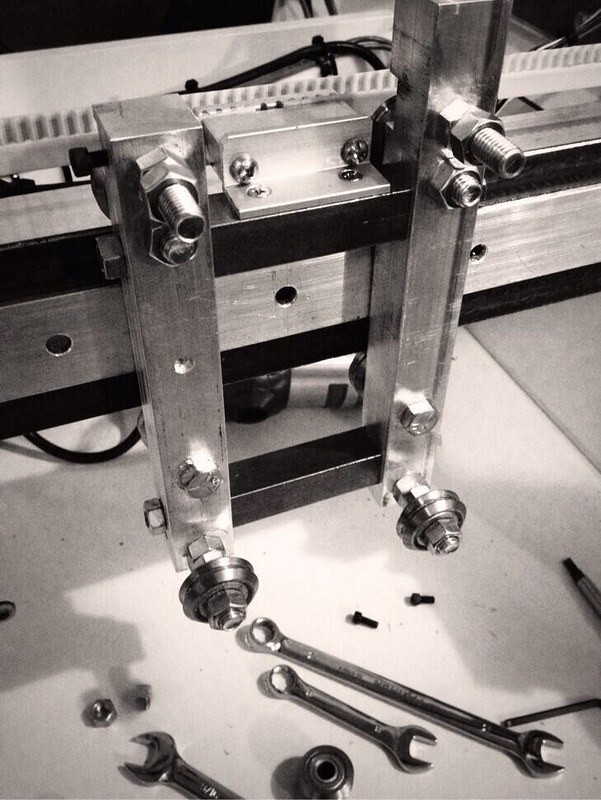
The first thing I had to do was stiffen my x axis carriage as it had a large HDPE block in the middle under compression...I've since replaced that with solid steel square. There are 2 thread rods that run thru the centre of the square and allow me to compress the entire assembly together very very tightly.
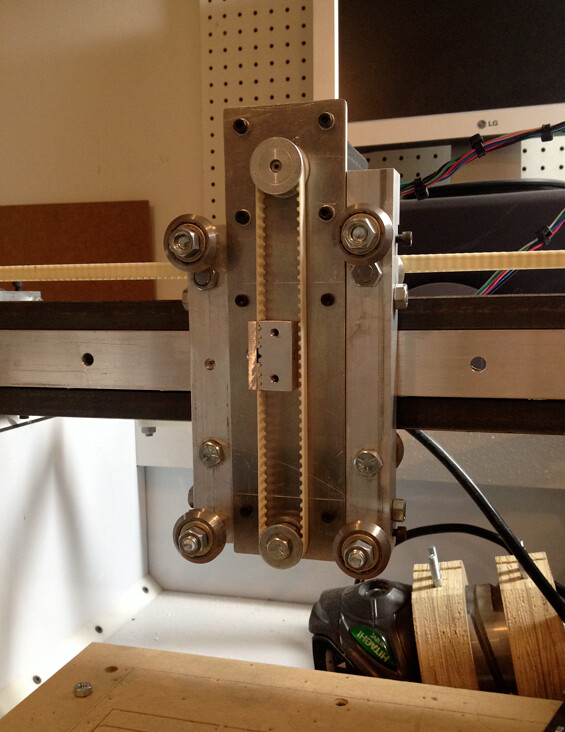
After this I added a 3/16" alum plate to the front of the assembly to hold the new belt drive. Here you can see the general overview of how it comes together. The bottom bearing hole is oval and allows for tension to be placed on the belt after assembly. The black socket cap screws are threaded into the steel bars and hold very firmly.
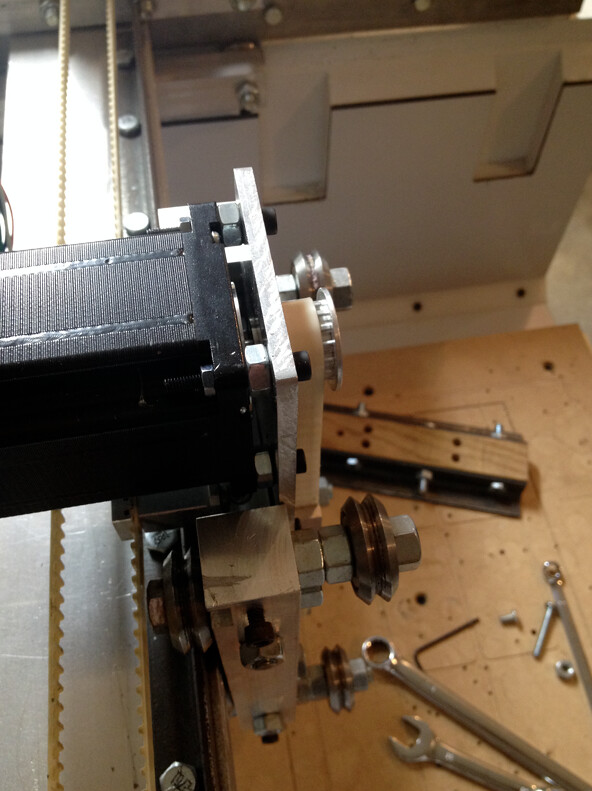
Due to my very limited space between the carriage and the z axis I had to mount the stepper slightly behind the z axis plate (5/16" nuts as standoffs). This makes it a bit of a pain to assembly, but not something I need access to all the time.
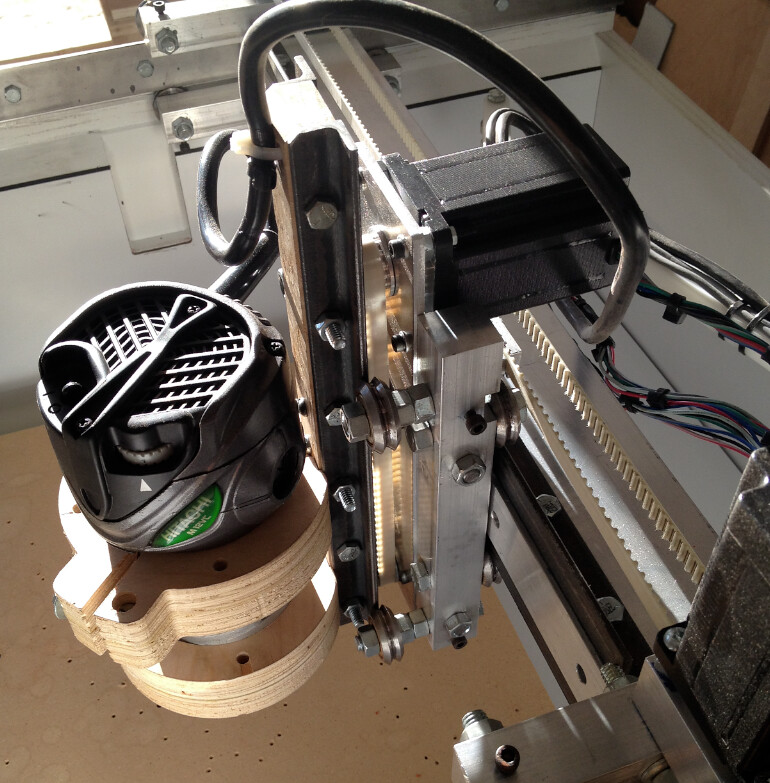
I've installed my original oak z axis beam and plywood router clamps. I still plan on replacing these but after all my testing they are still not the weak point in my re-design. The bearings supporting the z axis are still the location of greatest flex (notice the double nut standoffs) but its very very small at that...not something I notice unless I rapid into aluminum...which I try and avoid.
With everything rebuilt I was eager to see the results. I first 3D milled some foam and once I was satisfied that nothing would run away on me I moved into some aggressive cutting into some exotic hardwoods. The machine was behaving just as a screw driven Z would and I had no lost steps. For the curious I was cutting Paduk at 100-200 IMP with a 1/4" DOC with a 1/4" 0-Flute endmill.
The dial indicator was showing that the machine could jog (z axis) accurately down to 0.001" with backlash sitting at about 2-3 thou over its max travel...not prefect but would it be precise enough for my most challenging work? Could it mill PCB's while using its maximum rapid speed?
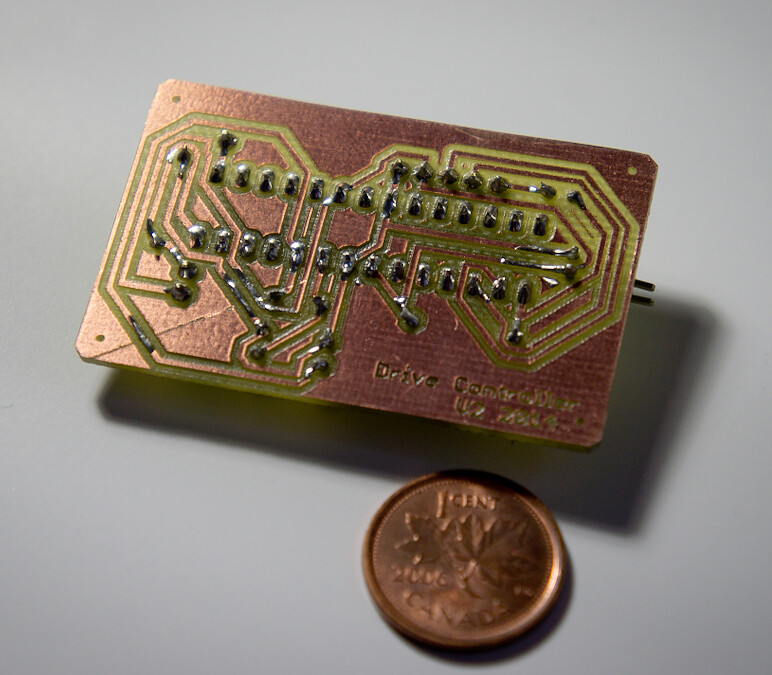
Here I have to say I was totally impressed. Normally I cut my PCB's on my micro desktop machine but I think I will now let this machine take over. Also note the diagonal line cut across the PCB...that would sadly be operator error.
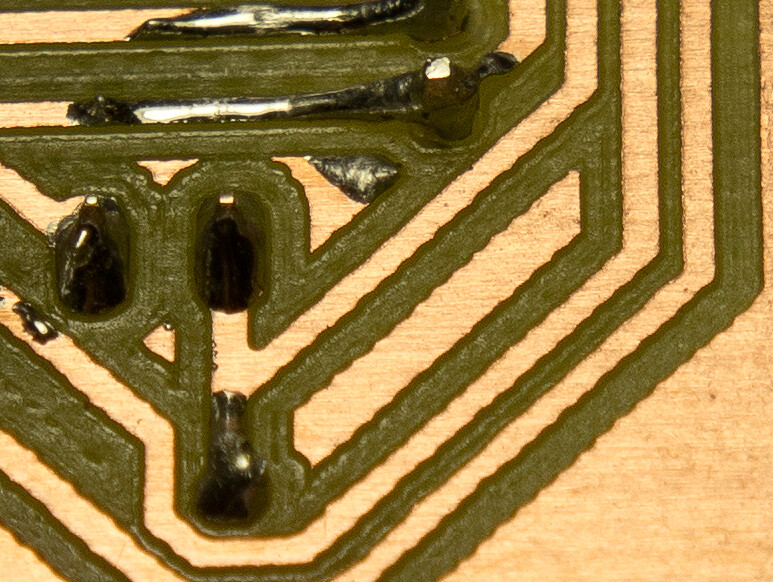
You don't gain much in the way of speed as you can only push the little v cutters so hard but its nice to plop down full sized PCB stock and run multiple boards at once. I made sure to include some fine text to see how the machine would cope, so heres a couple close ups...you can see the stepper motor driver's step breakdown on the diagonal passes (currently running 1/64th micro stepping).
If you look close enough you can see that the machine took 5 passes per trace to fully isolate to the settings I require (milled from eagle CAD's pcb-gcode plugin). The board was then soldered and conformal coated hence the sheen in the pictures. Text engraving was done with a single pass. All cutting done with a precise bits 60 degree v cutter...delicate but AMAZING cutters. Ruler in the next photo reads in mm...the centre of the 'o' is only a fraction of a millimetre large!
All the above cuts were taken at 0.005" DOC (except the drilling, that was 0.0625") at 20 IMP cutting and 400 IMP rapids. The only thing you need to remember when running a belt driven z axis is that the head is going to drop when you disconnect power. On this machine it comes down slow enough that its not going to snap any bits larger then 1/8" but it will easily snap my PCB bits so I'm sure to remove then from the collet before shutting down.
I've also included a short video showing the machine cutting the above pictured circuit. Next step for me is to now finish the top of the enclosure as my z axis is short enough to fityay!
http://youtu.be/lsfxo5WzFb8
Thanks all!
Thread: Belt Driven Z Axis
Results 1 to 6 of 6
Threaded View
-
04-19-2014, 02:52 AM #1
 Registered
- Join Date
- Apr 2010
- Posts
- 60
Belt Driven Z Axis
Similar Threads
-
3,000mm x 1,500mm Double gantry, belt driven 3 axis CNC machine
By Bert.C in forum DIY CNC Router Table MachinesReplies: 0Last Post: 04-29-2014, 10:54 PM -
belt or gear driven?
By mikeph in forum Bridgeport / Hardinge MillsReplies: 2Last Post: 11-24-2011, 07:18 AM -
direct driven or belt driven
By jeremy0203 in forum Benchtop MachinesReplies: 5Last Post: 07-27-2011, 05:23 AM -
belt driven CNC
By jwest in forum DIY CNC Router Table MachinesReplies: 1Last Post: 11-29-2008, 11:10 PM -
Belt driven screw ?
By tomcat47 in forum Linear and Rotary MotionReplies: 10Last Post: 01-29-2007, 05:20 PM





 Reply With Quote

