


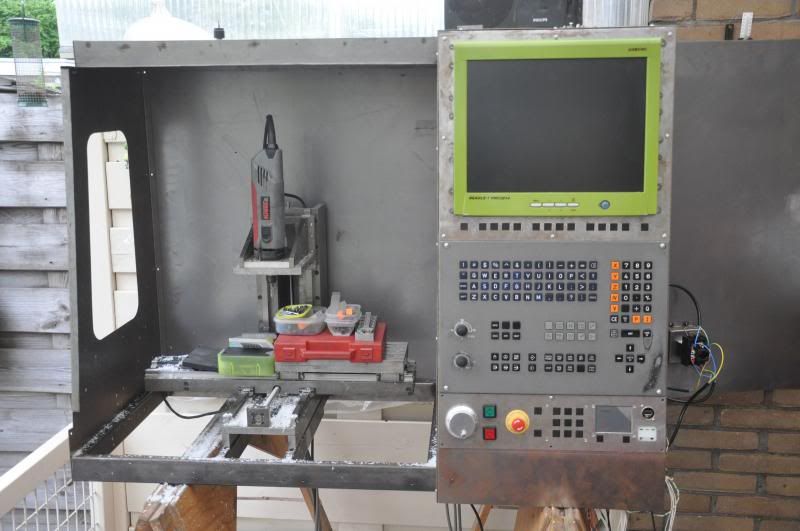
Jay!.. finally done with all the wiring.. i ran into a small problem.. 2 encoders to connect to the pokeys.. but only 3 pins left.. Hmm.... but!.. when looking through the manual.. i read that Spindle speed and Feed override could also be done analog.. with a Potentiometer.. Luckilly, i had two of those... the ones fitted originally.. so i just wired those to the CPU.. and.. Presto!.. problem solved.. i can now adjust my feed, and in the future the spindle speed by turing the knobs in the keyboard...
Tomorrow, i will drill some holes, to mount the last keypanels, and finally weld the socket-cup in place.. then.. i will start painting.. ! Jay!
Results 361 to 380 of 438
-
06-14-2013, 09:06 PM #361
 Member
- Join Date
- Jan 2007
- Posts
- 352
-
06-16-2013, 10:21 PM #362
Member
- Join Date
- Jan 2007
- Posts
- 352
Today i finally finished the console..
I milled a piece of HMPE plastic to house the touchpad and 2 buttons, as well as the power and reset Buttons and 3 leds... ( the white rectangle in the lower left )
Afther that. it was time to take the machine apart.. for painting.. so
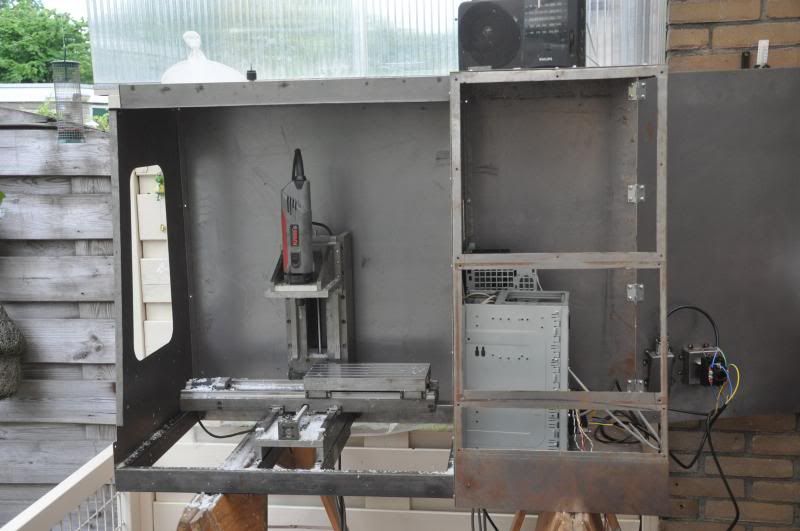
First, the console panels were taken off..
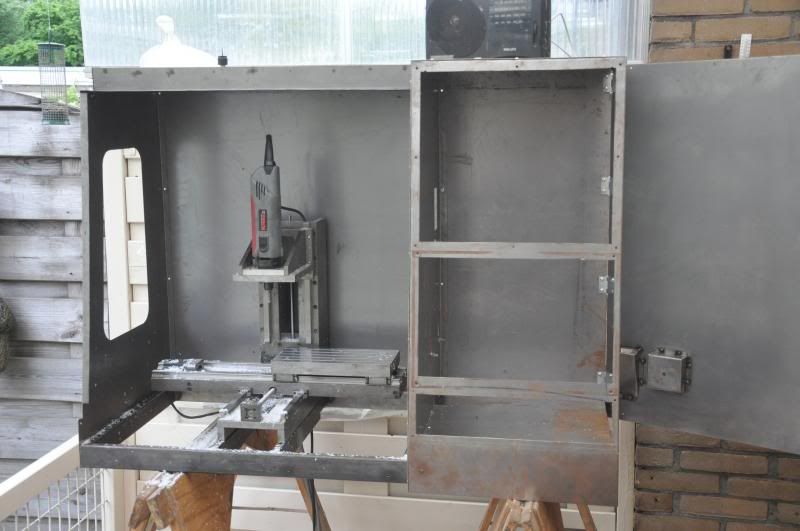
and then... the controller was taken out..

placed in this crate.. to be re-mounted after painting..
-
06-20-2013, 10:01 PM #363
Member
- Join Date
- Jan 2007
- Posts
- 352
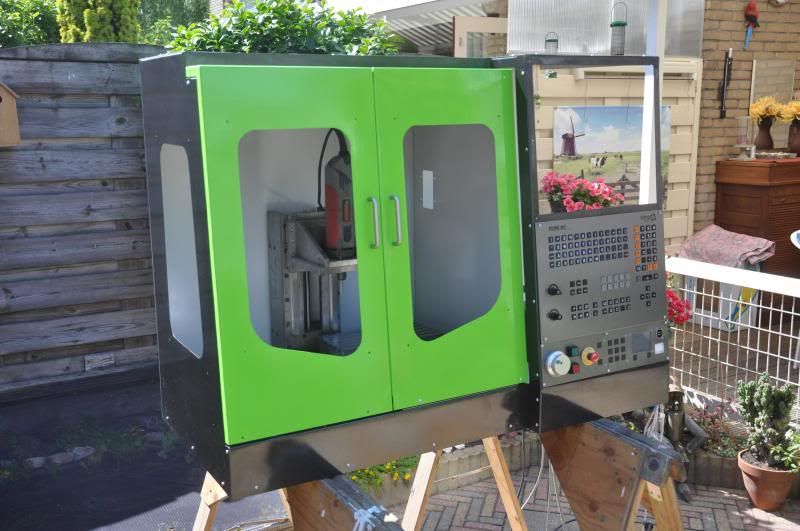
I'm in the middle of the painting proces at the moment..
So here's a little preview of the colors i'm using..
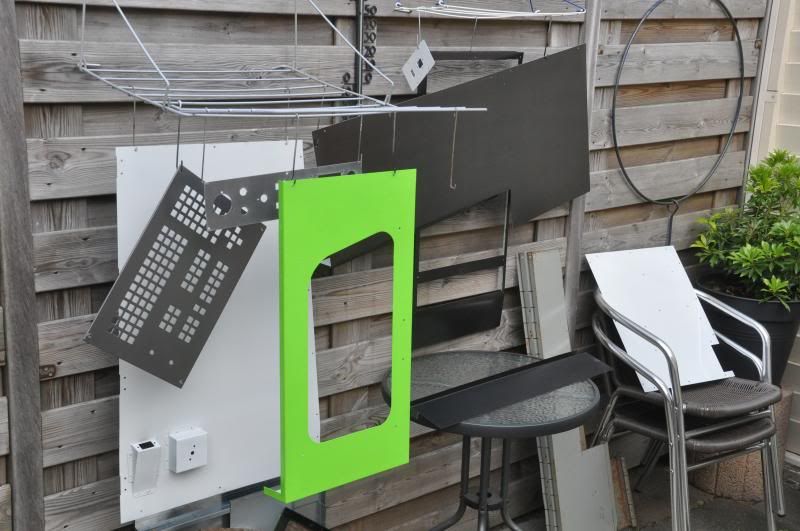
I also fitted the Plexiglass windows to the doors and sidepanel..
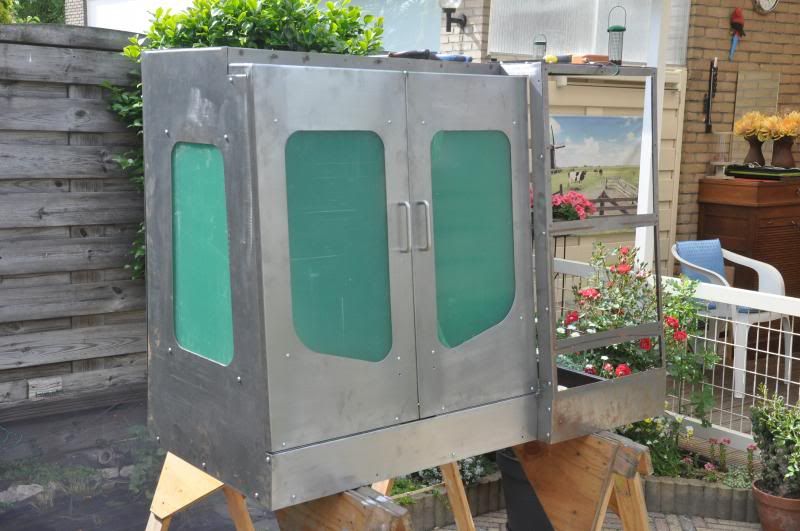
i needed to do this first.. for a little job that had to be done prior to painting..
Fitting a Brush
Normally you would fit such a thing to the bottom of a door, to block draft, but here it is perfect for keeping the controller cabinet free of chips..
-
06-23-2013, 10:59 PM #364
Member
- Join Date
- Jan 2007
- Posts
- 352
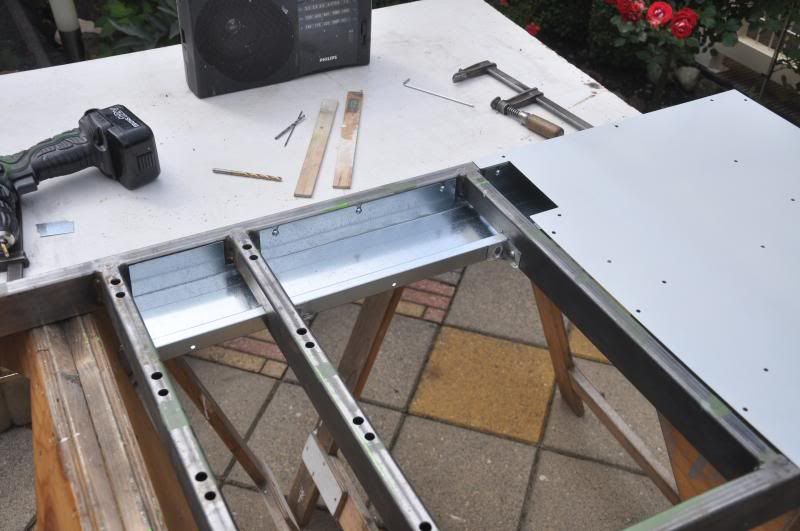
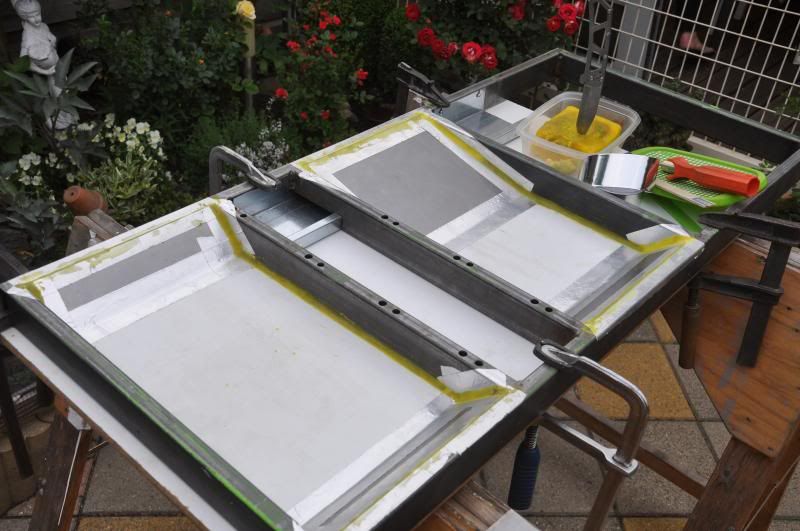
I had one "fabrication job" to be done.. the chiptrays..
Originally i was thinking about making them of leftover pieces of steel sheet, but.. they would "hover" in the middle.. or i would have to make complete trays with sidewalls.. wich would necessitate welding, with all kinds of distortion..
Hmmm.. let's first do the cablechannel.. and see about the trays later..
'kay... i had a piece of galvanised 0.5 mm sheet laying around.. used to be in some domestic device.. it already had a flange on 1 side.. instant ridgidity..
GO!.. i welded to small brackets, and made 5 slots for bolts at the rear..

Drilled and tapped some holes in the frame..
Right.. job done!.. and now those pesky chiptrays.. when.. suddenly an idea sparked.. Glassfiber.. why not?.. that will produce a nice and ridgid tray.. with rounded inside edges.. Cool.. only.. how am i going to make the mold?..
That's where my father came with the idea.. why not use the frame itself as your mold?.. i've got a leftover piece of board with a plastic surface.. clamp that to the frame, cover it with release agent and off you go!..
Dang!.. why didn't i come up with that?..
I still needed some sloping faces in there.. how to do that?..
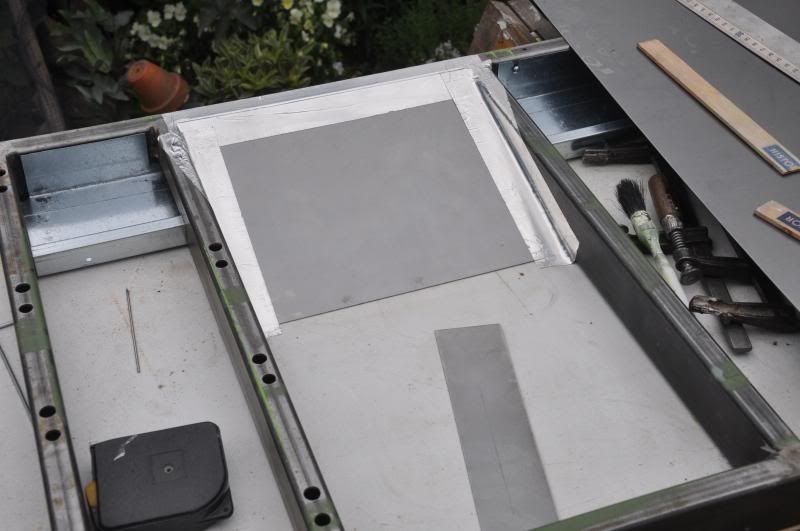
Indeed.. a piece of sheet, and some aluminium tape.. Presto!..
So, after making noise with the angle grinder for a couple of minutes, i had some more pieces of sheet..
I sacrificed some more aluminium tape for this exercise... and i put Nakiplast Beads in the inner edges of the "tray to be, Nakiplast is a plastiline ( like play-doh) based on beeswax.. i pushed it in the edges.. and shaped it with and old Kawasaki KR-1 Piston pin (that KR-1 was my first motorcycle 21 years ago )
Ready to get my hands dirty.. i covered the board, and pieces of the frame in Megiuars M88 Mold release wax..and then?.. Dinnertime.. so the wax could harden, while i was having Spuds and salad.. (lettuce, Tomatoes and olives.. yummie!)
Then... i could cut the glassfiber.. for the first layer i chose 80 Grams/m² Twill-weave, Twill is very supple and pliable, especcialy the 80 grams weave.. because it has very thin yarns..
I measured it up, and where i'd have to cut it, i pulled out one thread.. so i will always cut in a straight line.. furthermore, i sprayed a little bit of spray-tac on it,to stop it from fraying..
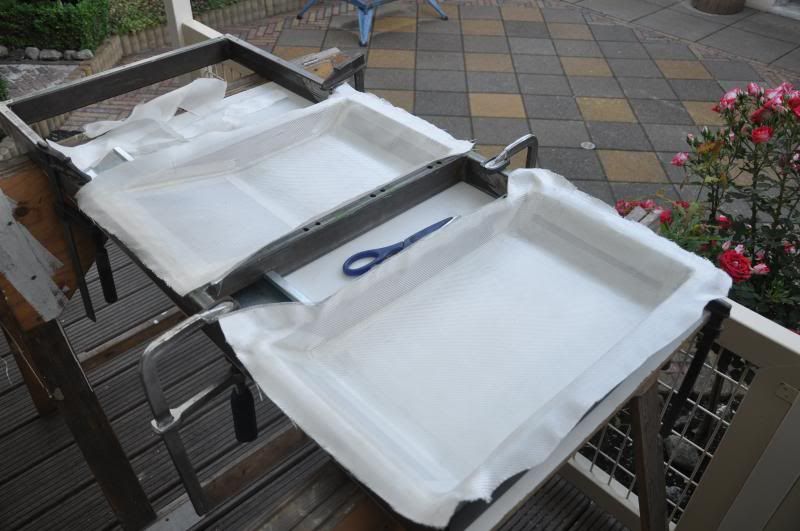
2 sheets of glassfiber, ready to be soaked in epoxy resin.. but first i sprayed a thin layer of spraytac in the corners to place the glassfiber more easilly., that way it will not move when soaking it with resin..
I mixed 45cc of resin, and soaked the first tray..
and another 45 cc later.. tray number 2.. .
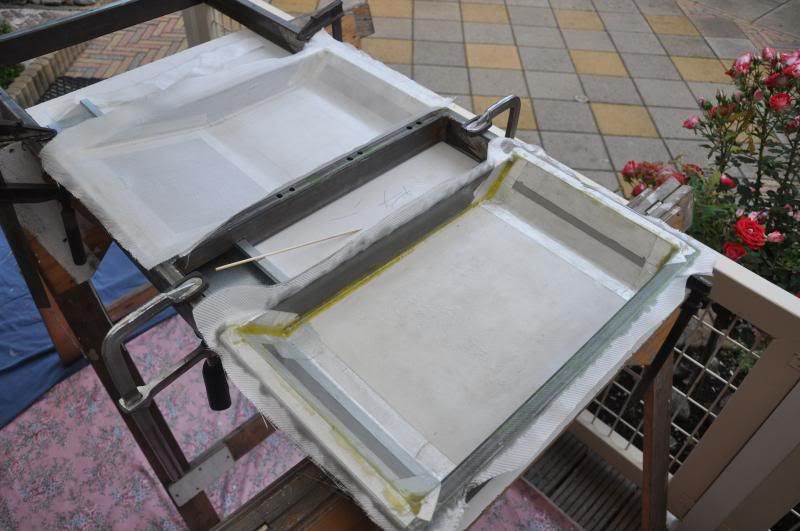
then.. from the leftovers, i cut some strips.. to reinforce the edges..
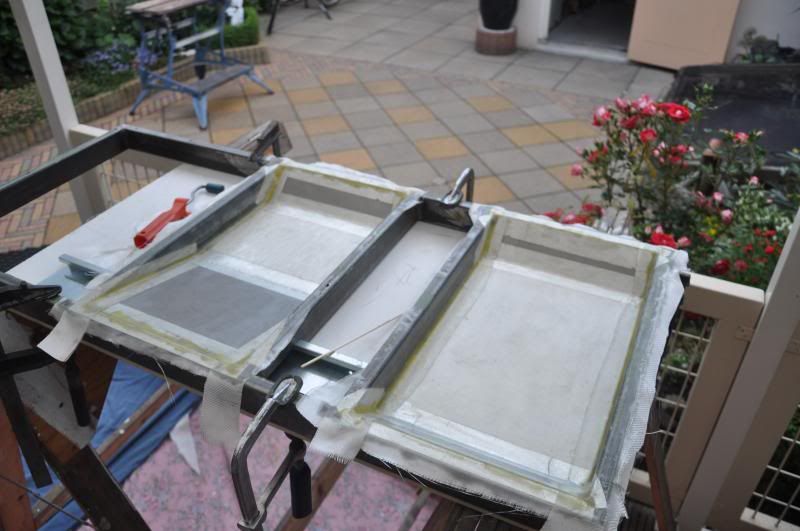
This will now cure overnight.. tomorrow i will add some more layers, preferably a heavier mat.. i have some 260 grams left from another job..
-
06-28-2013, 10:13 PM #365
Member
- Join Date
- Jan 2007
- Posts
- 352
Jay!.. Progress.. i put the keyboard back together.. it will be disassembled again in the future.. when i've made some custom buttons like "Ctrl", "Alt" "CapsLock" and "Windows".. and some special keys for G00, G02 and G03..
The enclosure is almost done painting.. so maybe tomorrow, i will start re-assembling the machine.. and re wiring the control...
-
06-29-2013, 09:45 PM #366
Member
- Join Date
- Jan 2007
- Posts
- 352
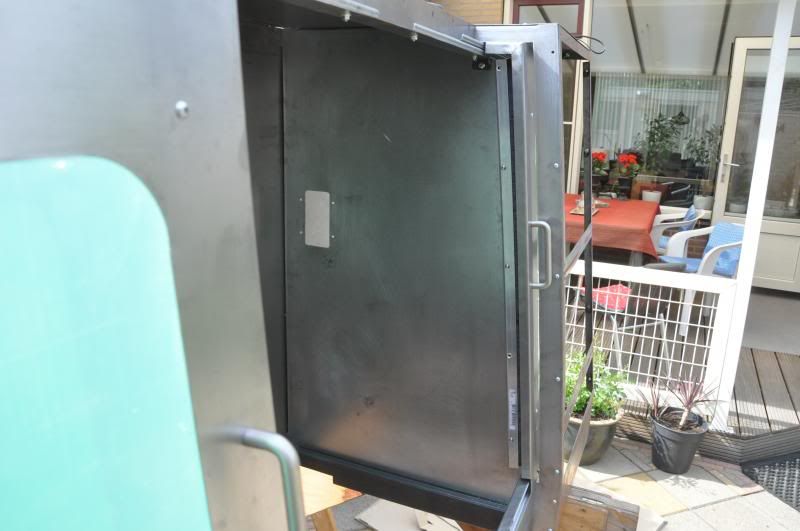
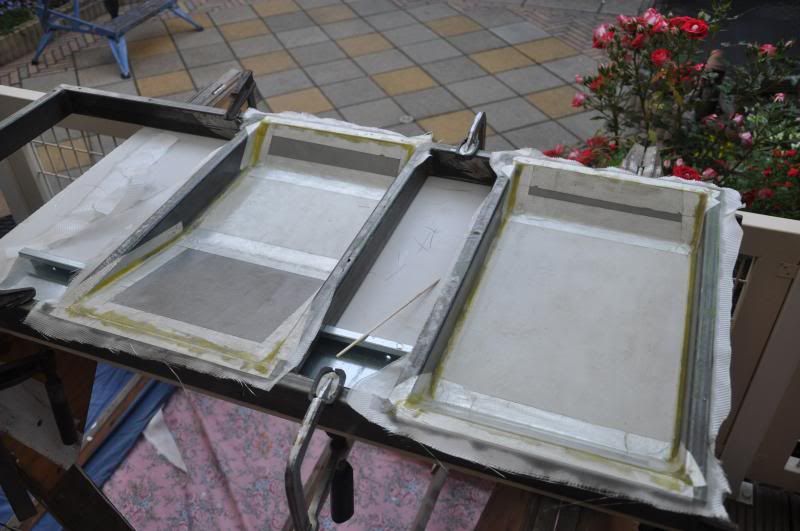
Today, i cut the chiptrays to size.. they fit snugly in the frame, so no screws are needed..
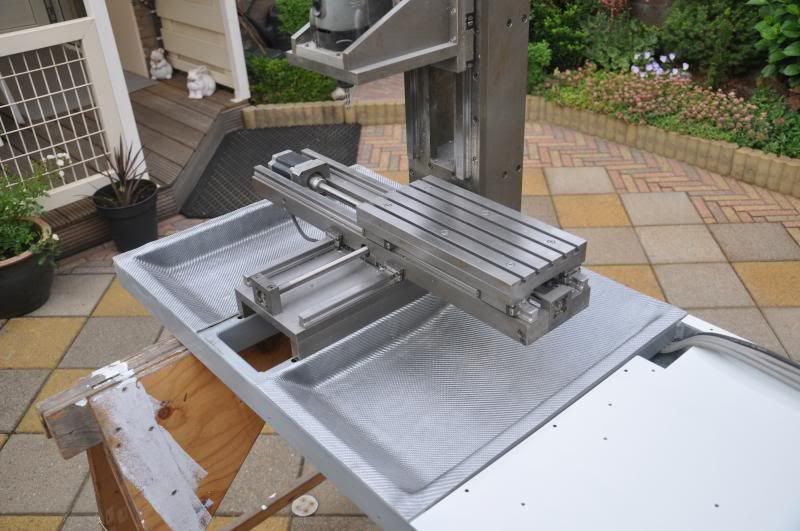
and this is how the cables come out of the cable guide in the frame, into the controller cabinet..
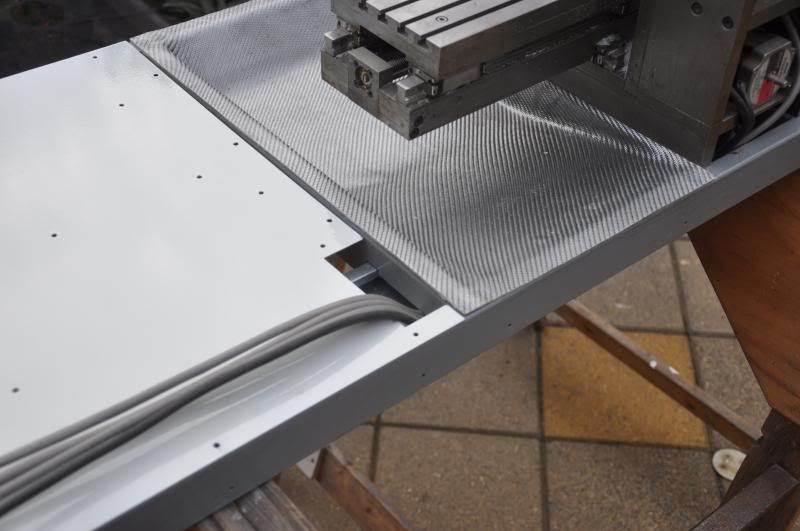
though i'm quite happy with the results, i think i will not use Alutex cloth again in a wet lay-up procedure.. it's better to vacuuminfuse it..
-
06-30-2013, 09:52 AM #367
Member
- Join Date
- May 2008
- Posts
- 1185
To get the chips out, do you remove the tray or suck them out?
-
06-30-2013, 10:52 AM #368
Member
- Join Date
- Jan 2007
- Posts
- 352
the trays fit snugly into the frame.. really snugly.. i need to push them in.. taking them out will be a challenge all in itself..
But.. i've made the rounded inside edges with a purpose.. this way it is easy to scoop the chips out.. just brush all the chips into the trays, and scoop, or vacuum them out.. won't take more than 5 minutes..
the sun is shining here.. on to the garden.. building the machine!
-
06-30-2013, 04:04 PM #369
Member
- Join Date
- Jan 2007
- Posts
- 352
Another sunny day, so another day of tinkering..

Building up the case..
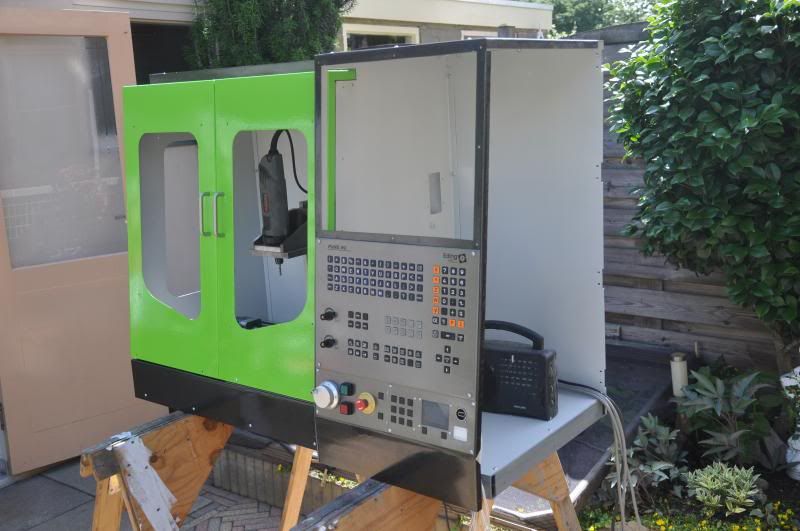
i'm really pleased with how the colorscheme turned out...
-
07-01-2013, 03:06 PM #370
Registered
- Join Date
- Sep 2006
- Posts
- 607
I love the colors and layout of the machine. Quite beautiful!
-
07-02-2013, 06:37 PM #371
Member
- Join Date
- Jan 2007
- Posts
- 352
Blight.. Thanks.. that makes 2 pleased persons!..
I made a transport-trolley today..
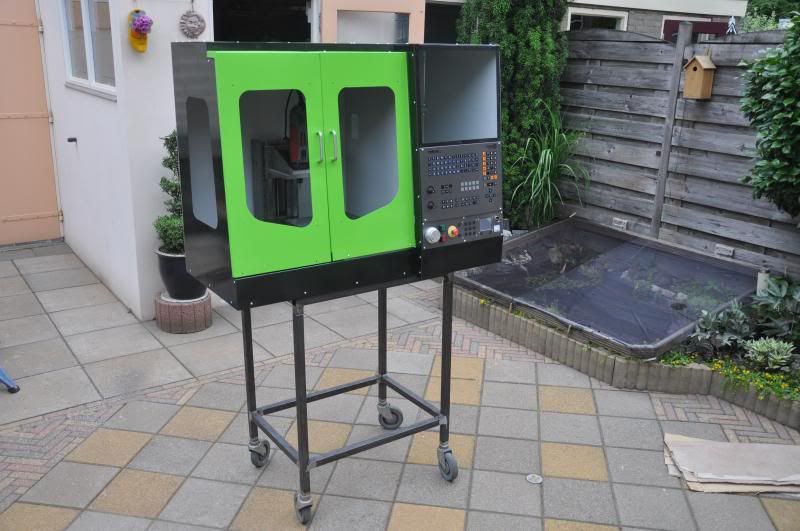
picked up a bunch of steel profiles and i cobbled up this frame-on-wheels i can now pull the machine from the cabinet, onto this trolley. when i need to work on it, or when i want to take it to a fair..
When not in use.. i just grab the topframe.. and lift it.. then the trolley almost falls apart..
Tomorrow i will drill some holes, to put in some "safety pins"...
-
07-03-2013, 12:37 AM #372
S.N.A.F.U.

- Join Date
- Jan 2005
- Posts
- 1880
Don't look now man but I think a pea vomited on your machine enclosure! but I'm not judging!
machine looks wonderful man! Keep up the good work.
but green? common your wife/gf picked that didn't she?thanks
Michael T.
"If you don't stand for something, chances are, you'll fall for anything!"
-
07-03-2013, 02:50 AM #373
Banned
- Join Date
- Jul 2013
- Posts
- 8
Tomorrow, i will drill some holes, to mount the last keypanels, and finally weld the socket-cup in place.. then.. i will start painting.. ! Jay!


-
07-03-2013, 10:26 AM #374
Member
- Join Date
- Jan 2007
- Posts
- 352
Hehehe.. Nope.. no wife.. no girlfriend is ever gonna decide what colors i will put on my machine.. i made it all up myself..
it may not be to everyone's liking.. but then again.. The Who also didn't make music to be liked by everyone.. they left that to the Beatles..
-
07-03-2013, 10:47 AM #375
Member
- Join Date
- Jan 2007
- Posts
- 352
Oops..
-
07-04-2013, 12:38 AM #376
Registered

- Join Date
- Jul 2003
- Posts
- 586
The color is similar to festool's green. So not a bad color, being that they are a top drawer manufacturer, more well know as festo. Like the Beatles comment.
-
07-04-2013, 11:53 AM #377
Member
- Join Date
- Jan 2007
- Posts
- 352
At the moment, i'm wiring all things in the enclosure.. i have to fit a SubD 9-pin in the carrier plate to be able to use my A-Axis..
Tomorrownight.. i'm going to a Concert.. The Who!..Quadrophenia.. looking forward to it!
-
07-04-2013, 03:38 PM #378
Member
- Join Date
- Jan 2007
- Posts
- 352
The Beagle has made her first chips again..
I had an old watch, with a plastic case wich cracked.. too bad.. well.. i've got a CNC machine.. why not make a new Aliminium Case..
to work on the caliber, which must be partially dissasembled to get it out of the casing.. i needed a caliber-ring..
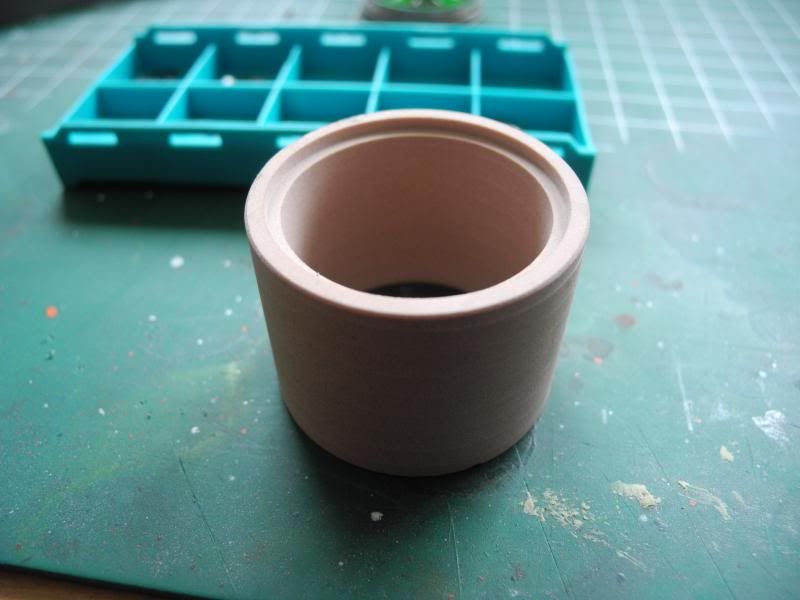
Milled using my own programming software.. 2 pocket cycles, and a round stud cycle were everything needed to make this ring
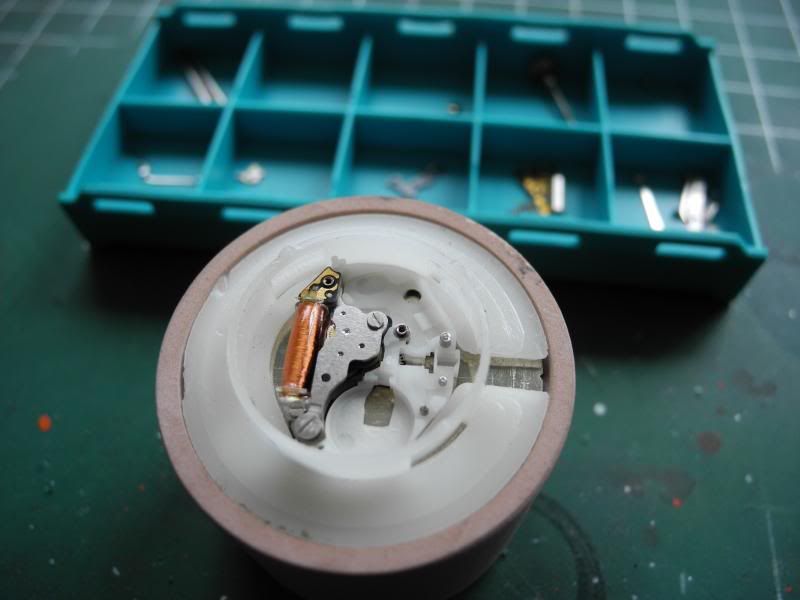
And here's the caliber resting in the ring, on the dial face, but the hands don't touch anything, so they won't bend...
since making this is so easy.. maybe i'll buy some ETA Calibers ( also uses in Citizen watches ) and make some watches for fun and profit.. i could engrave the dial with about anything!.
-
07-28-2013, 02:57 PM #379
Registered
- Join Date
- Dec 2009
- Posts
- 4
Well,I'm really shocked by what you had done. impressed by your skill. Nice job.
I really to have one like this in my home.How much did you cost?
I need to see if I can sustain.
Thanks
Chen From China.
-
08-01-2013, 12:00 AM #380
Member
- Join Date
- Jan 2007
- Posts
- 352
Well, to be honest.. this little machine has cost me a small fortune.. so be prepared to invest big money if you want to build something similar...

 Reply With Quote
Similar Threads
-
more progress..
By adam_m in forum DIY CNC Router Table MachinesReplies: 0Last Post: 11-26-2013, 03:56 AM -
Design In Progress
By JoeDawg in forum Uncategorised MetalWorking MachinesReplies: 1Last Post: 10-07-2008, 07:48 PM -
My First Router Design & Progress
By watsonstudios in forum CNC Wood Router Project LogReplies: 40Last Post: 07-22-2007, 09:19 AM -
Looking into buidling an Auto-start RPC
By Wendell in forum Phase ConvertersReplies: 2Last Post: 10-12-2006, 03:03 AM -
Alibre design in progress
By xyzcnc in forum Uncategorised CAD DiscussionReplies: 10Last Post: 06-07-2005, 06:49 AM
