


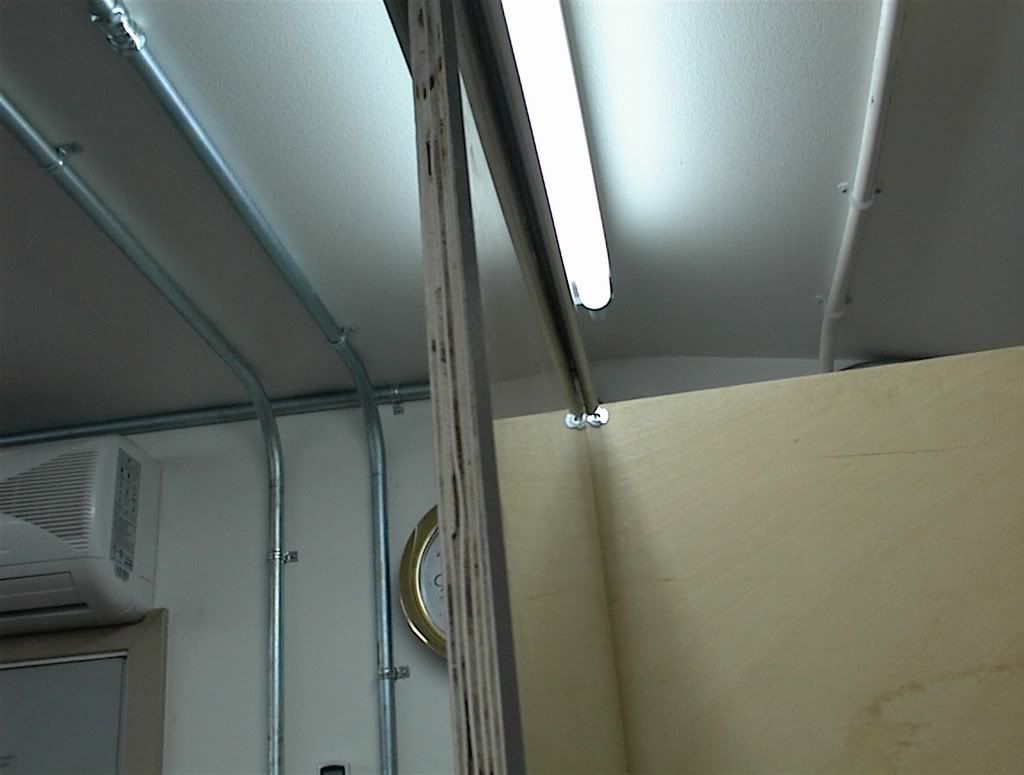
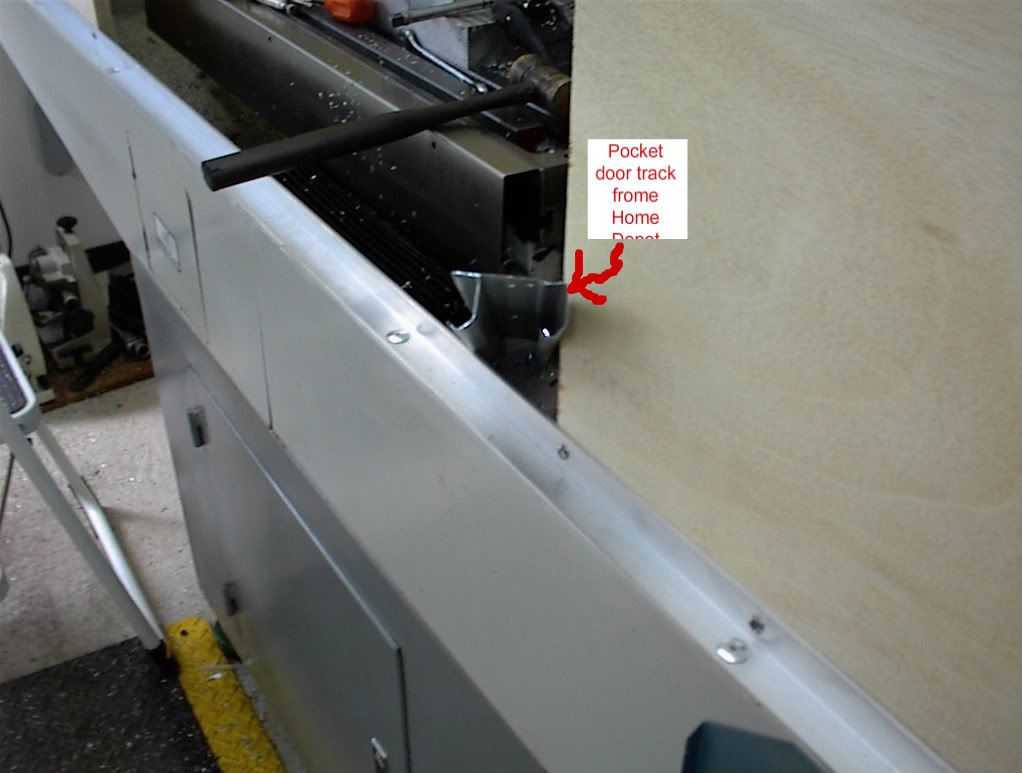
Stay tuned I will build a consol for the keyboard
and other controls tomorrow.
Results 1 to 20 of 33
-
05-29-2008, 03:24 AM #1
 Member
- Join Date
- May 2007
- Posts
- 163
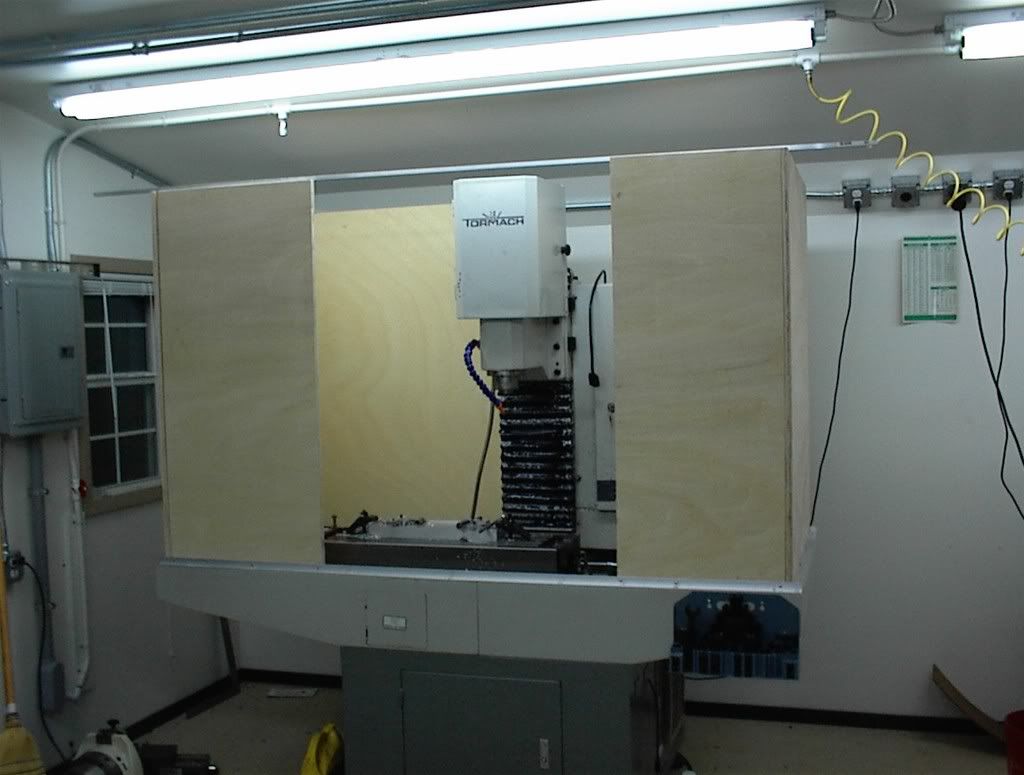
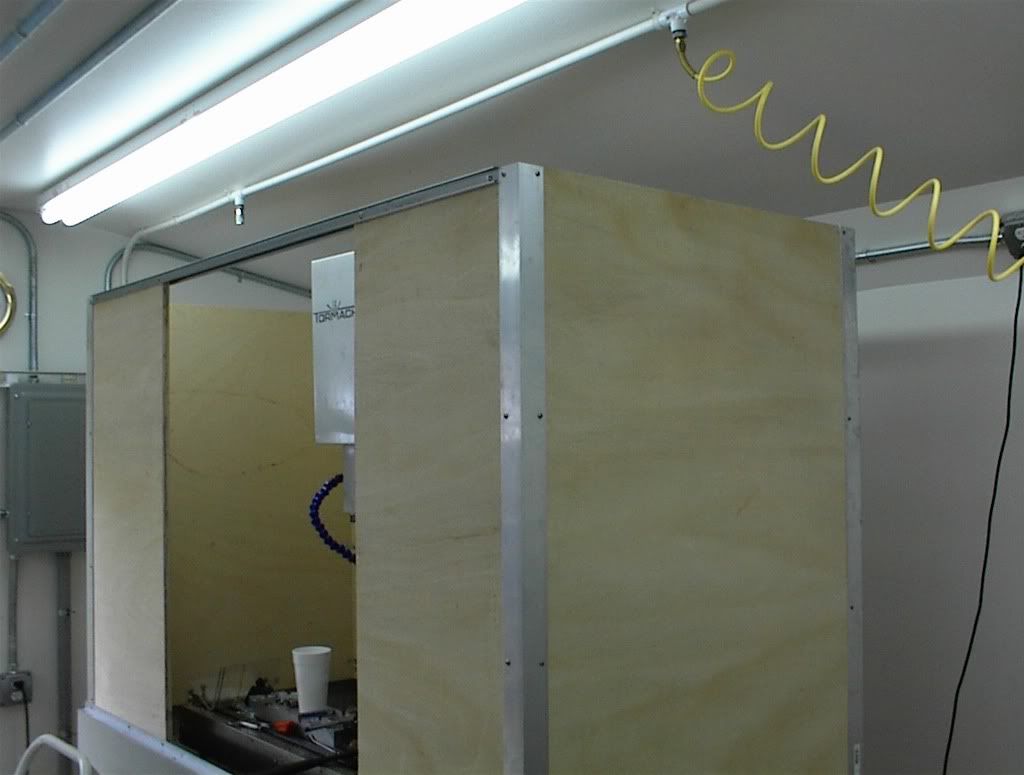
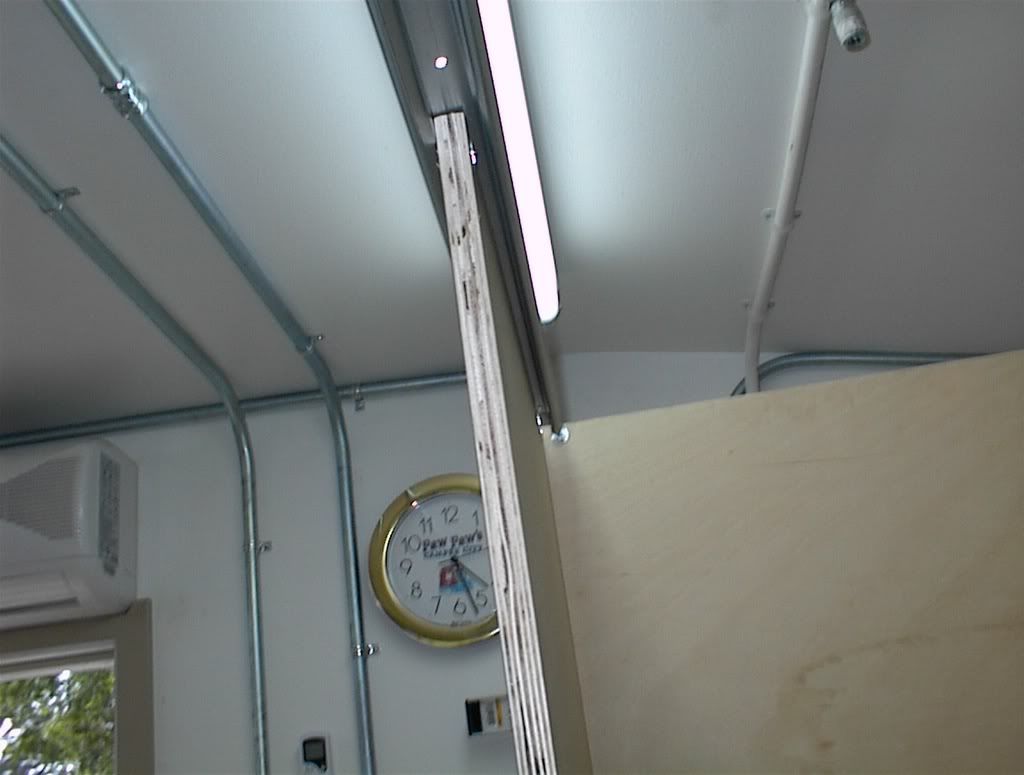
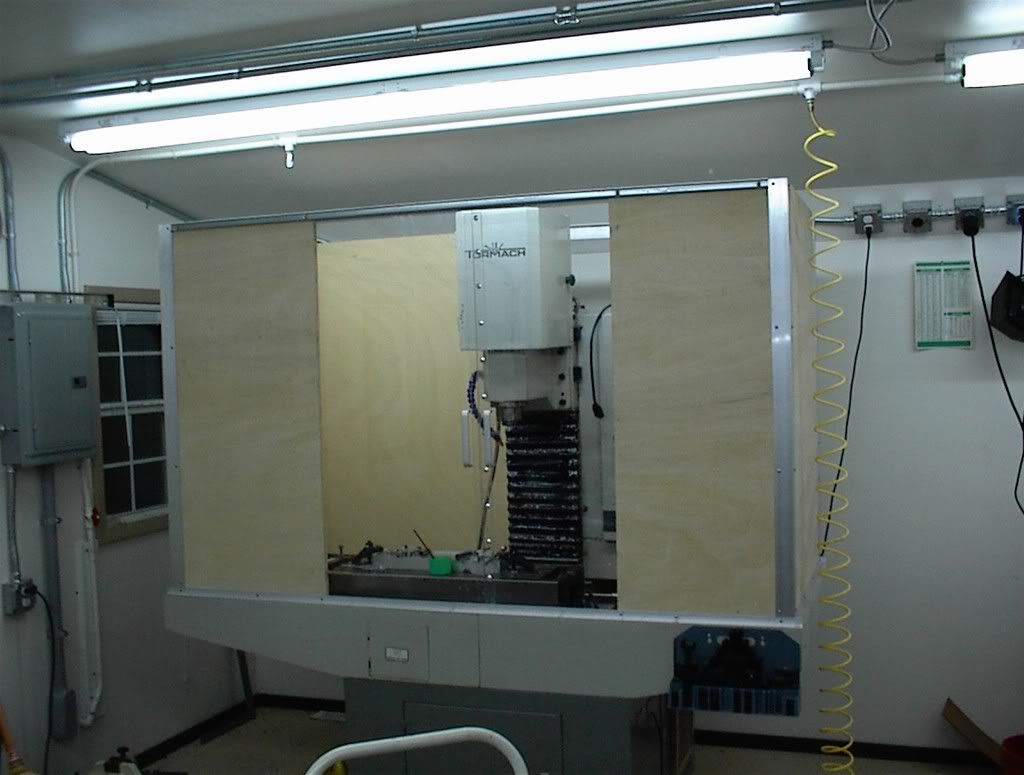
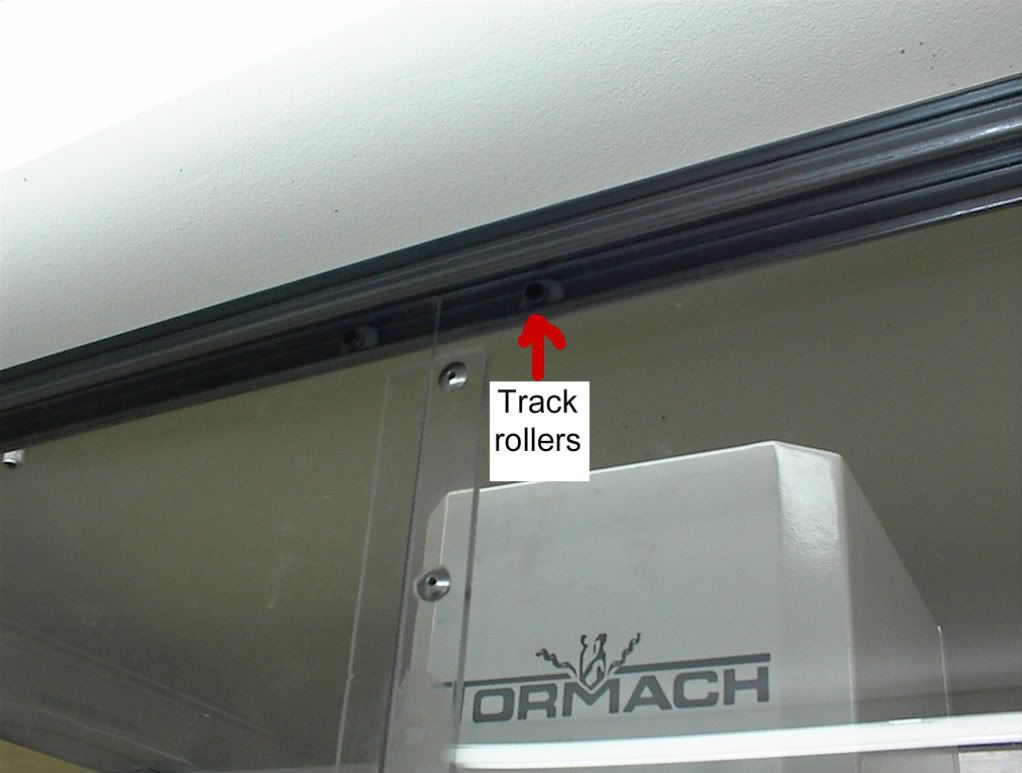
My encloser chips & coolant will never get away!
-
05-29-2008, 08:15 PM #2
Registered
- Join Date
- Jan 2008
- Posts
- 23
TT350,
Nice enclosure...it looks like you totally killed that problem! (chair)
A couple questions...
First, how do you like the 4th axis?
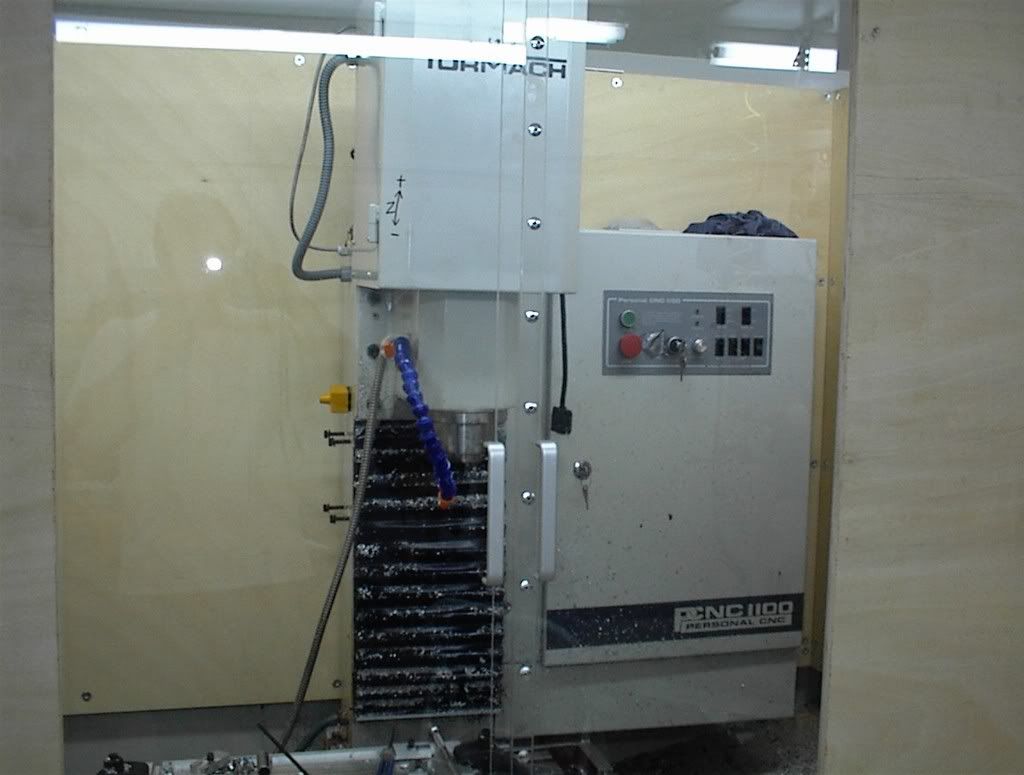
Second, is there a story behind the "+-Z-" that you marked on the Tormach? I'll bet there is! :stickpoke
Best Regards,
Tim
-
05-29-2008, 11:09 PM #3
Member
- Join Date
- May 2007
- Posts
- 163
The fourth axes works good but if you pin
a part really tite with the tail stock mine has
missed steps before.
It really needs a bigger motor.
This is my first CNC machine so wrote +-
on all the axes.
It made it easier for me.
-
05-30-2008, 03:57 PM #4
Member
- Join Date
- May 2007
- Posts
- 163
Console almost done
-
05-30-2008, 04:44 PM #5
Registered
- Join Date
- Jul 2006
- Posts
- 27
You might want to consider using some 2 part epoxy paint at minimum on the interior and edges of the plywood before it gets soaked by coolant.
Nice design!
Rick
-
05-30-2008, 05:08 PM #6
Member
- Join Date
- May 2007
- Posts
- 163
If all goes well I'll be painting it today.
-
05-30-2008, 06:15 PM #7
Registered
- Join Date
- Jan 2008
- Posts
- 23
Wow! Are you going to move all the controller boards, etc. into the new console too?
Tim
-
05-30-2008, 06:45 PM #8
Member
- Join Date
- May 2007
- Posts
- 163
No I’m just extending the wires for the panel you see
and making a cover for the cabinet inside.
-
06-02-2008, 08:14 AM #9
Registered
- Join Date
- Feb 2007
- Posts
- 1538
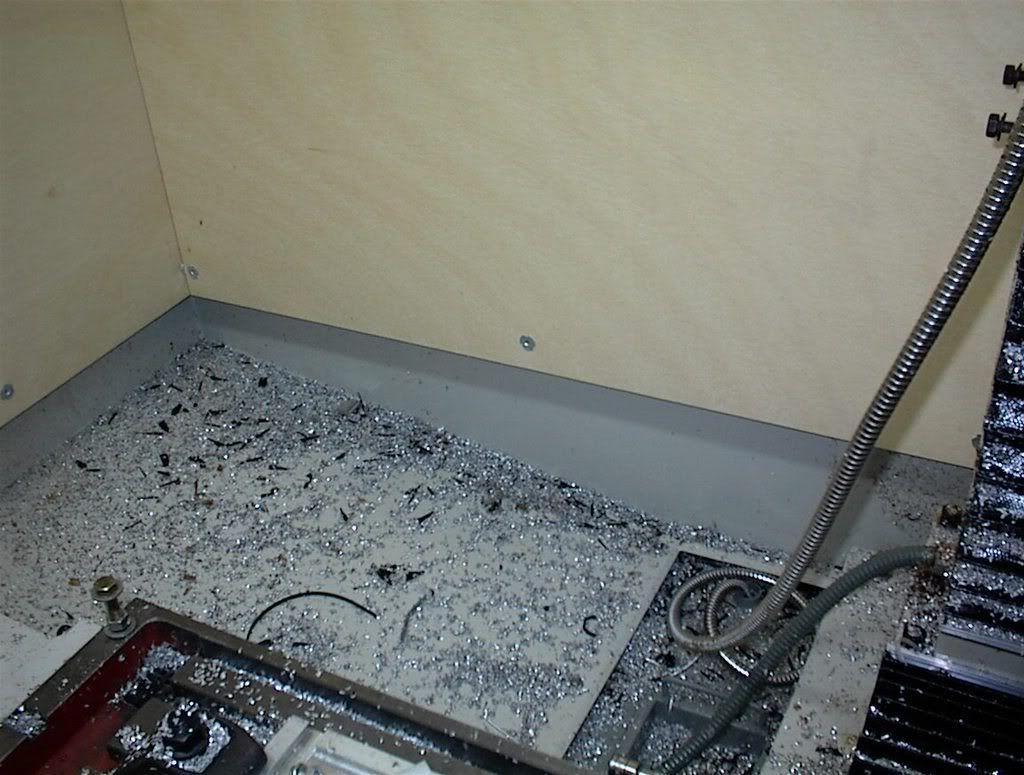
Hi TT - I found coolant gets in via that horizontal seam just below the door - make sure your cover goes that low - or just externally silicone seal it - seems to have worked for me.
-
06-02-2008, 07:06 PM #10
Member
- Join Date
- May 2007
- Posts
- 163
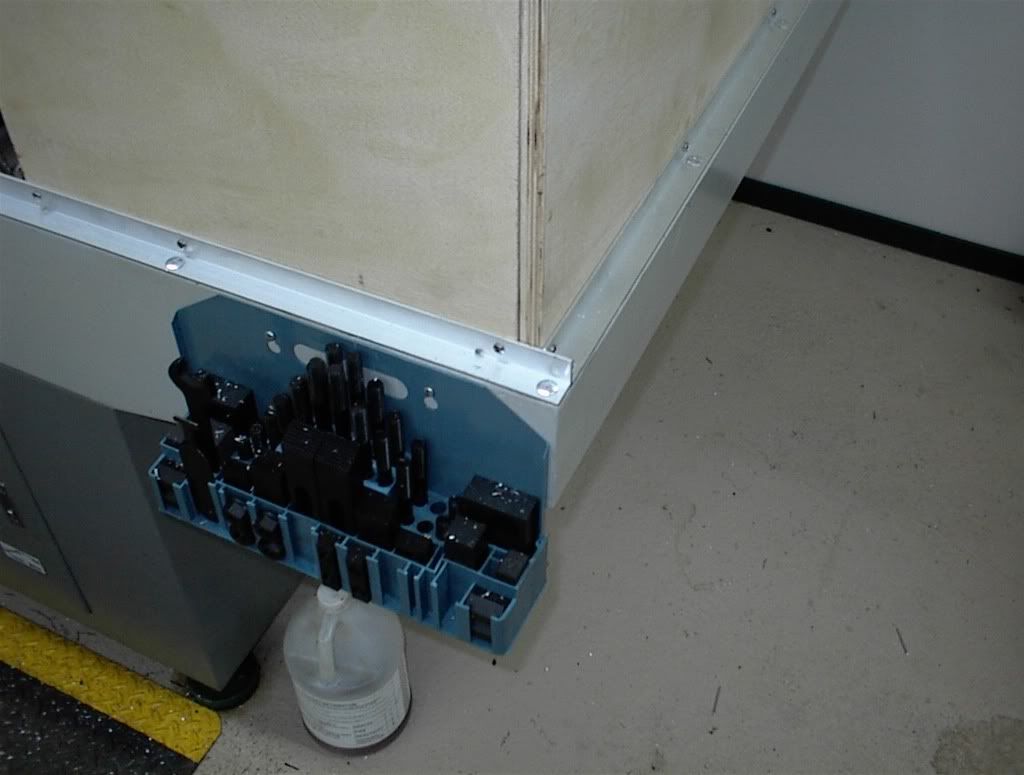
If you will look closely at the first picture you can see a row of pop-rivets. These pop-rivets are holding another piece of plexiglass to the inside - this way no coolant gets between the seams. The door also drops about an 1 1/2" below the stand.
-
06-02-2008, 07:06 PM #11
Registered
- Join Date
- Feb 2007
- Posts
- 1041
Little tight for me, but looking good !! Can't wait to see the pics
-
06-02-2008, 07:10 PM #12
Member
- Join Date
- May 2007
- Posts
- 163
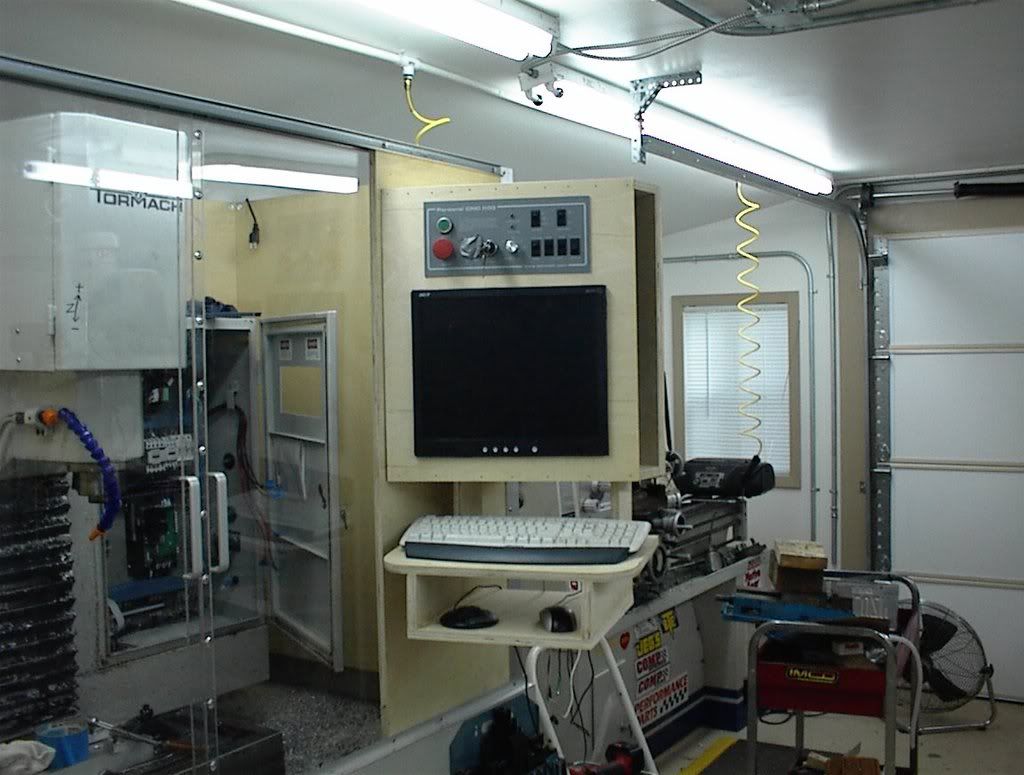
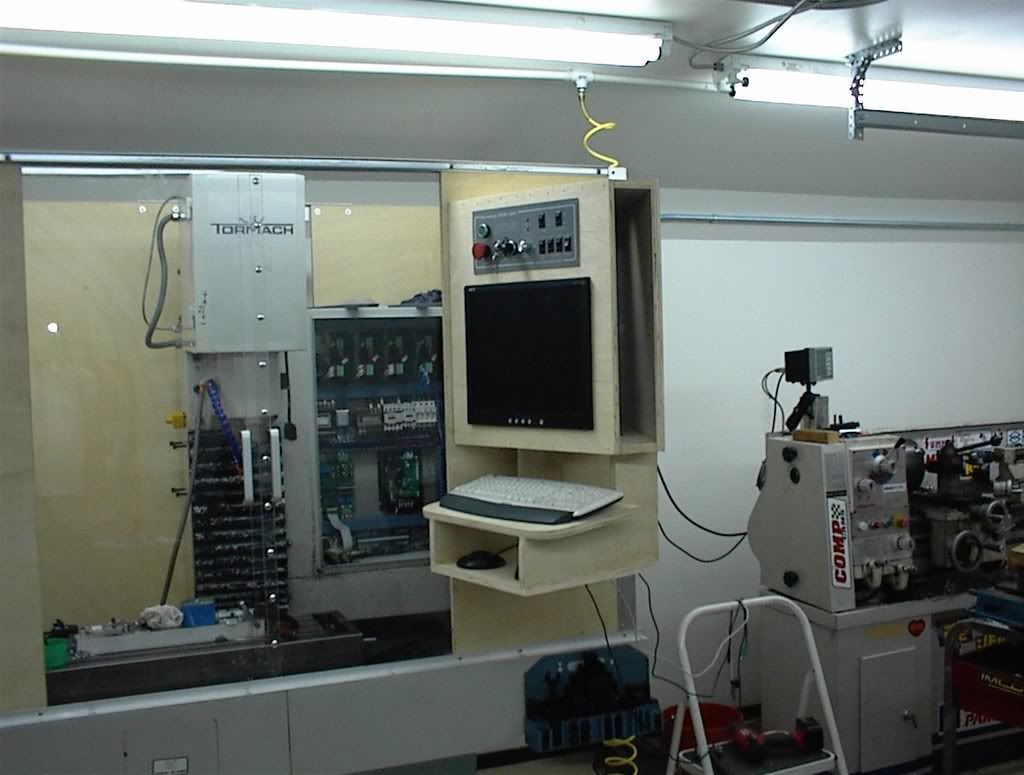
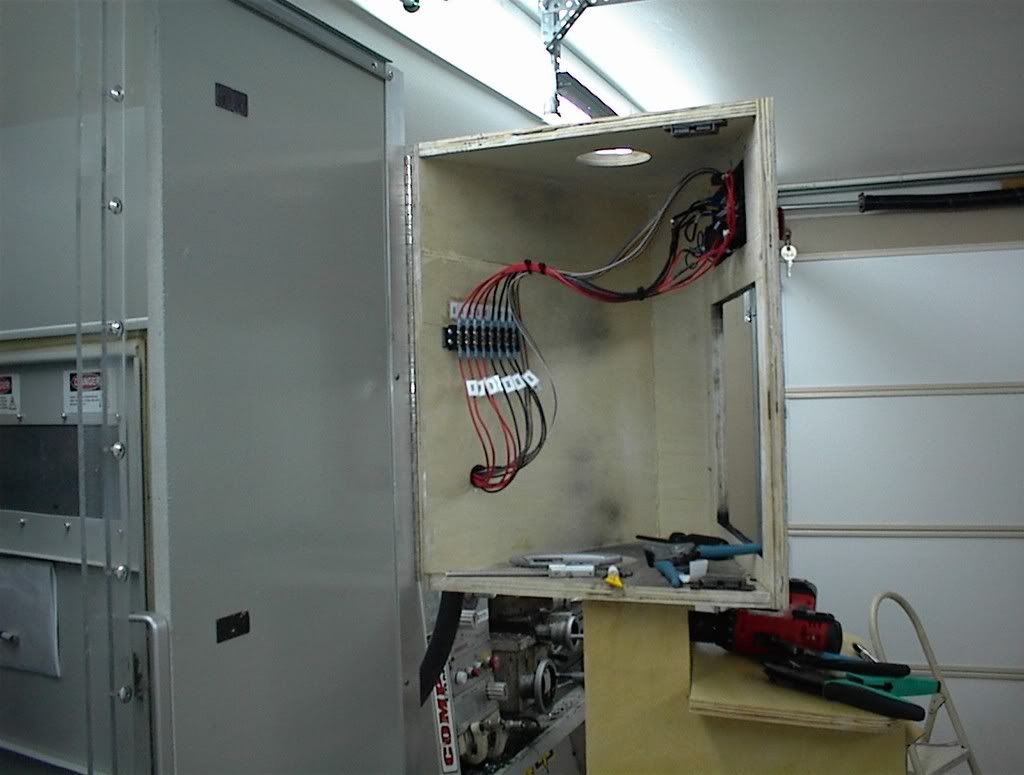
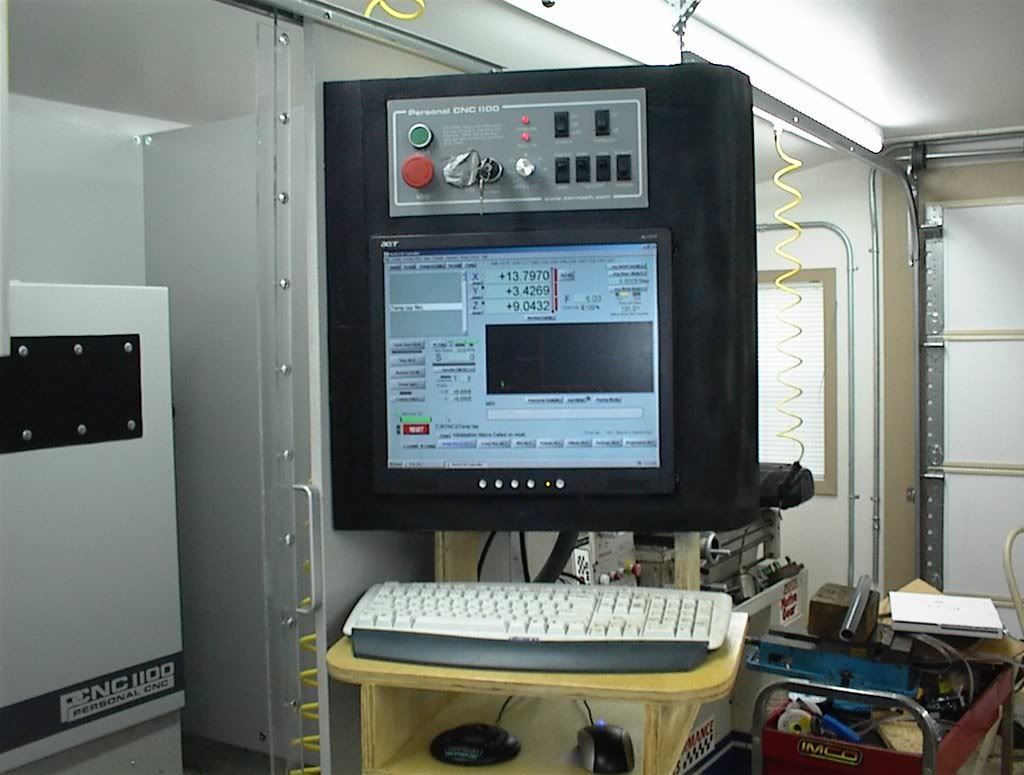
Here you can see how I designed the console to swing away on a hinge for easy access of any maintenance that may be required. Also you can see how I wired the panel using a busbar system. This way it can be disassembled if need be and no wires have to be cut.
Take a look at the top right hand corner of the console and you can see a set of magnets that I mounted. There is one on the top and a set on the bottom. No latches to undo here. Just swing the console over, let the magnets grab their little metal pads and she's ready for work.
It's alive!!!! I'm proud to say that everything is working just like it did before the panel was moved.
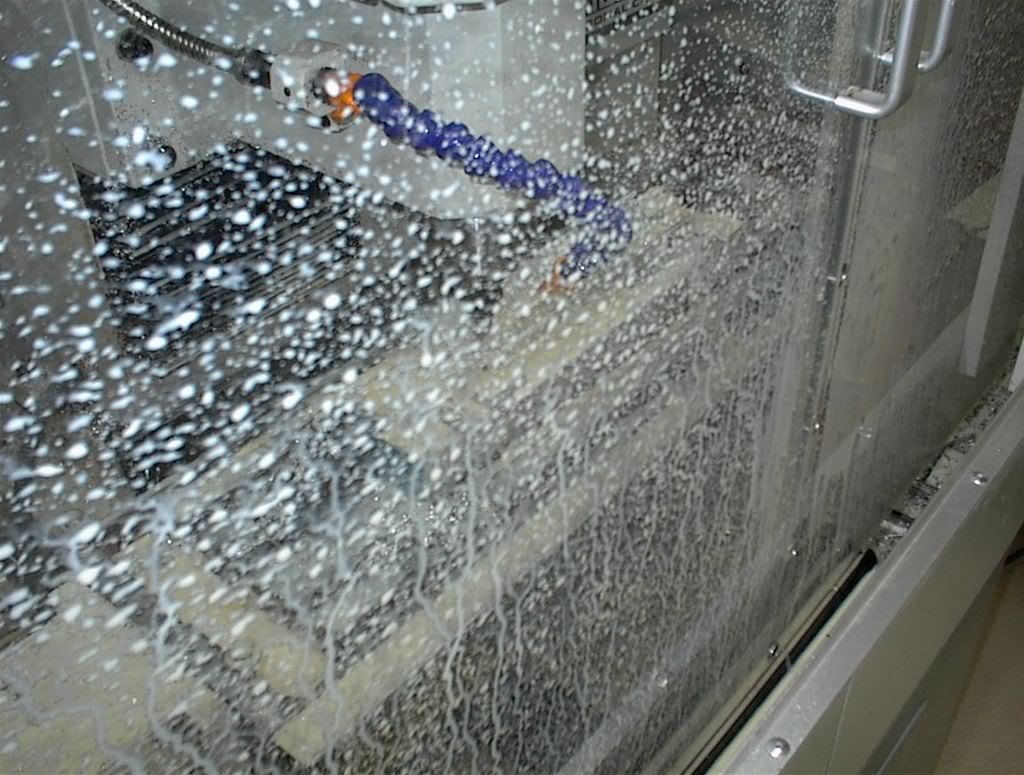
Here it is in action. It's doing its damn'dest to make a mess but we got that covered now.
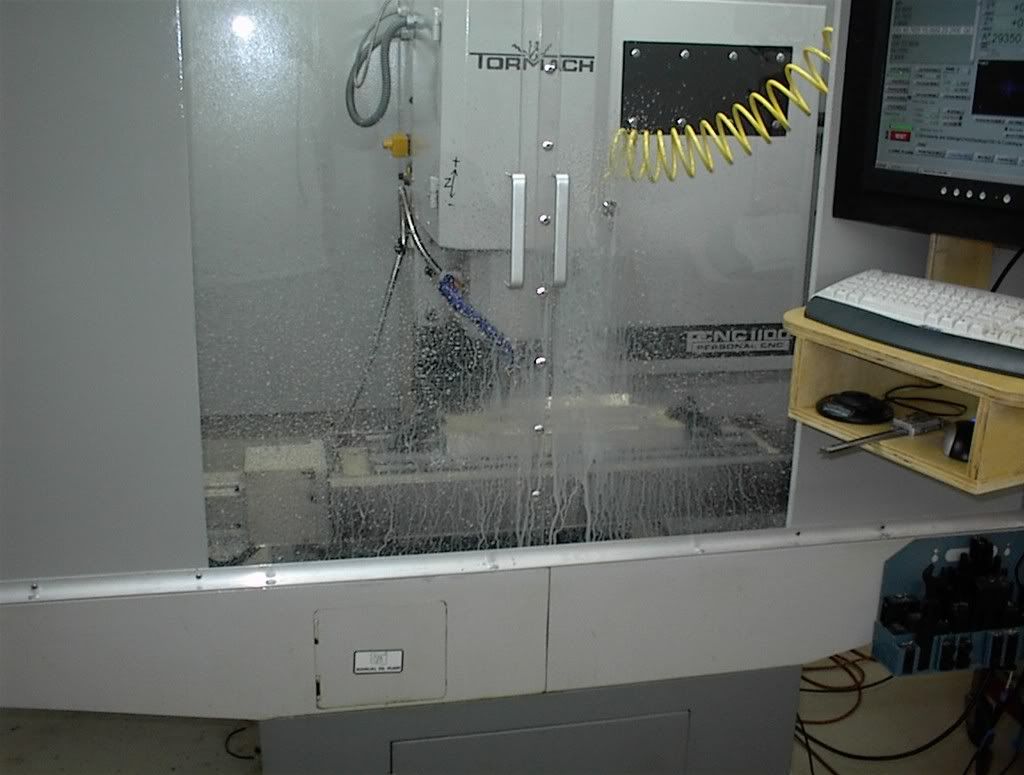
I can now run the coolant WIDE OPEN and not a drop gets away. Mission accomplished!
-
06-02-2008, 07:16 PM #13
Member
- Join Date
- May 2007
- Posts
- 163
Little tight? What's tight about it? Originally Posted by twocik

-
06-02-2008, 07:37 PM #14
Member
- Join Date
- May 2007
- Posts
- 163
Oh I see what you mean. I put RTV on that seam when I assembled the cabinet the first time. Originally Posted by keen
-
06-03-2008, 07:42 AM #15
Registered
- Join Date
- Feb 2007
- Posts
- 1041
"Little tight? What's tight about it?"
Looked kind of tight around the LCD console and doors.
Are you having any problems with the wood soaking ?
-
06-03-2008, 01:02 PM #16
Member
- Join Date
- May 2007
- Posts
- 163
I painted it with industrial/marine oil based paint.
-
06-03-2008, 09:38 PM #17
Registered
- Join Date
- Feb 2007
- Posts
- 1538
I mean the electrical cabinet door. Originally Posted by TT350
-
06-03-2008, 09:40 PM #18
Registered
- Join Date
- Feb 2007
- Posts
- 1538
I see your post know - yeah my plugs and leads were swimming in coolant!
-
08-27-2008, 08:55 AM #19
Registered
- Join Date
- Feb 2006
- Posts
- 1072
How's it working out?
tt350, thank you for the great description of your enclosure. I'm to the point of wanting to build a similar enclosure for my Tormach. Now that it's been a few months, how do you like your enclosure? Is there anything you'd do differently now? Any aspects that were'nt obvious at first?
Thanks,
Randy
-
08-27-2008, 12:01 PM #20
Registered
- Join Date
- Feb 2008
- Posts
- 180
It looks great. Good job.


 Reply With Quote
Similar Threads
-
Lets see what you are doing to protect your steppers from coolant and chips
By maxboostbusa in forum Benchtop MachinesReplies: 17Last Post: 01-25-2008, 11:42 PM -
My First Chips
By Chrisjh in forum Syil ProductsReplies: 2Last Post: 06-01-2007, 01:12 AM -
Chips
By LYN BYRD in forum MetalWork DiscussionReplies: 3Last Post: 04-24-2007, 01:47 PM -
How hot should LM chips get?
By phantomcow2 in forum Hobbycnc (Products)Replies: 5Last Post: 11-10-2005, 06:28 PM -
Cook your chips to make more chips :)
By ToMMY2ooo in forum Bending, Forging, Extrusion...Replies: 3Last Post: 09-07-2004, 07:38 PM
