


Hi,
As those of you who have assembled and disassembled the HP-UHU a few times probably know, it can be a bit tricky to do since there aren't any access-holes in the board to reach the screws for the MOSFETs.
At first I thought it wasn't that bad but after taking it apart a few times during the initial debugging I got tired of it a decided a better way was needed. So I came up with the following:
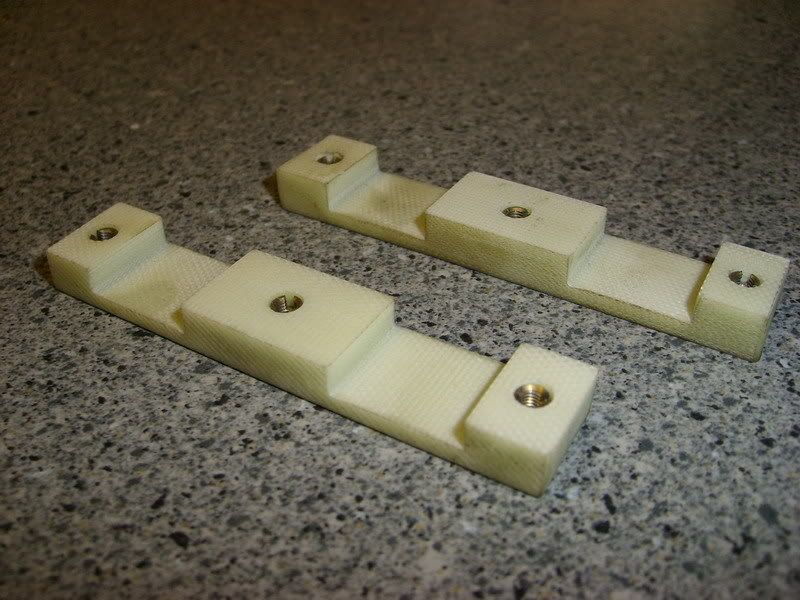
Here's two "clamps" that fit across the MOSFET's on the bottom side of the HP-UHU board.
They have three M3 threaded inserts each that is used to clamp the MOSFETs to the aluminum backplate:
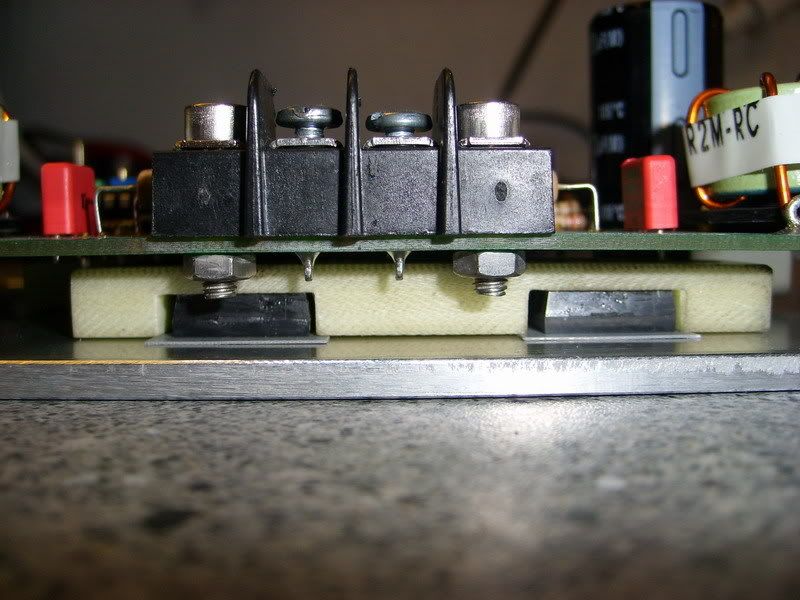
Here's a closeup:
And here's the back-side of the alu-plate, all holes countersunk...
Then comes the big old heatsink. I've attached a piece of aluminum sheet-metal that serves as a mounting bracket:
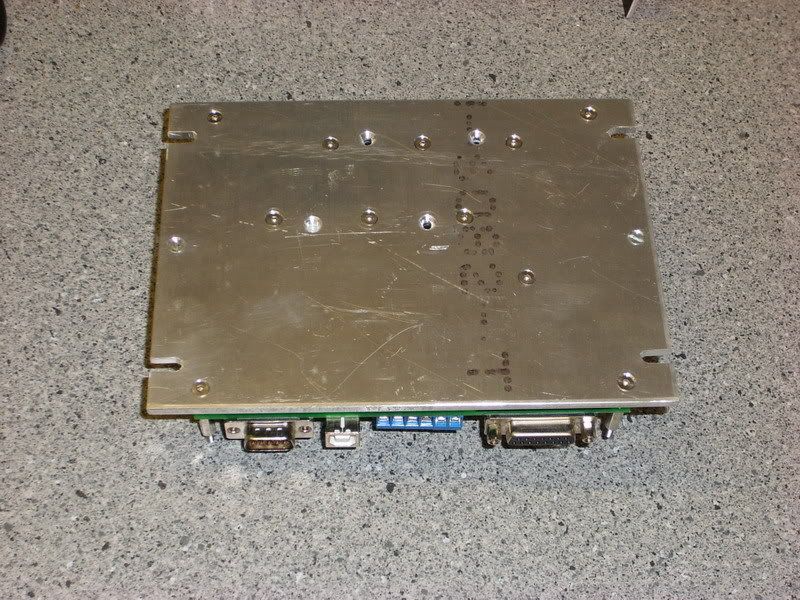
And here's the finished 'package':
Hopefully this will help other HP-UHU builders out there, thanks for looking.
/Henrik.
Thread: Heatsinking the HP-UHU
Results 1 to 17 of 17
-
07-10-2008, 08:23 PM #1
 Registered
- Join Date
- Jul 2007
- Posts
- 887
Heatsinking the HP-UHU
-
07-11-2008, 06:37 AM #2
Registered
- Join Date
- Jan 2005
- Posts
- 1050
HI Henrik, do you have the dimensions of the clamps? or a drawing you could post ,
any ways thanks for the brilliant ideas!
RGDS
Irfan
-
07-11-2008, 06:45 AM #3
Registered
- Join Date
- Jul 2007
- Posts
- 887
Hi Irfan,
Yes, I have drawings for the backplate and the clamps - just need to clean them up a bit....then I'll upload them here.
Thanks!
/Henrik.
-
07-11-2008, 07:01 AM #4
Registered
- Join Date
- Jan 2005
- Posts
- 1050
how did you fix the 7805 henrik?
-
07-11-2008, 07:50 AM #5
Registered
- Join Date
- Jul 2007
- Posts
- 887
Hello,
The 7805 is mounted with M3 screw and nut from the back of the plate, it's quite easy to reach in with a pair of pliers to access the nut so I didn't bother making a clamp for it.
Attached are two drawings, one for the clamps and one for the backplate. Please note that the hole for mounting the 7805 regulator is missing in the drawing...
/Henrik.
-
07-11-2008, 09:35 PM #6
Registered
- Join Date
- Nov 2006
- Posts
- 70
Great job Henrik, congratulation!

And thanks for the super documentation and photos ...
Jozsi
-
07-11-2008, 10:05 PM #7
Registered
- Join Date
- Jan 2005
- Posts
- 1050
Hi Henrik, are you using any thermal conductive paste between the flat Alu plate and the bigger heat sink?
RGDS
Irfan
-
07-12-2008, 07:54 AM #8
Registered
- Join Date
- Jul 2007
- Posts
- 887
Irfan,
Yes and no.... There's no thermal paste applied at the moment but I'm going to add that once I'm certain I'm not going to take it apart again.
Thanks!
-
07-12-2008, 10:05 PM #9
Registered
- Join Date
- Jun 2008
- Posts
- 130
You could use Arctic Silver 5 which is popular for computer heatsinks; it works very well, and is not sticky. The tube looks pretty small but it goes a long way, you only need a very thin layer. Jim Originally Posted by H.O
 No time to do it right, plenty of time to do it twice.
-
07-13-2008, 07:02 AM #10
Registered
- Join Date
- Jan 2005
- Posts
- 1050
Originally Posted by youngjim
i use something call pate340
its good, but I would like a pad, which I would cut to what ever size i want and paste it on the Alu heatsink, just a matter of comfort!
RGDS
Irfan
-
07-13-2008, 04:40 PM #11
Gold Member
- Join Date
- Aug 2006
- Posts
- 2758
Great idea!!!, Simple and beautiful.
Congratulations!!
Kreutz
-
07-14-2008, 04:13 PM #12
Registered
- Join Date
- Dec 2005
- Posts
- 231
Hi Henrik, Originally Posted by H.O
What type of material did you use for the clamps?
Thanks
John
-
07-14-2008, 04:15 PM #13
Registered
- Join Date
- Dec 2005
- Posts
- 231
Hi Henrik, Originally Posted by H.O
Do you have a source for the heatsink material?
Thanks
John
-
07-14-2008, 04:29 PM #14
Registered
- Join Date
- Jan 2005
- Posts
- 1050
I am planning to use Hylam, Henrik even I had that Q, seems like some sort of epoxy cloth of fiber?
-
07-14-2008, 05:36 PM #15
Registered
- Join Date
- Jul 2007
- Posts
- 887
Hi guys,
I got the heatsink from a scrapped MIG-inverter, I managed to squeeze out three HP-UHU sized heatsinks from a single large one - it was the mother of all heatsinks.... A qualified guess on my part though is that such a large heatsink isn't really needed - I just used what I had.
The material for the clamps is indeed some kind of epoxy/fiberglass, just like FR4 circuitboard material but a lot thicker. I guess bakelite/hylam, delrin, plexiglass or some other kind of fairly hard plastic should do it. You COULD make them in aluminum but then they need to be a bit thinner or the clearance may be on the low side....
And the alu-plate backplate, well...that's just a 4mm alu-plate.
HTH
/Henrik.
-
07-17-2008, 07:21 AM #16
Registered
- Join Date
- Jan 2005
- Posts
- 1050
my heatsink clamps
since i don't have a milling machine at hand, decided to use super glue and 3 mm thk hylam to use for the clamps with nuts embedded in between.
started of with my hacksaw and bench drill!
looks very crude but should work. will post you the clamp affixed pictures soon.
pictures are from a crappy Motorola E6 rockr ... kindly excuse!
-
11-02-2009, 11:45 PM #17
Registered
- Join Date
- Aug 2009
- Posts
- 7
Extra job
Extra job Henrik
/Robert - phoenix_1


 Reply With Quote