


Originally Posted by stevehuckss396

Awesome! Is this with the cylinder heads on or off?
Thread: Model V8 engine plans required
Results 201 to 220 of 525
-
04-08-2011, 01:35 AM #201
 Registered
- Join Date
- Oct 2006
- Posts
- 708
-
04-08-2011, 02:06 AM #202
Registered
- Join Date
- Dec 2006
- Posts
- 603
Originally Posted by dynosor
Off
You do everything you can to make sure the assembly fits and works well but sometimes (most times) you rotate and there is a sticky spot here or there. Putting it in the lathe and spinning the assembly works out the kinks and frees up the little burrs.
-
04-08-2011, 01:37 PM #203
Junior Member
- Join Date
- Jul 2010
- Posts
- 369
"Magnaflux" or "Dye Penetrant"
Did you do any NDT's "Magnaflux" and "Dye Penetrant" your parts to make sure they will stand up to the load once the motor is fired up. Just a precaution so as you wont destroy all of your hard work. Its way more easy to find a crack that will grow under load and make a new part than to make a whole new motor.
Good Luck~!:cheers:
-
04-08-2011, 02:59 PM #204
Registered
- Join Date
- Apr 2011
- Posts
- 0
This is way beyond anything I am capable of doing, but damn, I enjoyed following along up to this point very much! I am looking forward to seeing this progress to completed.
Love it!
-Ray
-
04-08-2011, 08:11 PM #205
Registered
- Join Date
- Dec 2006
- Posts
- 603
Originally Posted by Perfect Circle
Nope!!
-
04-09-2011, 05:16 AM #206
Registered
- Join Date
- Oct 2006
- Posts
- 708
What speed do you run the lathe and how do you mount the engine? Originally Posted by stevehuckss396
-
04-09-2011, 01:07 PM #207
Registered
- Join Date
- Dec 2006
- Posts
- 603
Originally Posted by dynosor
I put the crankshaft into a collet and hold the block in my hand. I run the lathe at it's slowest speed.
-
04-09-2011, 10:41 PM #208
Registered
- Join Date
- Dec 2006
- Posts
- 603
Hi guy's!
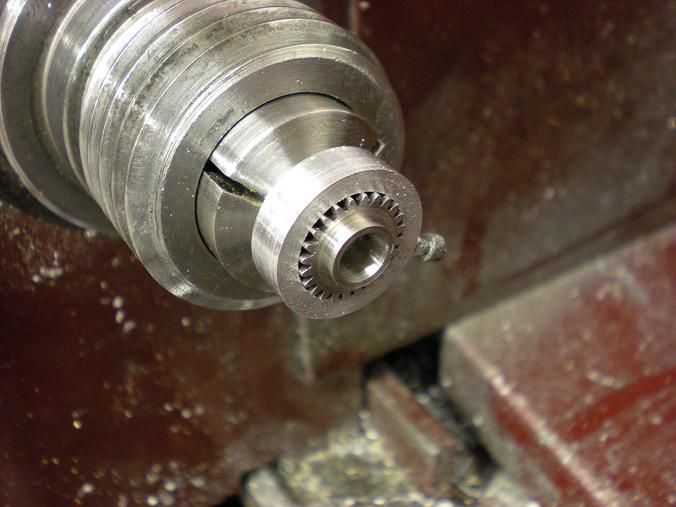
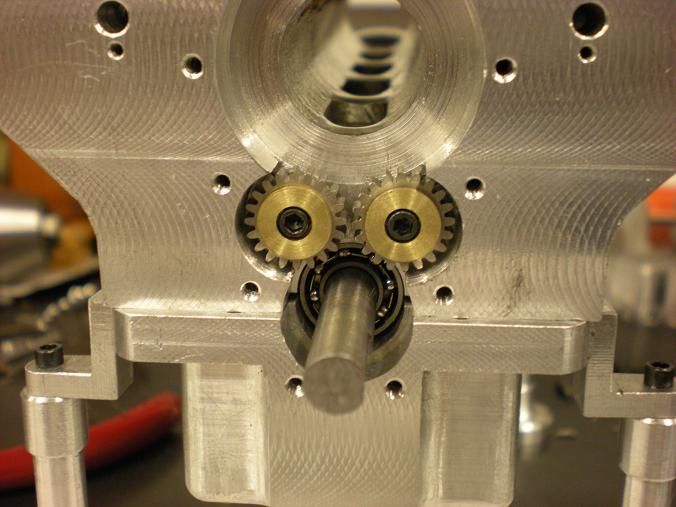
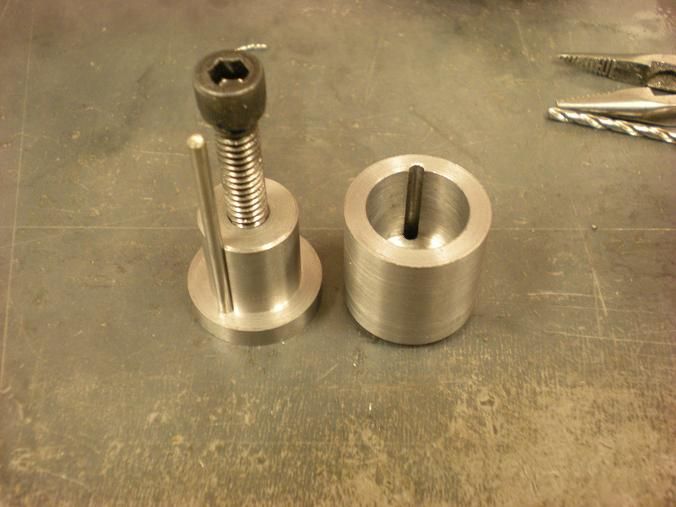
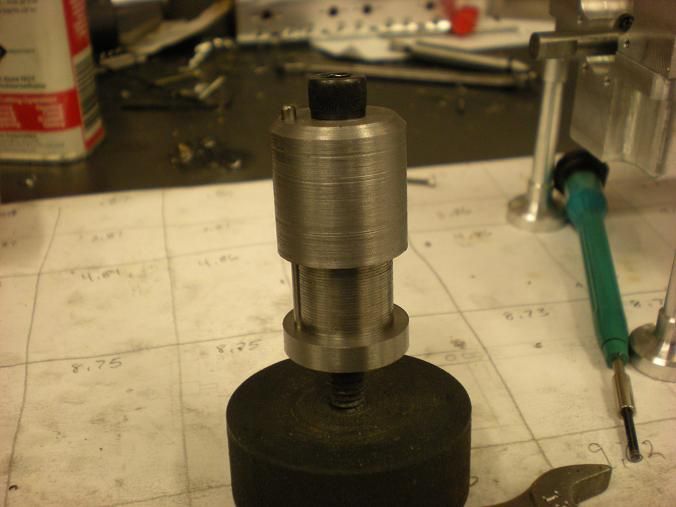
Made some progress on a few things today. I'm trying to get everything ready so the next time the crankshaft comes out, I will have everything ready to put it back in for the last time. I made a couple more collets to hold gears for modification. I made one for the idler gears and this one to modify the crankshaft gear.
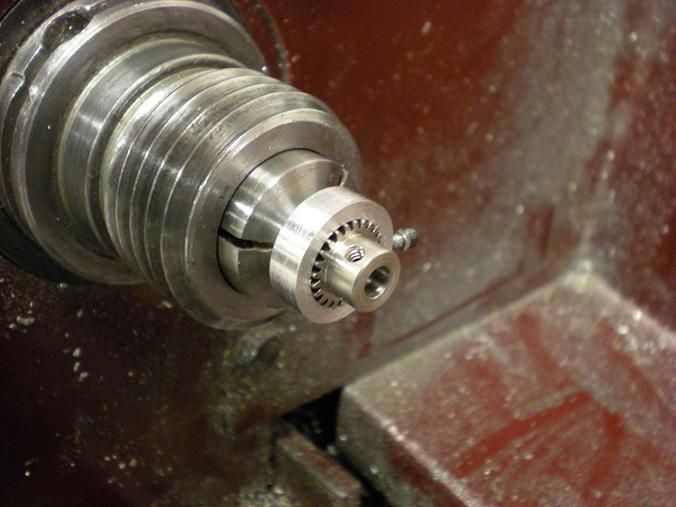
Turned the hub down to the correct thickness. This will put the correct distance between the gear and the bearing.
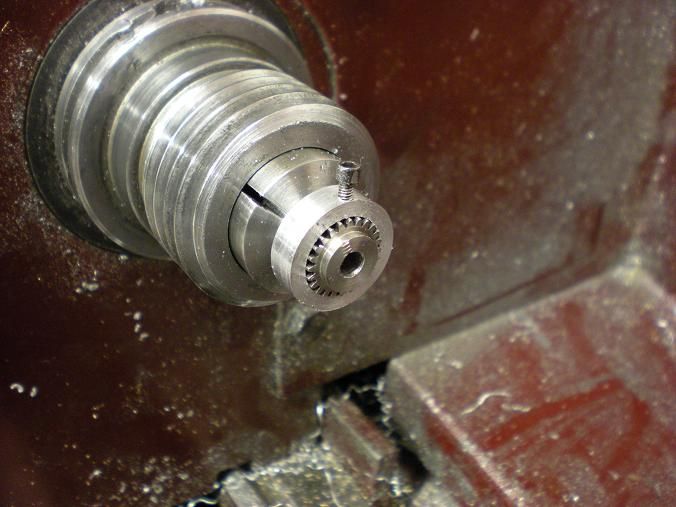
Then the OD was modified to work with the bearing. The bore was opened up to a press fit onto the crankshaft. This finished up the crank gear.
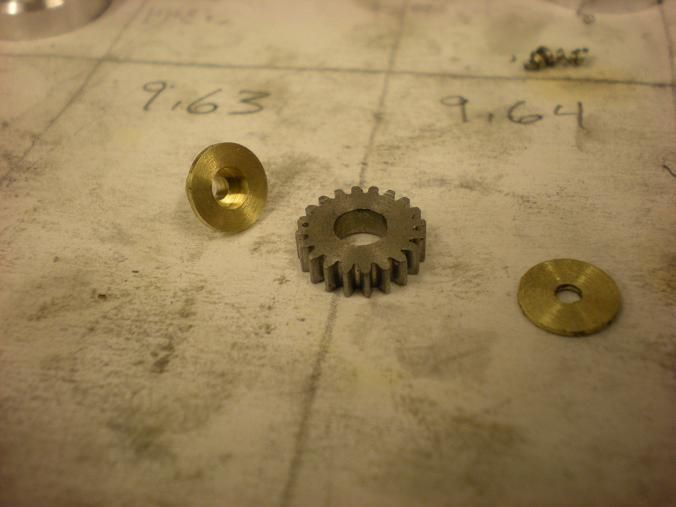
I also made one for the idler gears. The idler just needed the hub removed. I also made the idler mounts. Only one of the idler gears is needed but I wanted to make mine like a Pete Jackson gear drive so i'm going to run 2 idlers.
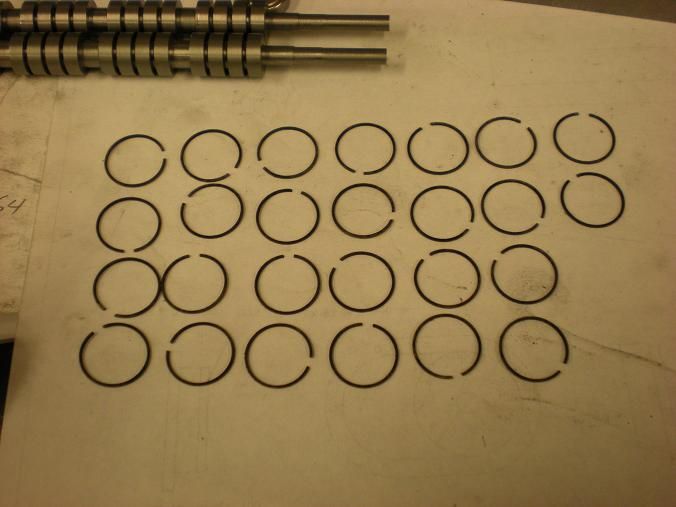
After that I made my fixture for heat treating my rings. This fixture is made the George Trimble way. I included the fixture in the drawings but it is only good for 5/8 rings.
Turned and bored the cast iron for the rings. Finished with 180, 320, and then 600 grit paper. Real happy with the finish and hit my number inside of .0002.
Loaded 27 rings into the fixture and they are ready for some heat.
-
04-10-2011, 05:12 AM #209
Registered
- Join Date
- Oct 2006
- Posts
- 708
Originally Posted by stevehuckss396
How do you create the break in the rings and at what temperature do you reshape them? How much larger do you make the ring OD after "baking" than liner ID?
-
04-10-2011, 12:11 PM #210
Registered
- Join Date
- Dec 2006
- Posts
- 603
Originally Posted by dynosor
I use a small set of wire cutters to "crack" the rings.
I make the ring as close to the bore size as I can but NEVER go under. This set was .0002 or less bigger than the bore.
I apply a powder that protects against scale and then bake them at 1100F for 4 hours.
-
04-10-2011, 02:09 PM #211
Registered
- Join Date
- Oct 2008
- Posts
- 73
How do you find the diameter of the piston ring groove?
9/10 of the piston diameter or something like that?
I suppose you can go higher with bigger pistons since the ring is more springy when it's larger?
-
04-10-2011, 09:44 PM #212
Registered
- Join Date
- Dec 2006
- Posts
- 603
Originally Posted by Adaware
There was an old magazine called "Strictly I.C." that covered nothing but model engine related topics. In some of the earliest editions there was an article by a guy named George Trimble. He did a mountian of testing to come up with a way to make rings. His method is not the easiest but it is one of the best for making rings. He covered how to design the rings for a given bore. He also tells how to design the fixture to heat treat the rings.
The back issues are still available. If you are going to do more than this engine, you should get the 3 back issues and read, read, read.
DESIGN & FABRICATION OF PISTON RINGS, by the late George Trimble. The EPITOME of miniature engine ring manufacture. Issues # 7,8 & 9 … $8.00 ea. ….. TOTAL: $24.00 http://www.strictlyic.com/pit01.htm
-
04-10-2011, 10:42 PM #213
Registered
- Join Date
- Dec 2006
- Posts
- 603
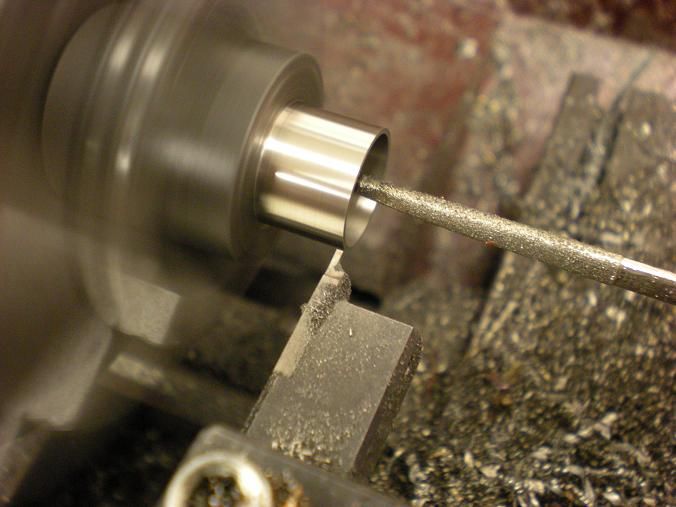
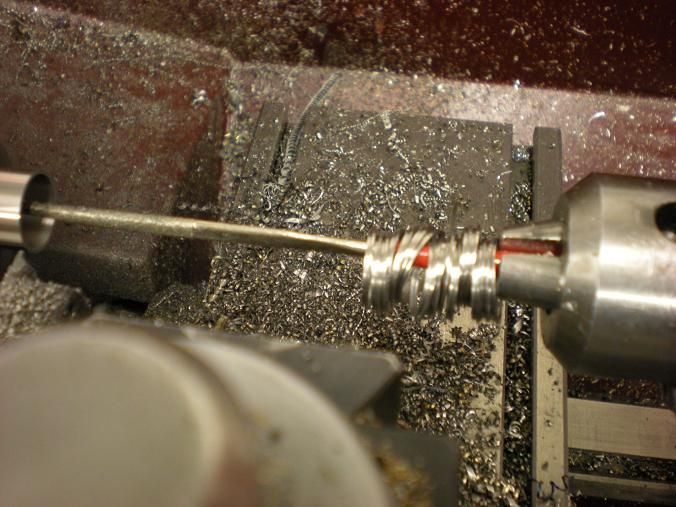
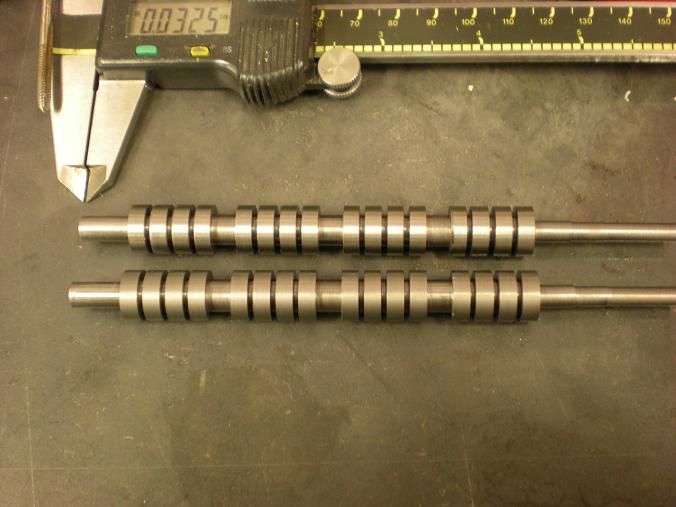
Well the rings are in the furnace for 4 hours so I made a couple blanks for my camshafts. I cut the drill rod to length and center drilled the blanks. Then I couldn't figure out how I was going to turn them. Couldn't put the lathe dog on and do the piece so i turned the first OD because it was .250 and I was able to put it in the lathe using a collet.
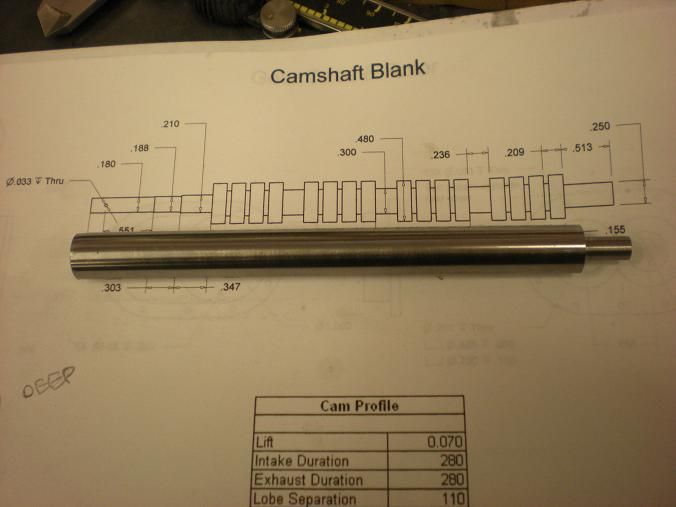
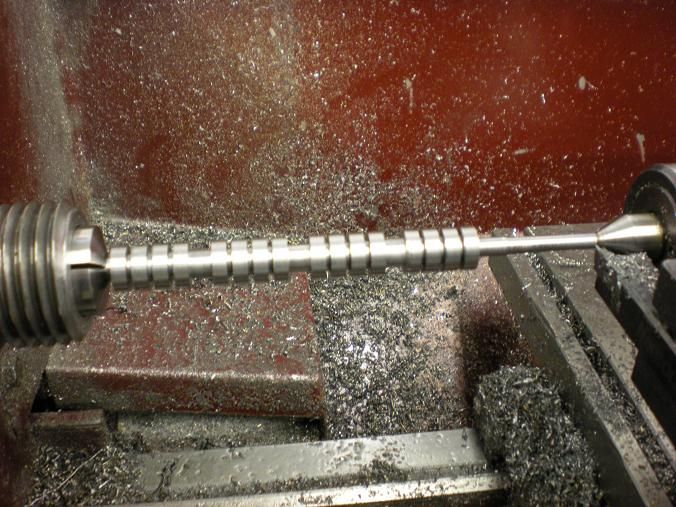
Turned all my OD's starting at the tailstock and worked my way back to the collet.
This cam will be the same as the V4 and the blown cam will have a little more race in it.
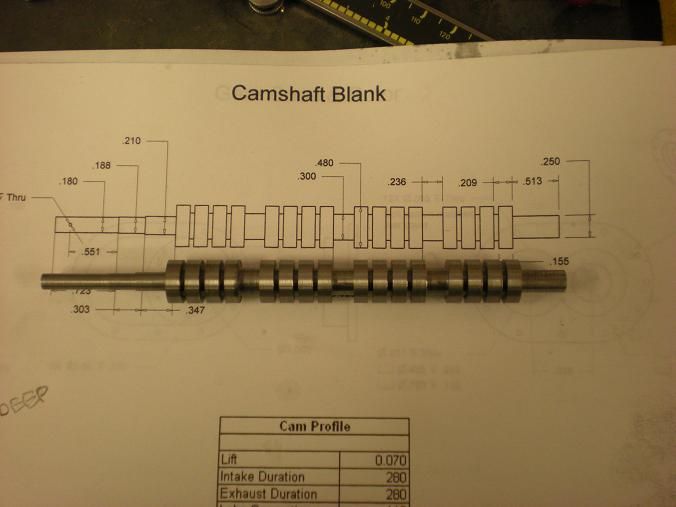
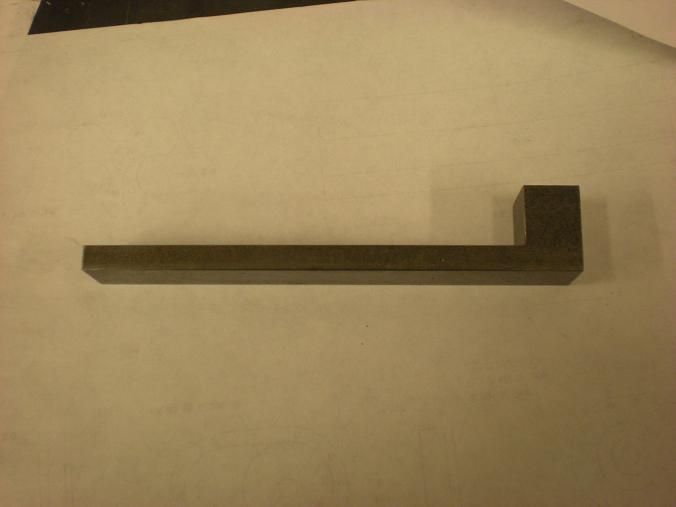
Started on the fixture to turn the cam. Decided I was done for the weekend.
-
04-11-2011, 02:33 AM #214
Registered
- Join Date
- Dec 2006
- Posts
- 603
The rings have cooled. I had to boil them to remove the anti-scale powder. I made them .001 thicker than needed so I will polish them with some 600 grit before installing them onto the pistons.
-
04-15-2011, 11:43 AM #215
Registered
- Join Date
- Jan 2007
- Posts
- 76
Why have photos disappeared....???
-
04-15-2011, 08:48 PM #216
Registered
- Join Date
- Dec 2006
- Posts
- 603
Originally Posted by bluejets
Photobucket is down, has been for a few days. When they resolve there issues all the photos will be restored.
-
04-20-2011, 05:46 AM #217
Registered

- Join Date
- Dec 2010
- Posts
- 0

No pictures makes me a saaaad Nick

-
04-22-2011, 02:33 AM #218
Registered
- Join Date
- Dec 2006
- Posts
- 603
Originally Posted by 3rnieball
Me three! Photobucket is still down. I don't plan to do much but if you come to names, here is what you will see.
Still a long way to go.
-
04-22-2011, 11:50 PM #219
Registered
- Join Date
- Dec 2010
- Posts
- 0
And just like that, photobucket is back up and running!!

-
04-27-2011, 04:01 AM #220
Registered
- Join Date
- Jan 2007
- Posts
- 76
Steve,
Do you flame harden your cams..??
I assume that "drill rod" you refer to is the same as we call silver steel here.

 Reply With Quote
Similar Threads
-
Engine Plans
By nzer in forum MetalWork DiscussionReplies: 1Last Post: 08-03-2012, 05:14 PM -
I.C. engine plans
By cumminsman in forum I.C. EnginesReplies: 7Last Post: 04-10-2012, 11:43 PM -
Does anyone have any good jet engine plans?
By flyguy1254 in forum Hobby DiscussionReplies: 18Last Post: 04-16-2010, 10:28 AM -
Jet Engine plans
By godspeed in forum Hobby DiscussionReplies: 3Last Post: 05-18-2007, 11:34 AM
