


Thats a very talented use of your CNC.. Did you machine the part 2-sided? Thanks for sharing the great work...
Thread: 3 Leg Table (weekend project)
Results 21 to 40 of 52
-
08-15-2009, 06:58 PM #21
 Gold Member
- Join Date
- Apr 2006
- Posts
- 3498
http://free3dscans.blogspot.com/ http://my-woodcarving.blogspot.com/
http://my-diysolarwind.blogspot.com/
-
08-17-2009, 03:44 AM #22
Registered
- Join Date
- Jun 2008
- Posts
- 203
Thank you very much for your comments : ) I milled the three legs in 6 halves and glued them together. Originally Posted by Khalid

-
08-17-2009, 05:41 AM #23
Registered
- Join Date
- Oct 2008
- Posts
- 1147
I would have never guessed that by looking at it. When you look at the picture before you painted it looks like you found 3 perfect branches and sanded the top and bottom. Originally Posted by Grunblau
BTW, my wife stopped as she passed and said that's cool. That's a big compliment coming from her.
-
08-17-2009, 07:13 AM #24
Registered
- Join Date
- Jun 2005
- Posts
- 176
Very nice results you have there, I imagine you could ask quite a lot of $$$ for that as a finished product
-
08-17-2009, 01:34 PM #25
Registered
- Join Date
- Aug 2009
- Posts
- 223
out of curiosity, how well are the magnets holding up?
-
08-21-2009, 06:40 PM #26
Registered


- Join Date
- Apr 2008
- Posts
- 235
That's a very nice design - very cool - very original
to chime in on the foundry stuff I use the lost foam casting technique and created a few posts and a video on it (only a few ingots poured I promise)
http://www.backyard-workshop.com/pro...-projects.html
-
08-23-2009, 05:42 PM #27
Registered
- Join Date
- Feb 2007
- Posts
- 71
you could take your legs, and build a rubber mold from them. (one at a time) Then use that female rubber mold to cast wax replicas. The wax replicas get encased in high temp plaster (investment). then you put the plaster in the oven, wax melts out and you pour in the metal. Lost wax. Used for sculptures and jewelry alot. connect alot of the leg waxes together into one big tree and then you get to cast multiples at a time. Might need to find a foundry for this one..
have fun, Im jealous
~Steve
-
08-31-2009, 08:28 PM #28
Registered
- Join Date
- Jun 2008
- Posts
- 203
Prototype is at the foundry
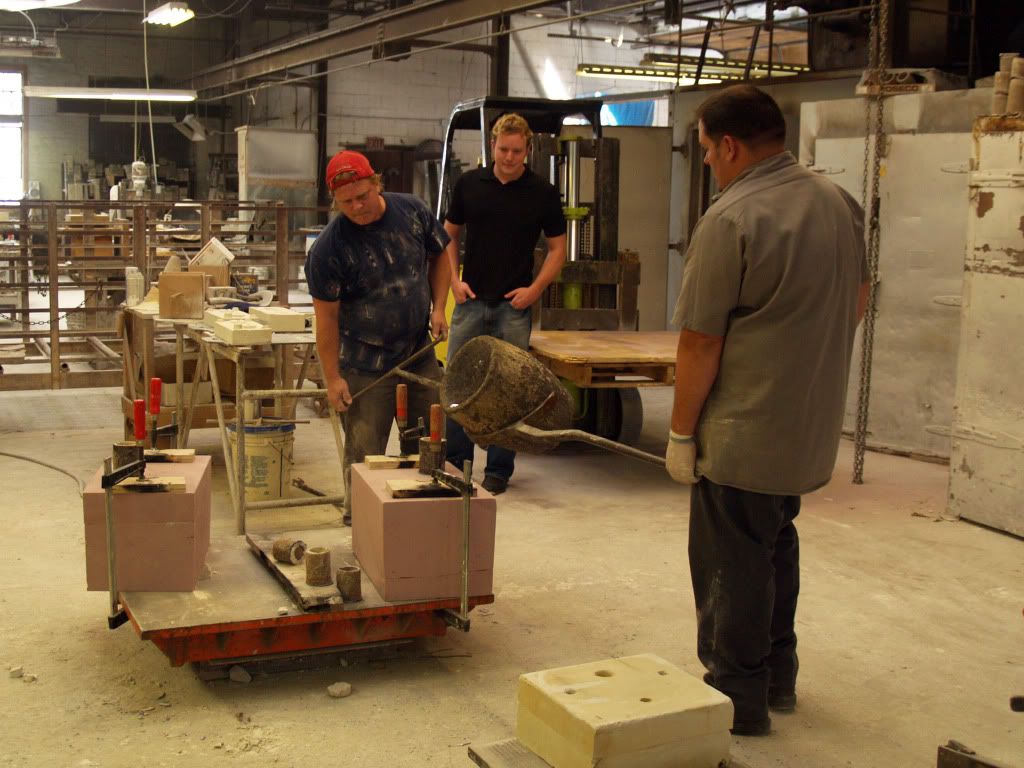
I dropped the prototype off at the foundry today. I am using Seaport Aluminum Prototype & Casting Co. in Toledo, OH. I was quoted $100 per leg for the initial sand cast. Seems okay to me for a 1 off, I would hope the price could come down a bit for multiples, as $300 + everything else I want to do = expensive table. So far, great people to deal with. They let us hang out and watch a pour. Here are a couple pics...
The legs at the foundry, The head casting guy, Chad dubbed my project 'Alien Table'
Me getting to watch them cast one of their sand cast molds... Chad is in the foreground.
I think I am going ahead with the magnet idea.. The new magnets are really strong, almost to the point of being a pinching hazard when you get one leg 6 inches from the other legs. I might add a horizontal washer to keep things from sliding in plane as it is much more difficult to pull the legs apart vs sliding them apart. I am open to suggestions!
I hope I have an update with pics of the aluminum legs sometime next week!!!
-
09-01-2009, 02:05 AM #29
Registered
- Join Date
- Jun 2005
- Posts
- 176
Great to see your project moving forward into the realms of metal! I like the magnet idea too, very neat. If you need some way to index the legs for assembly you could use a stainless dowel maybe? I look forward to seeing the finished "Alien Table"
-
09-01-2009, 05:22 AM #30
Registered
- Join Date
- Dec 2003
- Posts
- 128
looks sleak and stylish
-
09-01-2009, 05:25 AM #31
Registered
- Join Date
- Dec 2003
- Posts
- 128
maybe some futuristic looking corian? Originally Posted by Grunblau
-
09-01-2009, 12:03 PM #32
Registered
- Join Date
- Jun 2008
- Posts
- 203
Awesome suggestion! I was considering Corian, I have milled it before and it was like butter. I might even go with white.. I know they have red. Corian is $$$ though. My initial attempt will probably be in some birch plywood. Originally Posted by margni74
Thank you for the comments!
-
09-01-2009, 12:07 PM #33
Member
- Join Date
- Apr 2007
- Posts
- 8082
Corian is available in all sorts of styles and colors. Simulated stone and color combinations. Web search will give you some ideas. Originally Posted by Grunblau
CarveOneCarveOne
http://www.carveonecncwoodcraft.com
-
09-01-2009, 01:04 PM #34
Registered
- Join Date
- Nov 2008
- Posts
- 18
Coirian
Corian can be less expensive than wood. If you count all of the extra preparation and finishing that wood needs to end up with the beauty and durability of Corian, it can beat the cost.
duPont has an outlet specifically for furniture, art and industrial products. Art Specialties International (1-800-724-4008) sells just the quantity you need, not cutoffs or full sheets. They also have all of the consulting and adhesives help you may want. They also have a free information package on working with Corian.
With the great design of you table, I would give it a shot.
I hope this helps
Ken
-
09-01-2009, 04:32 PM #35
Community Moderator
- Join Date
- Mar 2003
- Posts
- 35538
Try here. Remember, you can glue smaller pieces together to make larger ones without a visible seam. Just make sure it's from the same lot #, so the color doesn't vary.
http://www.solidsurface.com/surplusGerry
UCCNC 2017 Screenset
http://www.thecncwoodworker.com/2017.html
Mach3 2010 Screenset
http://www.thecncwoodworker.com/2010.html
JointCAM - CNC Dovetails & Box Joints
http://www.g-forcecnc.com/jointcam.html
(Note: The opinions expressed in this post are my own and are not necessarily those of CNCzone and its management)
-
09-01-2009, 07:24 PM #36
Registered
- Join Date
- Dec 2003
- Posts
- 128
glad i could be of help... keep this thread updated! looks like an awesome project! Originally Posted by Grunblau
-
09-01-2009, 08:37 PM #37
Registered
- Join Date
- Jun 2009
- Posts
- 7
Instead of using magnets to hold the legs together what about redesigning them, I know that sucks, to have a T-slot and T tab in each leg? Then each leg's T tab would slide into the corresponding leg's T slot, locking them together. Just a thought. Nice looking table by the way. Really nice.
-
09-02-2009, 01:02 AM #38
Registered
- Join Date
- Jun 2008
- Posts
- 203
Thank you very much for the links!
I Just ordered some Corian samples! I am sticking with more graphic colors, the four end colors are translucent.


-
10-02-2009, 02:29 AM #39
Registered
- Join Date
- Jun 2008
- Posts
- 203
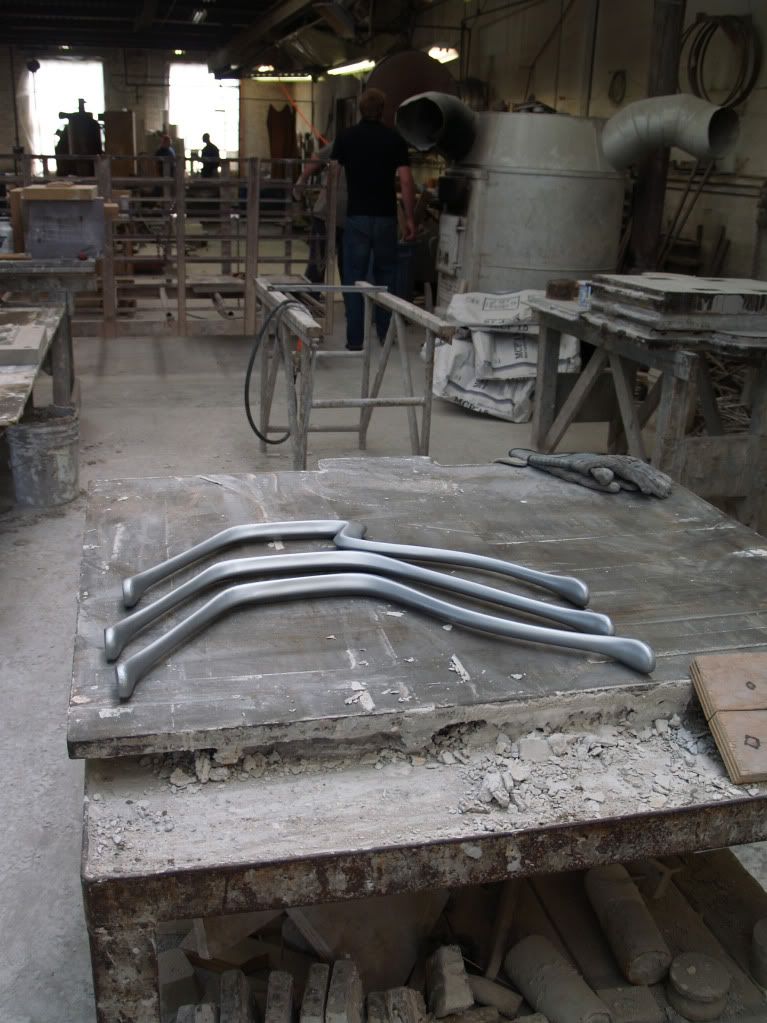
 UPDATE: Aluminum pieces!!!
I ended up getting two sets cast for $500. The guy said if I went into production(100+), it would be significantly cheaper. I couldn't stop myself from doing a little sanding just to see what it will look like when it is smooth.
Here is a picture of the prototype standing over the new aluminum copies. Looks pretty simular... I am glad the prototype survived!

A view showing the difference between the sanded finish and the sand cast. I still have a lot of sanding left just to take out some imperfections...
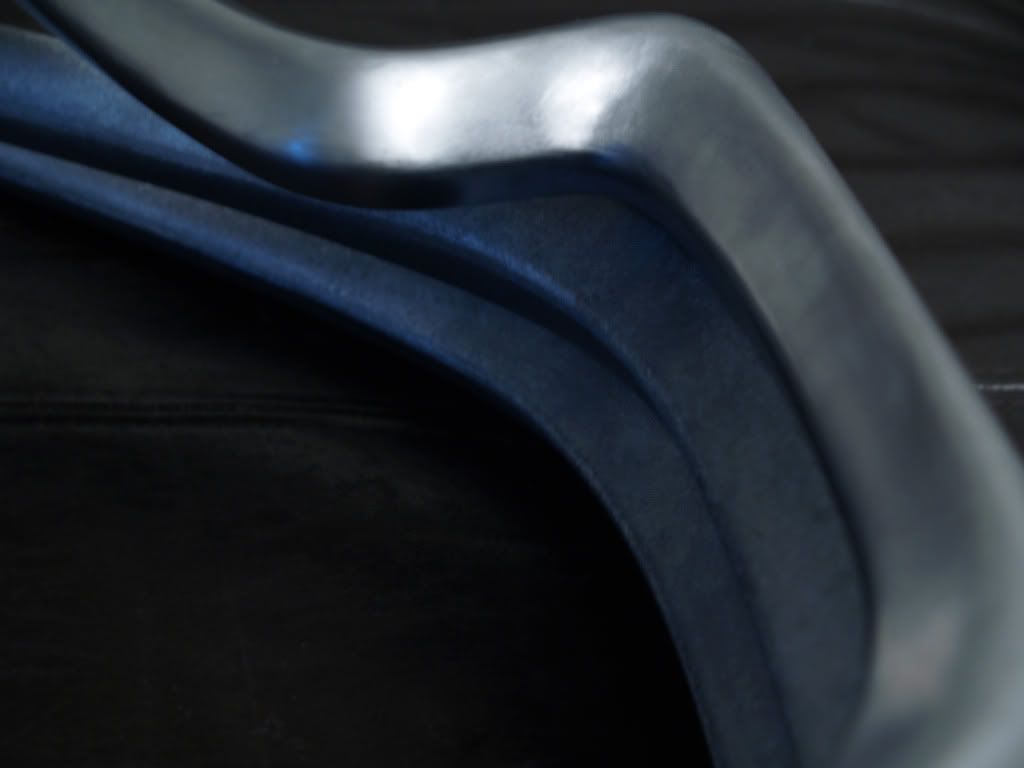
Another view of the surfaces...
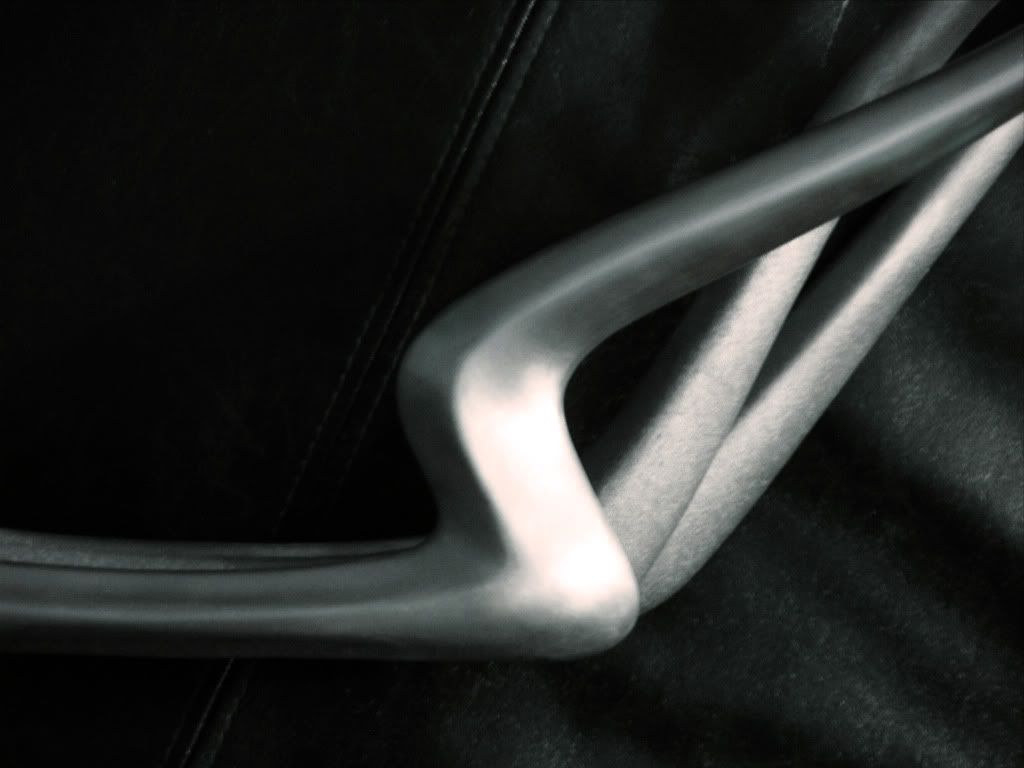
A view looking at the feet...
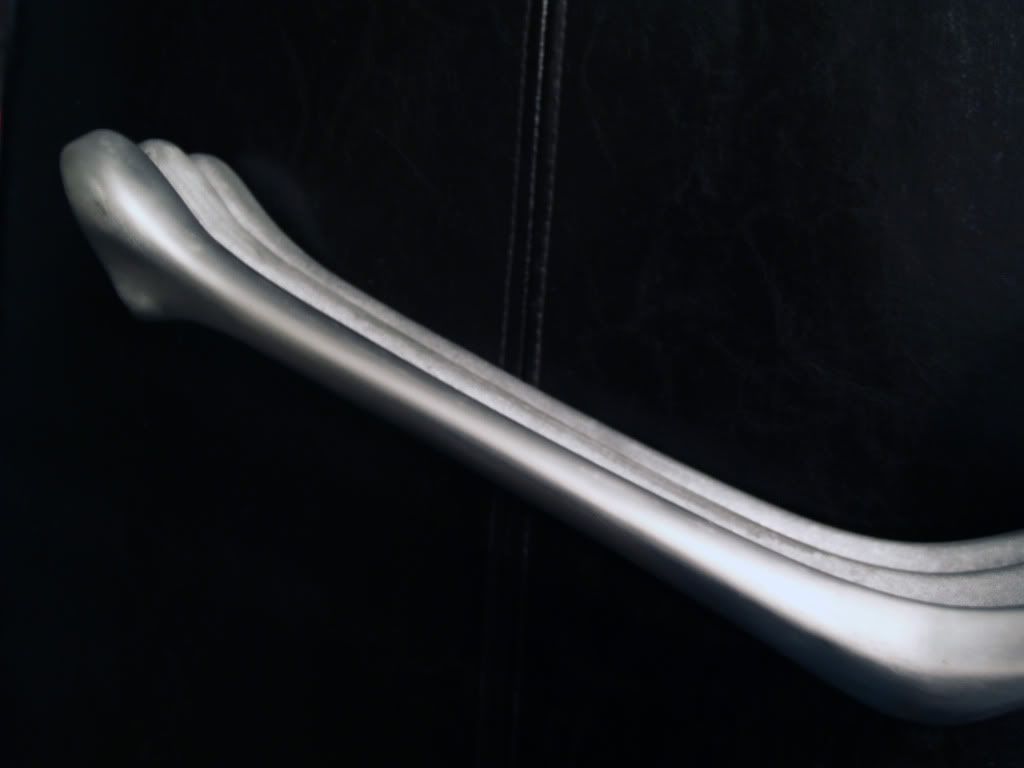
Here are the three pieces side by side...
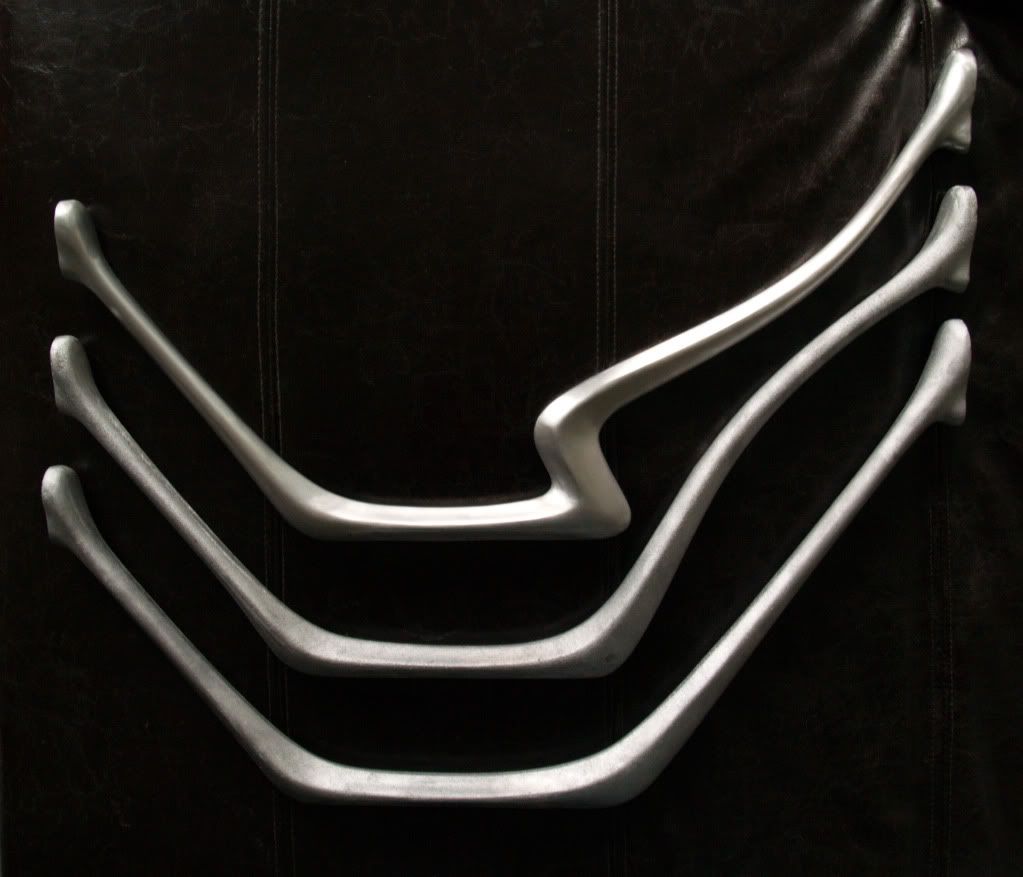
Overall view of the pieces stacked. Here you can see the differences between the legs...
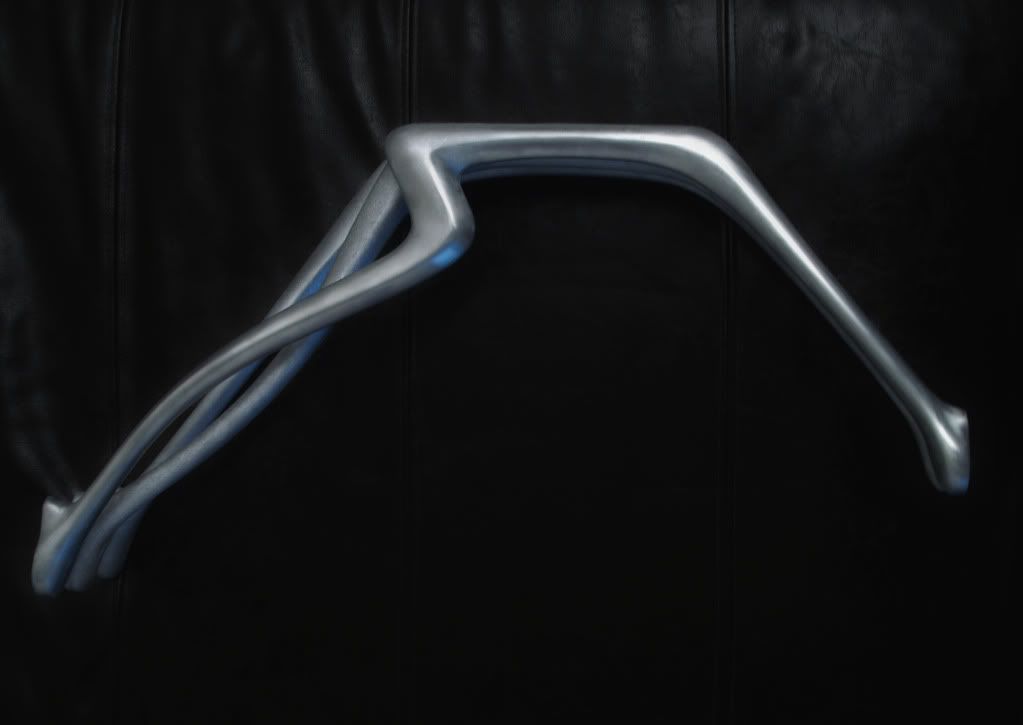
Let me know what you think!
Between working 50+ hours/week at my job and now teaching at a local college, I hope I'll be able to find some time to finish it!!!
-
10-02-2009, 03:32 AM #40
Registered
- Join Date
- Sep 2009
- Posts
- 96
Those look fantastic! Can't wait to see the finished table.

 Reply With Quote
Similar Threads
-
3x2m plasma table project/log
By bekx in forum Plasma, EDM / Other similar machine Project LogReplies: 56Last Post: 05-07-2008, 05:57 AM -
5 x 10 table for plasma / tourch / router - project
By ajclay in forum Plasma, EDM / Other similar machine Project LogReplies: 29Last Post: 03-21-2008, 12:30 AM -
Parker Daedal servo CNC table Project
By GEORGETOUBALIS in forum DIY CNC Router Table MachinesReplies: 1Last Post: 12-18-2007, 05:19 PM
