


My nephew asked me to help him make a "Awana Grand Prix" car, these are pretty much the same as the BS pinewood derby, but it is a church run group. So, we set out to make one on the CNC mill.
Before anyone gives me crap about doing this for him, the only thing I am doing is setting up and running the machines. He's only 12, and I am trying to teach him about the machines and the software. I helped him design the model in sketchup, we exported it to 3ds format and imported it into artcam. I setup the tool paths, and he's doing all the finish sanding. The car is also going to have working LED headlights, and so he's going to learn some very basic electronics stuff as well.
I have no idea how this thing will preform, we were going for more of a really cool look.
Here are the pics so far:
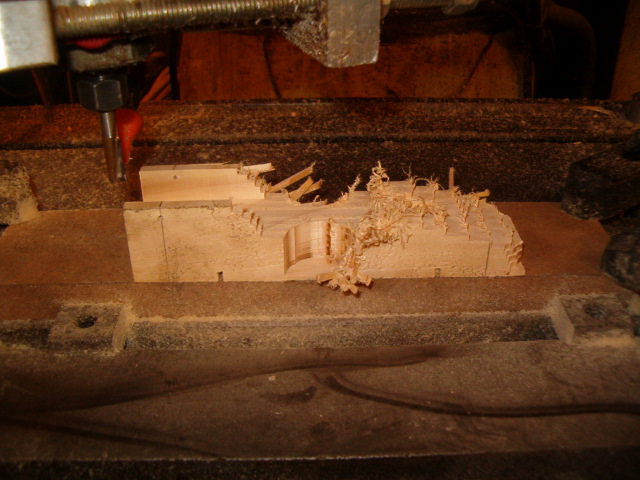
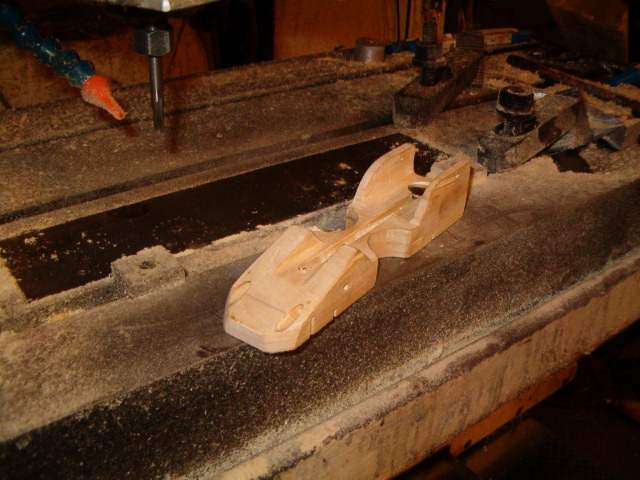
Model roughed out
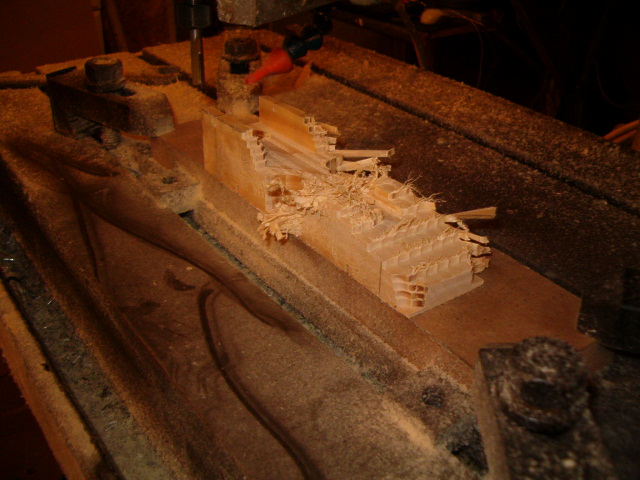
3d finish passes, and a lot of hand sanding
Later,
Jason
Thread: CNC pinewood derby car
Results 1 to 10 of 10
-
01-18-2010, 07:46 PM #1
 Registered
- Join Date
- Sep 2007
- Posts
- 119
CNC pinewood derby car
-
01-19-2010, 07:35 PM #2
Registered
- Join Date
- Jun 2005
- Posts
- 305
Looking pretty cool!
ObrienDave. MasterCam since V6. Gcode since 1983.
The nose you punch today may belong to the butt you have to kiss tomorrow.
-
01-19-2010, 08:53 PM #3
Registered
- Join Date
- Sep 2007
- Posts
- 119
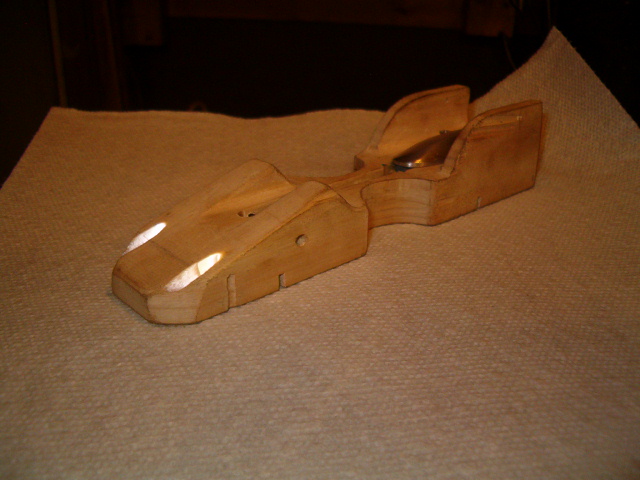
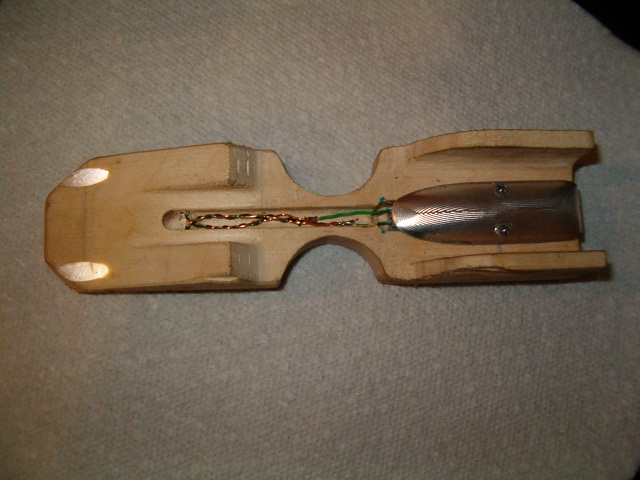
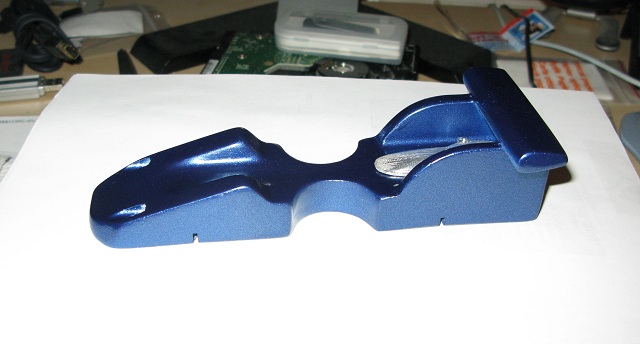
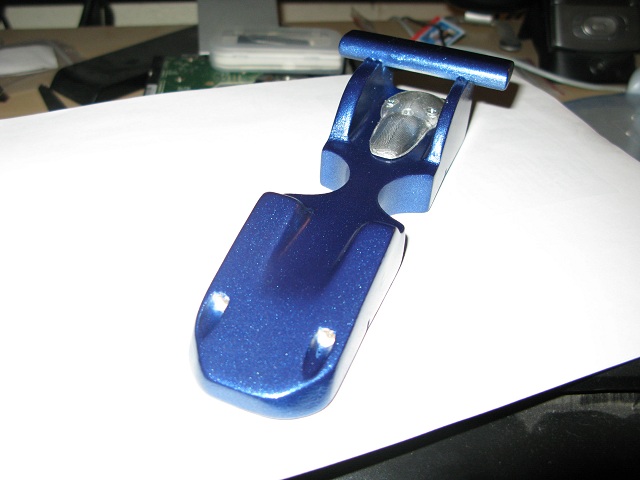
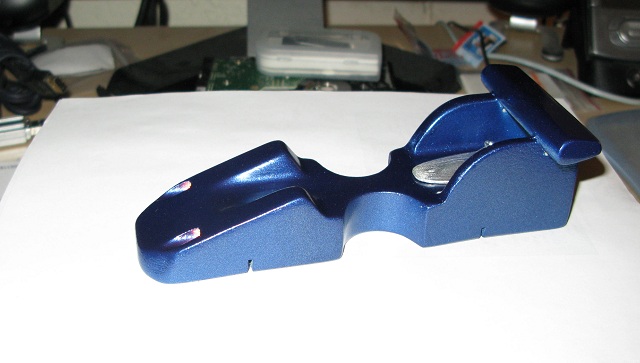
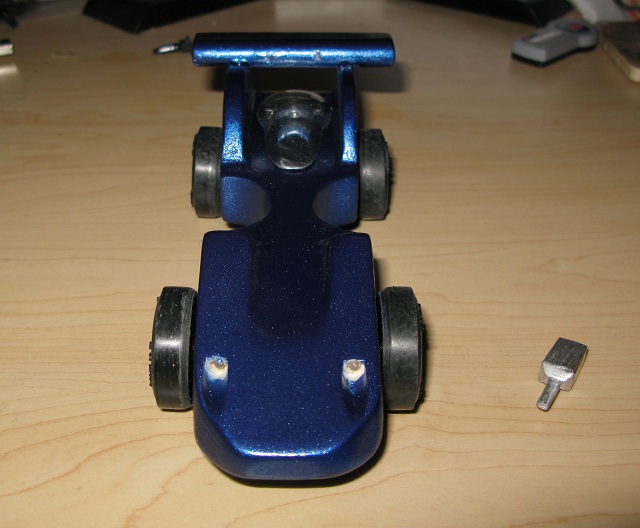
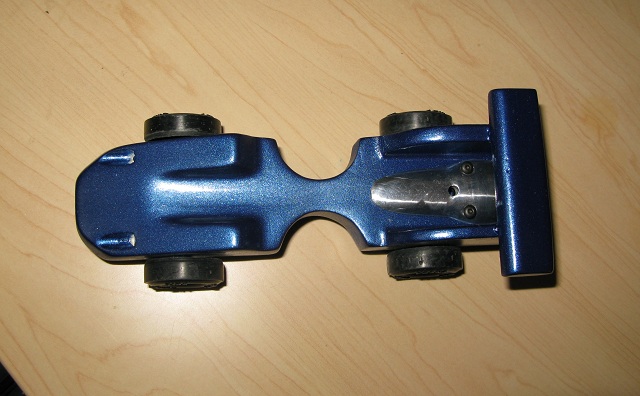
Here is where we are today. Electrics are in for the headlights. Twin 3mm white leds, a little push button switch and a 3v lithium coin cell. Machined a little cowl today to cover up the battery and switch, you have to remove the cowl to turn the lights on and off though...
The wiring channel is going to get filled with body filler here in a few minutes, and we'll fill the chips and holes that were from mounting it and machining it. We're at 3oz right now, limit of 5oz, so we have room to go with weight.
Here are some pics:
Later,
Jason
-
01-21-2010, 01:00 AM #4
Registered
- Join Date
- Sep 2007
- Posts
- 119
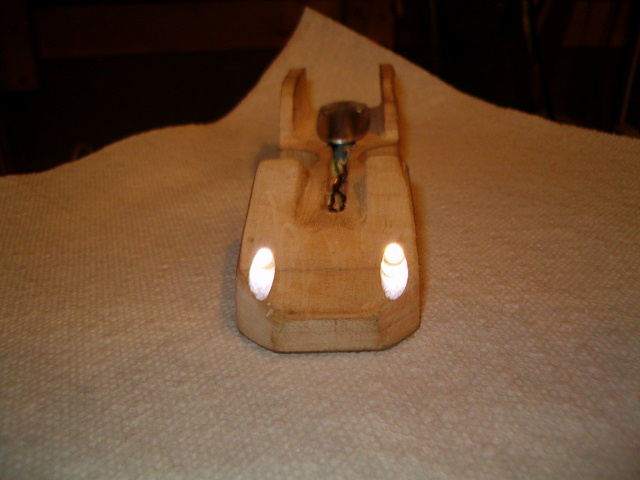
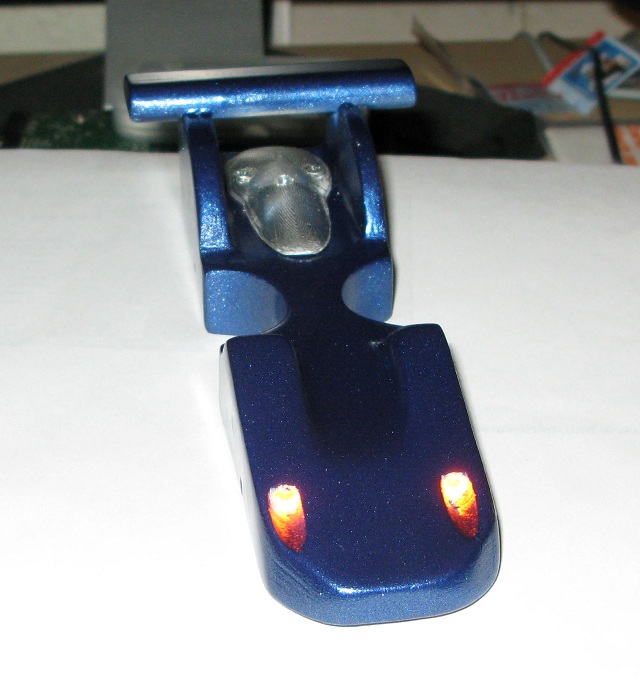
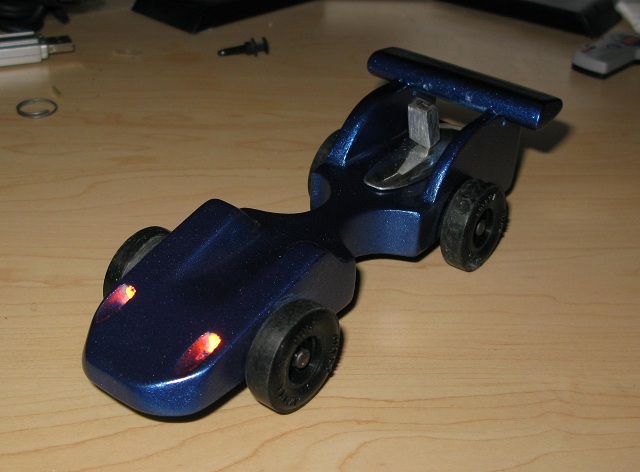
Here are some progress pics from today. He changed his mind on the headlights, we went from white to orange (they show up yellow in the camera) today, luckily I hadn't glued the white ones in yet.
Anyhow, lights are permanent now, we've filled the channel with bondo. We made a little wing for it, and glued it on. Also changed the design for the cowl a little bit to allow access to the switch underneath w/o having to remove it. Hopefully, tomorrow after he finishes sanding it, we'll will be ready for paint.
Here's the pics:
Later,
Jason
-
01-21-2010, 01:12 AM #5
Gold Member
- Join Date
- Feb 2009
- Posts
- 6028
Let me know if you can do a Porsche 914 ! Very cool, and I know a lot of people who would want one !
-
01-21-2010, 10:09 PM #6
Registered
- Join Date
- Jan 2010
- Posts
- 1
Get the weight as far forward as you can...makes'm faster out of the gate.
-
01-22-2010, 02:56 AM #7
Registered
- Join Date
- Sep 2007
- Posts
- 119
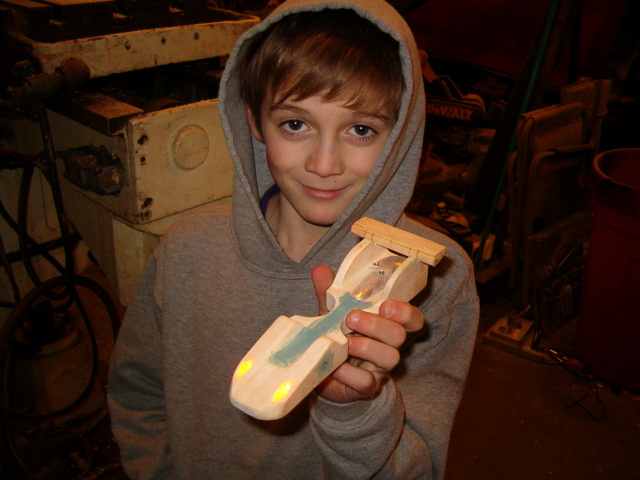
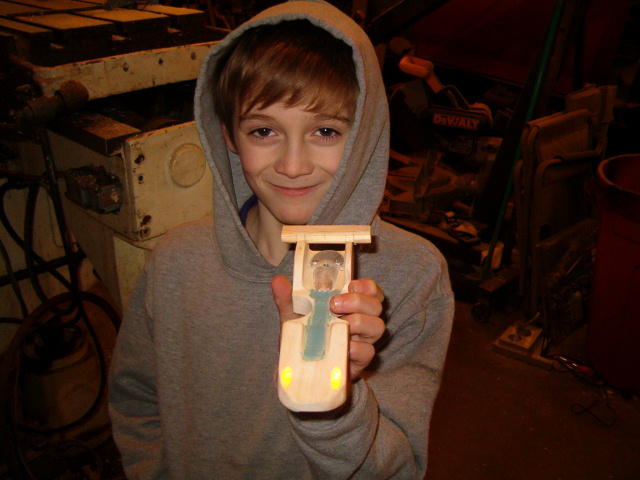
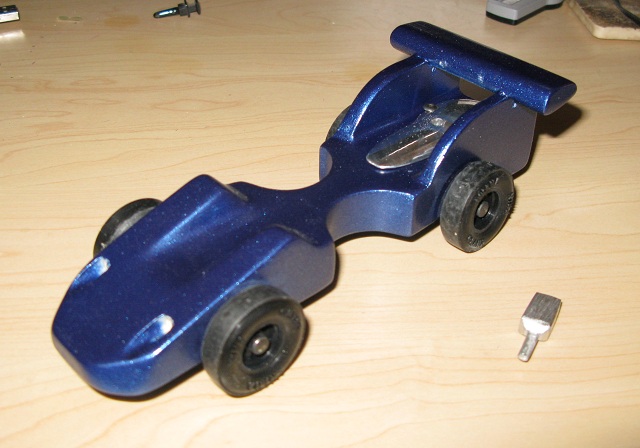
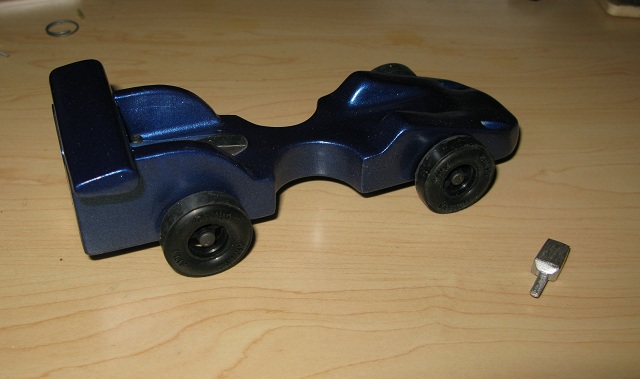
Well, it is almost done, and I am out of time to help, I go back to work tomorrow night.
He sanded entire car progressively smoother from 60grit to 320grit. We shot it with rattle can primer, he sanded again, we shot two more coats of rattle can metallic paint, and am calling it done. We still need to add two ounces, still hovering right around 3.1oz. Maybe my digital scale sucks...
Anyhow, here is the end result:
Later,
Jason
-
01-22-2010, 03:29 PM #8
Registered
- Join Date
- Apr 2007
- Posts
- 24
We used to drill holes underneath in the front with a forstner bit and screw in a set of washers. I agree with getting the weight up front for speed.
-
01-22-2010, 10:08 PM #9
Registered
- Join Date
- Sep 2007
- Posts
- 119
Well, my nephew couldn't skip anymore school for this, so I tied up the loose ends today. I got the wheels and tires on, added the weight, polished out the aluminum cowl, and made a little "key" for him to switch the lights on and off with. I'll let you all know how the races come out!
Later,
Jason
-
03-04-2010, 05:46 AM #10
Registered
- Join Date
- Mar 2008
- Posts
- 309
Cool car.
My seven years of research has shown that weight in the front adds stability, weight in the rear adds speed. I would aim for a CG about .75" to 1" forward of the rear axle. Balance the car on a ruler edge to find the CG.
Why? Because the further you get the weight from the bottom of the track, the more energy goes into the car. Height equals energy. Energy equals speed. It's simple physics.
If you want the car to "come out of the gate" faster, cut the wheels to reduce their rotational inertia. Your local rules may or may not allow modifying the basic shape of the wheels. Depending on the shape of the track, you'll want to balance low inertia hole shot with high inertia runout at the end of the track. In other words, if the track has a long flat section after the initial ramp, you may be better off with more rotational inertia in order to keep the speed on the flat part. If it is all ramp and no flat runout, you almost assuredly want very low rotational inertia.
Finally, reducing friction by polishing bearing surfaces on the axles and wheels (and possibly reshaping them) will always pay off.
On the other hand, sometimes the car with sticky wet paint and the wheels stuck on sideways just happens to run just right...
Enjoy the race!
Regards,
- Just Gary

 Reply With Quote
Similar Threads
-
PINEWOOD DERBY
By bhuss in forum Hobby DiscussionReplies: 39Last Post: 08-05-2017, 02:02 PM -
Pinewood derby car
By andedwa in forum WoodWorking TopicsReplies: 4Last Post: 04-05-2016, 02:16 PM -
demolition derby
By kyle.markins in forum Hobby DiscussionReplies: 1Last Post: 04-05-2016, 08:36 AM -
BSA pinewood derby cars
By Drew in forum WoodWorking TopicsReplies: 12Last Post: 02-21-2009, 04:16 AM
