


my latest bit of progress.
[nomedia="http://www.youtube.com/watch?v=izdkxgjnqSY"]YouTube - video-2011-05-02-12-20-09.3gp[/nomedia]
Thread: newbie diy router build.
Results 181 to 200 of 209
-
05-02-2011, 08:46 PM #181
 Registered

- Join Date
- Feb 2010
- Posts
- 331
-
07-10-2011, 04:39 AM #182
Registered
- Join Date
- Feb 2010
- Posts
- 331
well its been a while but i finally have some more progress to report.
i have been pretty busy with work. (10hr days plus Saturdays) but things are slowing down again so i have had more time to work on the machine.
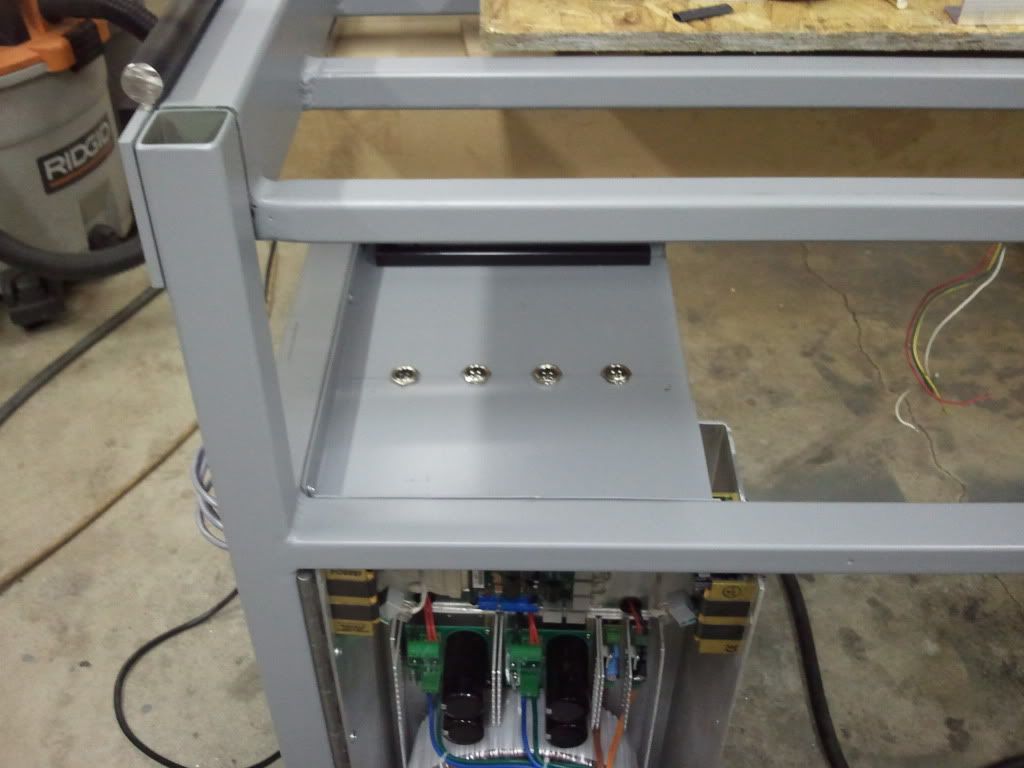
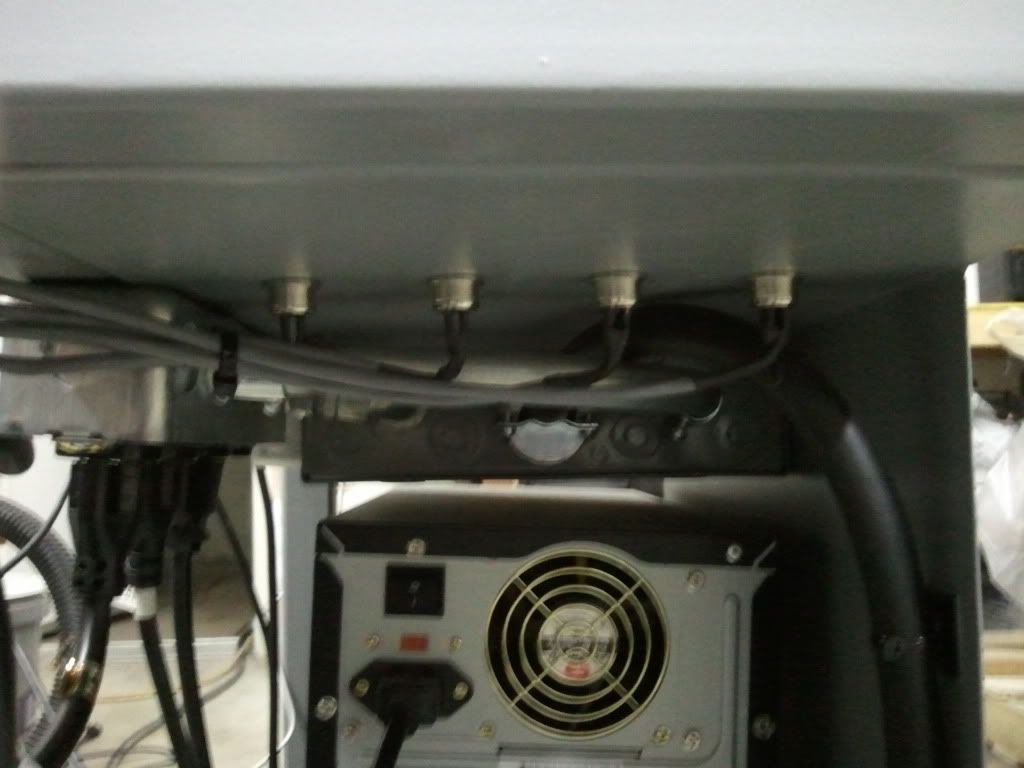
i have the electrical cabinet wired up. or at least as much as it can be without the rest of the machine being finished. it is all wired up for power and everything works. (tho i think one of my drivers may be toast). fortunately i have 4 and only need 3 right now. ill have to look into it more.
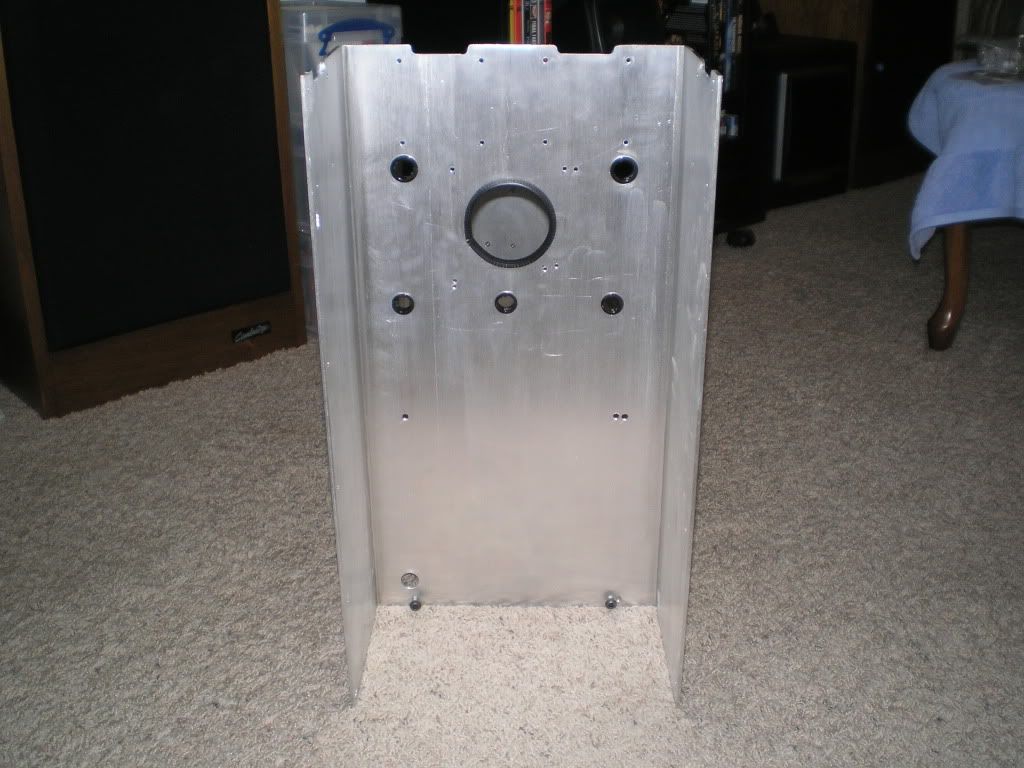
i took a lot of wiring techniques from the custom computer world. (i have been building them for over a decade now.) and from my professional career. hopefully the results speak for themselves.
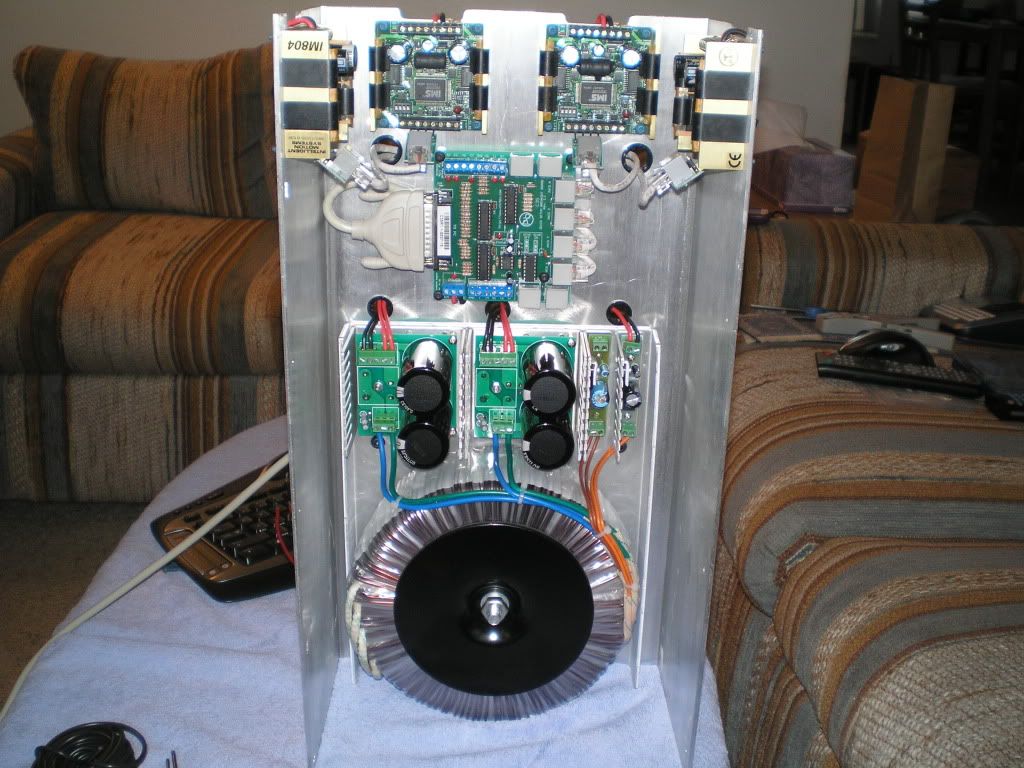
i still have to wire up the home/ limit switches. and the e stop and motors, but otherwise this is how it will look. (wont even look much different with those hooked up as they should be hidden.)
i have also been accumulating parts. i got my gear racks and some couplers for the motors. a few other things as well.

i also finished the z axis. i made the beam out of aluminum to save weight. so i had to epoxy the rails on. think they will be strong enough. they have quite a bit of surface area to hold on to. after it was dry i stood on it and jumped on it, seemed to be just fine. hopefully it will hold up over time.
here it is in the jig curing.
more to come
stay tuned
-
07-11-2011, 07:29 AM #183
Registered
- Join Date
- Feb 2010
- Posts
- 331
today i got the x axis gear racks cut and mounted. i had to drill and tap holes in the 1/8" steel plate. my tap handle broke, so i had to go buy another one. the original one was garbage and had been on its way out for some time. now i have a shiny new one.
more to come.
Stay tuned.
-
08-01-2011, 07:24 AM #184
Registered
- Join Date
- Feb 2010
- Posts
- 331
update!
i have had first motion! the z axis lives! sorry i have no video. i had to mount it in my vise to test it and i needed one hand to run the computer and one hand ready to hold on in case anything crazy happened. it did not seem to have enough torque to hold the whole z axis up, but i more than likely had all of the settings wrong. it DOES move up and down tho. so big step toward a functional machine.
i also took the opportunity to test out the electrical cabinet. i think something is wrong with the a axis driver. ill have to look into that further. it was throwing a fault. the x axis driver was not working either, but i did some trouble shooting and found out it was only the cable from the bob to the driver. i custom made all of them, so it should not be a big deal to make another. other than that all is well and appers to be working.
more to come, hopefully i can get a vid up.
-
09-14-2011, 08:41 PM #185
Registered
- Join Date
- Feb 2010
- Posts
- 331
progress has been slow, too many other things to do. not enough time.
i did however manage to get some of the painting done on the unit.
here is a little taste of how it will look.
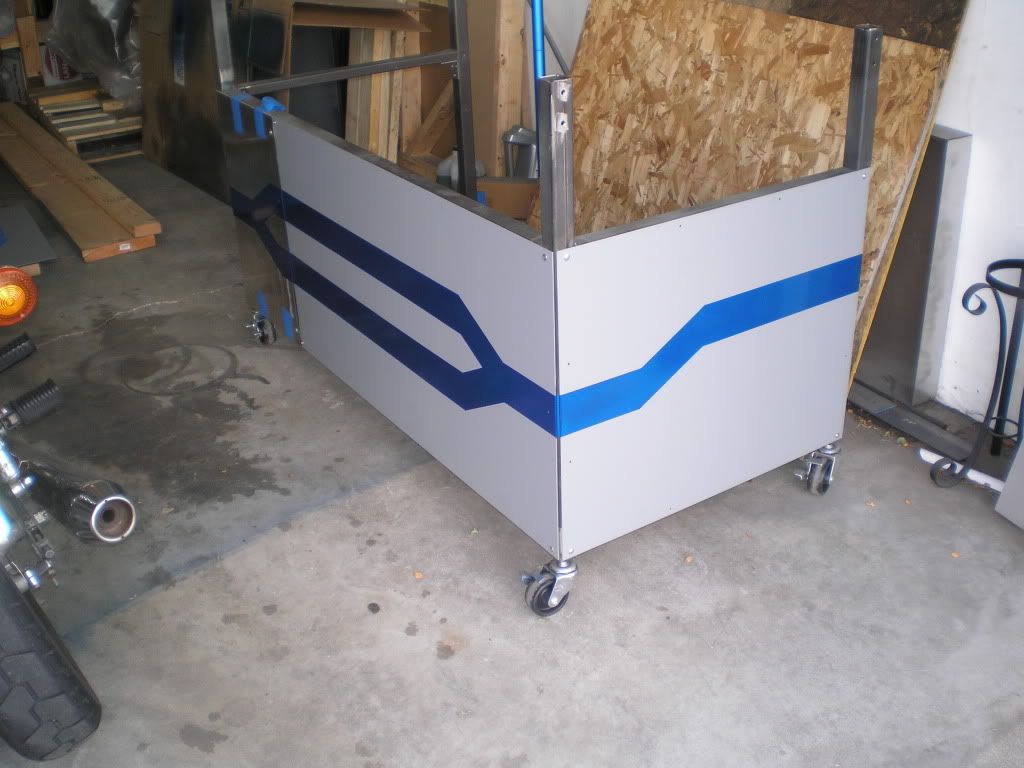
its a metallic blue over an epoxy gray (ooo shinny!)
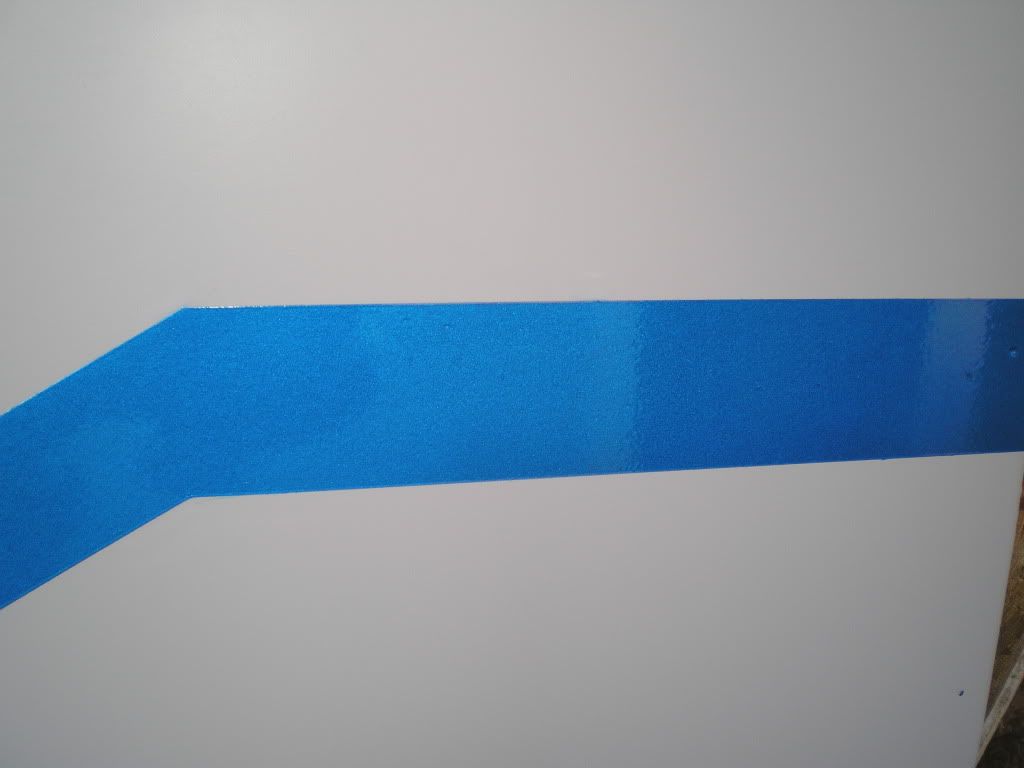
hard to pick it up on camera, but it really sparkles and shines in the light!
that's all for now.
stay tuned!
-
11-05-2011, 06:05 PM #186
Registered
- Join Date
- Feb 2010
- Posts
- 331
thanks to real life, being out of the country, and waiting on my welder, things were on hold. i finally made some more progress. so i decided to make a little time lapse video of my work the other day.
[ame=http://www.youtube.com/watch?v=S3OZ1NK63Ys]cnc time lapse 1 - YouTube[/ame]
tell me what you think.
-
11-07-2011, 04:57 PM #187
Registered
- Join Date
- Nov 2006
- Posts
- 1036
Looks like you're having fun and making progress. At my house, SWMBO gets upset when I leave the door between the house and the garage open! Please keep posting.
-
11-08-2011, 05:37 AM #188
Registered
- Join Date
- Feb 2010
- Posts
- 331
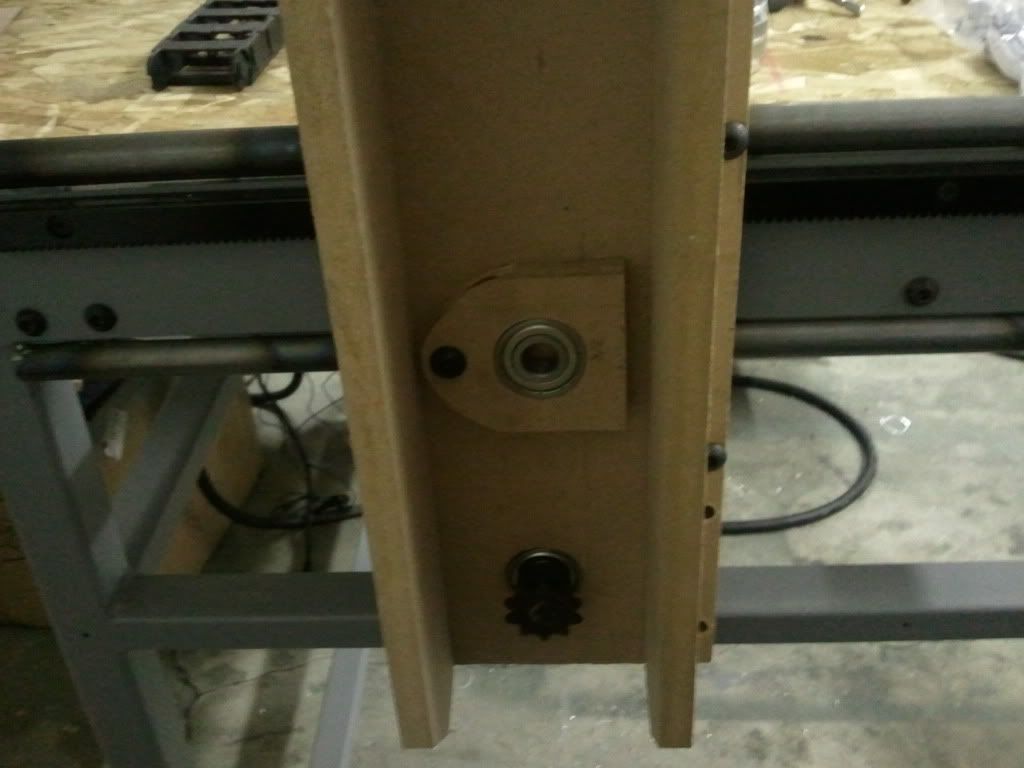
another short video. got the gantry more or less mounted. needs a little tweaking.
[ame=http://www.youtube.com/watch?v=BmdV-iWTEOc]cnc time lapse 2 - YouTube[/ame]
here are a few pics of how it sits now.
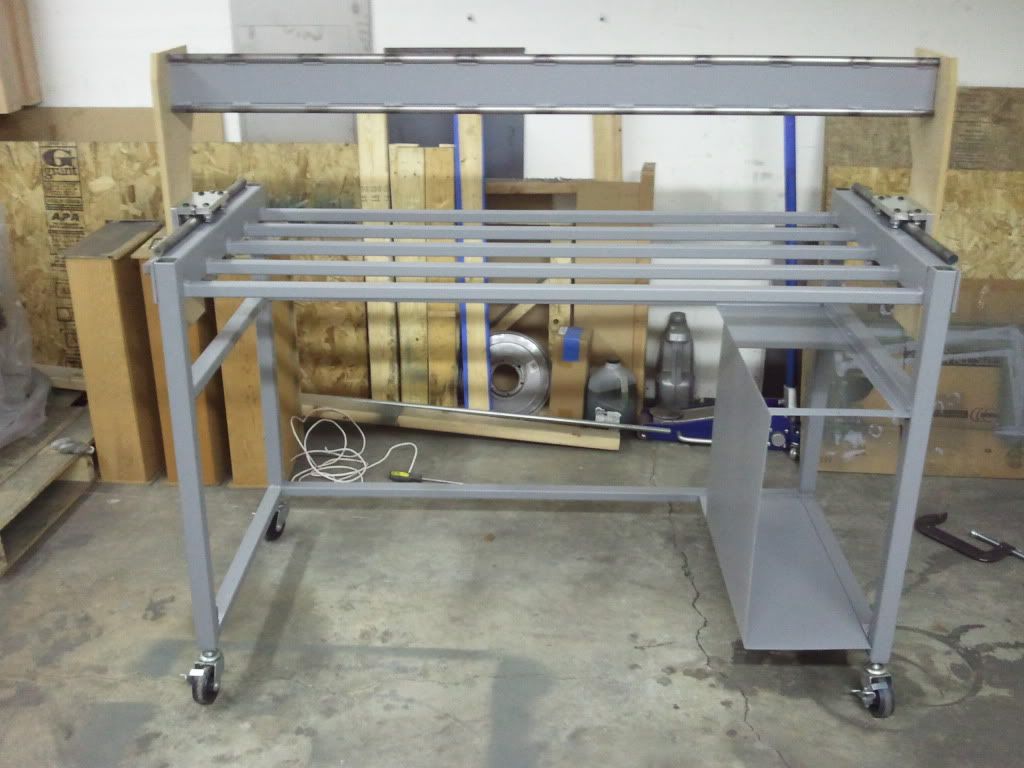
should be strong enough!
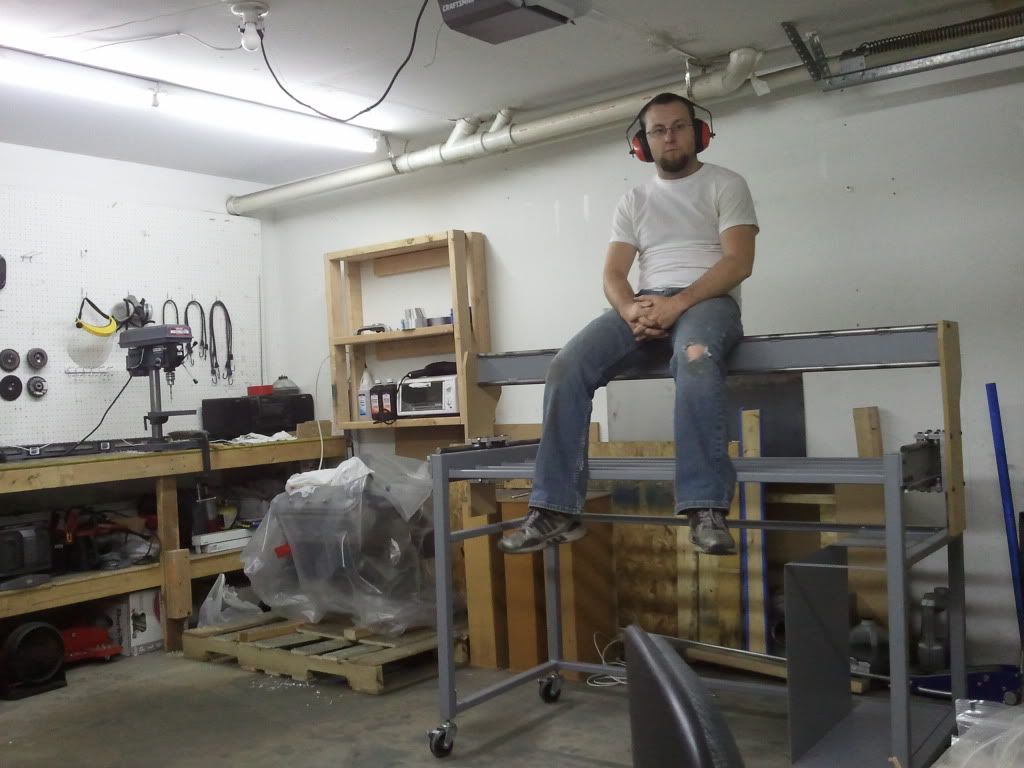
(i need to lay off the cookies!!!)
thanks for watching!
-
11-08-2011, 05:58 AM #189
Registered
- Join Date
- Feb 2010
- Posts
- 331
yea, mine is actually pretty tolerant of my shenanigans. Originally Posted by DonFrambach


-
11-24-2011, 04:41 AM #190
Registered
- Join Date
- Feb 2010
- Posts
- 331
quick update for your thanksgiving browsing!
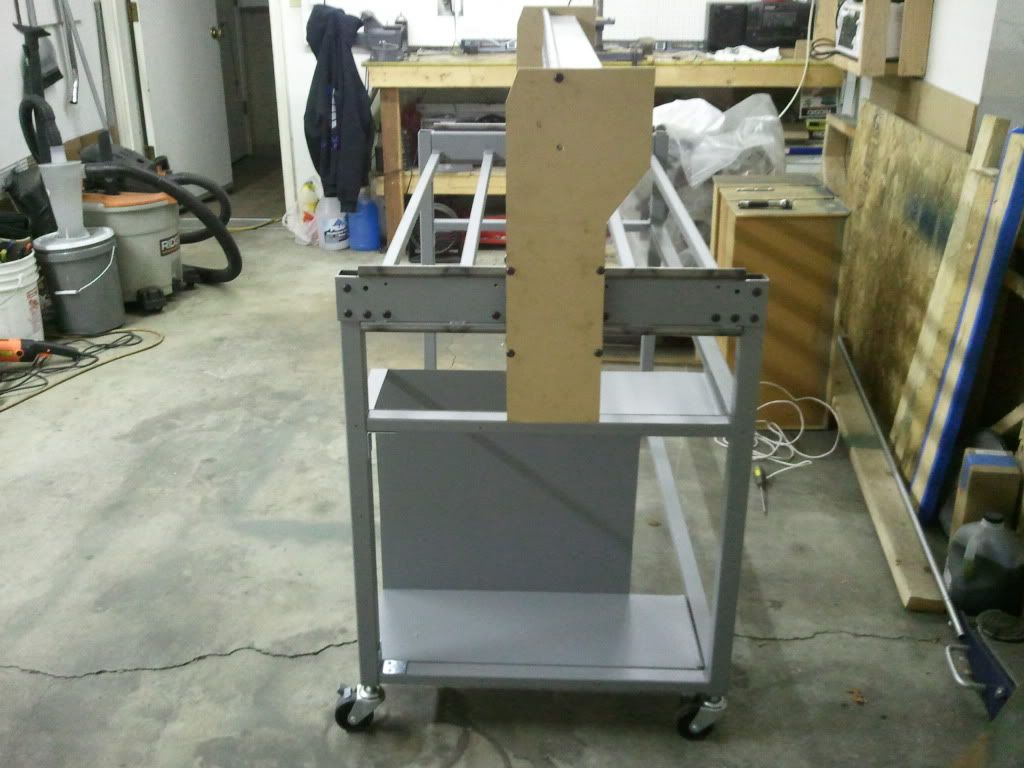
i got the x axis carriage mounted, and and then got the z axis mounted.
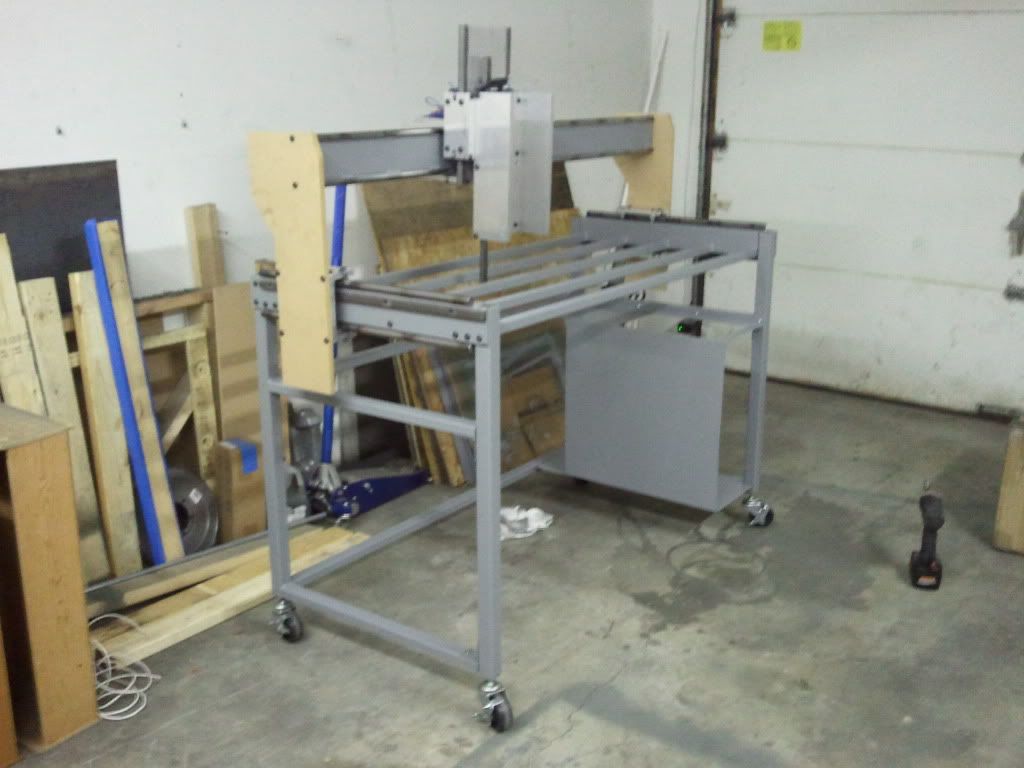
i shot a quick video of the x axis. smooth as butter.
[ame=http://www.youtube.com/watch?v=su2yY4ew8VU]x axis - YouTube[/ame]
hope you like it.
stay tuned!
-
12-05-2011, 08:09 PM #191
Registered
- Join Date
- Feb 2010
- Posts
- 331
ok, small update and hopefully someone can help me out a bit.
i got the machine mostly wired up for power. everything works, with one exception. the power supply for the drivers. it works but the large in-rush current trips the breaker. this had been a problem since i got it. i turn it on it trips the breaker, then if i turn it on again all is well. there are no shorts or other problems. it just pulls such a large amount of current when it is turned on for the first time that it will trip the breaker.
so my question to you guys is what can i do to limit the in-rush current, without affecting the power supply during normal operation? i considered a current limiting resistor, but i think that is pretty impractical, considering the power supply is a 1.5 kilowatt supply. so i am open to suggestions, and appreciate any help you guys may have to offer.
pics of progress and set up to follow soon.
-
12-05-2011, 08:53 PM #192
Registered
- Join Date
- Feb 2010
- Posts
- 331
ok, did a little more research and it looks like my first inclinations were right.
i think i need a ntc (negative temperature coefficient) thermistor. i found some on digikey that are reasonably priced few $, and meet the current requirements. i think i am going to order a couple. if anyone on here has a better idea of how i should do this or what to use i am still open to suggestions.
-
12-06-2011, 03:43 AM #193
Registered
- Join Date
- Feb 2010
- Posts
- 331
ok, no pics just yet, but i do have a video. i think you will be ok with that.
[ame=http://www.youtube.com/watch?v=-t4Br_xV6Us]cnc update 2 - YouTube[/ame]
-
01-07-2012, 06:48 PM #194
Registered
- Join Date
- Feb 2010
- Posts
- 331
well the holidays are over and i have some time to spend on the cnc again.
i made some temporary router mounts. ill use the machine to make the permanent ones later.

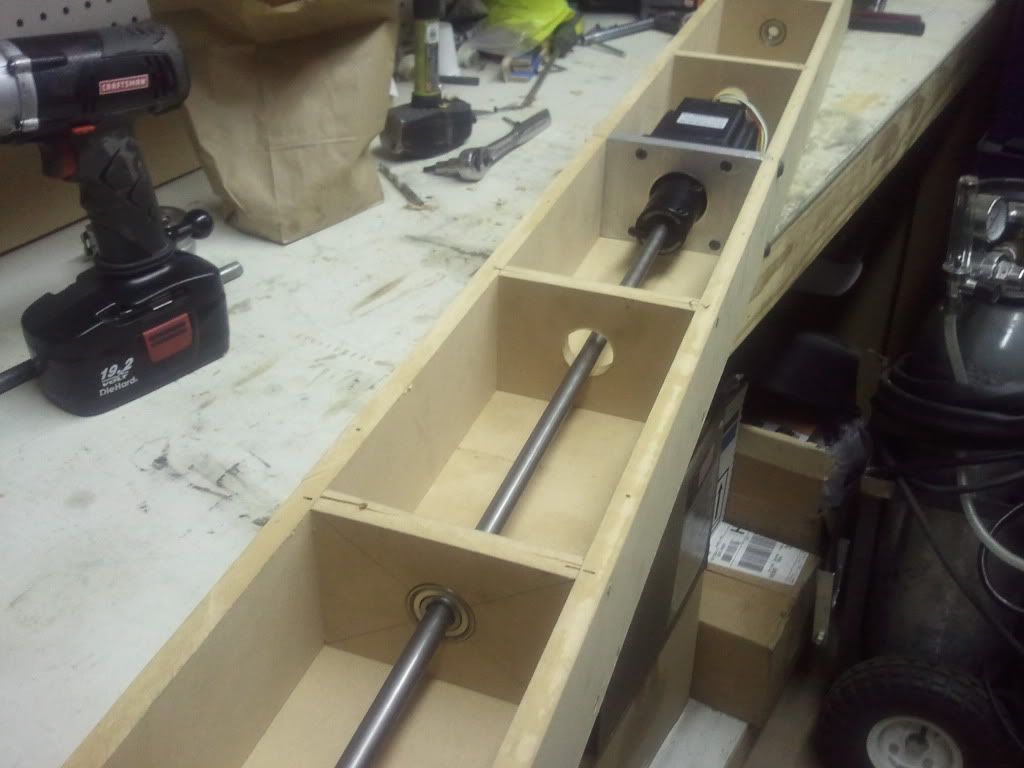
i also got the y axis started. it is the mdf section under the table. it houses the stepper motor and drive shafts.
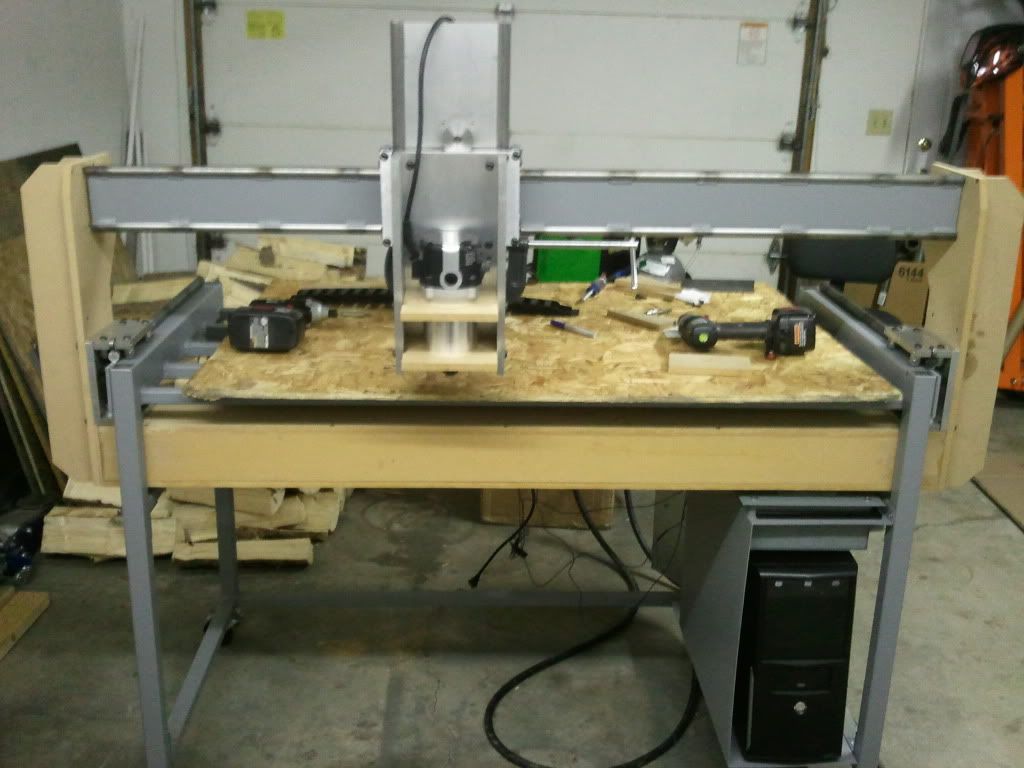
i have quite a bit left on the y axis, then i will need to order the parts to finish everything up. after that it should be off to the races, and hopefully a running machine!
stay tuned!
-
01-15-2012, 08:06 AM #195
Registered
- Join Date
- Feb 2010
- Posts
- 331
ok, little update for you guys (and gals, if there are any)
i got the y axis motor mounted in the torsion box
then i got the drive shafts and bearings installed.
then i built the tensioner plate.
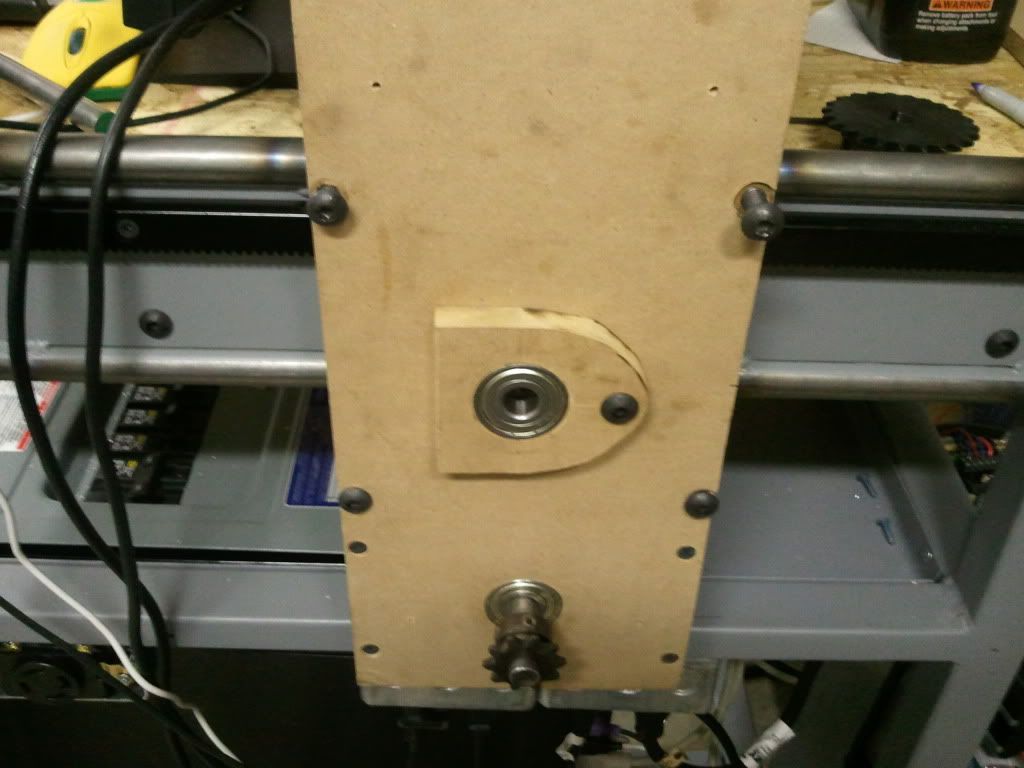
this will ensure that the gear is always pressed tight against the rack even if the rails or the rack are off slightly.
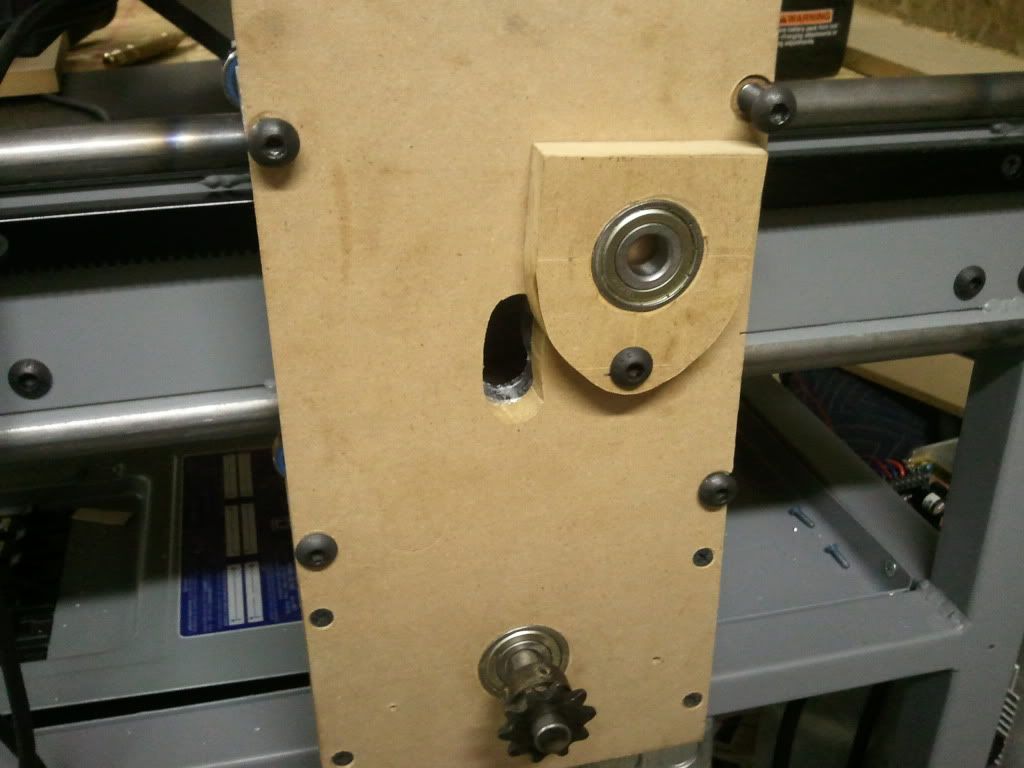
then i had to make a slot for the drive shaft to pass through. i started with a series of holes, i located them using the tensioner as a guide.
i drilled them larger and larger until they were connected, then i filed them to a nice arc. (would have been really nice to have a cnc machine for this.") )
)
end result should work.
and here is the gear and chain mocked up. this should give me around a 3:1 gear reduction.
all of this fits in between the support ribs.
that's all for now. i need to do a little more work on the drive, mostly i need to turn down the gear for the gear rack so that it will clear the bolts holding the rail on, and i need to get a set screw in it as well. from there i need to set up a spring and a mount that will keep pressure on the tensioner. should be off to the races from there.
-
01-15-2012, 11:20 PM #196
Registered
- Join Date
- Aug 2011
- Posts
- 617
did you get the power sorted ?
The toroids do take a huge draw when 1st energized, not a lot you can do easily. The power caps are another matter, they are basically a short when they are empty, so if you can fill them slowly via a resistor that will help, you can bypass the resistor either manually with a switch, or with a relay and timer.
just an idea
Rich
-
01-16-2012, 02:40 AM #197
Registered
- Join Date
- Feb 2010
- Posts
- 331
I haven't done anything else with it yet. I think the terroids are the main problem so i was going to start there. I have just been working on mechanical stuff lately. As it is now i just have to flip the breaker twice
-
01-23-2012, 07:19 AM #198
Registered
- Join Date
- Feb 2010
- Posts
- 331
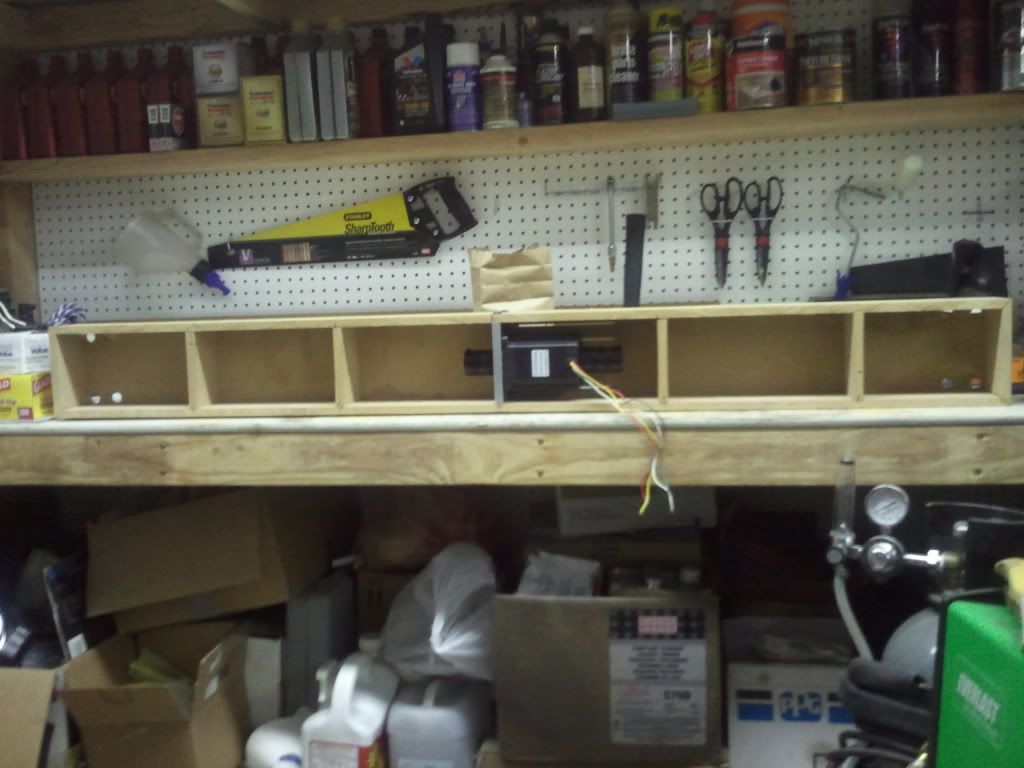
got a little bit more done this weekend.
since i got the remainder of the stuff i needed to wire up the motors i started to work on that.
got the cables soldered to my quick connectors.
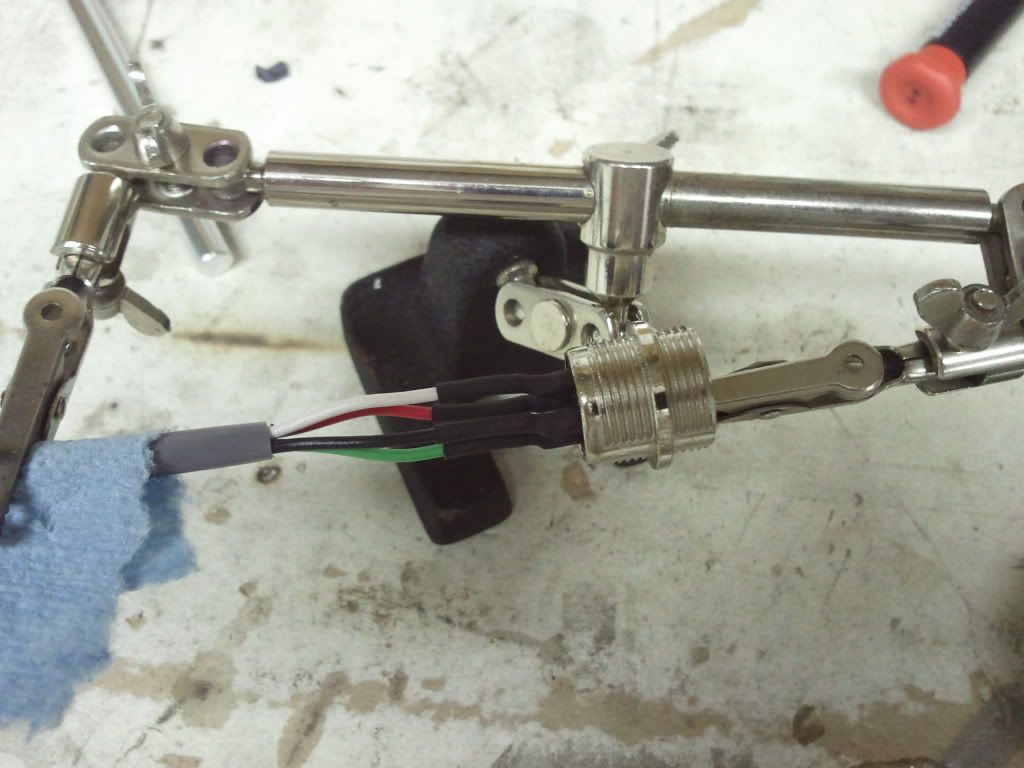
and double insulated.
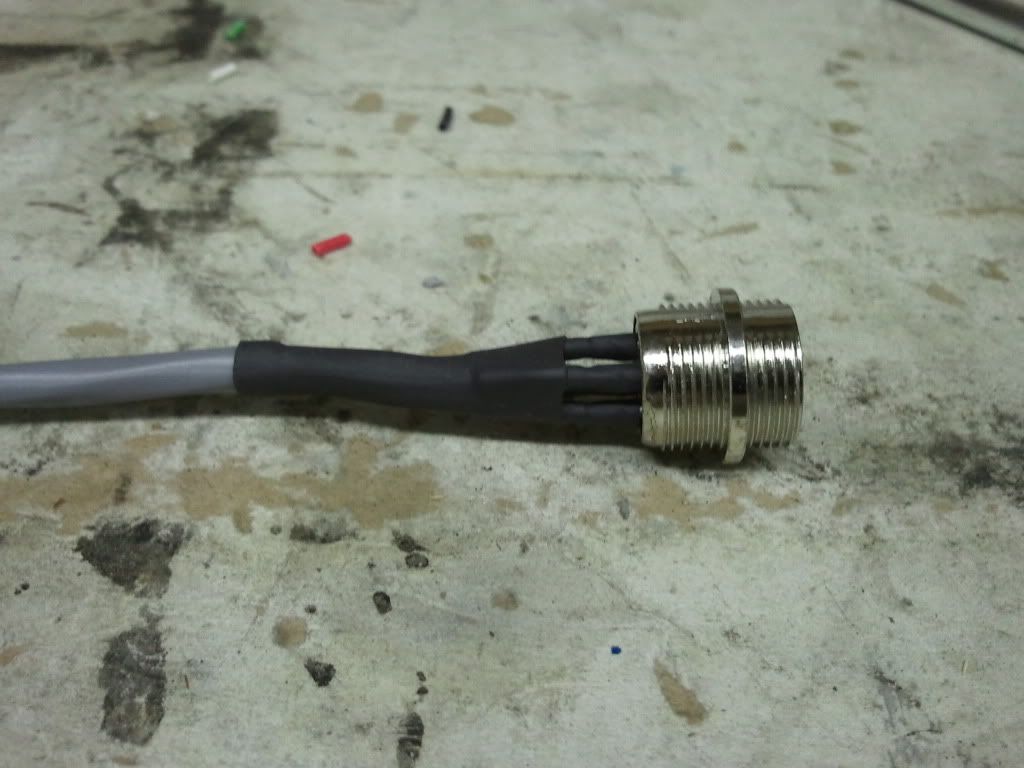
then i drilled some holes and got them all mounted.
underneath
i still need to make the harness that connects to the motors. then they will be ready to run.
i also still need to order the "last" of the mechanical pieces to finish things up.
i also did a bunch of little stuff, and while important, it is not very interesting, so ill save you the details.
stay tuned!
-
05-19-2012, 06:00 AM #199
Registered
- Join Date
- Feb 2010
- Posts
- 331
i know its been a while. i've been busy with life. changed jobs... twice and we are looking to buy a house.
however, i did find a little bit of time to make a quick video. hope you enjoy.
-
05-23-2012, 05:18 AM #200
Registered
- Join Date
- Feb 2010
- Posts
- 331
well, it has been a long time coming... but here it is.
i had the x axis set up wrong so the holes in a circle came out more like an oval. i fixed it and tried again. it is the one on the left in the next vid. (old one on right)
So how about it, am i part of the club now?(group):rainfro::wave::cheers:

 Reply With Quote
Similar Threads
-
Newbie - To build or not to build Router/Plasma Table
By dfranks in forum Waterjet General TopicsReplies: 10Last Post: 04-08-2011, 05:16 AM -
newbie CNC build
By tanis in forum DIY CNC Router Table MachinesReplies: 6Last Post: 10-24-2009, 03:34 PM -
UK newbie first build in progress
By m2uk in forum DIY CNC Router Table MachinesReplies: 7Last Post: 01-19-2009, 05:49 PM -
Newbie wants to build a CNC Machine
By Pyros1988 in forum DIY CNC Router Table MachinesReplies: 0Last Post: 01-12-2009, 11:47 PM
