


Hi all, I am brand new to CNC, but have been reading alot about it and have been doing some homework for the last few months, and decided to go ahead and take the plunge.
I ordered the plans from Solsylva.com and just started assembly today.
A bit about me, I am a 25, and live with my wife and dog in Boise, ID. I work for a company that specializes in low voltage wiring and fiber optics. Like I said, I am new to CNC, but very familiar with electronics, wood working, shop, and computer aided design (notice I didn't say CAD!) I also like long walks on the beach, yada yada. Ya'll will get to know me, I hope to stick around for a while.
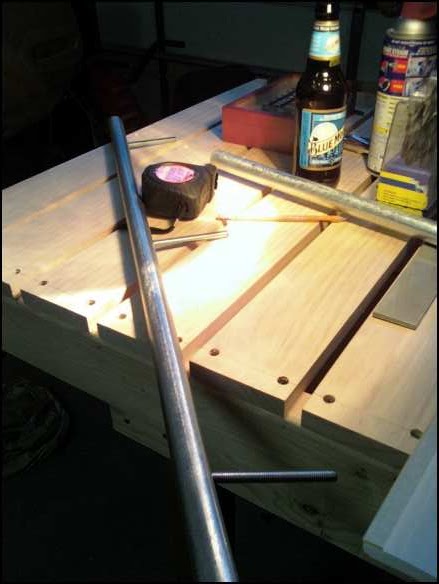
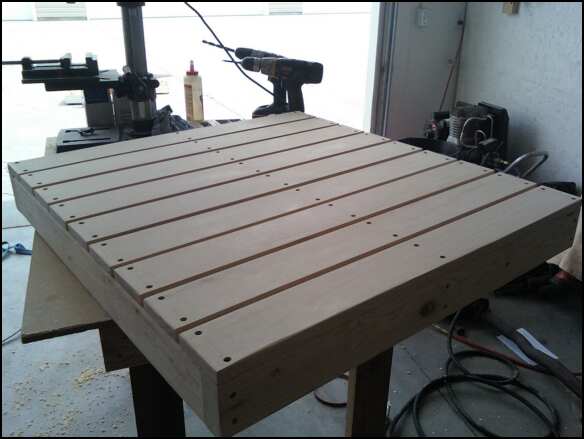
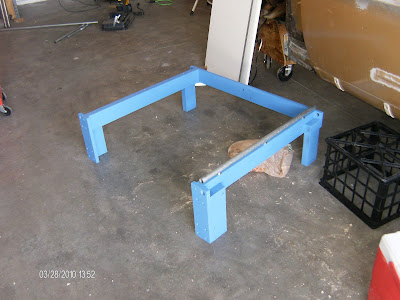
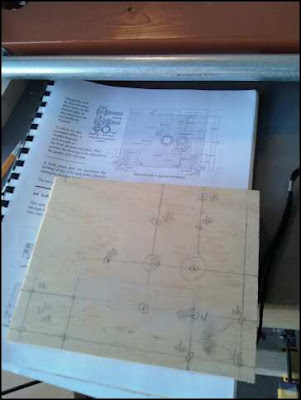
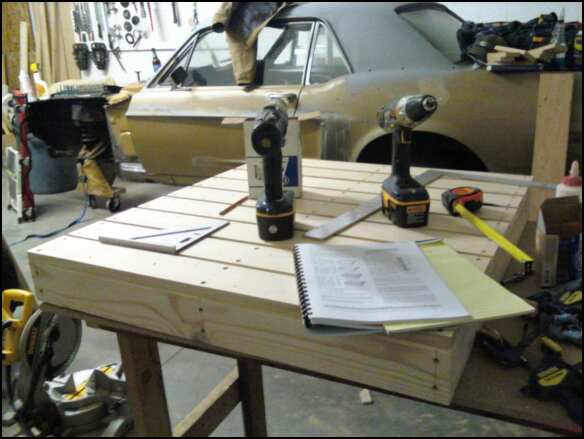
Here is my start:
The way I see it is so far I have the base for my CNC or a very expensive and extremely square cargo pallet.
It took about 4 seconds to decide to ship the base that is shown in the plans. Something about it I don't really like. I will eventually build something to put it on, but for now I just want to get to the good stuff.
I'm not made of money, so budget will probably be the limiting factor on how fast I get this thing built. Sorry if it takes a while, but I promise you, I will get there!
So far thinking about using the HobbyCNC Ez package with the 305oz steppers. Sound like enough? Will also probably start out with the Linux CNC package as I am an Ubuntu nut.
Definitely have a lot of questions, especially when I get to steppers and electronics but my hope here is to have some fun.
God bless!
Results 1 to 20 of 221
-
04-09-2010, 05:17 AM #1
 Registered
- Join Date
- Apr 2010
- Posts
- 363
Crane's 25x25 Solsylva Build w/ Pictures
-
04-09-2010, 07:21 AM #2
Registered
- Join Date
- Jun 2004
- Posts
- 35
Nice Mustang and Baja Bug. Ubuntu is awesome. I myself am leaning toward using emc2. I will watch with interest
 Is the voice in my head bothering you?
-
04-09-2010, 12:40 PM #3
Registered
- Join Date
- Jan 2006
- Posts
- 738
Welcome Crane,
Greetings from Oklahoma. Looks good so far! Will be interested to see your progress. My current machine is about that size, 26" X 26" X 9", but is soon to be dismantled for larger one. I used a piece of an old desk top for my table and aluminum extrusions for the mechanicals. For leadscrews I used 1/2" 10 single start acme which allows up to about 75 IPM. I added a rotary table that can mounted either under / in the table, or at the end with a tail stock at the other end.
I commend your thought on using Ubutu! EMC2 is a breeze to install and set up. You just download the ISO image, burn it, and install. It installs Ubutu and the EMC package. Just don't upgrade to the latest Ubutu or EMC will quit working properly. There is even a built in utility (you have to enable it) that converts a grayscale BMP to 3D for lithophane work like this:
Your choice of drivers/motors sounds like it will definately fit the bill. I use a Bosch Palm router for the spindle now. The variable speed is nice and the price is hard to beat.
Keep the pictures coming !
Enjoy
Steve
-
04-09-2010, 09:50 PM #4
Registered
- Join Date
- Apr 2010
- Posts
- 363
Thanks for the Ubuntu tips. I am going to run the bootable CD here soon and poke around to see what features there are, and see what kind of software is bundled, but I will leave most of my research until the machine is getting closer to finished.
Just got off work, on my way to the shop to start on the rails. Got to stop by Lowes to pick up some parts. I am also picking up a drill press on my way there, its about dang time I got one of those.
The plans call for 1/2" I.D (approx 7/8 OD) black gas pipe. I snagged some 3/4 EMT from work, the outside diameter is 7/8 and the stuff seems pretty rigid. I know its really heavy. Anyone foresee problems?
Will post pics. Wish me luck.
-
04-09-2010, 10:40 PM #5
Registered


- Join Date
- Aug 2009
- Posts
- 392
Looking forward to see this progress.
I plan on using EMC2 as well (at this point in time, whenever I get my machine built  ).
).
-
04-10-2010, 05:40 AM #6
Registered
- Join Date
- Apr 2010
- Posts
- 363
Well, started on the rails today.
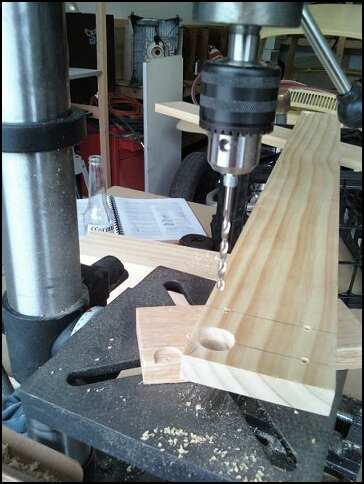
Here is my birthday present this year. Been needing one for a while now and just finally got one.

Of course had to pick up a set of Forstner bits while I was at it. Probably spent more today in drill bits then materials. $20 Forstner bit set, $11 this, $9 that... Aaargh.
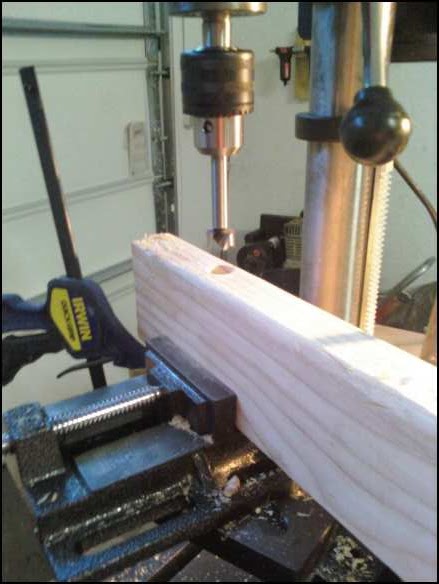
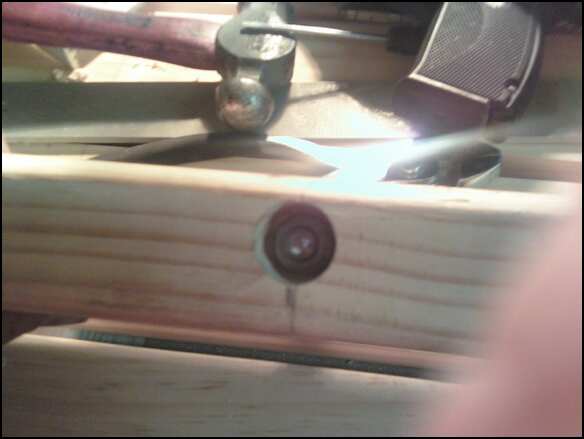
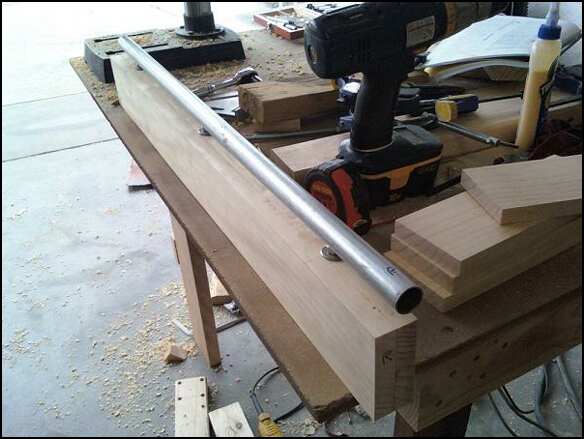
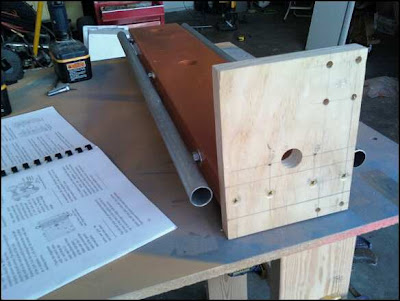
Here is the bottom of the rail support.
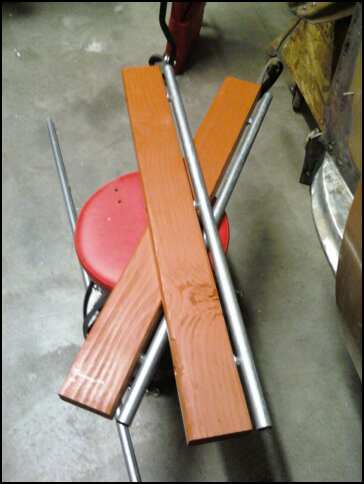
And the completed rails, but not attached to the bed yet. I will probably take them apart to paint tomorrow. Now to choose a color...
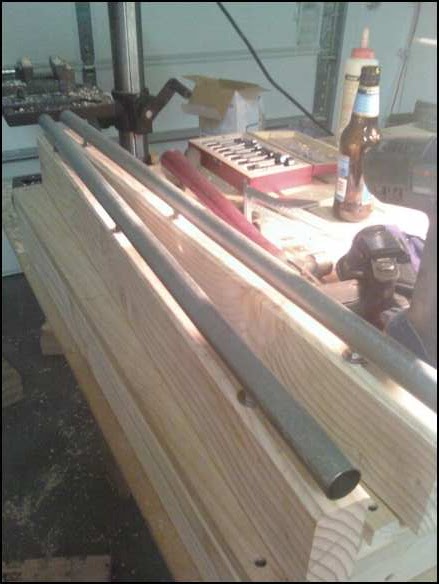
I selected framing grade 2x4's for the 2x material. Hope this was the right choice. I looked at the more expensive 2x4's, but they all were not nearly as straight as the framing ones, altho the wood seemed better. So now I am second guessing. I will probably leave it for now and come back later to replace.
-
04-10-2010, 11:32 PM #7
Registered
- Join Date
- Apr 2010
- Posts
- 363
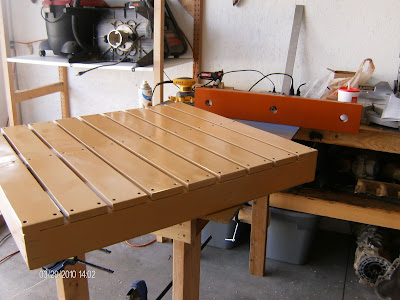
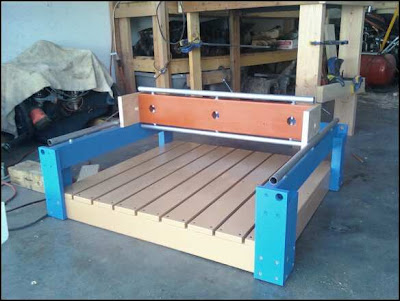
Sanded the bed and got the first coat of paint on today. Stood in front of the paint section at home depot for waaaay too long this morning. Could not decide on colors so just decided to go with our local teams color, the Boise State Broncos. Anyways, blue and orange it is.
Sanding is always a pain, but I knew that if I didn't do it now so I could paint it never would happen. I want to get on to the good stuff, but unfortunately this is just one of those things that just takes time.
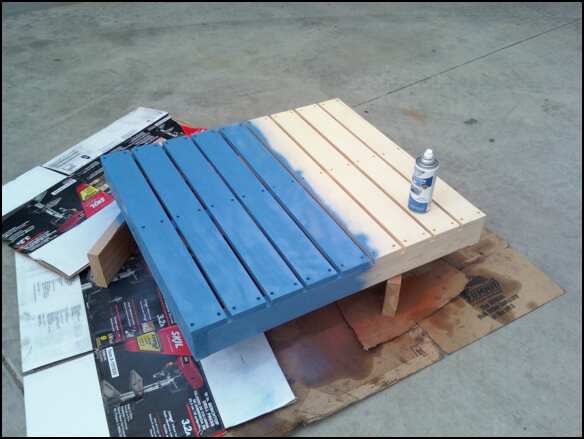
Waiting for the bed to dry I got a start on the X axis frame.
-
04-10-2010, 11:52 PM #8
Registered
- Join Date
- Aug 2009
- Posts
- 392
This should be one bright and colorful machine with those color choices
 Looking forward to seeing more progress.
-
04-11-2010, 07:31 AM #9
Registered
- Join Date
- Apr 2010
- Posts
- 363
Well, friends, it has been a VERY busy day. Been at this since this morning and only stopped for a couple hours of church, and then straight back to it.
Since my last post earlier today (while at church :nono I have got quite a lot done. Started out by installing the rails back onto the newly painted supports.
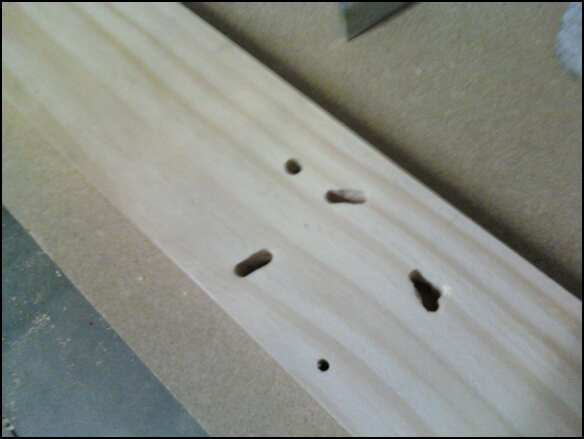
Then I cut all the remaining pieces to length and drilled. I had a little trouble getting the X axis motor mount to look right, even though I was going off of a template. I think most of it will be covered up via a LARGE washer. I guess its not that bad, but geez.
Then it was time to attach the legs. This task was a LOT harder then I thought it would be. If your reading this thinking of starting this project let me give you two tips that will save you a ton of grief:
1. Make sure your workbench is big enough, and LEVEL!!!!! Mine is probably only off by a 16th on an inch, but it shows up over and over. A completely flat work surface lets you use the table as a reference. I am shooting for 1/32 precision in all my cuts and joints. An uneven surface makes achieving this a nightmare.
2. For your 2x material...DONT USE FRAMING LUMBER. I wish I would have gone to my local hardwood store and had them cut me something custom and paid $30 for the wood, instead of $9 for the 3 2x4's I have needed so far. Even if it looks straight in the pile, it is not. Nor is it square. I have been fighting this all day.
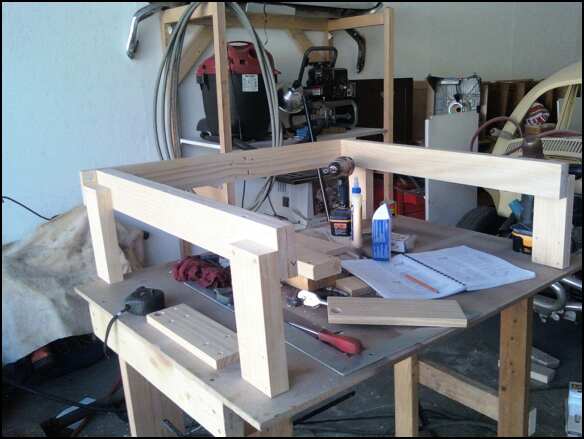
Despite those two setback, it's all together and believe it or not, its all straight. Took a TON on trial and error, and even putting in glue and dowels to holes I already screwed so I could move the joint 1/16 of an inch. This could have gone a lot faster, but I am very confident that everything is exact, and my gut feeling is this will make things easier (or at least not more difficult) later.
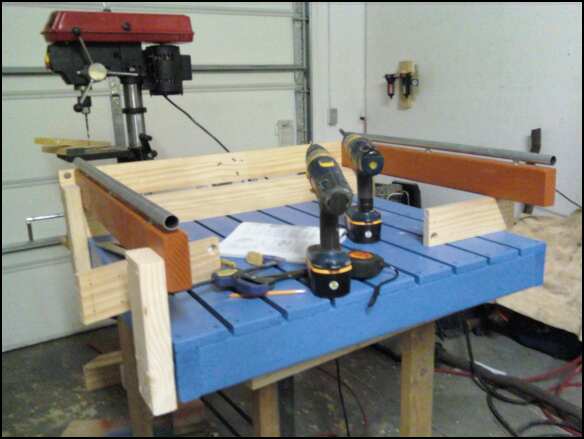
Here she is currently. Before I mount it to the bed, I will sand it and paint it. (Come on, its 12:30am!) Then tomorrow its onto the gantry...
Stay tuned! I know this is the boring part, but things will get interesting! :banana:
-
04-11-2010, 12:24 PM #10
Member
- Join Date
- Apr 2007
- Posts
- 8082
If those 2x4 pieces continue to give you trouble, make new replacements by gluing two layers of the 1x4 clear pine together with the annular rings opposing each other like (). Use 60 minute epoxy or a good coat of Titebond yellow glue. You'll end up with the same 1.5" x 3" physical size with nice square corners. Originally Posted by crane550

When I built my Solsylva 25x37 I ruled out the 2x4 lumber right away because they are not stable with time and decided it was going to be made of poplar or red oak. Both are expensive, but I ended up using red oak because the bolts don't sink in so easily when tightened and it just looks so much better than poplar. That was the best decision that I made on that build. It cost me around $80 for the wood though.
The 25x37 uses EMT electrical tubing. After 1.5 years of very light use it is starting to develop some flat places where the bearings roll but it will be a long time before they need to be replaced.
CarveOneCarveOne
http://www.carveonecncwoodcraft.com
-
04-11-2010, 03:28 PM #11
Registered
- Join Date
- Apr 2010
- Posts
- 363
I had the exact same idea with gluing the wood, and if I were to start over I would definitely do that, but for now it is together and fairly straight so I think I will leave it. This machine is *hopefully* just to get me started. I would like to build another w/ aluminum using this machine once it is all done.
I have also worked with red oak a LOT. I have build an entertainment center, several coffee tables, end tables, guitar rackmounts...quite a bit. I really like how red oak works. The problem w/ that is I buy mine at a local hardwood store, and all they do is plane two sides and joint one. Then I run the same piece several times thru my table saw. This does not give the best results. It's more then good enough for the furniture I build, because I kinda like the sawed look, but for something that I want straight as an arrow I just decided to buy the already cut pine at Home Depot. A better table saw would do the trick, but then again thats more money. $$
Also, good to know on the rails. But again same story. The EMT was also free.
-
04-13-2010, 04:41 AM #12
Registered
- Join Date
- Apr 2010
- Posts
- 363
Well, friends. What a day it has been.
Spent a lot of money and can't really say I have gotten much further. After CarveOne's comment about the framing lumber, and looking at his Solsylva build I was kinda sold on rebuilding the rails and legs. They took less time to build then the last ones, and came out nicer, but still, don't really feel like I made any ground.
Also the colors were really bugging me. I don't know why, but since I was rebuilding the X axis anyways, and didn't need the frame to work on it today, I figured why not. So I painted the frame an ugly brown and the X axis is now a stained blue. Will probably just bomb can the X again tomorrow, don't know what I was thinking spending $10 to have them mix me a custom stain. Didn't look anything like I thought.
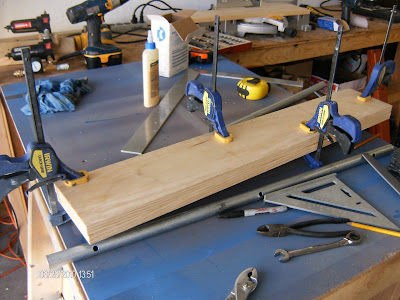
Anyways, here are the new X rails.
Gluing the 1x4's to make 2x4s...
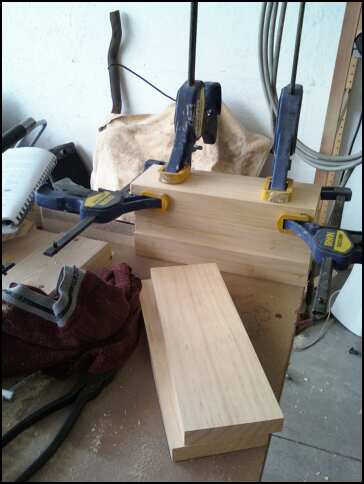
And the new 100% pine X. I know pine is not as strong as other woods, but it's cheap, and the stuff they had at Home Depot was straight, so don't give me too much crap.
Whew. All day working on this and I am in the same spot I was last Friday. Sleep time.
Comments please!
-
04-13-2010, 07:47 AM #13
Registered
- Join Date
- Oct 2005
- Posts
- 2392
Interesting build!
I don't know anything about the Solsylva plans, but looking at your main rails I was thinking it would be good if you had some easy way of shimming and/or aligning the rails. Like if the steel tubes were mounted on a flat piece of wood or say a 1x2 or 2x2, and that wood was screwed along the top of your 2x4 beams. You could even use flat alloy bar, like a 1.5"x1/4".
Then you could easily shim for height between the woods (with no real disassembly needed) and have enlarged holes in the top wood so you could adjust for square and parallel (again quickly with no disassembly needed).
To my mind if you are working with a structural material that is not perfectly square (and may also expand or warp later) it's worth designing in easy adjustment of all the critical alignments so you can just build first and align later.
-
04-13-2010, 11:53 AM #14
Member
- Join Date
- Apr 2007
- Posts
- 8082
On mine, the plans show the EMT mounted in a piece of 1/2" aluminum plywood edging channel to "flatten off" one side where the tube and channel mount to the wood. If you tighten the mounting bolts too much the channel spreads out but it can be tightened enough to hold things steady. I limited how much it can spread by cutting scrap oak into strips that are placed in the channel before the tube is mounted. Now it can be cinched down really well and the tube stays straight. I also made round metal plugs with a threaded thru-hole to slide into the tube to act as internal nuts instead of threading the thin tube wall. Originally Posted by RomanLini
I expected that one to be a permanent addition to the shop as well as being a stepping stone to a much larger machine, so I made a lot of changes to it versus the original design. The smaller Solsylva designs are intended to be very low cost and will work as designed. They can be improved a lot by throwing more money at them in the form of much better materials and lead screws.
So, back to crane550's build. It's looking much better to me now that it has better wood. I'll keep watching.
CarveOneCarveOne
http://www.carveonecncwoodcraft.com
-
04-14-2010, 06:12 AM #15
Registered
- Join Date
- Apr 2010
- Posts
- 363
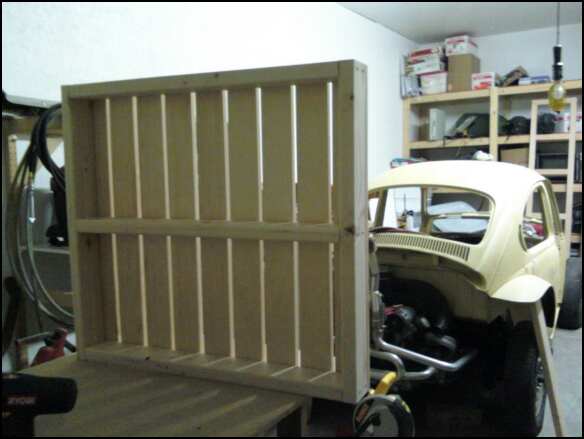
Well, got some more work done today. Finally started the gantry, but didn't get too far. Spend 90% of my time re-arranging the shop and cleaning. It was just getting out of hand and I just can't work that efficiently in clutter.
But anyways, glued 2 1x4's for the gantry and fabricated the rails:
From CNC
The completed X
From CNC
And a *somewhat* cleaner shop
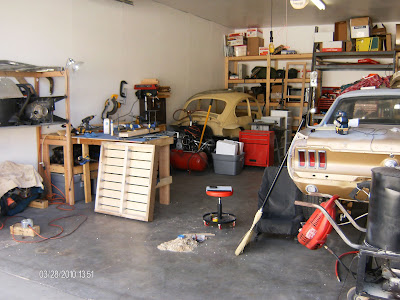
From CNC
As you can see the Baja got pushed into the back corner...if someone could just pay me to do my hobbies full time...
-
04-15-2010, 01:21 AM #16
Registered
- Join Date
- Apr 2010
- Posts
- 363
Got a little done. Finished the Y rails, fabbed the Y 2x6, and got it painted. Tomorrow I start on the end caps, if I have time.
Now to start looking into securing all those specialty parts.
From CNC
-
04-15-2010, 01:26 AM #17
Registered
- Join Date
- Aug 2009
- Posts
- 392
Looking good. Watching intently
Also, is that a mid/late 60's mustang I see? Or am I mistaken
-
04-15-2010, 01:35 AM #18
Registered
- Join Date
- Oct 2009
- Posts
- 272
 INSANE CNC?
It has been said..." A clean desk is a sign of an insane mind"... Originally Posted by crane550
INSANE CNC?
It has been said..." A clean desk is a sign of an insane mind"... Originally Posted by crane550
Does the same hold true for a workshop?
Progress looks good, keep the pic's coming!
Randy,I may not be good....
But I am S L O W!!
-
04-15-2010, 06:08 AM #19
Registered
- Join Date
- Apr 2010
- Posts
- 363
Indeed. This is my '68 dream come true. Bought it 5 years ago even tho I was no where close to being able to afford it....and lets just say I'm still trying to catch up! Originally Posted by Jesse B
Not to get too far O.T... but it's got a 331 stroker going back into it, as well as modified front suspension, custom exhaust, and new undercoating and paint (someday)
Unfortunately she is kind of on the backburner right now...
-
04-16-2010, 01:40 AM #20
Registered
- Join Date
- Apr 2010
- Posts
- 363
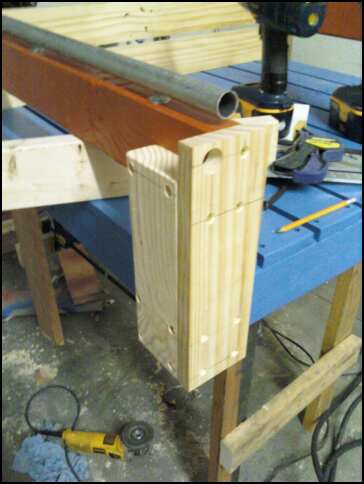
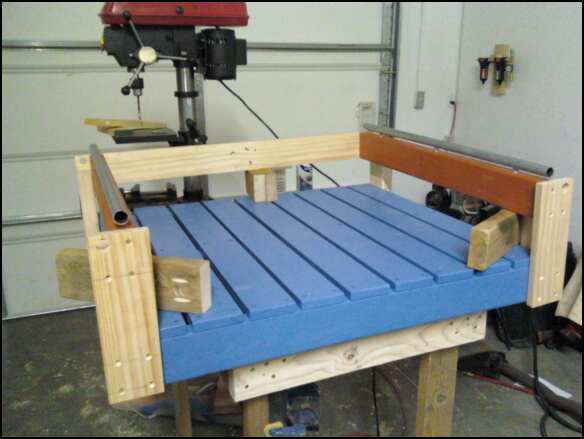
Well, made some good progress today. Got the rails connected to the Y, fabbed the end caps, and got those painted, and got the X mounted to the bed. I am pretty happy with everything that happened today.
Here it the router I plan to use. It is a 9A, something somthing HP, deWalt. Only accepts a 1/4 chuck tho. I have been using this for a long time with my router table, but plan to upgrade that one to something that can accept a 1/2 chuck. Will I need a 1/2 chuck also for my table? This should be plenty enough for what I need, right?
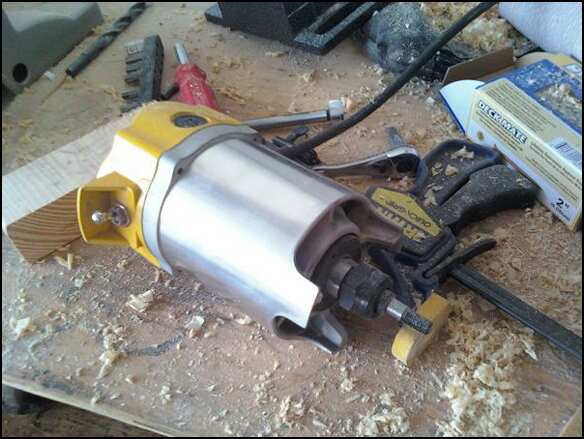
From CNC
Fabbing the end caps
From CNC
From CNC
It is actually starting to look like a CNC!
From CNC
And finally the bomb can art. Too many runs, but who cares, right?
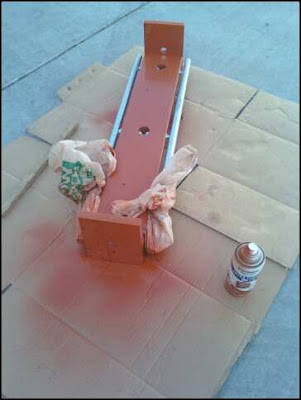
From CNC
Ordered 30something skate bearings off of ebay. Ran me about $25 but I got the ones with the ABEC5 rating. Not sure how much difference there is but why not, right? Not I have to wait...

 Reply With Quote
Similar Threads
-
Newbie Solsylva 25x25 build
By jubo in forum CNC Wood Router Project LogReplies: 8Last Post: 03-04-2014, 12:58 AM -
First machine build Solsylva 25x25
By Marcdavis in forum CNC Wood Router Project LogReplies: 23Last Post: 03-01-2014, 03:40 AM -
Solsylva 25x25 Build
By NichB77 in forum DIY CNC Router Table MachinesReplies: 21Last Post: 02-23-2014, 03:23 AM -
Bubble Tech's "Bad decisions make great stories" 25x25 Solsylva Build
By muibubbles in forum DIY CNC Router Table MachinesReplies: 57Last Post: 12-17-2012, 03:00 PM -
solsylva 25x25 cnc help
By mononukeleosis in forum Want To Buy...Need help!Replies: 0Last Post: 08-14-2010, 06:39 PM
