


Hello Gecko users/ mods!
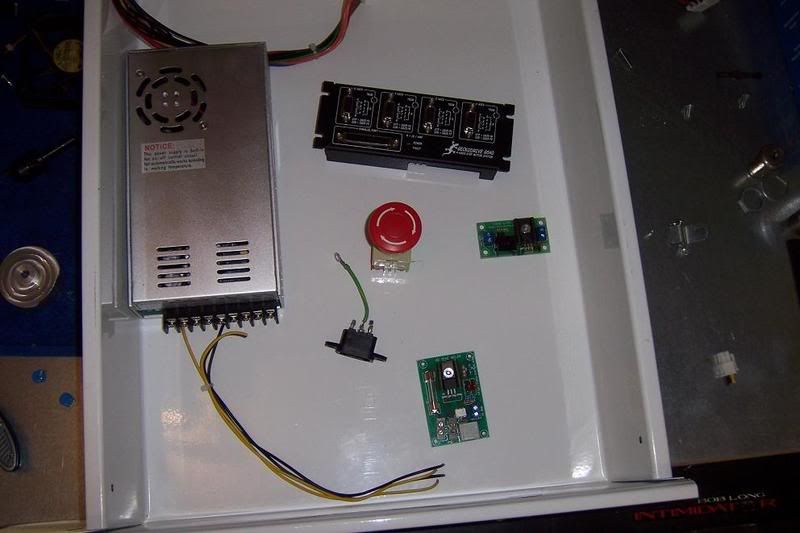
I have my Gecko 540 and components I want to start too wire togetherBefore I can make any cuts into an enclosure for all my stuff, I need to have the 540 wired and working just so I can make a new home for it.
I have some questions.
1.I have my 7.3 Amp;48 volt PS from Keling that came today (great shipping), I wire positive to terminal 11, Negative to terminal 12 on 540. Ok good, I think I have that.
2.Secondly, since I'm using EMC2, I have heard people say that an E-Stop is a must to bring the 540 out of fault, So I also bought an E-Stop from Keling, mine has 4 contacts, two on pos; two on neg. I hope this will work, but I am not sure how to wire this. The second part of my question here is, if the E-Stop is "ENABLED" this ENABLES the 540 and vise versa, isn't this a little odd? So in order to STOP/DISABLE THE 540, I will have to twist the E-Stop and let it pop to original form which would be DISABLE on e-stop but DISABLE on 540? (Unless I have mixed the terms of closing/enabling of the switch) The E-Stop is wired to Terminal 10 and Ground; Terminal 12 on 540 (Correct)
3. One last MAIN QUESTION; My power Supply will have a cord (obviously) that will be plugged into the wall. Will I DAMAGE the 540 or PS if I to turn on the unit/off the unit plug and unplug the cord from the wall? Or do I need a switch between the PS (POS)(NEG) and the 540 Terminal 11 or 12. If so, is it better to put the switch on The (Neg;grnd wire) or (Pos wire) or should I not put the switch here!
I sound really "Noobish", I am good with small electronics but am worried about blowing anything up because it's happened in my shop before and not by me but by faulty components. I'm just saying that I want to ask before I do anything.
I will worry about adding outputs such as Relays once I have the 540 working and the enclosure made, so I will ask more questions in a bit.
-Jason
Thread: Gecko 540 wiring: Questions
Results 1 to 20 of 25
-
09-25-2008, 10:25 PM #1
 Gold Member
- Join Date
- Sep 2006
- Posts
- 1738
 Gecko 540 wiring: Questions
-
09-25-2008, 11:02 PM #2
Community Moderator
- Join Date
- Mar 2003
- Posts
- 35538
1) OK
2) You have it backwards. The switch is closed when it's out, and open when pushed in. The G540 is enabled when the switch is out (closed) and disabled when it's in (open). Pins 10 and 12 OK.
3) unplugging the power supply is OK, or put a switch in the plug. But NEVER switch the DC side to the G540!!Gerry
UCCNC 2017 Screenset
http://www.thecncwoodworker.com/2017.html
Mach3 2010 Screenset
http://www.thecncwoodworker.com/2010.html
JointCAM - CNC Dovetails & Box Joints
http://www.g-forcecnc.com/jointcam.html
(Note: The opinions expressed in this post are my own and are not necessarily those of CNCzone and its management)
-
09-25-2008, 11:10 PM #3
Gold Member
- Join Date
- Sep 2006
- Posts
- 1738
Ok yea, thought I may have it backwards, how do I wire the 4 contacts? Is it ok just to run 1 wire from ea' side.
So I need to place a switch between the wall plug and the PS, NOT from PS too 540.
-Jason
-
09-25-2008, 11:13 PM #4
Community Moderator
- Join Date
- Mar 2003
- Posts
- 35538
They are probably two separate sets of contacts for switching two different things. You should only need to use one, or you can use the second one to switch off your power supply. Just make sure the contacts are isolated from each other.
Yes, between the plug and PS.Gerry
UCCNC 2017 Screenset
http://www.thecncwoodworker.com/2017.html
Mach3 2010 Screenset
http://www.thecncwoodworker.com/2010.html
JointCAM - CNC Dovetails & Box Joints
http://www.g-forcecnc.com/jointcam.html
(Note: The opinions expressed in this post are my own and are not necessarily those of CNCzone and its management)
-
09-25-2008, 11:22 PM #5
Gold Member
- Join Date
- Sep 2006
- Posts
- 1738
Oh ok, I'll get a separate switch to turn the system on and off.
And everything seems clear, will post if anything arises.
-Jason
-
09-26-2008, 12:36 AM #6
Registered
- Join Date
- Oct 2006
- Posts
- 323
E-stop
IIRC, the e-stop through Keling, like so many others, has two pairs of contacts, one set NO, one set NC.
With the E-stop, pulled out you would want to route your g540 enable signal through the closed pair of contacts (not in E-stop is normal).
A common application of the NO contacts would be to turn on a red lamp or horn to indicate an E-stop condition when they close (or feed a discrete I/O for the controller/PLC/etc to respond or display E-stop message).
-
09-26-2008, 11:48 AM #7
Registered
- Join Date
- Jun 2005
- Posts
- 22
Jason,
The E-stop contact depends on which revision of the 540 you have. Rev 1 requires a normally open contact on the e-stop, Rev 3 requires a normally closed. As noted in an earlier post there is also a warning in the rev 3 documentation that the DC supply should only be switched on by turning on the AC power not by breaking the DC side to the drive. On the AC power you would only break the power lead on a single phase system. You would not break the grounded conductors ie. the neutral and the ground.
I am interested how EMC works for you I tried it several years ago and the pulse train was so inconsistent that I could only a achieve half the speed in rapids that I got from the Yeager software. The PC was a 400 mhz system and the drives were Gecko 210s. The final configuration was a 600 mhz PC with Mach 1 running the machine.
Cliff
-
09-26-2008, 08:26 PM #8
Gold Member
- Join Date
- Sep 2006
- Posts
- 1738
Thanks for the information guys, I will hopefully have some time today and wire the E-Stop and maybe get some tests. Hopefully I won't have a headache like I did with my Xylotex system....Horrible.
So as long as I put a switch from the Ac side, I will be fine. When I wire the switch, is it best to have the switch on the ground, or positive or neutral? Just double checking.
-Jason
-
09-26-2008, 11:43 PM #9
Gold Member
- Join Date
- Sep 2006
- Posts
- 1738
Ok, I have a very simple wiring set-up, Only thing wired is an E-Stop to Pin 10 and 12 on 540 and Power Supply: 11 and 12.
I can't seem to get it out from fault.
I'm not sure exactly what my EMC2 stepconf pins should be set, I have an idea. But don't know if it's right.
What is everyone using for the 540 and emc2?
-Jason
-
09-27-2008, 12:09 AM #10
Registered
- Join Date
- Feb 2008
- Posts
- 243
Do you have the rev 3 G540 with the chargepump disable switch that was released after 9-22? If not you need to contact gecko drives because the charge pump was a requirement and as I recall emc doesn;t have charge pump pwm output. On the other hand if you do have newer G540 then make sure that your pc bios is set up for EPP. The newer rev3 have a switch to disable the charge pump and thus will work with non mach3 programs.
Dan Mauch
camtronics-cnc.com
the case for the G540 and stepper motors as well as servo and other stepper products.
 Originally Posted by SpeedsCustom

-
09-27-2008, 12:17 AM #11
Gold Member
- Join Date
- Sep 2006
- Posts
- 1738
I guess I only have the Rev2, I go my stuff last week

Actually EMC2 does have a ChargePump, Mine was enable on Pin17. I'll need to contact them!
-Jason
-
09-27-2008, 12:51 AM #12
Registered
- Join Date
- Jan 2007
- Posts
- 467
Jason,
The charge pump signal must be applied to pin 16 on the DB25. It also has to be above 10kHz for it to work.
Marcus
-
09-27-2008, 12:55 AM #13
Gold Member
- Join Date
- Sep 2006
- Posts
- 1738
I did enabled it on 16. I meant 16, not 17.
It won't come out of fault.
-Jason
-
09-27-2008, 03:38 AM #14
Gold Member
- Join Date
- Mar 2003
- Posts
- 2839
WON'T EXIT FAULT troubleshooting.
A lit red LED means the G540 will not run. You must get a lit green LED to use the G540.
Four conditions will place or keep the G540 into FAULT (red LED):
1) Incorrect parallel port configuration in BIOS.
2) Miswired and/or shorted motors.
3) No charge pump signal.
4) E-STOP input not grounded.
1) Boot your PC, go into BIOS, set the parallel port to 'EPP'. 'STANDARD' will not work. Do this first.
2) Unplug all motor DB9 connectors during setup. This eliminates motor wiring issues. The G540 has short-circuit protection circuitry that will place the G540 into FAULT (red LED) instantly no matter what else is going on. This is a latched condition that is designed to be non self-clearing. The only way to reset it is to recycle the power supply or cycle the E-STOP input.
3) Earlier G540 REV3s require a 5kHz or more Mach3 compatible square-wave watchdog timer (charge pump) signal to be present to enable. It is designed to be . Other CNC programs may not generate this signal at all or it may not meet the Mach3 standard.
Recognizing this, as of Friday last week (Sept 19), we have been shipping G540s with an internal slide switch that removes the charge pump as a requirement for enabling the G540. The switch presently accessible only when the cover is removed. The next revision (REV4) will have the switch accessible externally.
Until then, if you are not using Mach3, remove the G540 cover and slide the switch in the direction away from the DB25 connector to disable the charge pump input. The default position is for Mach3 enabled.
4) During setup (no motor connectors attached), jumper E-STOP to POWER GND with a short wire loop. Connect your E-STOP switch afterward once you get the G540 to enable.
---------------------------------------
Following the steps listed above, the G540 will enable (show a green LED). Connect your axis motor connectors one at a time. Recycle the supply after each new motor connect. This will help identify a miswired axis motor; should the dreaded red LED come on then the last motor connected has problems. Otherwise it's all Hades to figure out which axis motor of the 4 has problems.
Once all used axis motors get a green LED, wire-in the E-STOP switch. A red LED again will indicate a wiring problem there.
Hope that helps, it's kind of easy. We have been doing this about 80 times a day here during final G540 test. That's how many are going out the door every day.:-)
Mariss
-
09-27-2008, 05:04 AM #15
Registered
- Join Date
- Jun 2008
- Posts
- 21
From that sentence, would have to repeat what we all know...We have been doing this about 80 times a day here during final G540 test. That's how many are going out the door every day.:-)
If YOU build it, they will go > FAST.
res out
-
09-27-2008, 06:42 AM #16
Gold Member
- Join Date
- Mar 2003
- Posts
- 2839
resistor,
Thanks. A product cycle has distinct phases, summarized as youth, middle-age and senescence. A crappy product goes through all 3 in a year, a really good one stretches 20 years.
Youth is from idea to first marketable example. The idea phase usually involves a single individual who takes it from what's in his head to something that's tangible and works. Production gets involved and there is a quick flurry of revisions until the product is refined and works in nearly all applications flawlessly.
Middle-age is a time where little or no changes are made to the product. What few changes are made are primarily to enhance production. Little changes that save a penny here and a minute elsewhere. This is the cash-cow phase of a product. It makes money with very little input apart from the production crew.
Senescence is an end of life phase. The product now relies on what are becoming obsolete components or the market has caught up and is offering newer, better products at a lower price. The product becomes increasingly difficult and expensive to manufacture for what it does.
The process begins anew if a company has enough sense to know up from down. R&D is the lifeblood of any successful enterprise.
Mariss
-
09-27-2008, 04:23 PM #17
Gold Member
- Join Date
- Sep 2006
- Posts
- 1738
I will try you steps, I will do this with no motors connected. Seems straight forward, thanks Mariss.
I received my 540 last Wednesday, so 2 days short of your revision of the 540.
I hopefully I can get this all to work, it's simple but just need to tweak the right thing. And yes, I am using EMC2, not Mach. I hope I can access BIOS through Linux....
-Jason
-
09-27-2008, 05:41 PM #18
Community Moderator
- Join Date
- Mar 2003
- Posts
- 35538
You access the bios before Linux boots, as soon as you turn on the PC. Originally Posted by SpeedsCustom
Gerry
UCCNC 2017 Screenset
http://www.thecncwoodworker.com/2017.html
Mach3 2010 Screenset
http://www.thecncwoodworker.com/2010.html
JointCAM - CNC Dovetails & Box Joints
http://www.g-forcecnc.com/jointcam.html
(Note: The opinions expressed in this post are my own and are not necessarily those of CNCzone and its management)
-
09-27-2008, 06:00 PM #19
Gold Member
- Join Date
- Sep 2006
- Posts
- 1738
Yea, No I got it. Stupid me. I work with computers all the time, very good with them just never paid attention when Linux was booting up. Got into the BIOS, couldn't find the parallel config (Was rushing)
So after I do that I will proceed with the following things.
I did already jumper the 540, I took off the E-stop and jumper'd Terminal 10 on 540 to 12.
-Jason
-
09-27-2008, 07:28 PM #20
Gold Member
- Join Date
- Sep 2006
- Posts
- 1738
Ok, so I got into my BIOS and changed to EPP it was something different. So I changed that. I have my E-stop off too the side and just jumpered a wire from Terminal 10 to terminal 12 on the 540.
In EMC2 Stepconf, pin 16 is set to Chargepump.
I still can't seem to get the fault light off, I don't have the motor wires installed just the 540 with the wiring.
Now it has to be with my HAL FILE.
I have I asked a few people for there HAL file but have not gotten any responses.
-Jason
Originally Posted by Mariss Freimanis


 Reply With Quote
Similar Threads
-
Wiring Breakout Board Questions
By Dingo745 in forum XylotexReplies: 14Last Post: 03-31-2008, 08:47 PM -
Wiring loom design questions
By andy_ck87028 in forum DIY CNC Router Table MachinesReplies: 6Last Post: 10-16-2007, 12:55 AM -
Wiring Questions
By cnc2k in forum CNC Machine Related ElectronicsReplies: 8Last Post: 11-28-2004, 12:45 AM -
4-phase motor and wiring questions
By DmitryZ in forum CNC Machine Related ElectronicsReplies: 10Last Post: 04-14-2004, 05:14 AM
