


Ok, here we go. I hope this worked, I dont zip much stuff. When you open it its the broken view but it should all fit together...! Hopefully people will start including their .skp files now along with their pics.I'd love to see servoguy's .skp file from post no.7. Likewise jakarro from post no.22.
Thread: Google Sketchup Pics
Results 41 to 60 of 65
-
07-17-2006, 11:15 PM #41
 Banned
- Join Date
- Apr 2006
- Posts
- 1257
-
07-17-2006, 11:34 PM #42
Banned
- Join Date
- Apr 2006
- Posts
- 1257
The sketchup tutorials at the link below have good details about textures, among others. I saw them today. There seems to be a lot of flexibility with the digital photo route.
http://download.sketchup.com/downloa...Tutorials.html
-
07-18-2006, 12:31 PM #43
Banned
- Join Date
- Apr 2006
- Posts
- 1257
Ok, heres a new x-Ray view, pic, and the sketchup file with the Oak texture. I took a photo and pasted it in. It worked very well I think and quite easily. When your aligning the texture to a flat surface I found moving the pins in the order Red - Green - Blue - Yellow works best.
-
07-19-2006, 12:57 AM #44
Banned
- Join Date
- Apr 2006
- Posts
- 1257
Hi. I noticed that some of the sections in above door are out by 1/16th of an inch. This is very strange as I actually used the typing feature to enter most of the dimensions when drawing. This is not the first time I have noticed parts randomly changing size, or parts that should fit due to centuries of mathematical logic not fitting.....hmmm.....goblins in the program?
Also, after more critical examination, the digital photo texture route needs a bit more effort than I put in. As you can see (Or maybe not but take my word for it!) the oak texture is more dark than it should have been. I suppose this is due to the lighting when I took the photo, not sketchups fault.
Im wondering if anyone downloaded the above zip file of this door, and if so did you get the texture ok? It'd be great if we could share texture photos like this.
-
07-19-2006, 02:31 AM #45
Community Moderator
- Join Date
- Mar 2003
- Posts
- 35538
I doubt it's a problem with the program. More likely you not being careful enough. I see CAD drawings every day with plenty of discrepancies that shouldn't be there, but are due to operator error. Originally Posted by diarmaid
 Gerry
Gerry
UCCNC 2017 Screenset
http://www.thecncwoodworker.com/2017.html
Mach3 2010 Screenset
http://www.thecncwoodworker.com/2010.html
JointCAM - CNC Dovetails & Box Joints
http://www.g-forcecnc.com/jointcam.html
(Note: The opinions expressed in this post are my own and are not necessarily those of CNCzone and its management)
-
07-20-2006, 08:55 PM #46
Banned
- Join Date
- Apr 2006
- Posts
- 1257
Thanks!!.....nah, your probably right, I should be more careful.
-
07-27-2006, 03:54 AM #47
Registered
- Join Date
- May 2005
- Posts
- 405
Found there is a "snap to length" parameter and a "Precision" setting that could be the cause of your issue. Originally Posted by diarmaid
Select Window, Model Info, Units.
You can set the precision to 1/64 in Architectural format or points of feet in Engineering Format and turn the length snapping off.
It looks best of all in decimal, where you can select thousandths or even millionths of inch or mm.
Paul
-
07-27-2006, 08:33 AM #48
Banned
- Join Date
- Apr 2006
- Posts
- 1257
Thanks paul, I hadn't seen that. I'm gonna mess around with it later and see what difference it makes. If I could even get it to 1/64 inch it would be accurate enough for what Im doing.
-
07-27-2006, 08:35 AM #49
Banned
- Join Date
- Apr 2006
- Posts
- 1257
Can someone download the door in post No. 43 and see if you can get the oak digital photo texture ok please?
Then we could share textures.
Thanks.
-
07-28-2006, 12:40 AM #50
Banned
- Join Date
- Apr 2006
- Posts
- 1257
Hi folks. This is something I have to build in the next few weeks time permitting. Drawing it up in sp helped me avoid having to do all the maths to figure out the total lengths of 2x1 needed....I know, Not 'that' complicated but anyway, I just drew them until the space was used up then counted them.....I love drawing to scale!

I took a photo of some rough untreated white deal I had lying around for the texture. It'll be built out of pressure treated but didn't have any of that at the moment. Anyone who downloads the .skp will see that I didn't position the textures on the rear....its late....Im tired....nobody will need textures on the rear of the pic for this job. Theres a small single gate to match that I'll post when I have it done up.
L8rs.
PS: Someone let me know about the textures....ref post 49.
Thanks
....Also...thanks Paul. Playing around with the Model Units has solved my rogue measurements problems.
-
07-28-2006, 01:19 AM #51
Gold Member

- Join Date
- Jun 2003
- Posts
- 3312
"Build it and they will come" Cudo's to Google's marketing , give away a funtional tool, provide online storage for completed designs and models. CADsoft has done the same with Eagle, users grow, libraries grow, tool matures............
Phil, Still too many interests, too many projects, and not enough time!!!!!!!!
Vist my websites - http://pminmo.com & http://millpcbs.com
-
08-06-2006, 05:51 AM #52
Registered
- Join Date
- May 2006
- Posts
- 22
I spent a few hours on this today. Sorry guys Im not going to post the skp. file or show any of the dimensions only because this is someone elses plans. I might have missed this in the videos but to move a object to a certain point. Take and click a construction point that meets up with another construction point saves so much time of trying to line things up. If I figured this out in the beginning I would have save a few hours. Hope you enjoy[IMG]
 [/IMG] [IMG]
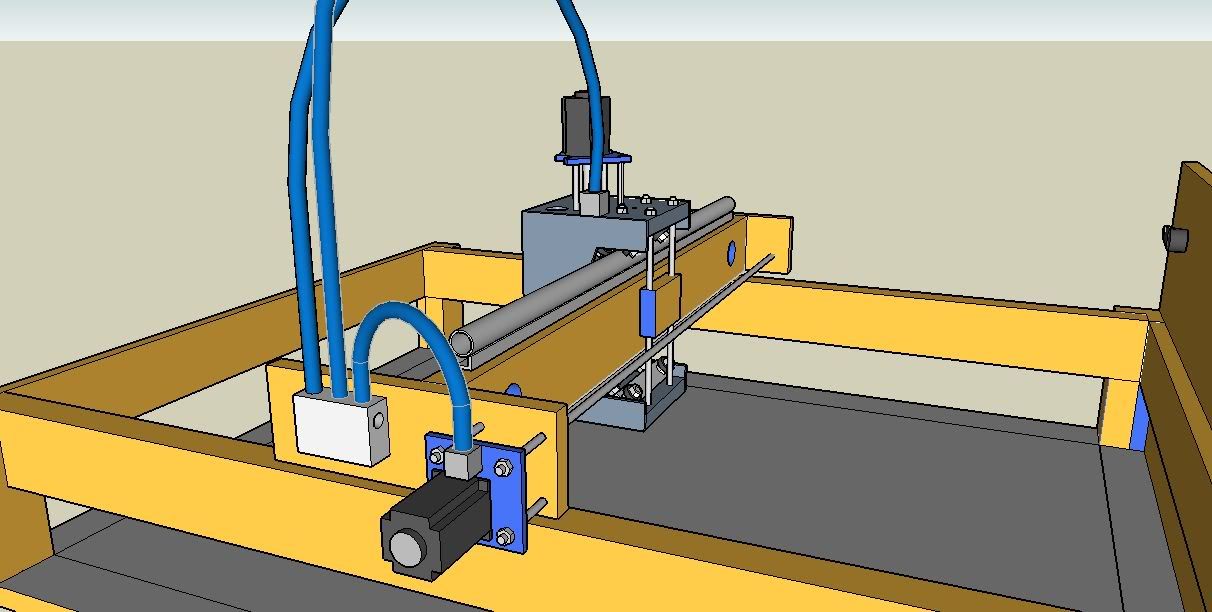 [/IMG]
-
08-19-2006, 05:06 PM #53
Banned
- Join Date
- Apr 2006
- Posts
- 1257
Did up this drawing for my dads study conversion today in about an hour. Google skup gets really quick when you've used it for a while. Regular concrete texture. 15mm Plasterboard with plaster texture. Digital photos for the wood flooring and the wallpaper. Didn't colour the shelves yet because they're all 1inch and I have to change them to 3/4 inch.
PS: Nobody let me know yet if the textures in the above .zip files worked out ok? Im thinking maybe they're ok opened in the original file but cant be extracted in sketchup for use in other files.....let me know....thnx.
-
08-20-2006, 06:45 AM #54
Moderator
- Join Date
- Jan 2006
- Posts
- 4396
Free!!!!!!!!!! Filzip!!!!!!!!!!
http://www.filzip.com/ Toby D.
"Imagination and Memory are but one thing, but for divers considerations have divers names"
Schwarzwald
(Note: The opinions expressed in this post are my own and are not necessarily those of CNCzone and its management)
www.refractotech.com
-
08-20-2006, 12:17 PM #55
Banned
- Join Date
- Apr 2006
- Posts
- 1257
Cool. Thankyou toby.
-
08-20-2006, 02:22 PM #56
Community Moderator
- Join Date
- Mar 2003
- Posts
- 35538
Did you just use the one image? Wood-oak.jpg? It appears to work on my end. The image is apprently emedded in the file.
Gerry
UCCNC 2017 Screenset
http://www.thecncwoodworker.com/2017.html
Mach3 2010 Screenset
http://www.thecncwoodworker.com/2010.html
JointCAM - CNC Dovetails & Box Joints
http://www.g-forcecnc.com/jointcam.html
(Note: The opinions expressed in this post are my own and are not necessarily those of CNCzone and its management)
-
08-20-2006, 06:13 PM #57
Banned
- Join Date
- Apr 2006
- Posts
- 1257
Thanks ger. Yup just one image to the best of my recollection. Embedded in the file, that means you cant take it somehow and use it in another drawing?
Damn, I thought it might have been included as a seperate .jpg/texture file that split upon unzipping. Oh well. I suppose we can just upload the jpg pics directly. I'll do this with some of mine later.
-
08-20-2006, 09:13 PM #58
Registered

- Join Date
- Feb 2006
- Posts
- 10
Hello Diarmaid
Open the Library folder where your installed SketchUp and add a new file New.skm
Then there will be a New blank page in your Materials library open it and then In Model right click on the texture add to Library
The texture will be added to New.skm and you can upload the New.skm in sted of the pics.
Edit:
Try to putt this Brick2.skm in the Library I added 8 new Brick textures
-
09-14-2006, 09:25 PM #59
Banned
- Join Date
- Apr 2006
- Posts
- 1257
That Brick2 didn't work for some reason. It kept saying Not Found, and even when I could see it copied into the folder, and it showed up as an option in the skup Materials Browser it said this and wouldn't load. I cant figure it out. Could you upload a different material for me to try? Thanks.
L8rs.
-
09-18-2006, 11:27 PM #60
Banned
- Join Date
- Apr 2006
- Posts
- 1257
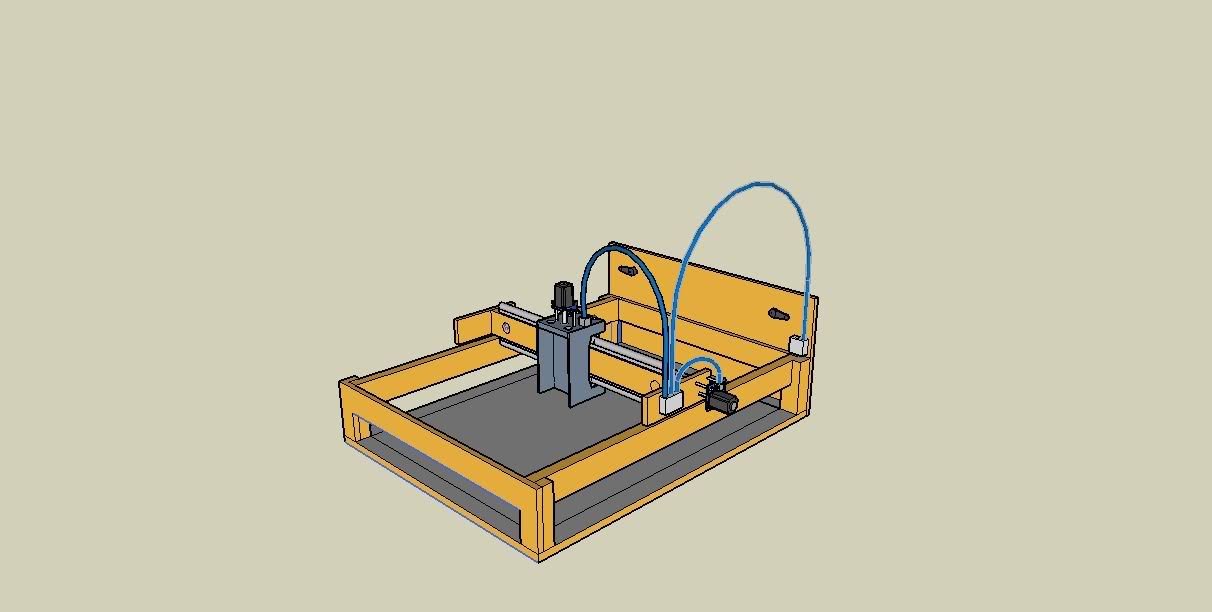
Does anyone know an accurate and easier way to do this in sketchup?
I want to draw a solid bendy tube with a second smaller solid bendy rod inside it.
I tried these steps:
1) Make a circle and offset it
2) Draw lots of normal bendy lines from each of the inner and outer circles to the end point.
3) Used 'follow me' on the inner first, then seperately on the outer.
But its quite a complex system of bends for piping and my bends never seem to line up perfectly for both tubes all the way around, with the inner tube sometimes even protruding out of the outer one.
Any ideas?

 Reply With Quote
