


Dear William D,
Thank you for getting your fingers dirty. Great posts.
That counts for a lot more than my two cents.
Anyway here they are...
Production lines need to pump out the product, and whether they are building GRP boat hulls, or epoxy composites, they need to do it fast.
That means that they have to lay up the mould and get the cured product out of the mould as quickly as is economically possible. They therefore use a fast curing resin and as much catalyst as possible because it speeds up production.
This means that the exothermic reaction is probably fairly large and speeds the cure. Exotherm will be about as large as they can get away with without distorting the mould or setting fire to the facility.
In your case, as a non-production craftsman, there is really no need for speed.
IMVVHO, what you need for a successful epoxy/granite/sand mix is a mixed resin mixture that is extremely non-viscous, (ie really thin) so that it can thoroughly "wet" all parts of the aggregates as it goes into the mould, or when it is in there before it is curing.
I think that the best way to do this would be to use a really, really slow curing epoxy resin and absolutely as little catalyst as possible.
Under these conditions, you may well be able to heat the resin, catalyst and aggregates to make the mix "flow" well for some considerable period before the whole shebang starts setting up. The resin mix will become less gloopy purely due to the application of external heat. The catalyst kicks in later.
Just a thought,
Best wishes
Martin
Best wishes
Martin
Thread: Polymer Concrete Tests (PICS)
Results 21 to 40 of 47
-
03-06-2007, 12:48 AM #21
 Member
- Join Date
- Dec 2005
- Posts
- 1408
-
03-06-2007, 12:53 AM #22
Registered
- Join Date
- May 2005
- Posts
- 674
William, this is pretty cool.
Continuous cast iron costs around $1.60-$2.00 per pound (Dura-bar, Versabar, etc). Custom castings are out of the question for individuals like myself.
My rough calculation based on 10lbs/gallon of epoxy (in large quantities) = $2.93 per pound. Add in the aggregate, which is practically free, and the cost drops to about 30-35 cents per pound. Much cheaper than cast iron. Then factor in the much lower density, and the price per given volume is even less.
I'd be more interested in filling a 1/4" thick steel tube or weldment (box) with this stuff than making a standalone molding. The steel would be easier to drill, tap, and grind, and it would offer a hard, non elastic surface for mounting stuff.
-
03-06-2007, 03:38 AM #23
Registered
- Join Date
- Sep 2005
- Posts
- 249
Another quick and interesting observation; I took the block I had poured last night, and did the heat thing. I did it a little too much, and it burned. Definetly doesn't smell good. It was pretty dang hard surface though. So I decided to see how it would stand up to a drill. Oh yeah, and I beat the crap out of it with a hammer and some edge tools, didn't do anything to it. This thing is solid. I want to break it in half and see about air and what not on the inside.
So anyways, I used my drill press to start drilling a hold. It didn't get very far! It was basically just scratching the epoxy before it got to the rock. The interesting thing though, is that I didn't really feel any of the vibration in my hand, which was holding the block. The head of my drill press was having a problem though.
So this got me thinking, I can have the biggest base and sides and gantry for my mill, but if most of the vibrations are going to be going through the head, I will have to make sure there's no weak link in the chain. I'm hoping to start off with a mini-mill head at first, the move up from there. I don't even expect it to do anything a mini mill wouldn't power wise, just a different work space. Any thoughts on this? I'm going to start a thread soon with my gantry mill I'm doing this all for. I'll probably ask more there.
-
03-07-2007, 08:53 AM #24
Registered
- Join Date
- Sep 2005
- Posts
- 249
Some more pics and comments.
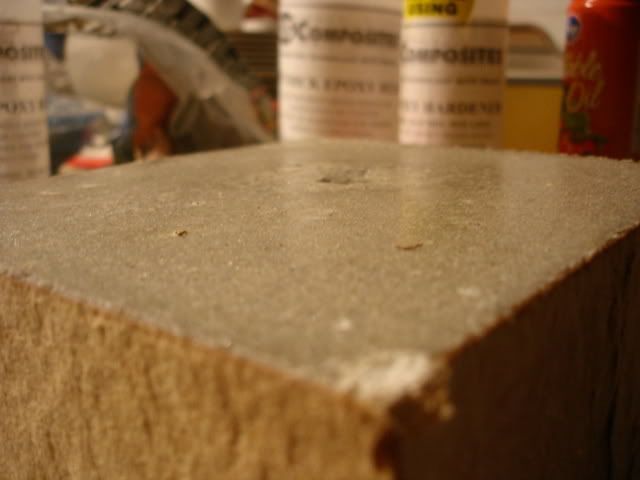
I've discovered I do indeed have too thick an epoxy. I will be ordering a gallong of the thin stuff, and do more testing. I used smaller rocks this time, and the same sand as a filler. I noticed with the thicker epoxy that the big rocks will surface to the top when you tamp it. I think that will go away when I get the epoxy viscocity right.
Anyway, here's some pics of my setup.
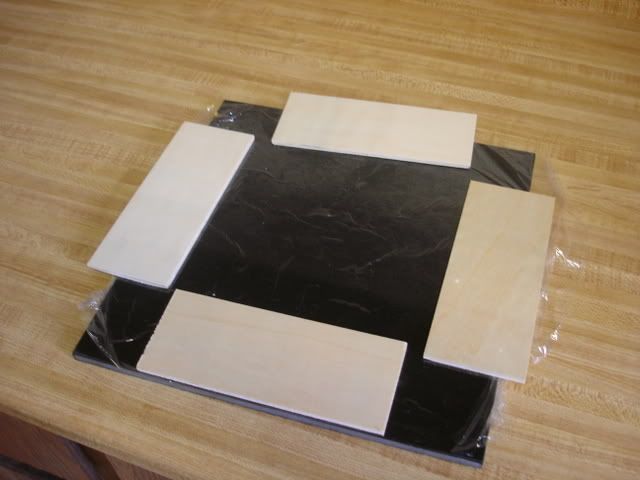
This is my granite plate with saran wrap, and some wood sheets to act as a mold.
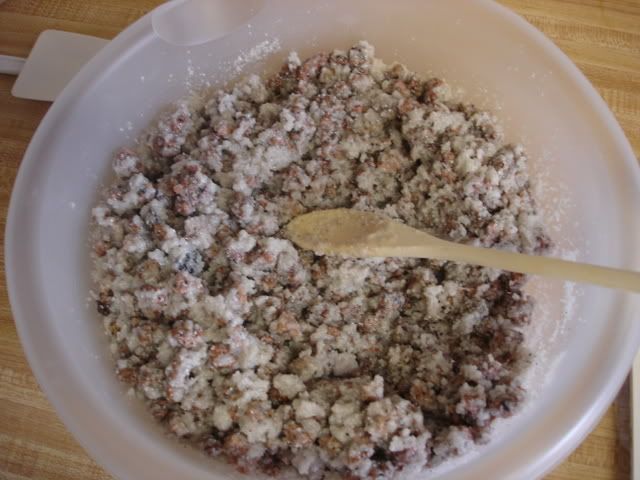
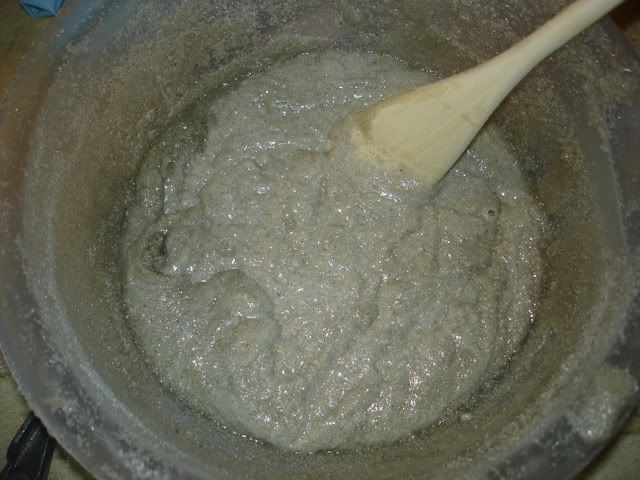
Here was the mix before pouring. As you can see, not very pourable. I just scooped it out and tamped it into the mold. Definetly need to work on a better flow. Based on the cps of each epoxy, I expect the thinner stuff to be REALLY thin in comparison.
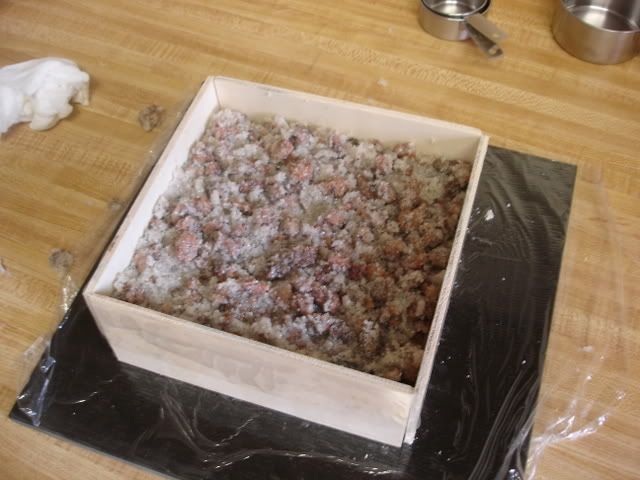
Here is a pic inside the mold. I had used some tape to hold the four sides together. Nothing too fancy.
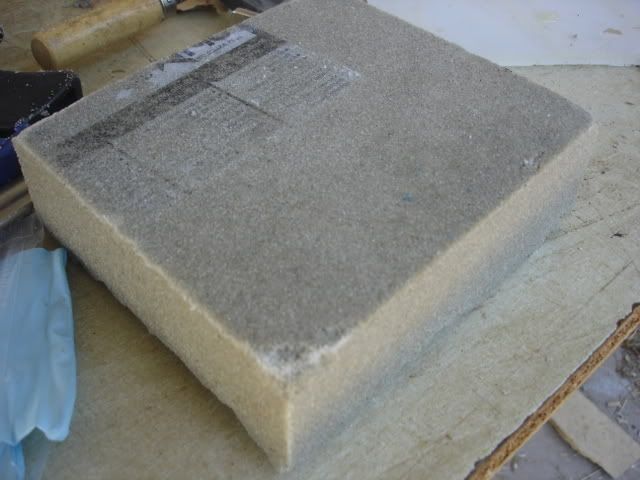
This thicker epoxy sets REALLY fast. I took it out of the mold 4 hours later. Or rather, had to break off the sides.

Unfortunately, the bottom had stuck to the granite place in some places, so it didn't immediately come off. Later on, I pryed it up, counting on something breaking. But it was just a few little spots, and nothing was damaged. As you can probably see from the picture, the epoxy was setteling again on the bottom. I think the thinner stuff will solve this also.
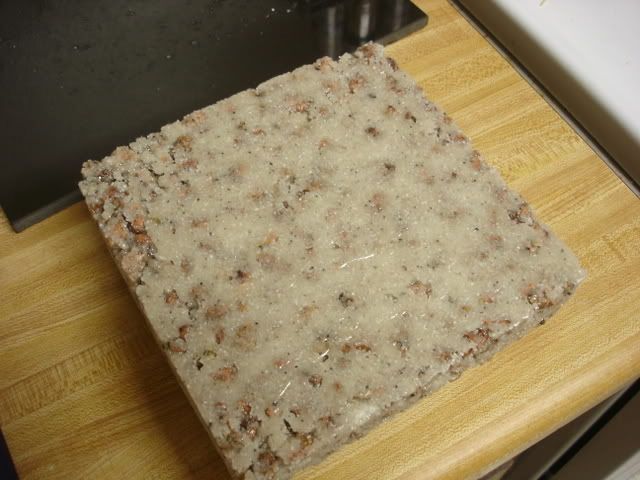
This thicker stuff gets real hard, real fast. I really won't be using it for molds anymore, but probably just some standard quick epoxy holding stuff. I should be set for awhile!
More pics and tests will ensue after I get my new epoxy. Definetly think that will resolve some issues.
-
03-07-2007, 09:05 AM #25
Community Moderator


- Join Date
- Mar 2004
- Posts
- 1661
Thumbs up William!
This is interesting, as I've been thinking of making a large epoxy "table plate" for my new gantry router. I use a lot of epoxy, for example to line up guide rails. So a epoxi base would be natural for me. Some fibres for reinforcement and we're good to go!
If you want the epoxi to cure slower, i.e. getting longer pot life, use a big bowl and keep it cold until it's going to be used.
Regards,
Sven
-
03-07-2007, 09:09 AM #26
Community Moderator
- Join Date
- Mar 2004
- Posts
- 1661
Oh, by the way, a DIY-release agent for the surfaces: car wax.
Vax them well two times and polish it with a thin layer of oil. Normal veggie oil is good and easy to spread.
-
03-07-2007, 10:05 AM #27
Registered
- Join Date
- Sep 2005
- Posts
- 249
Thanks for the tips!
-
03-07-2007, 03:51 PM #28
Registered
- Join Date
- Sep 2006
- Posts
- 157
Great stuff,
This might have been mentioned already but here are a couple things I remember/ thought of.
First of all basic epoxy becomes the consistency of hard rubber at 140 degrees. So in a high heat environment you could deformation and potentially an effect called calorific absorption. There are post cured version which probably have less sensitivity to heat. However this probably beyond the scope of what you are looking for.
An acid test on the structural properties might be improved by creating strips say 1" by 12"+. This would then allow you to test the material without a supported span (use supports on either side). The reason being you will need to know how much support is needed or if you need
longitudinal stiffening or similar. Also, it will allow you to look beyond compressive strength.
Ultimately, masonry sand will have slightly better characteristics because play sand has softer edges and will make a weaker matrix.
Also if your large aggregate came to the top then you should vibrate less. The heating will handle the air problem.
-
04-10-2007, 03:55 PM #29
Registered

- Join Date
- Dec 2005
- Posts
- 77
Thank you William and other contributors on this thread. You have all given me hope that I might be able to cast a machine base. I thought this was beyond me, but maybe it isn't. I have ordered a polymer concrete base for my milling machine, but it really is about 6 inches shorter than ideal. Perhaps with this technique I can make one myself that is the right length. Thank you again.
Barry Young
Young Camera Company
-
04-11-2007, 06:10 PM #30
Registered
- Join Date
- Sep 2005
- Posts
- 249
Sorry for the delay in posting. My wife and I had our new baby boy born at 26 weeks, so I've been at work, school or the hospital. Plus taking care of my two little girls. But, I'm EXTREMELY committed to this project. I've already ordered some more low viscocity epoxy, and will be experimenting with that. There's some awesome samples on the main E/G thread, and it's great how people are contributing so much. I certainly think this is a good DIY project within reach by most. I also am desing mill and lathe beds to utilize this stuff. Hoping to have some more pictures and results over the next few days.
-
04-12-2007, 02:04 AM #31
*Registered User*
- Join Date
- Jan 2007
- Posts
- 8
You might want to drill and tap BEFORE you pour and put well waxed bolts in place. Drilling and tapping granite is not for wimps!I'd be more interested in filling a 1/4" thick steel tube or weldment (box) with this stuff than making a standalone molding. The steel would be easier to drill, tap, and grind, and it would offer a hard, non elastic surface for mounting stuff.
-
04-17-2007, 02:50 AM #32
Registered
- Join Date
- Jul 2006
- Posts
- 130
I was thinking, depending on size. Get some Threaded rod couplers and put those in place. Cap them with plugs (small piece of rod threaded into it, set screw, whatever you have) then hold them in place with your bolts. Use a washer and you have something that could hold some pretty heavy duty torque. Originally Posted by SirDave144

Now poor and, Viola.
-
04-23-2007, 05:13 PM #33
Registered
- Join Date
- Sep 2005
- Posts
- 249
Finally an update!
So, I had done another sample, and finally got around to some testing. Unfortunately the wife has the camera, so picutres will follow shortly.
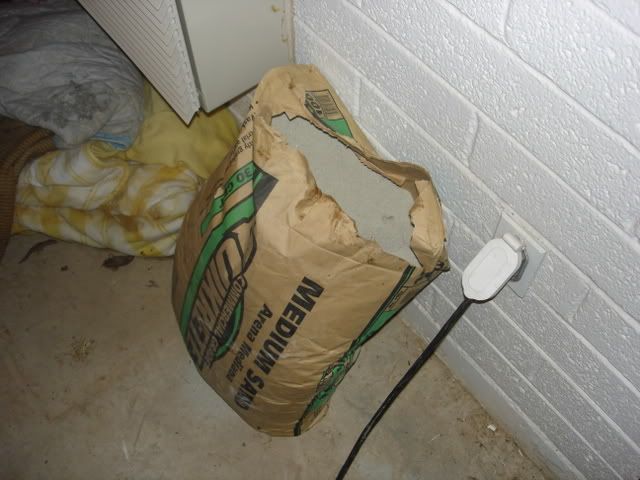
I went to Lowe's and got some "Medium" sand, came in a 100 lb bag. It was also listed as 30 grit. It seemed pretty fine, but you'll have an actual comparison with the photos.
I decided to make a mold using just that sand, and the thick epoxy I have on hand. I used some MDF pieces I had cut for a mold, with the bottom being a piece of acrylic sheet. Nothing too fancy.
So I started out by doing small batches. By volume, I started with 1 cup of mixed epoxy. Then I would put the sand in 1/2 cup at a time. I would mix it and examine the consistency. Keep in mind I'm using the epoxy that's like thick molasses.
So I got to about 3 cups total of sand before it looked like it was still semi 'pourable.' For the last cup of sand added, I would have to get in there with my hands and make sure it was mixed well enough. The plus side was that it went in the mold and compacted very well. I really only had to use my hand to pat it down. The best think I could compare it to, (and it's a really good comparison, which is odd) is that it's like bread dough. It reminded me of kneading bread dough. Werid, huh?
So I did three batches like that to fill up a 6x6x4" mold. So then I came back 24 hours later to see the results. It didn't stick at all to the bottom acrylic, which is nice. It did seem through and stick to the MDF. Doh! The bottom was the smoothest I had gotten a mold yet. A little more compaction, and a thinner epoxy would be perfect. I had a sander and a vibrating massage instrument to help vibrate the mix, but they didn't work too well. For thicker batches, definetly need a "higher frequency" vibration. Plus I think the thinner epoxy would have helped.
So then I moved on to 'destructive' testing. I was rather pleased with the appearance of the block, and really liked the consistency. When it came to destroying it, I couldn't do it! I slammed it repeatedly on the concrete floor, against hard edges and all. I literally did that until I was tired! The dang thing would not break. When I would use hammers to bang the surface, it would ding, but just absorb the blow. The edges of the block would chip when hit, but no cracks would appear.
So, I'm giving it to a friend who has a press and some sledge hammers, and he's going to go to town on the thing. I really want to see how the middle ended up, and see if there's any problem with doing multiple batches. Oh, and the batches were only minutes apart.
I really wanted to have some pictures to post with this update, but they will be up shortly.
The tests have well exceeded my expectations, and I'm going to start on making a mold for a 24x30 laser table. It will be good practice, and I will get experience doing bolt holes and what not. I will post images of that later, and probably on another thread.
-
04-23-2007, 06:00 PM #34
Registered
- Join Date
- Jul 2006
- Posts
- 1256
Good work William.
Are you doing destructive tests only at 24hrs?If so very impressive as epoxy takes a week to fully cure.Have you tried heating the mix?This will lower your viscosity.
Larry
-
04-23-2007, 06:21 PM #35
Registered
- Join Date
- Sep 2005
- Posts
- 249
No, I have not tried heating the mix yet. It was also 60 degrees outside when when the epoxy was curing. The stuff is solid after about 6 hours, I could only get to it after 24. Yes, based on what you guys are talking about, this stuff cures very quickly. I'm going to start doing stuff like threaded rod and inserts next, and trying to pull them out for testing.
-
04-24-2007, 06:17 AM #36
Registered
- Join Date
- Sep 2005
- Posts
- 249
Some pics finally!
OK, I'm almost convinced that this thing is indestructable. I have tried everything in my power, and am giving it to a friend tomorrow so that he can try.
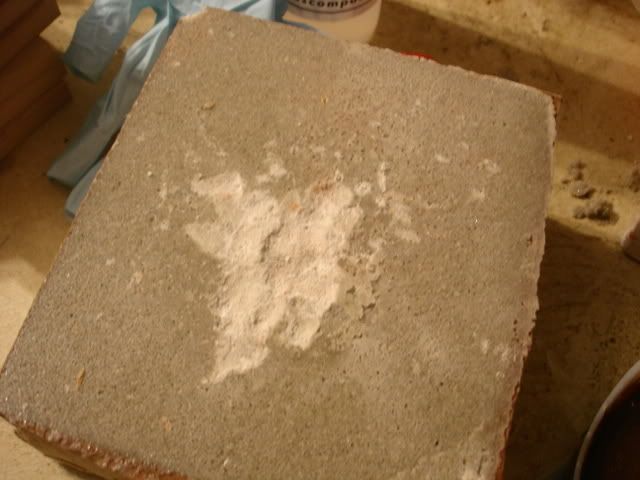
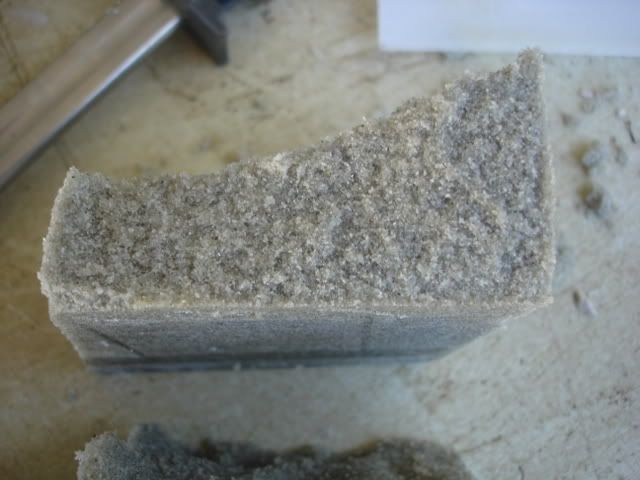
First, here is the block.
It's a little dinged up, because this is after some testing.
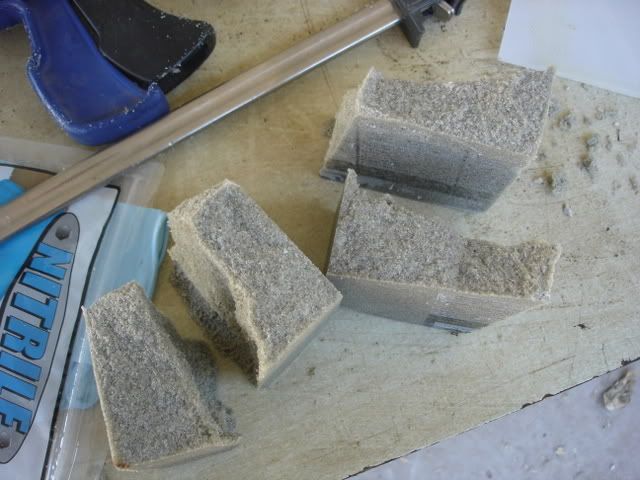
This is what REPEATED blows with a hammer did. I went until my hands hurt to much. All it did was kind of mash some away, SLOWLY but surely.
Here is the sand I used.
I even found a big rock in the backyard and though smashing them together would break it.
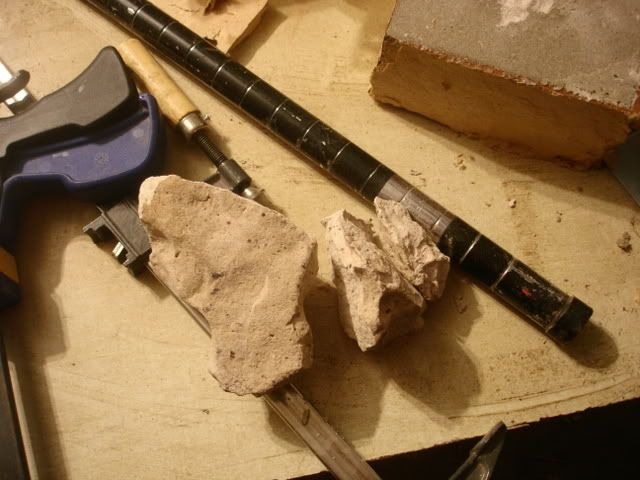
It literally blew the rock up on the first hit. I found out after it exploded, that the rock was a little soft, so it doesn't really count. Plus, it didn't even seem to mar the surface.
I don't know what kind of abuse you guys will be putting your E/G slabs through, but that about does it for me. I don't know how well this will dampen vibrations, but it can sure take a beating without ringing. I'm going to mock up a bigger slab next, and see how much more stable it seems. The sand is pretty cheap, so why not!
-
04-24-2007, 07:36 AM #37
Gold Member
- Join Date
- May 2003
- Posts
- 792
Good job!
-
04-25-2007, 02:52 AM #38
Registered
- Join Date
- May 2005
- Posts
- 674
A sledge hammer will do the trick in a single heavy blow.
-
04-26-2007, 01:35 AM #39
Registered
- Join Date
- Sep 2005
- Posts
- 249
Another test...
I wish it would break with a blow from a sledge hammer! Believe me, I tried. I'm not saying I'm the strongest guy in the world, but I know how to swing a sledge. From what I can tell from this next test, too much epoxy was used.
So for this one, I used 1 cup epoxy, and 5 cups of sand. I believe that results in 16% epoxy. It was definetly a bit more dry. I had to really mix the mixture with my hands to make sure it was good and mixed. It definetly wasn't gummy, but if I made a ball of it in my hands, like packing a snowball, it was basically hold it's shape. So I just had to ram it into the mold a bit more.
Here's some pics.
Here's one cup epoxy, and one cup sand.
This is obviously very pourable, but very expensive for any large structures.
Here is what the block looked like after coming from the mold.
Another interesting observation is that the MDF didn't stick to the sides. The just broke off clean. I guess there wasn't enough epoxy to really stick. Kind of a plus.
After 24 hours, this one broke a bit easier. Although, this was a much thinner than the other sample, and it felt more "brick" like. It only took a couple blows with a hammer while the block was on a wedge. But after looking at the pieces, there's didn't seem to be any air pockets. It seemed to compact pretty well.
I really like the first of the sand samples. It seems to be very strong and what I'm looking for. However, it'v very expensive at 25% epoxy. Next samples are going to have layers. I'm going to do a sand only mix for the surface (bottom), then bigger rocks with sand to fill the gaps, then another layer of sand. That will help with not using too much epoxy. I'm also going to look for those scrap pieces of granite people are talking about. More in the not too distant future.
-
04-26-2007, 02:52 PM #40
Registered
- Join Date
- Dec 2006
- Posts
- 325
William,
16% epoxy by volume equals 8% by weight which should be a minimum, you should try a sample at 20% by volume, it might be a good compromise.
I would like to make a suggestion:
When you make E/G samples, try to make them as identical in size as possible.
Also when you try to break the sample, try to do it the same way also from one sample to another.
Your second sample is weaker than your first one for 2 maybe 3 reasons:
1- the sample is thinner
2- the epoxy resin content is smaller
3- by placing a wedge you increased shear force applied to it.
Which of the above variables really made the difference?
Only God knows and the devil might have an idea LOL
By making the same size samples and using the same testing methods, you know the results you'll get will be according to the mixture made and nothing else.
Best regards
Bruno

 Reply With Quote
Similar Threads
-
Epoxy-Granite machine bases (was Polymer concrete frame?)
By walter in forum Epoxy GraniteReplies: 5052Last Post: 02-08-2024, 12:42 AM -
Polymer Concrete
By ericdwilso in forum Uncategorised MetalWorking MachinesReplies: 10Last Post: 09-14-2009, 07:00 PM -
Tests for Shoptask tolerances?
By pfarber in forum Shopmaster/ShoptaskReplies: 7Last Post: 04-05-2007, 11:26 PM -
Polymer enhanced Concrete Work Area
By jsage in forum Open Source CNC Machine DesignsReplies: 0Last Post: 01-29-2007, 11:37 PM
