


Thanks for the interest and feedback. I am still learning as I go so hopefully if I do something too wrong, someone will let me know :P
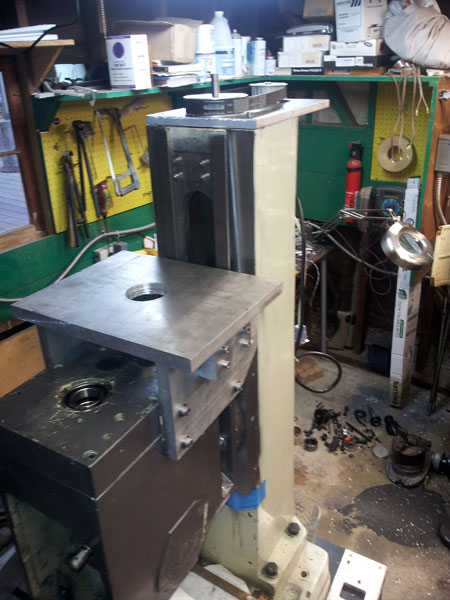
I made a little more progress on the motor mount. Given the size and extra power, I wanted a really stout mount. The horizontal plate on top will bolt to the motor and pivet to adjust the belt tension. The top plate is bigger because the motor diameter is 2 inches larger than the with of the head. I will make the pulleys now I just got my 8 rib poly v belt from Mcmaster Carr. Here is the basic layout:
side view:
Thanks for looking
Results 21 to 40 of 100
-
06-12-2012, 05:18 AM #21
 Registered
- Join Date
- Mar 2010
- Posts
- 156
-
06-21-2012, 04:04 AM #22
Registered
- Join Date
- Mar 2010
- Posts
- 156
update:
I now have all three axis done, motor mount and cerakoted the parts sniper grey to match the hammered grey finish i painted the mill. I am looking forward to assembling it and start things moving finally. This was a bigger project than I thought
Parts ready to go back on the mill:

-
06-21-2012, 05:18 PM #23
Gold Member
- Join Date
- Sep 2006
- Posts
- 1738
Beautiful!! :cheers:
-
06-25-2012, 03:29 AM #24
Registered
- Join Date
- Mar 2010
- Posts
- 156
Made some real progress today:
Completed the VFD conversion by machining 2 identical 8 rib poly v pulleys exactly .0921 distance between 40 degree .072 deep v grooves and mounted the motor:

I am ready to hook up the vfd but am unsure on the wiring for the motor. I found the wiring diagram but am a newbie on these 3 phase motors . Any suggestions on the wiring?

Finally, I hooked up the z axis servo and was able to test it with the heavy motor on it. I only got to run it at less than 50% speed as I was scared I would have a crash otherwise.
VIDEO:
-
06-25-2012, 12:36 PM #25
Gold Member
- Join Date
- Sep 2006
- Posts
- 1738
Nice!!!!
-
06-27-2012, 05:28 PM #26
Registered
- Join Date
- Mar 2010
- Posts
- 156
Update:
I got the belt drive working and AC Tech VFD wired and controlling the motor. I need to adjust the pulley's though as I have a little wobble on the motor side.
I am extremely happy with AC Tech. I hooked it up in 10 minutes and it just works!

Video:
-
07-16-2012, 03:07 AM #27
Registered
- Join Date
- Mar 2010
- Posts
- 156
Update:
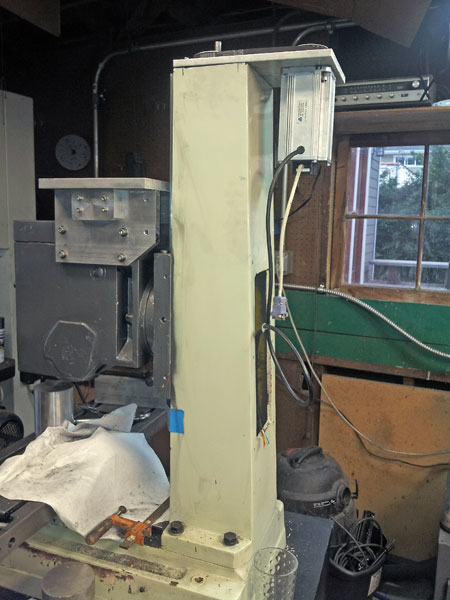
I got back from Milwaukee and got started on the control box. I was going to go with a separate box but ended up re-purposing the stock electronic box instead. Everything fits together except for the pc.
I also re-purposed the stock master switch after seeing it was rated for 30 amps. I also mounted an e-stop switch on the side. I will add another on the front later.
Power and e-stop:

Here is the control box. It has the 3 drives, breakout board and antek power supply. I was able to set up the power switch so I have one 240v going into the box. The power switch controls everything so turning it on sends power to the vfd and spindle via relay and also to the 21 amp power supply:

I cut all the wires to length and soldered/shrink wrapped things and anchored things.
Thanks for looking.
Mark
-
07-30-2012, 03:05 AM #28
Registered
- Join Date
- Mar 2010
- Posts
- 156
Update:
I got the machine working with Mach 3 and Z axis is now functional. I feel like I am drinking from a fire hose but at least I got it working. E-stop, limit switches work and the DMM servos are moving the heavy motor and head with authority:
-
08-08-2012, 04:54 AM #29
Registered
- Join Date
- Aug 2011
- Posts
- 0
 AC servo driver
Hi Gt40
i've seen your video and read this thread, its owesome, great job
i have some desired to retrofit my CNC mill, it came with sinumerik that i'm not familiar with it..
i want to change unto pc based mach3 too..
the machine came with 3phse ACservodriver(ampli) and motor
im very confused, how to wiring the acdriver to my brekout motion control, which port that i have to connect, and which port not necessary?
can you msg me your wiring connection, or post it here..
just from your PC-breakout-driver-servo
ur advice will very helpfull me to do my project too...
sorry if my english bad...i came from indonesia
best regrads
abe
-
08-09-2012, 02:58 AM #30
Registered
- Join Date
- Mar 2010
- Posts
- 156
Thanks for your comments. I would suggest going to your manufacturer of your servos and breakout board. Originally Posted by aaabeee

I just followed the wiring on page 7:
DMM Technology Corp.
I think wiring will be specific to your board and servos so you should find the wiring for what you have.
good luck
-
08-18-2012, 12:48 AM #31
Registered
- Join Date
- Mar 2010
- Posts
- 156
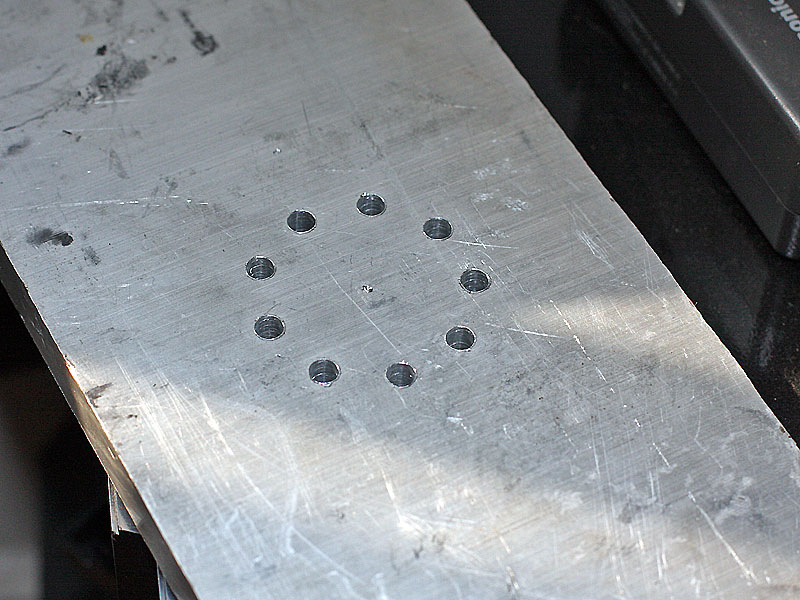
update: first chips video!
I finally got all 3 axis working and spindle control. I still need to properly calibrate things but things are finally working.
Here is a video using the mach3 circular hole wizard to drill 9 holes:
Finished:
-
08-18-2012, 01:17 AM #32
Gold Member
- Join Date
- Jan 2010
- Posts
- 2141
Very cool...
My PM-45M is scheduled to be delivered next week. I have the standard motor, so I will need to figure out either a motor swap or a belt drive or both to get a higher spindle speed (since I intend to use it with aluminum). To start out, however, I will be using it manually to do some work with steel parts while I get some practice using the mill.
-
08-20-2012, 01:22 AM #33
Registered
- Join Date
- Mar 2010
- Posts
- 156
Belt drive was pretty easy actually thanks to the conversions already on this site. Best of luck to you. Originally Posted by doorknob
On another note, accuracy is looking pretty good on simple test calibration:
Mach 3 has a built in DRO/ Jog function with "go to capabilities. You can also add a pendant which is basically a hand held controller to do this while you look at the mill instead of the computer screen if you want. So basically, I have a 3 axis power feed mill with jog capabiility to 10th via Mach 3. Since as I am still learning how program it, this is actually really cool because I can move the table faster and better than I could before and cutting/ drilling is smoother than manual. The go to and zero functions are pretty neat as you can tell it to move all 3 axis to a given point.
Repeatability seems to be pretty good too. Below is a video where I zeroed the dro in Mach 3, zeroed the indicator and then moved the table and then hit move to zero button on mach 3:
-
08-21-2012, 02:36 PM #34
Registered
- Join Date
- Mar 2010
- Posts
- 156
I went beyond drilling and cut my first chips, machining a 1.5" diameter x .45" deep pocket in aluminum. It measured 1.5124" diameter and isn't perfectly round. I think I need to properly dial in Mach3. there doesn't seem to be any measureable backlash at least. I am still learning all of this and not sure of the best way to calibrate things.
Video:
https://vimeo.com/user1548682/pm45m-first-cuts
-
08-21-2012, 03:18 PM #35
Gold Member
- Join Date
- Jun 2011
- Posts
- 695
Here I just happen to have this bookmarked. Axis Calibration
-
08-22-2012, 05:15 AM #36
Registered
- Join Date
- Mar 2010
- Posts
- 156
Thanks a lot. I followed the video and the 3 axis got .00005 to .0001 calibrated. I cut another pocket here: Originally Posted by FannBlade
Things are much better but the hole still is a tiny oval.
-
08-27-2012, 03:31 PM #37
Registered
- Join Date
- Mar 2010
- Posts
- 156
Update:
I installed my DRO back on the machine and recalibrated things. MUCH better. I still have to play with backlash compensation but the mill is finally starting to cut half way decent.
Here is a video cutting a 2.5" circle through 1/2" thick 6061:
Finished:
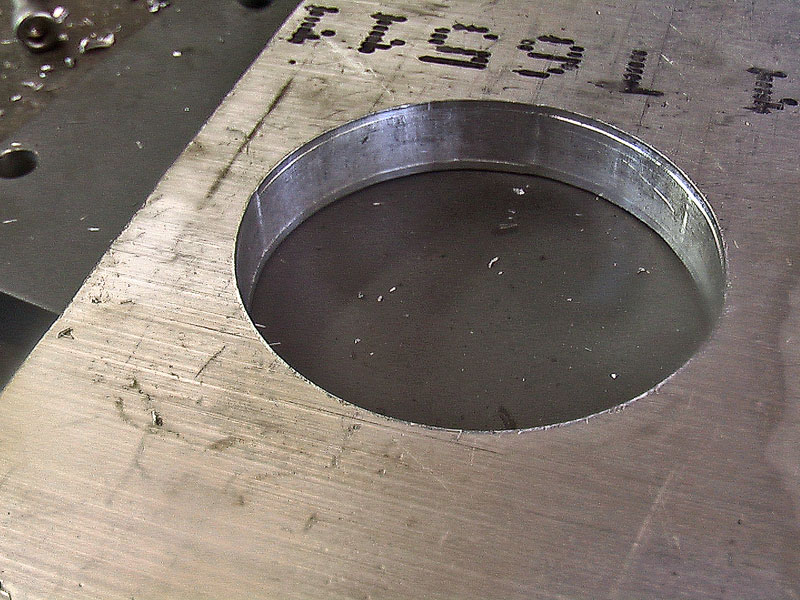
Measured:
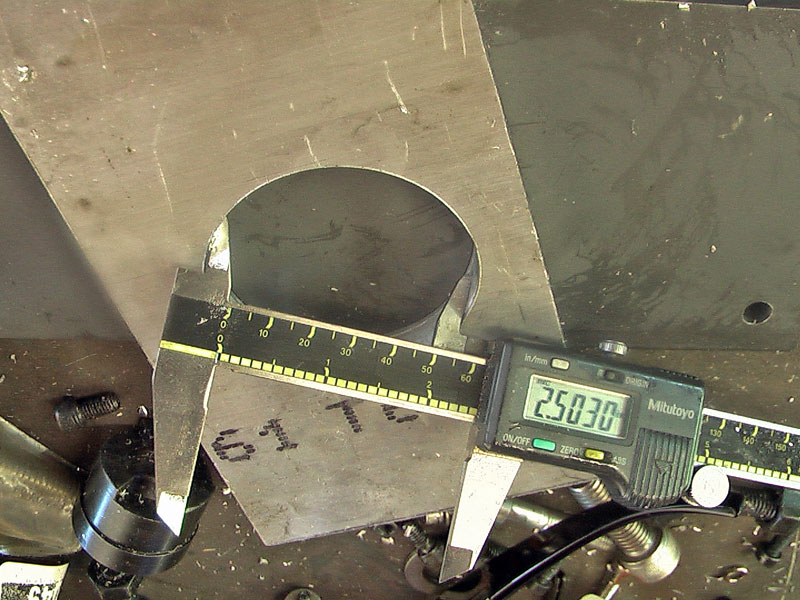
Not perfect but getting there. I measured 2.4845" at smallest and 2.5030" at widest point without use of backlash compensation.
At least the hole is roughly 2.5" and not a full oval any more. Calibrating the steps over the full length of travel made a huge difference.
Any suggestions would be appreciated.
Thanks for looking
-
08-31-2012, 04:54 PM #38
Registered
- Join Date
- Mar 2010
- Posts
- 156
Update:
I ran the belt driven spindle and measured 7680 rpm with a laser tach. Shortly there after the stock bearings started to smoke from the speed. New angular contact bearings coming tomorrrow. I can verify the following sizes for my PM45M mill that I measured and ordered:
Lower bearing: Kit10853
7207CYP4 Nachi Angular Contact Bearing 35x72x17 Abec-7
Upper bearing: Kit10852
7206CYP4 Nachi Angular Contact Bearing 30x62x16 Abec-7
In addition for the belt drive bearing tube that is per GD Marsh's design, I ordered:
(2) Kit8891
7007B Angular Contact Bearing 35x62x14 Ball Bearings
FYI, make sure you install the bearings correctly facing the correct direction. I managed to do both wrong and killed a set of cheap angular contact bearings from vxb by installing them with the cage plate facing out which is backwards + tapping them in with a dead blow hammer.
Don't beat on bearings. In hindsight, this was completely obvious :P
Handle with care and use a press etc and properly support them by putting the load on the outside only and not the floating assembly in the center.
Good video of the process from Hoss:
[ame=http://www.youtube.com/watch?v=hP-XvbV7Pc4]G0704 Spindle Bearing Replacement - YouTube[/ame]
I ended up buying the fancy abec7 bearings because I want the machine as quiet and smooth as possible.
On another note, I found that I had failed to properly tighten my y axis center bearing block and that is why my test hole above was less than ideal. With the DRO installed, total backlash is now measuring 0.0002 or less.
-
08-31-2012, 08:17 PM #39
Gold Member
- Join Date
- Jan 2010
- Posts
- 2141
I will watch the Hoss video above - but if you care to take any photos of your ok and show them here it would be appreciated.
I would imagine that adding a belt drive and replacing spindle bearings are in my future, too..
-
09-01-2012, 05:37 AM #40
Registered
- Join Date
- Jul 2012
- Posts
- 0
On your last video, I'm going to guess that's a 3/8" end mill, right? How fast was the spindle running?

 Reply With Quote
Similar Threads
-
An Aussie IH Clone Build (Long Travel RF45)
By Wallerawang in forum Benchtop MachinesReplies: 91Last Post: 08-28-2014, 10:22 AM -
What RF45 clone should I get?
By Nigel Tufnel in forum Benchtop MachinesReplies: 2Last Post: 12-03-2013, 06:24 AM -
Build Thread: HF 8x12 variable speed DC motor conversion
By gt40 in forum Mini LatheReplies: 1Last Post: 04-13-2010, 10:16 PM -
X3 or RF45 clone?
By logjammer in forum Benchtop MachinesReplies: 13Last Post: 12-14-2006, 03:34 PM -
convert rf45 type to belt variable speed and some cnc info?
By ataxy in forum Knee Vertical MillsReplies: 20Last Post: 09-03-2006, 04:58 PM
