


Hello Pete,
i have a Compct 6P wich is similar to the 120P. A very nice and sturdy machine. My machine was in a very good condition so i changed nothing. Wich chuck will you use? The pneumatic one opens only 3mm. I thought about changing the chuck to a bigger manual one. But then i realized that if i do so i could not use boring tools. Not so good for hobby use. I think i´will have to buy the manual chuck from Emco but it costs about 650 €.
I´m very interresed in your conversion.
greetings Rene
Thread: Emco 120p Rebuild
Results 1 to 20 of 31
Hybrid View
-
04-08-2011, 08:11 AM #1
 Registered
- Join Date
- Feb 2007
- Posts
- 24
-
06-08-2011, 09:23 PM #2
Registered
- Join Date
- Feb 2007
- Posts
- 24
Hello Pete,
anything new?
Greetings Rene
-
06-08-2011, 09:49 PM #3
Registered
- Join Date
- Jul 2006
- Posts
- 367
Lots, I have installed a 4 hp induction motor, with a VFD. There are now 2 new stepper motors controlled by Kelling's solid state drivers Originally Posted by rot


Everything runs great under Mach3, speed control, stepper movement, etc.
I'll try to post some pics soon...
Lastly, I'm currently working on the tool changer. I'm currently researching my options
pete
-
06-14-2011, 11:04 PM #4
Registered
- Join Date
- Jul 2006
- Posts
- 367
Here's my progress ..so far.
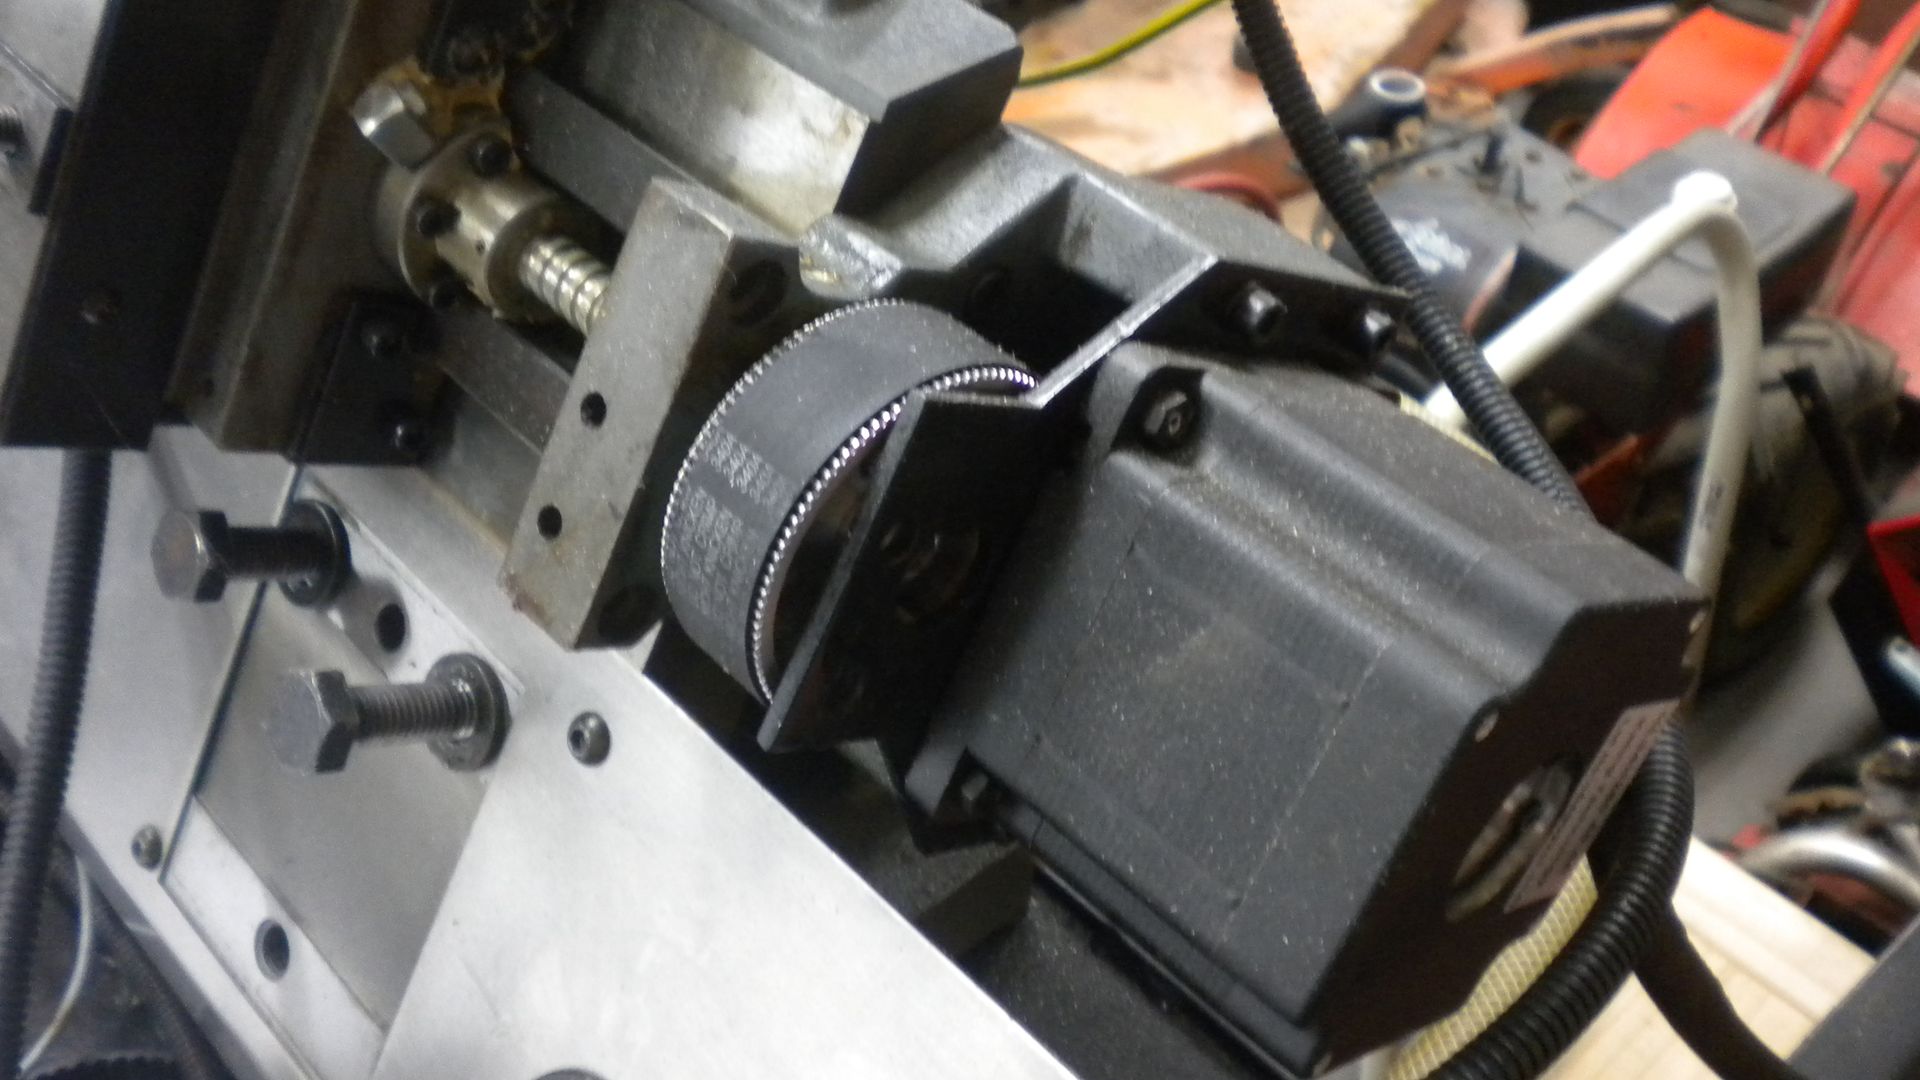
Here's my X axis...I had to mill the the ID of the original bracket and pulley to fit the new stepper.
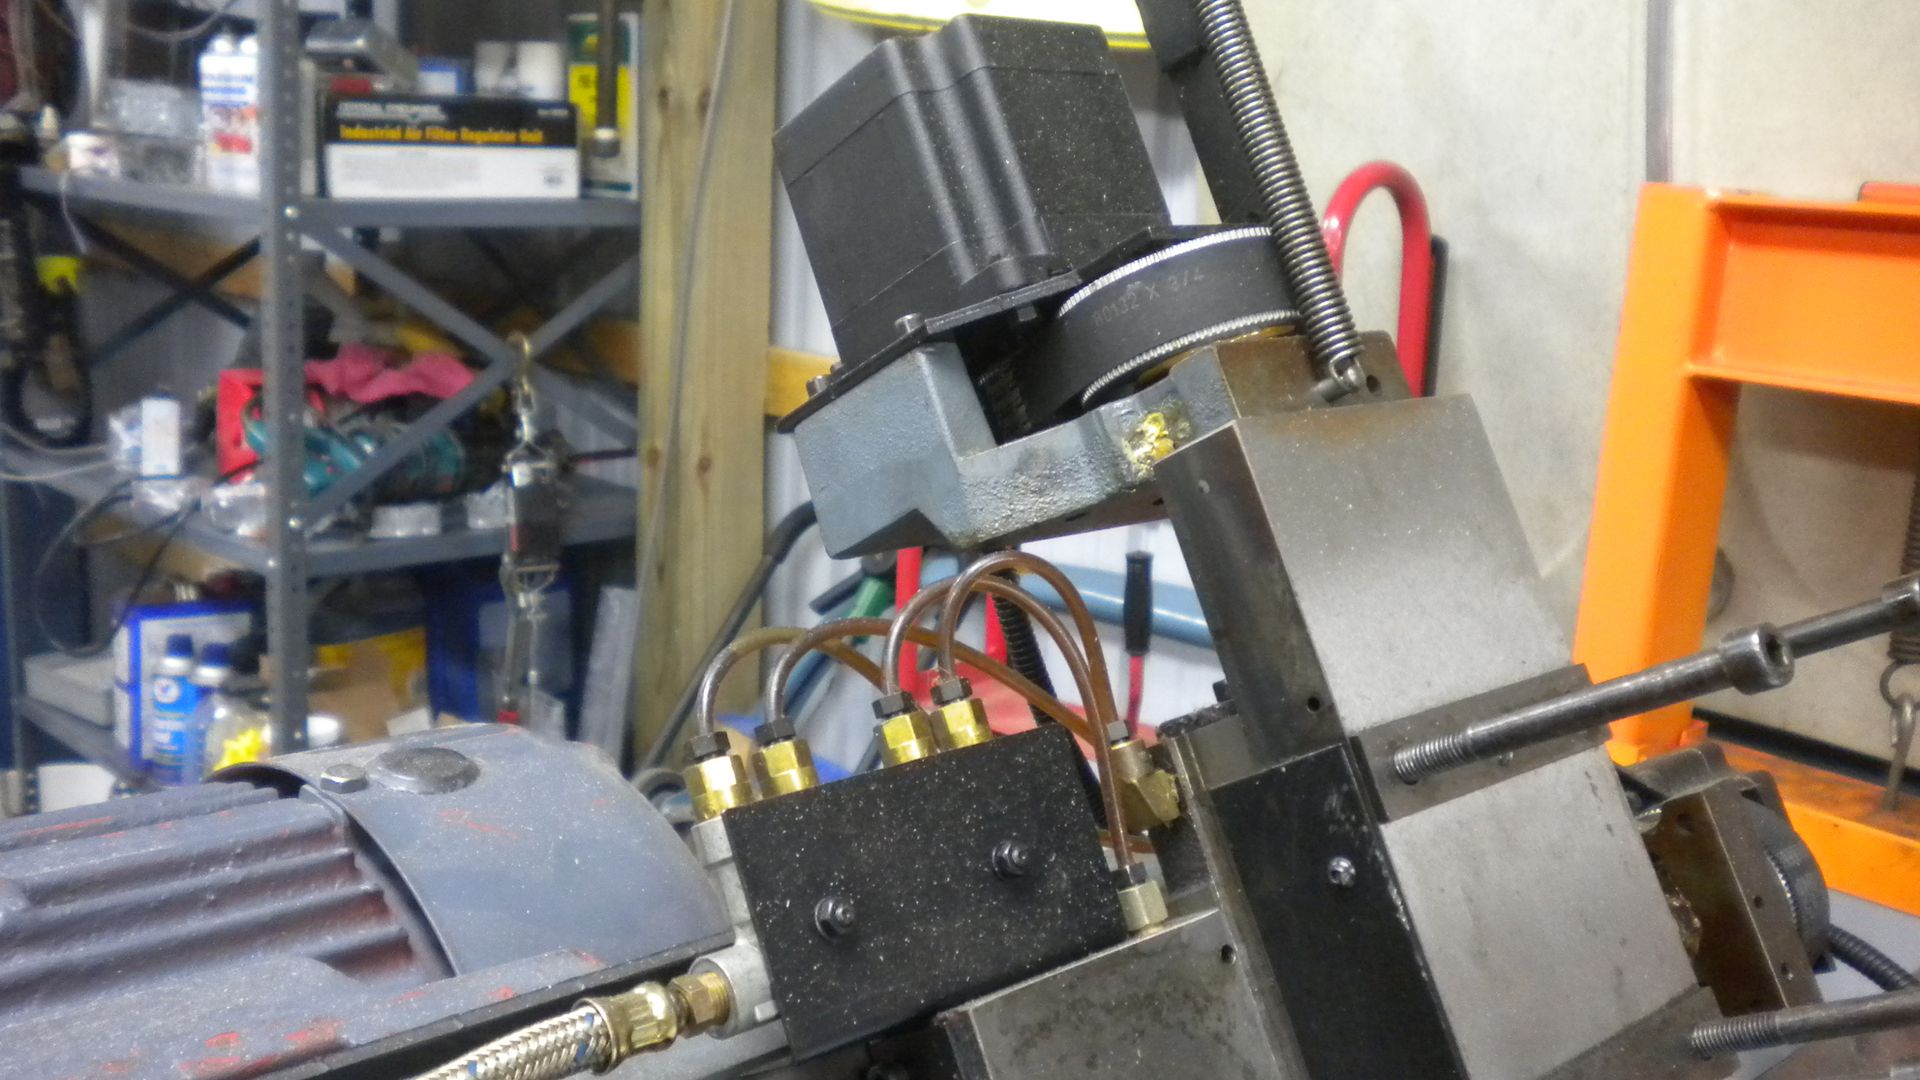
Here's the Z axis...
This is the motor that will provide power...I'm using a Huanyang 5 hp vfd to convert to 3 phase.
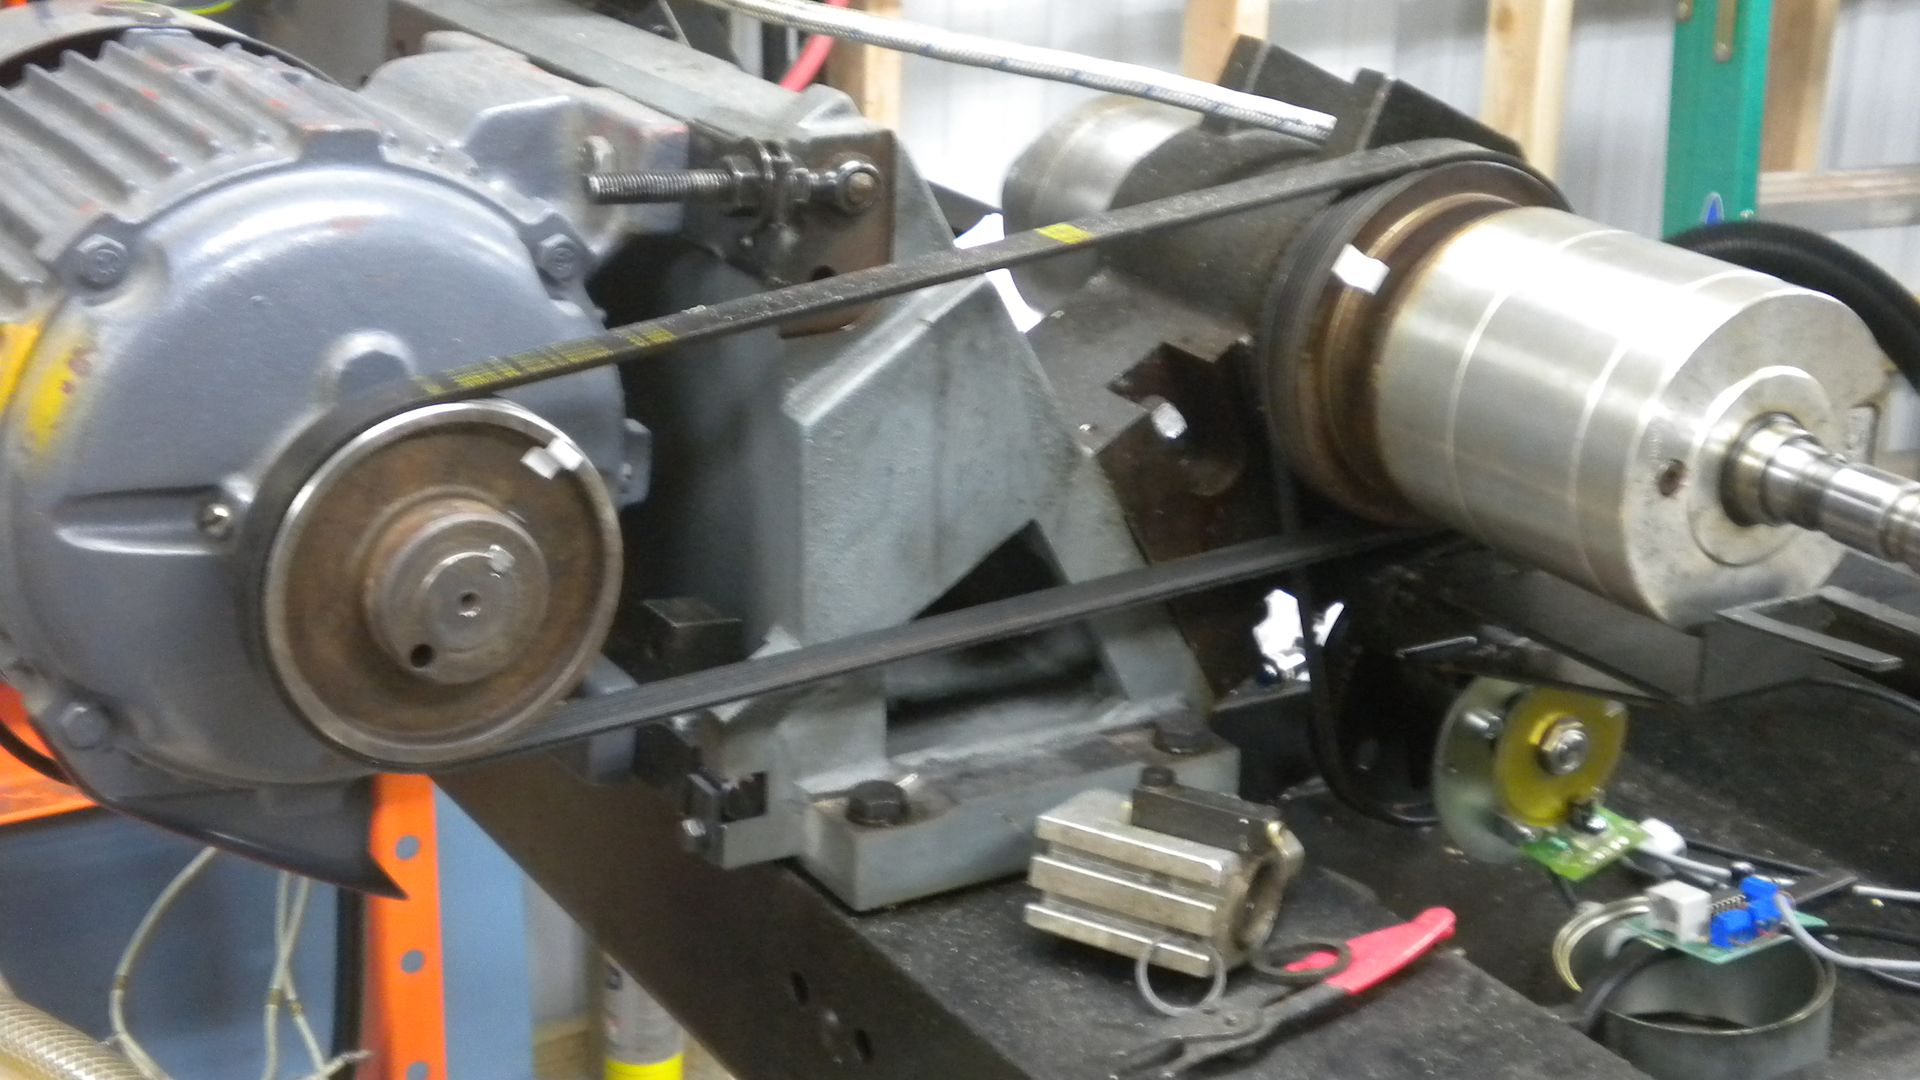
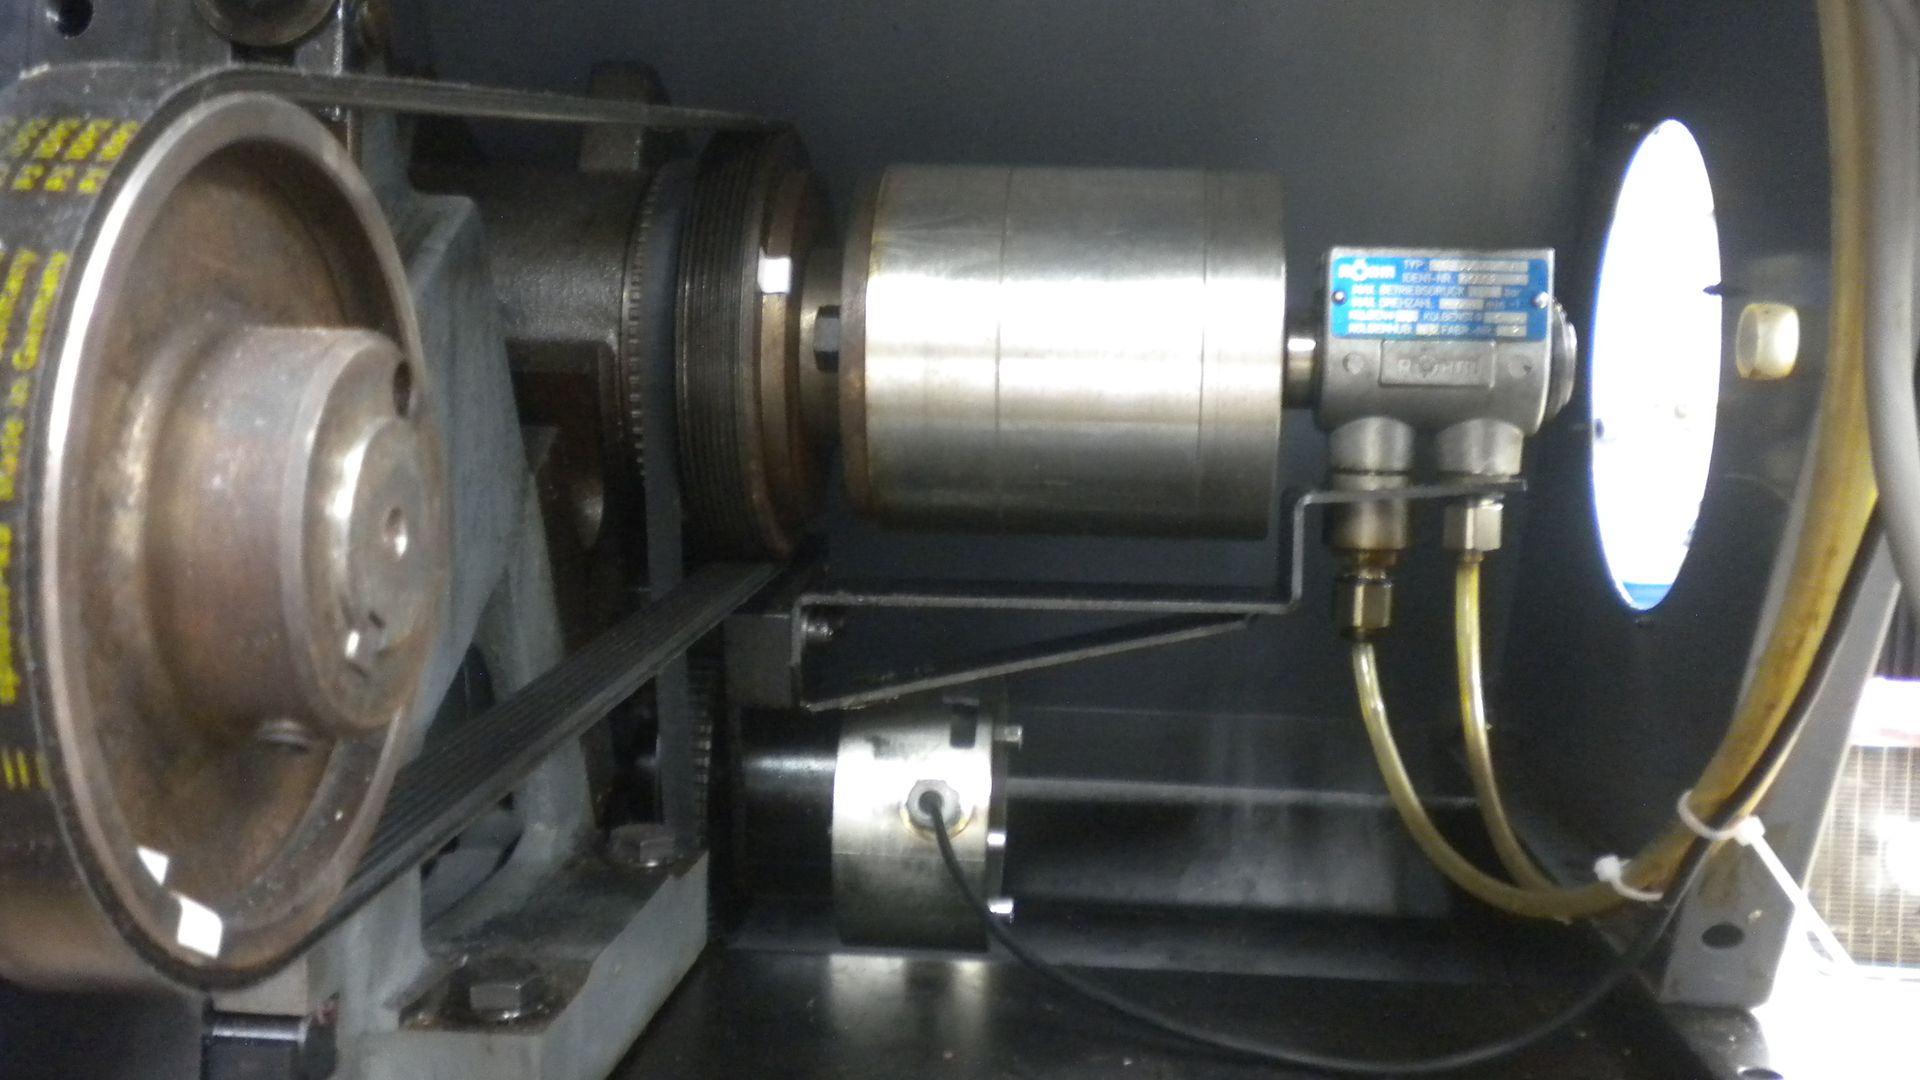
I used the original pulley, just opened it up a bit to fit the shaft. Both pulley's are original. I'm getting 2875 rpm for the high.
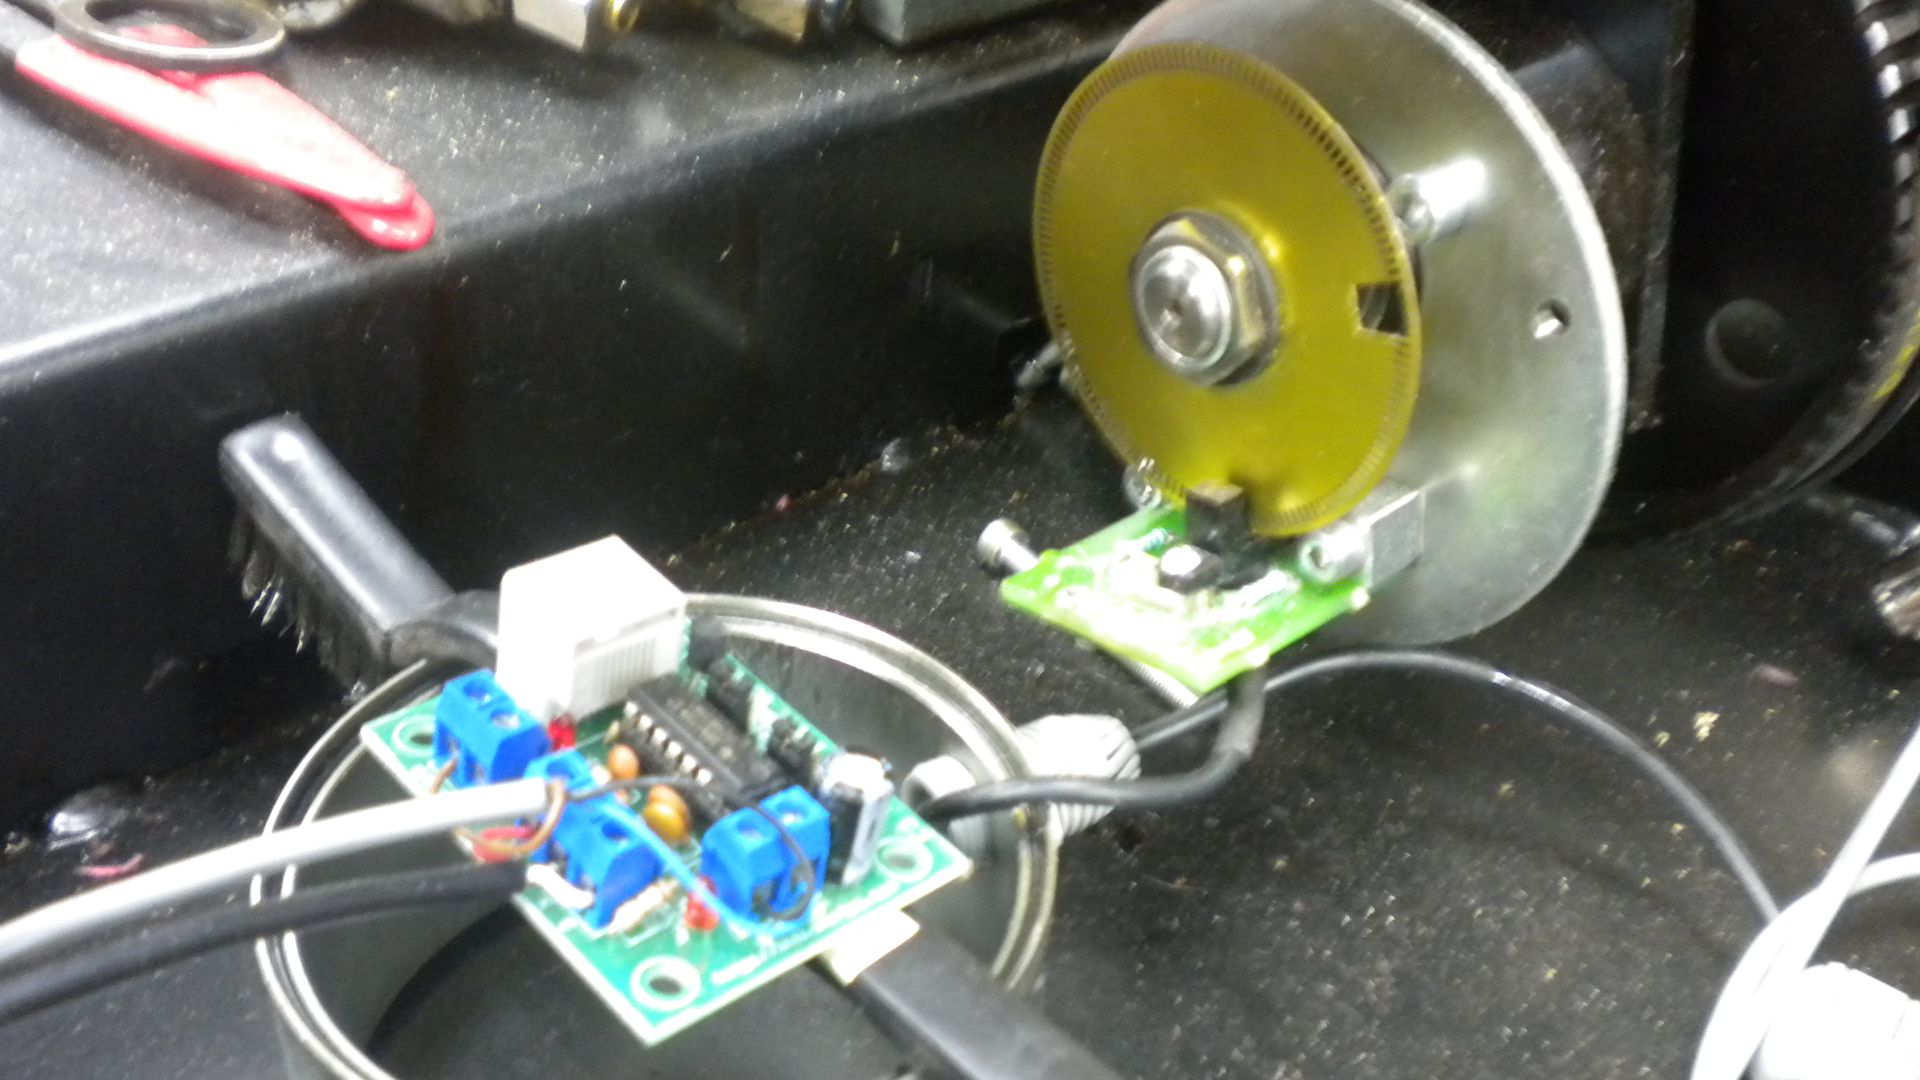
Here is how I'm reading and adjusting my speeds....I'm using the original disc and housing. The gap is about .250" in width. The optical sensor is Arturo's C3 index pulse card . The sensor sits on top of the original circuit board and is in a position so that it only reads the larger gap.
I have ran everything thru Mach 3 and all seems good so far. I'm able to change speeds and I have good movement with the steppers. Next comes the homing and limit switches. I've decided to use proximity switches.
I still have a lot to learn, as this is my ever involvement in CNC.
pete
-
07-19-2011, 12:11 PM #5
Registered
- Join Date
- Jul 2006
- Posts
- 367
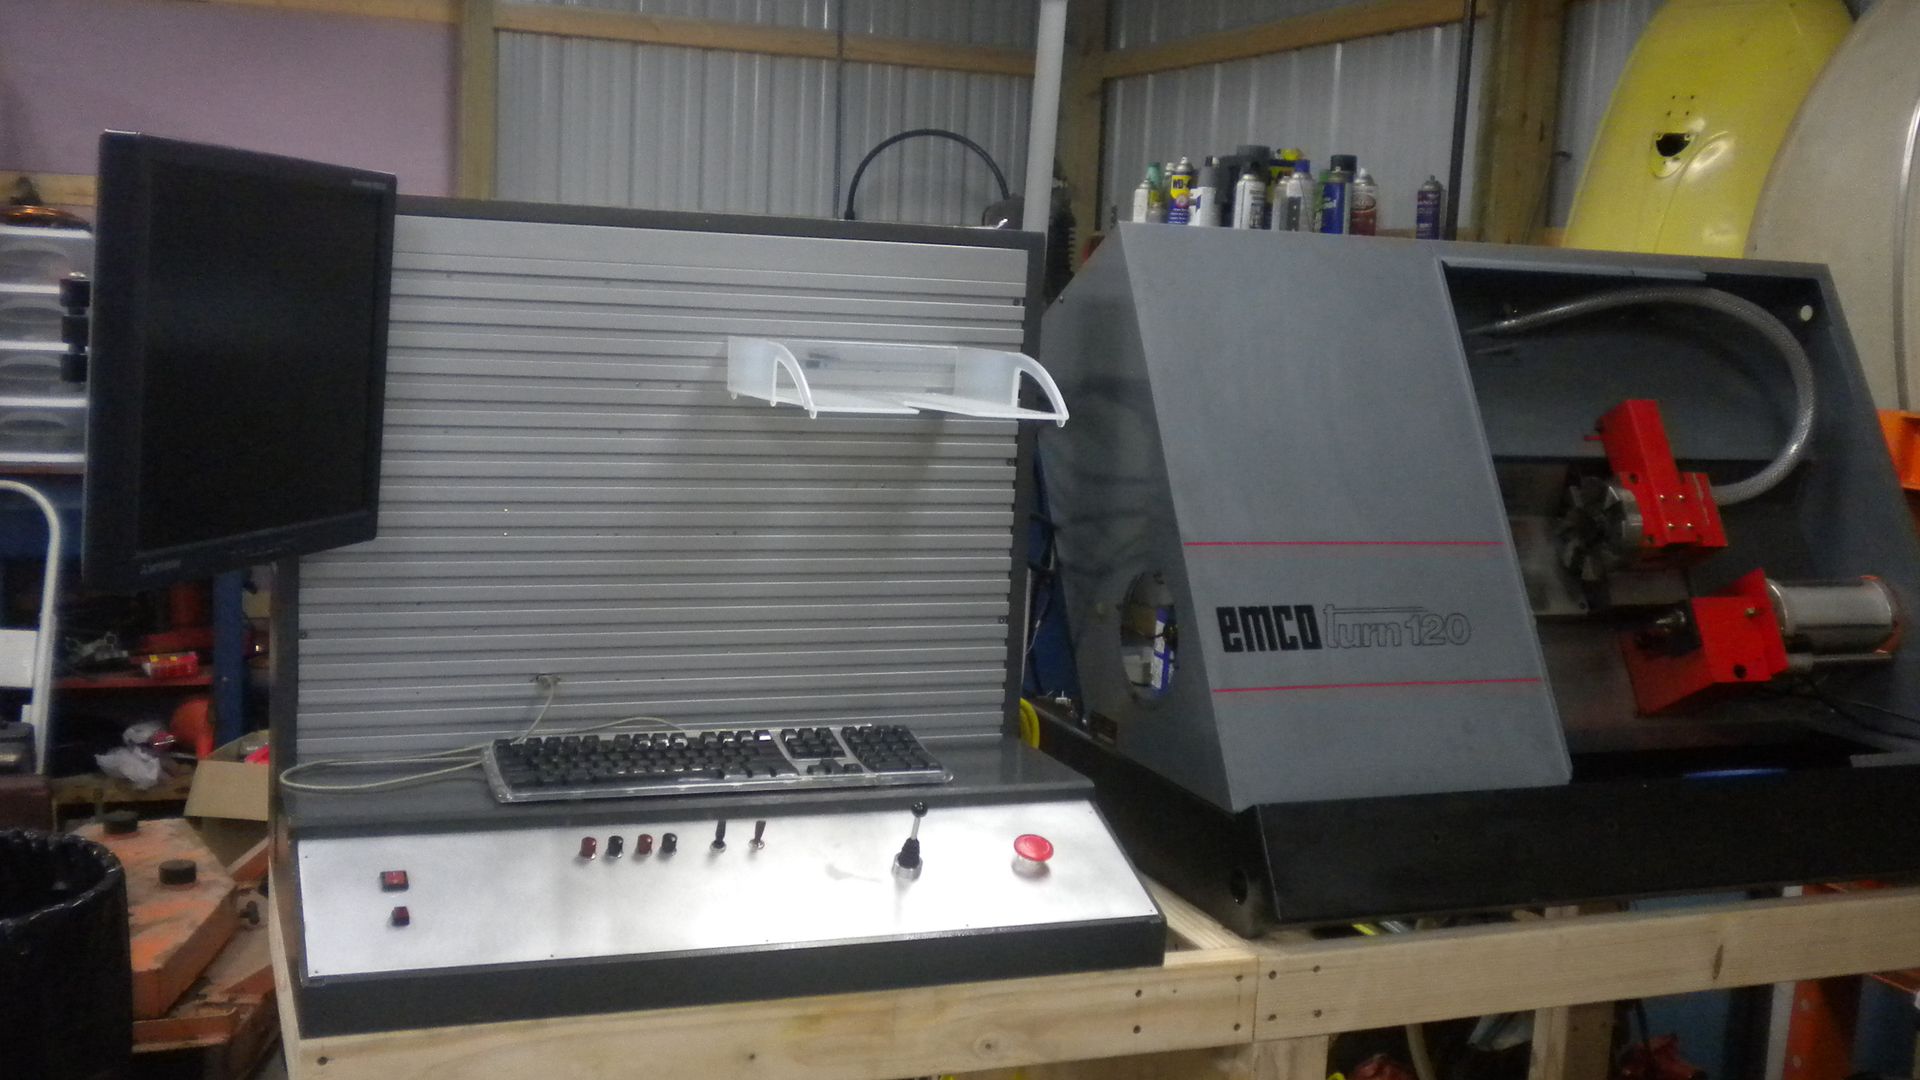
It’s been a while since my last post. But, things have been moving forward. At work, they scrapped some sections of aluminum slat panels. I then decided to use them for my new control panel.
Thanks to budget constraints and my lack of welding skills, I made up the control panel out of a pine and maple combination (it’s what I had laying around). So, if the wood bothers anyone, oh well…lol.
Anyway, Here is a pic of what things will look like, barring any other changes…….
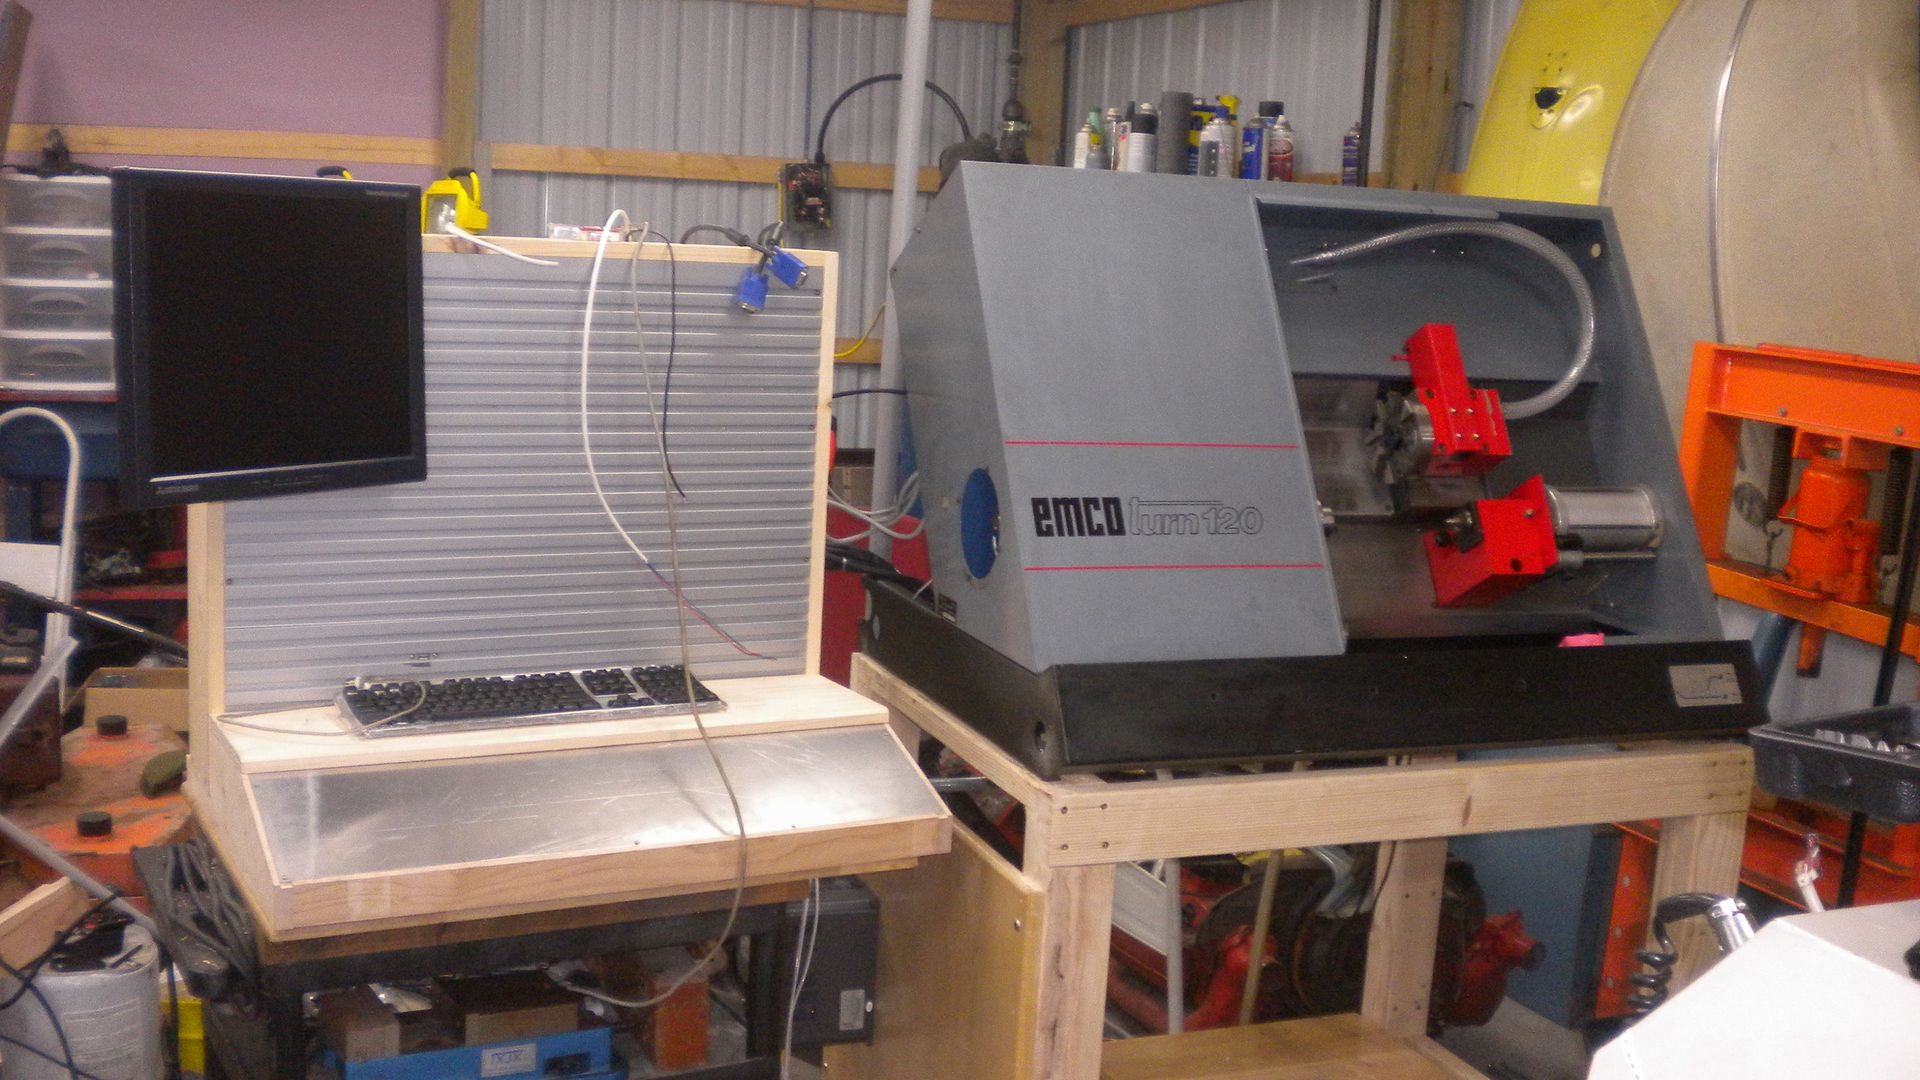
The lathe has been cleaned up and resealed. Here is the cutting room….
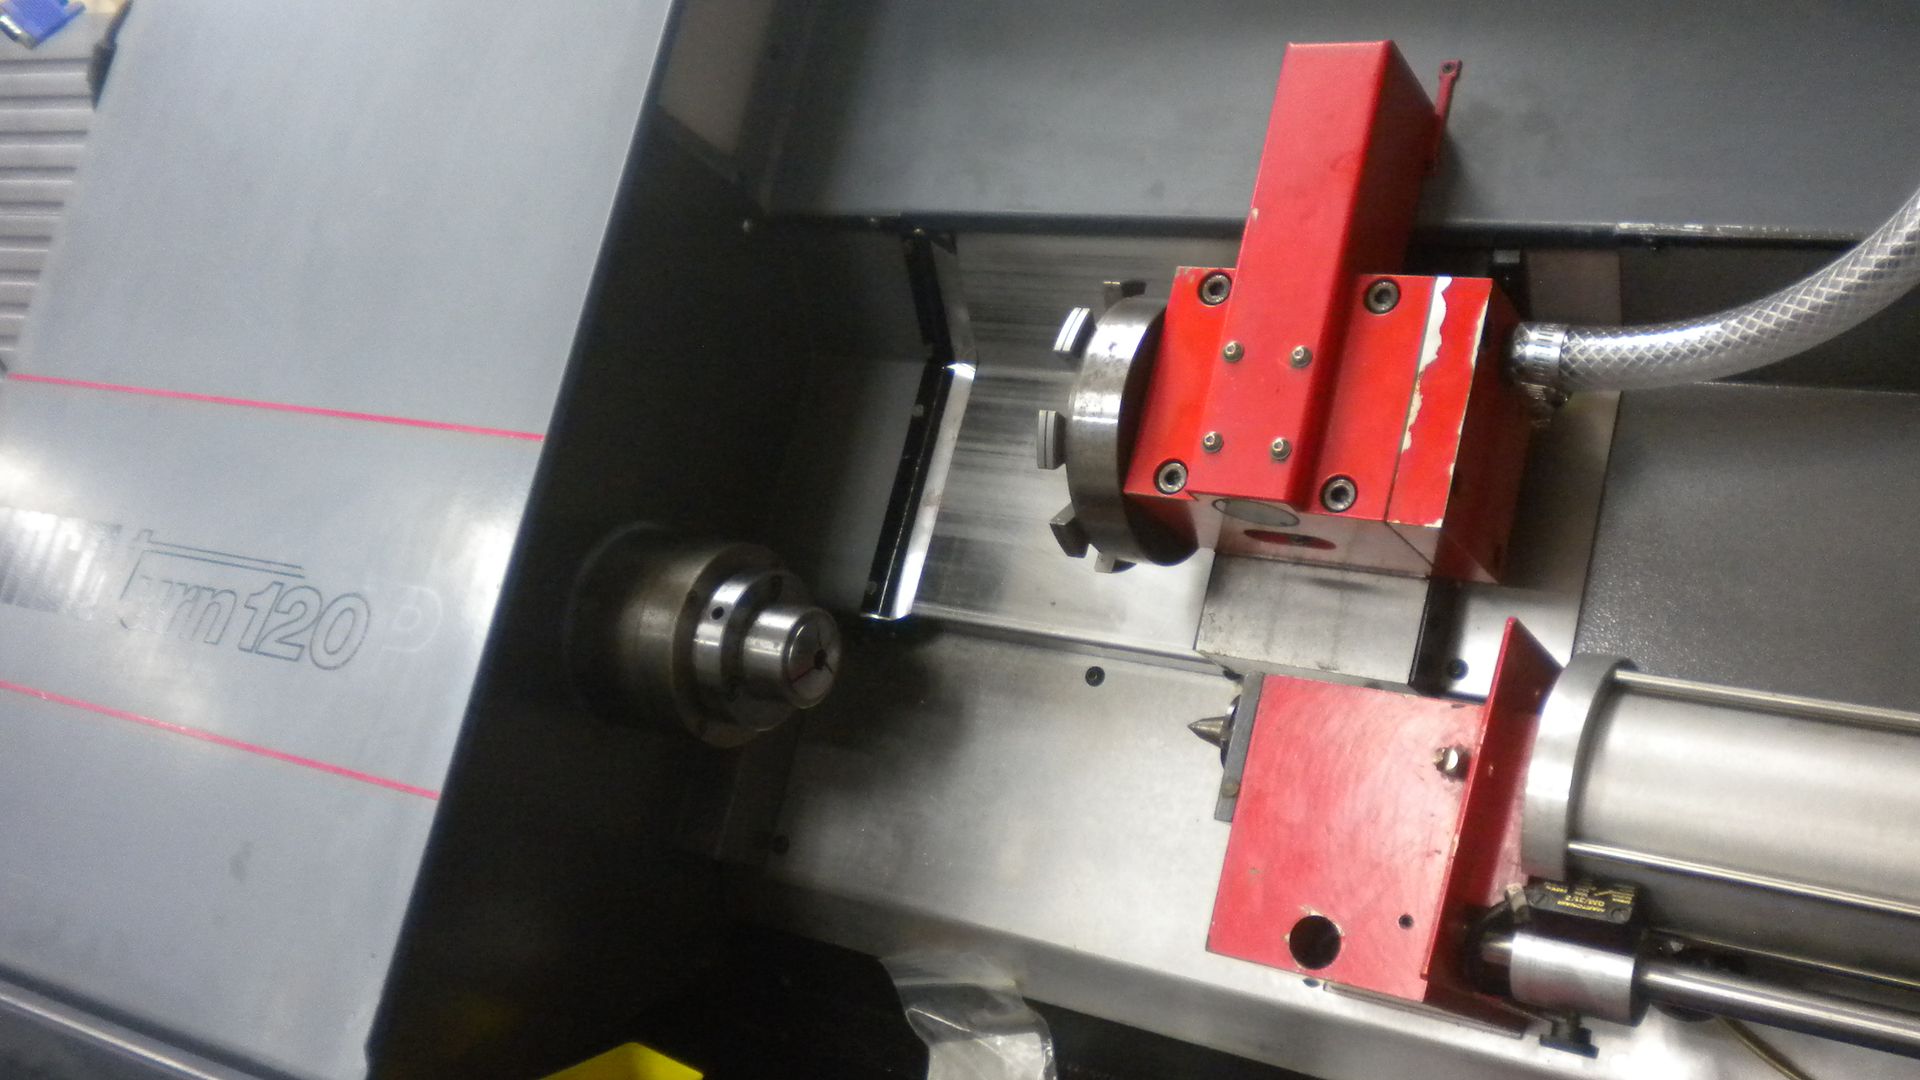
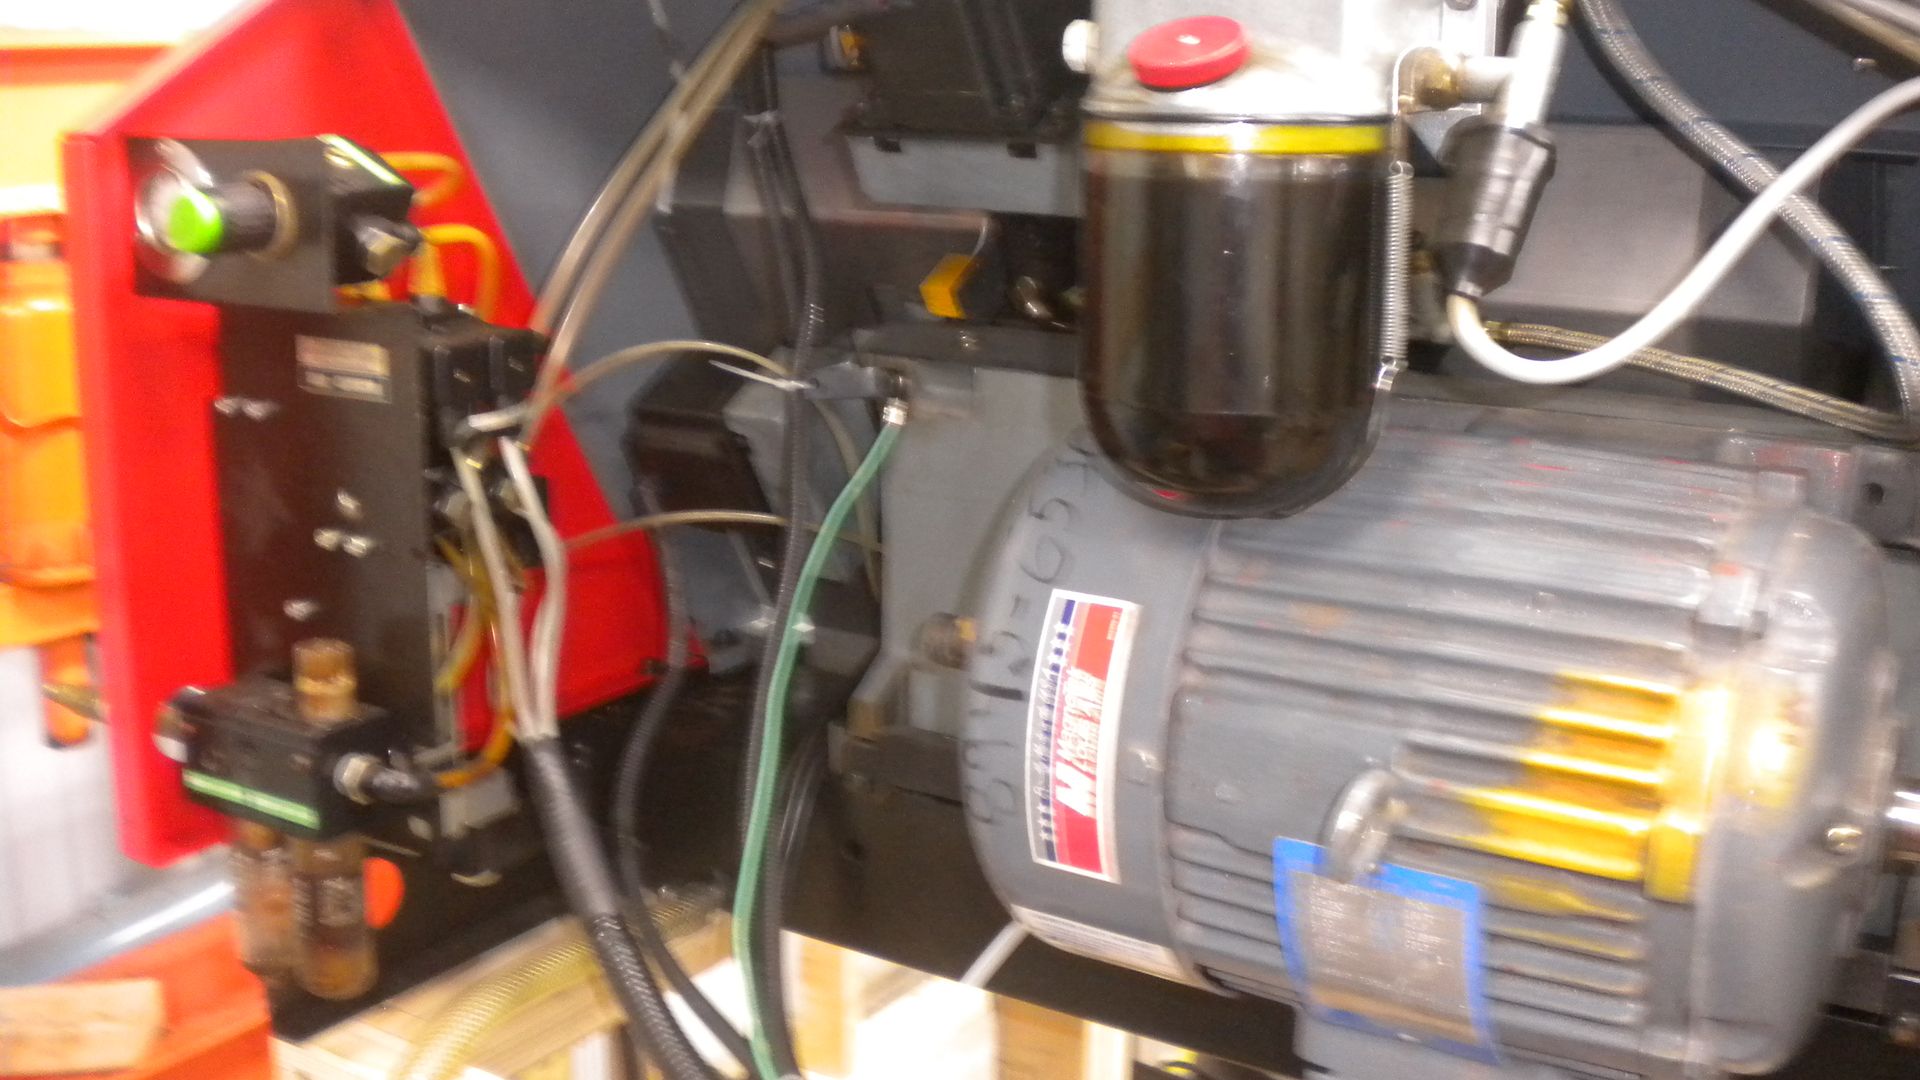
In this shot (sorry about the quality) you can see the new motor, the pneumatics..which power the tailstock and chuck and automatic oiler.
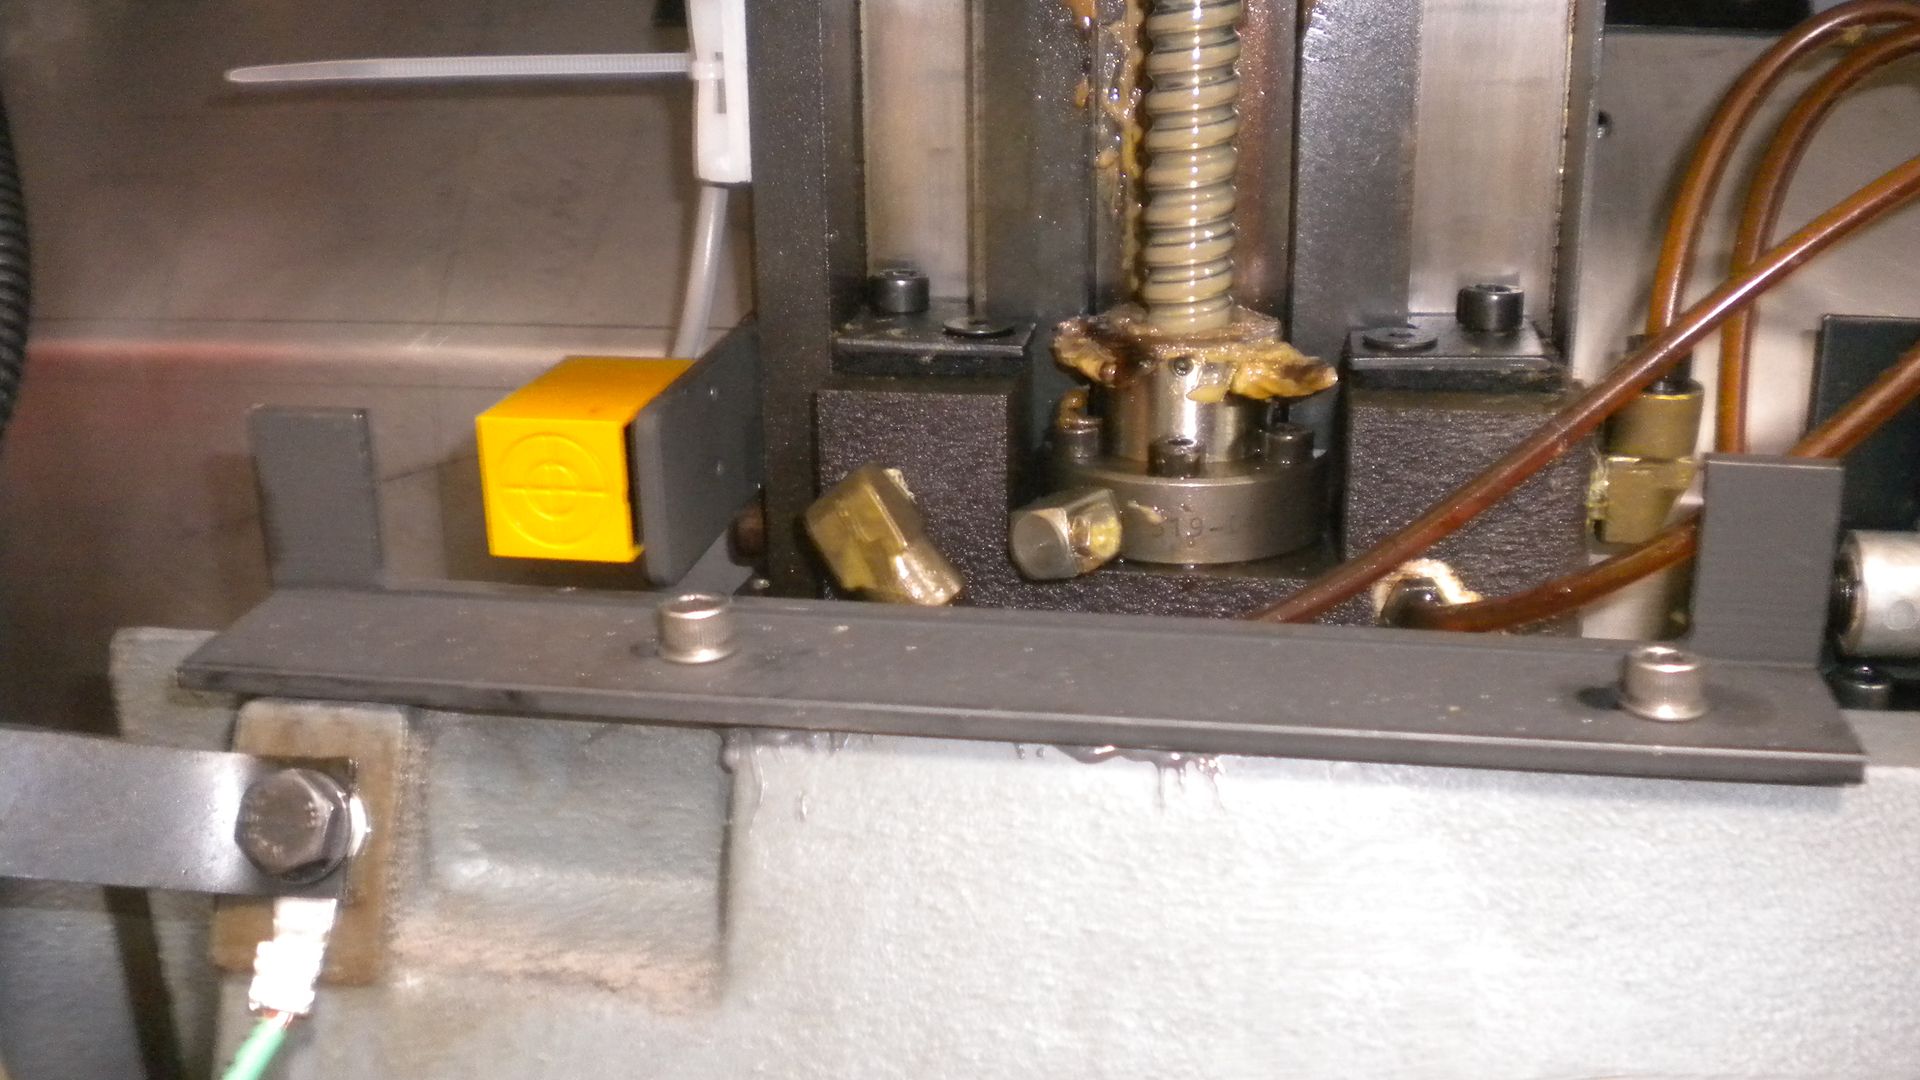
My retrofitted speed sensor and chuck closer…
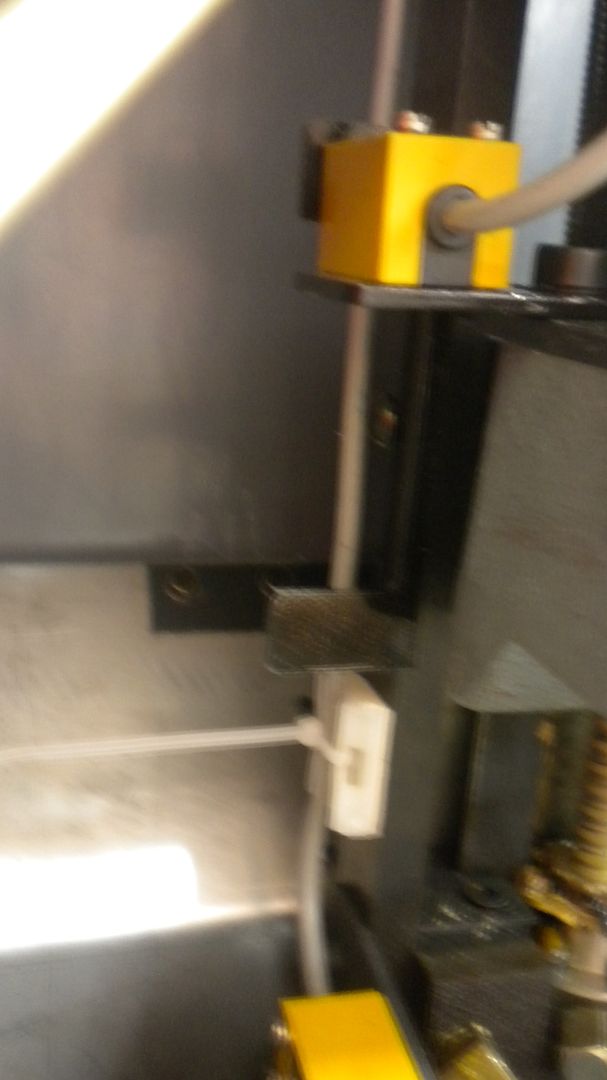
I am only using two proximity switches for my homing and limits. I was going to use 6, but, after reading a post on here, I decided to go with only two. It does make for an easier wiring job
Here is the Z setup…
And the X (sorry about the blurry pic)..
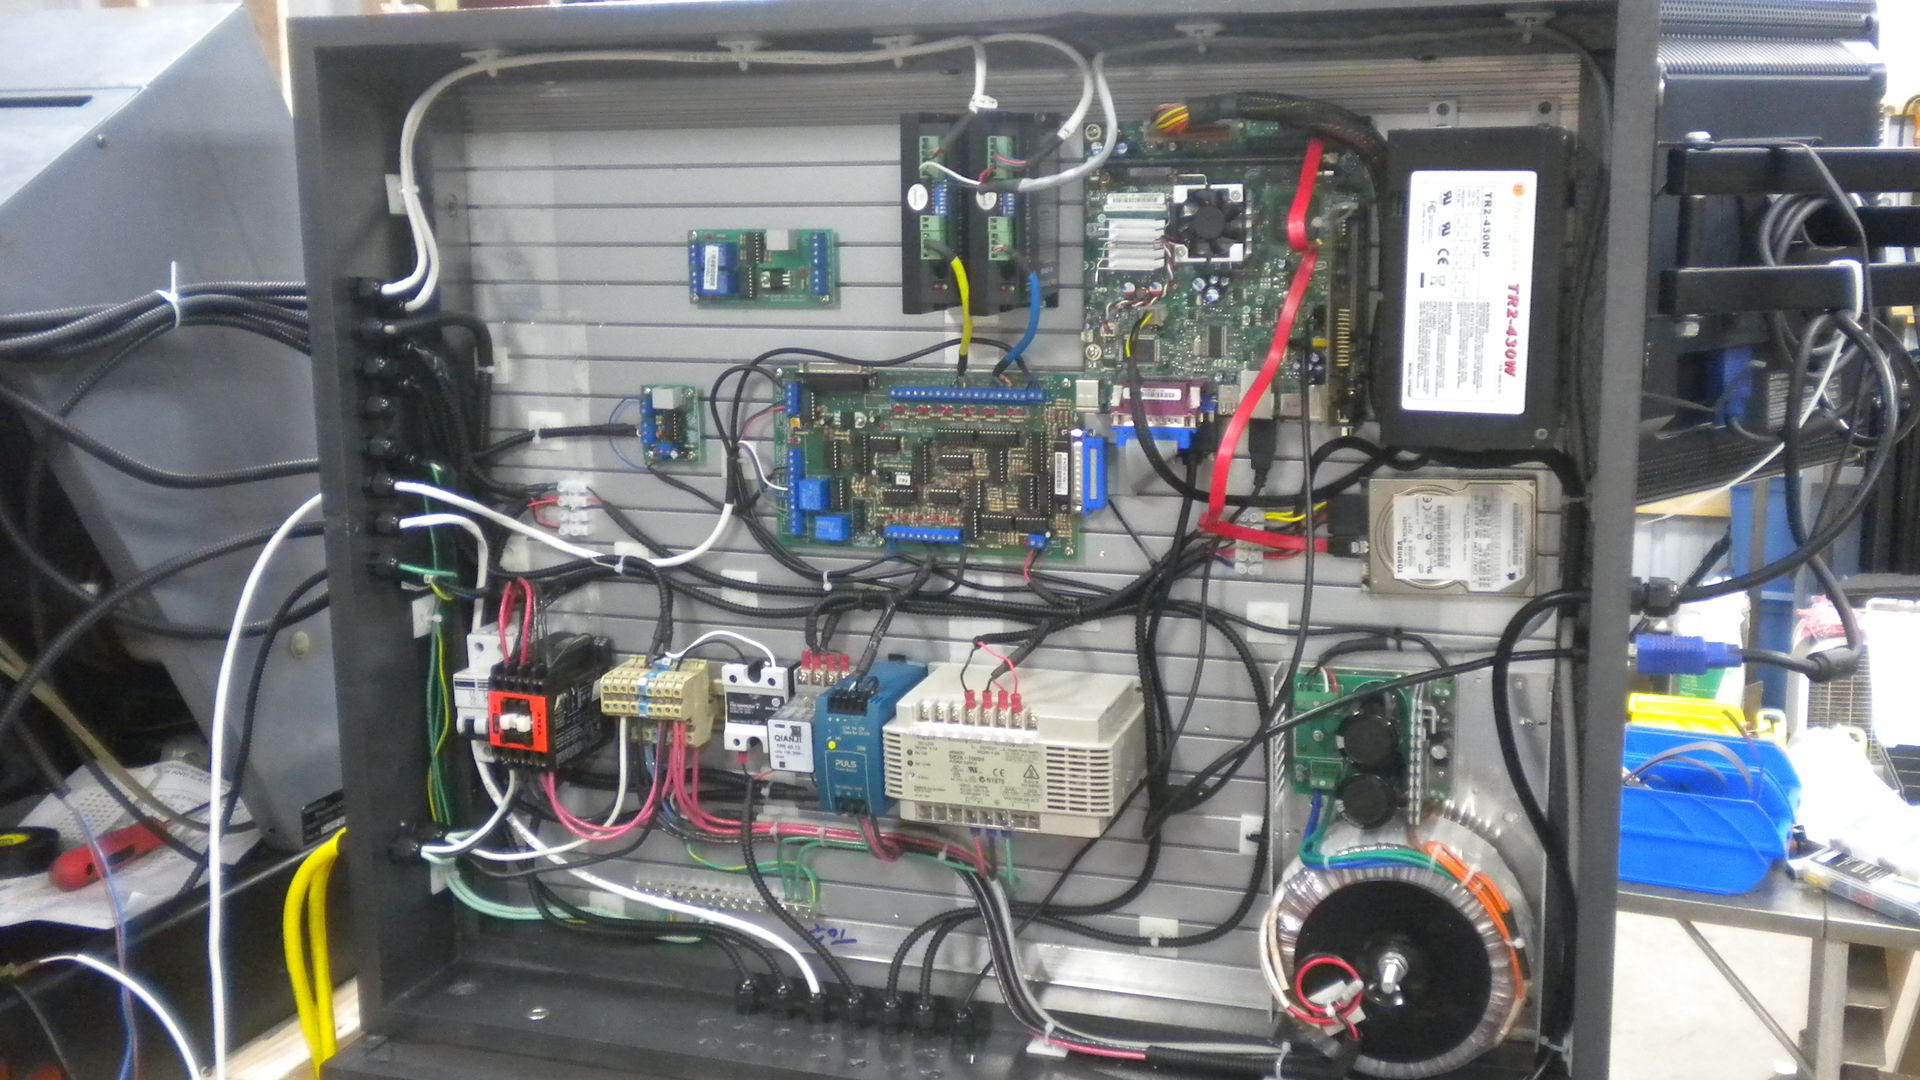
Now for the control board… it’s still in the building stages, but, you’ll get an idea of what is going on.
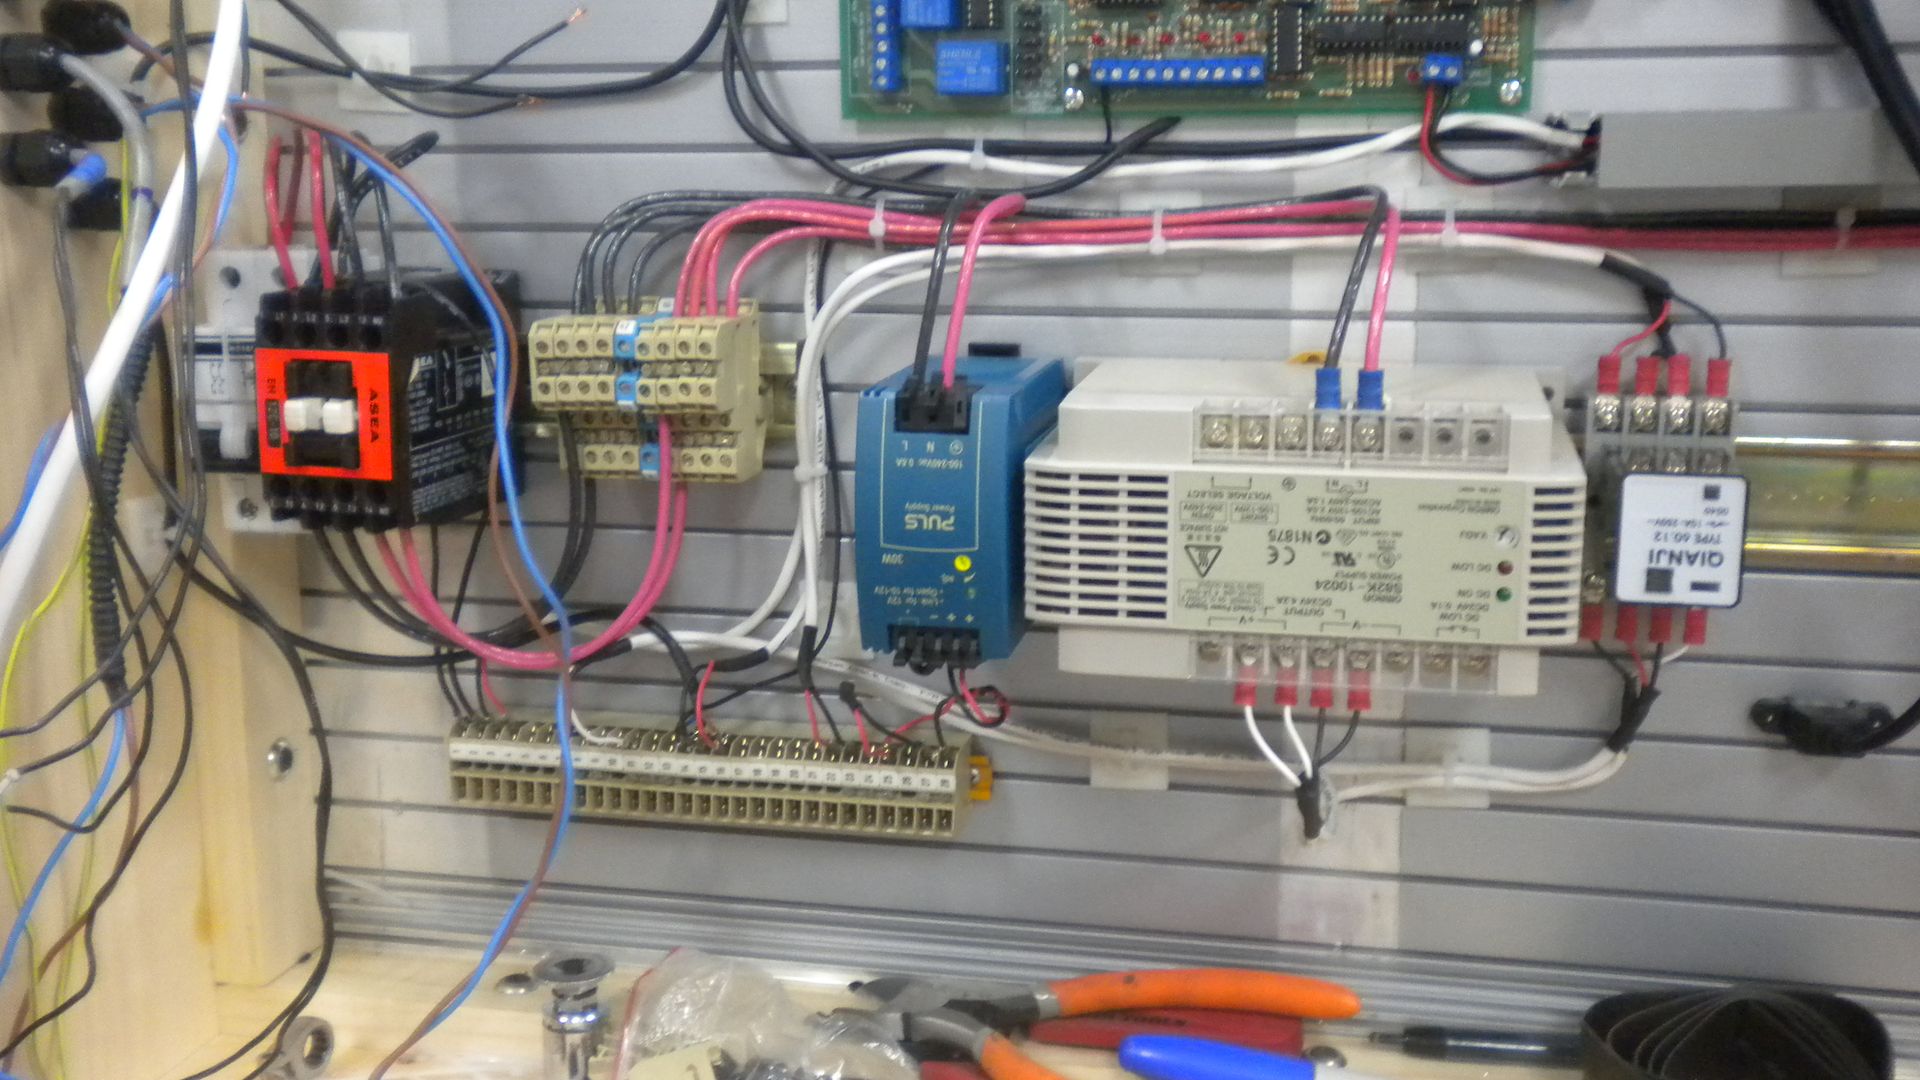
Here is the distribution area. My main 220 volt supply (with breaker and contactor), a 12 volt and a 24 volt supply…and terminal boards…
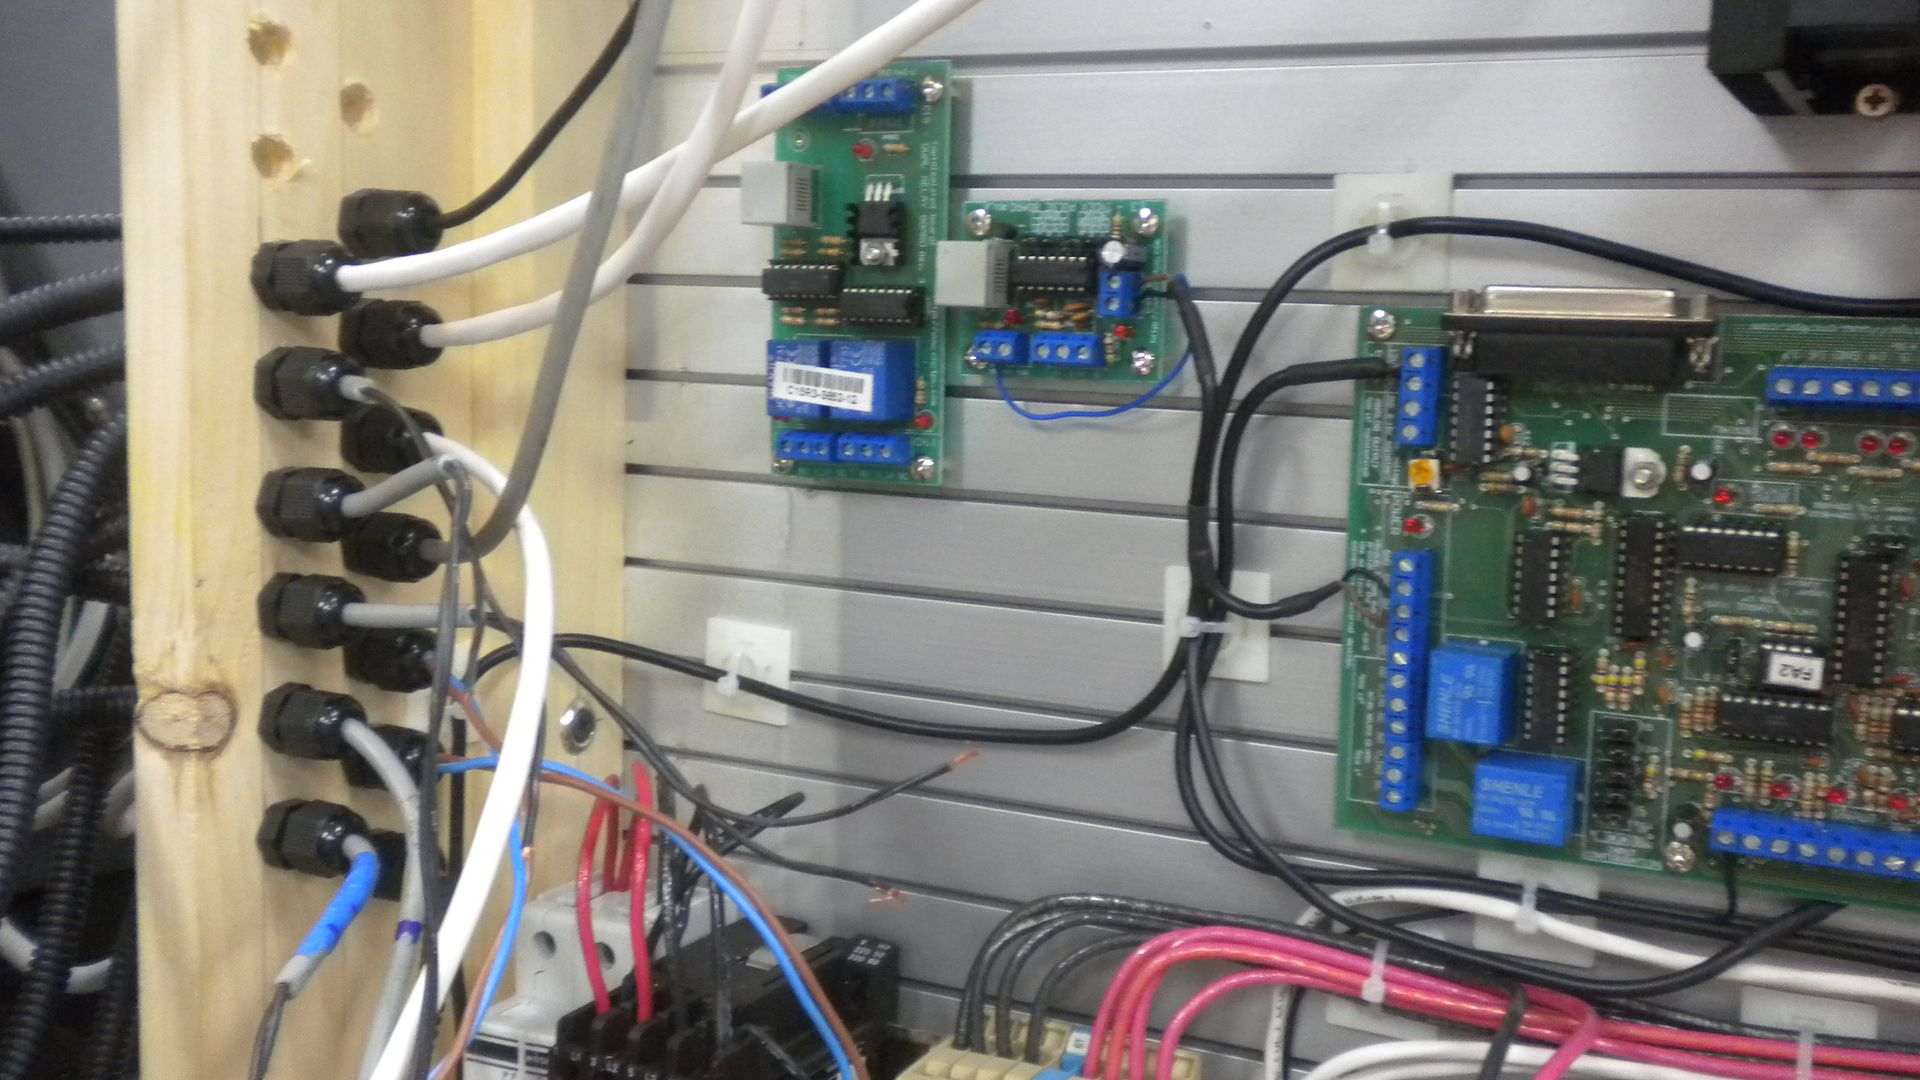
Here is a shot of the C3 index pulse card, C15 dual relay board (which will be used for the automatic oiler) and some of the 18 cables that are coming from the lathe…
The intel itx mother board, C11 board, Keling digital drives and power supply.
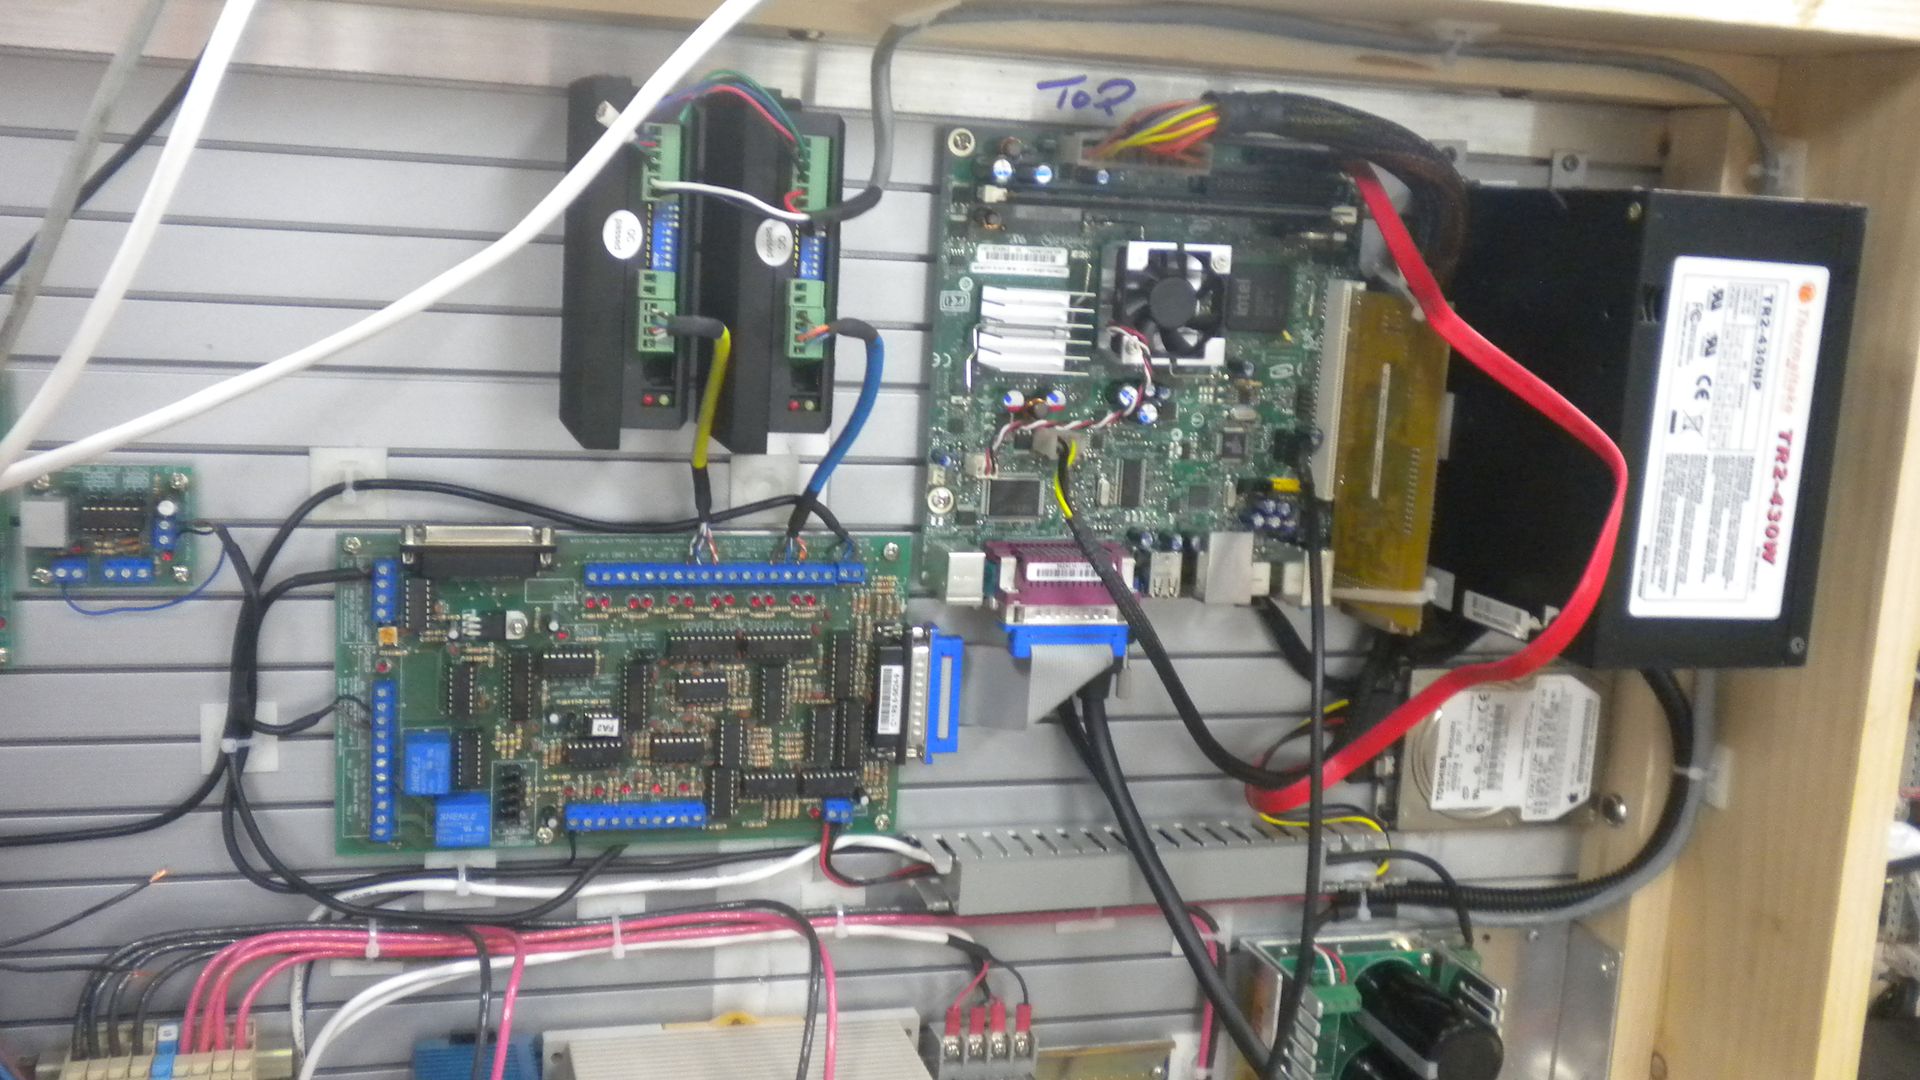
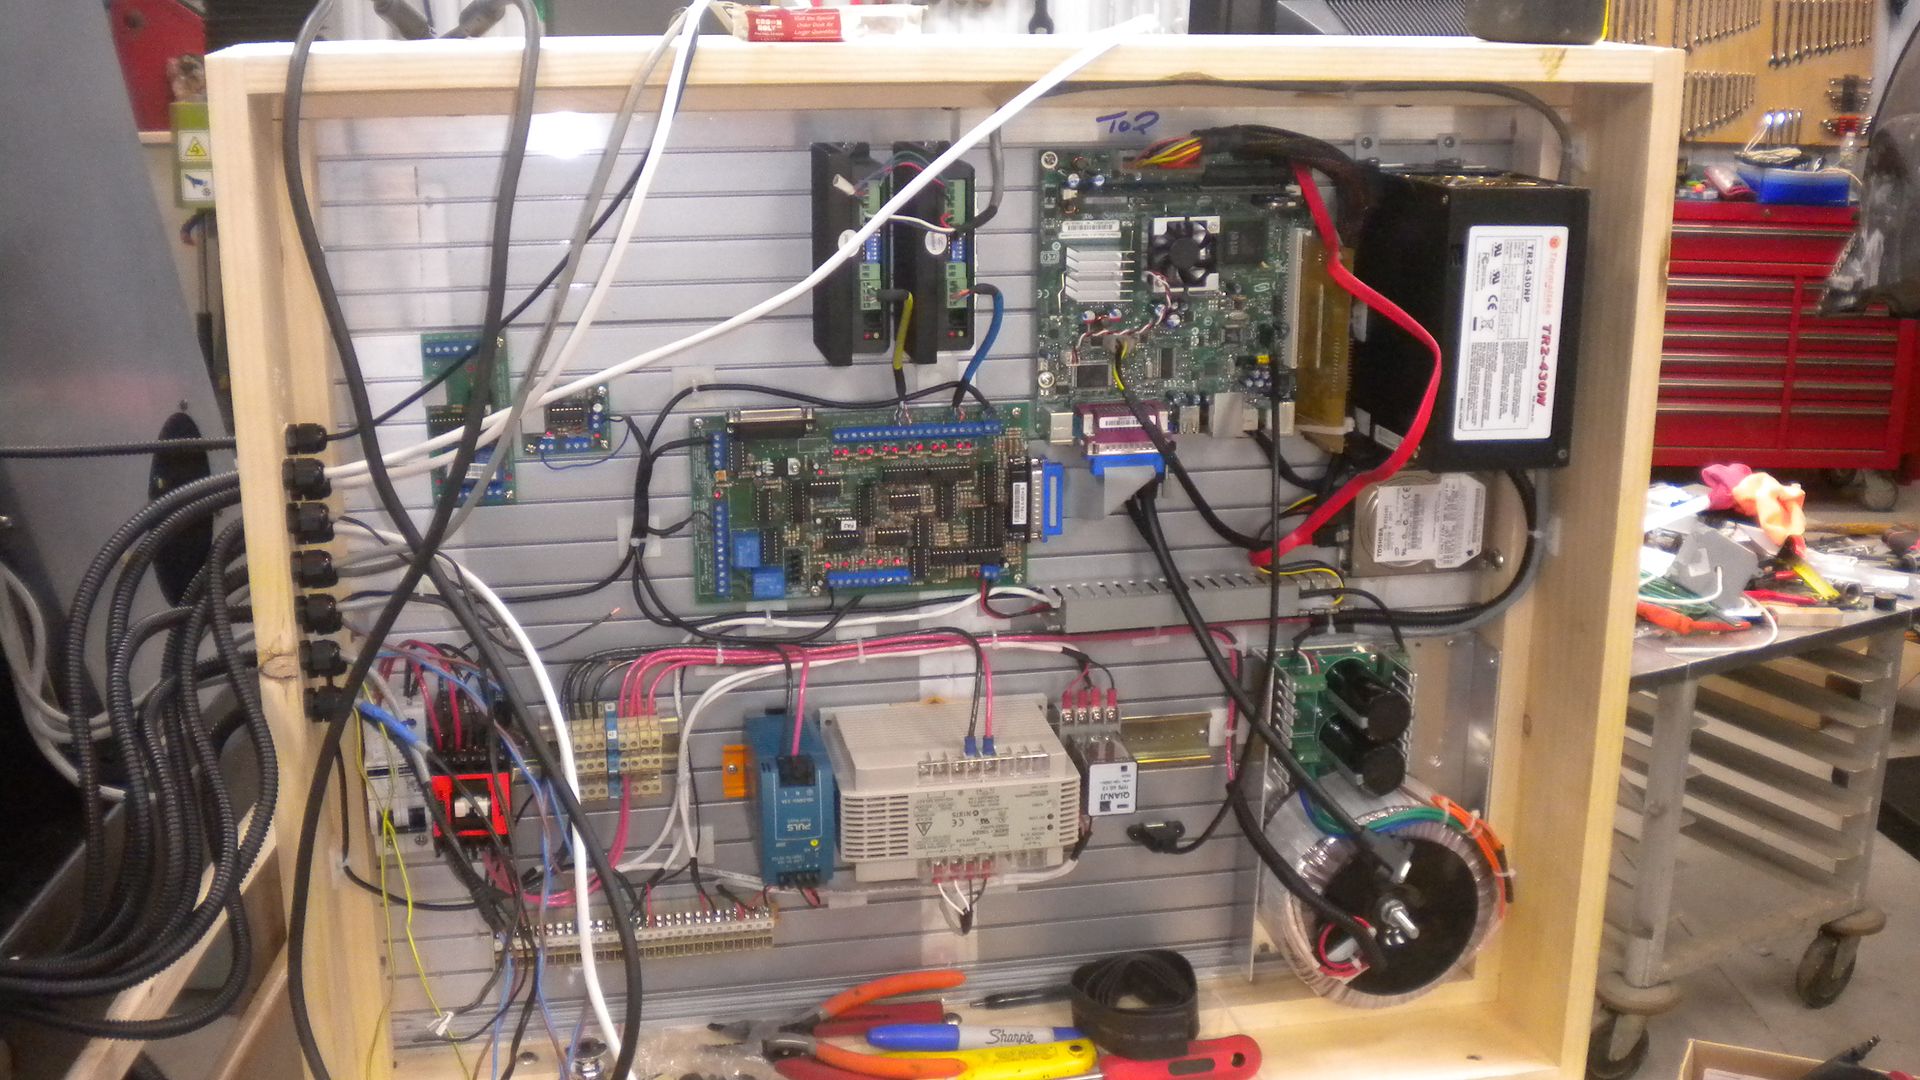
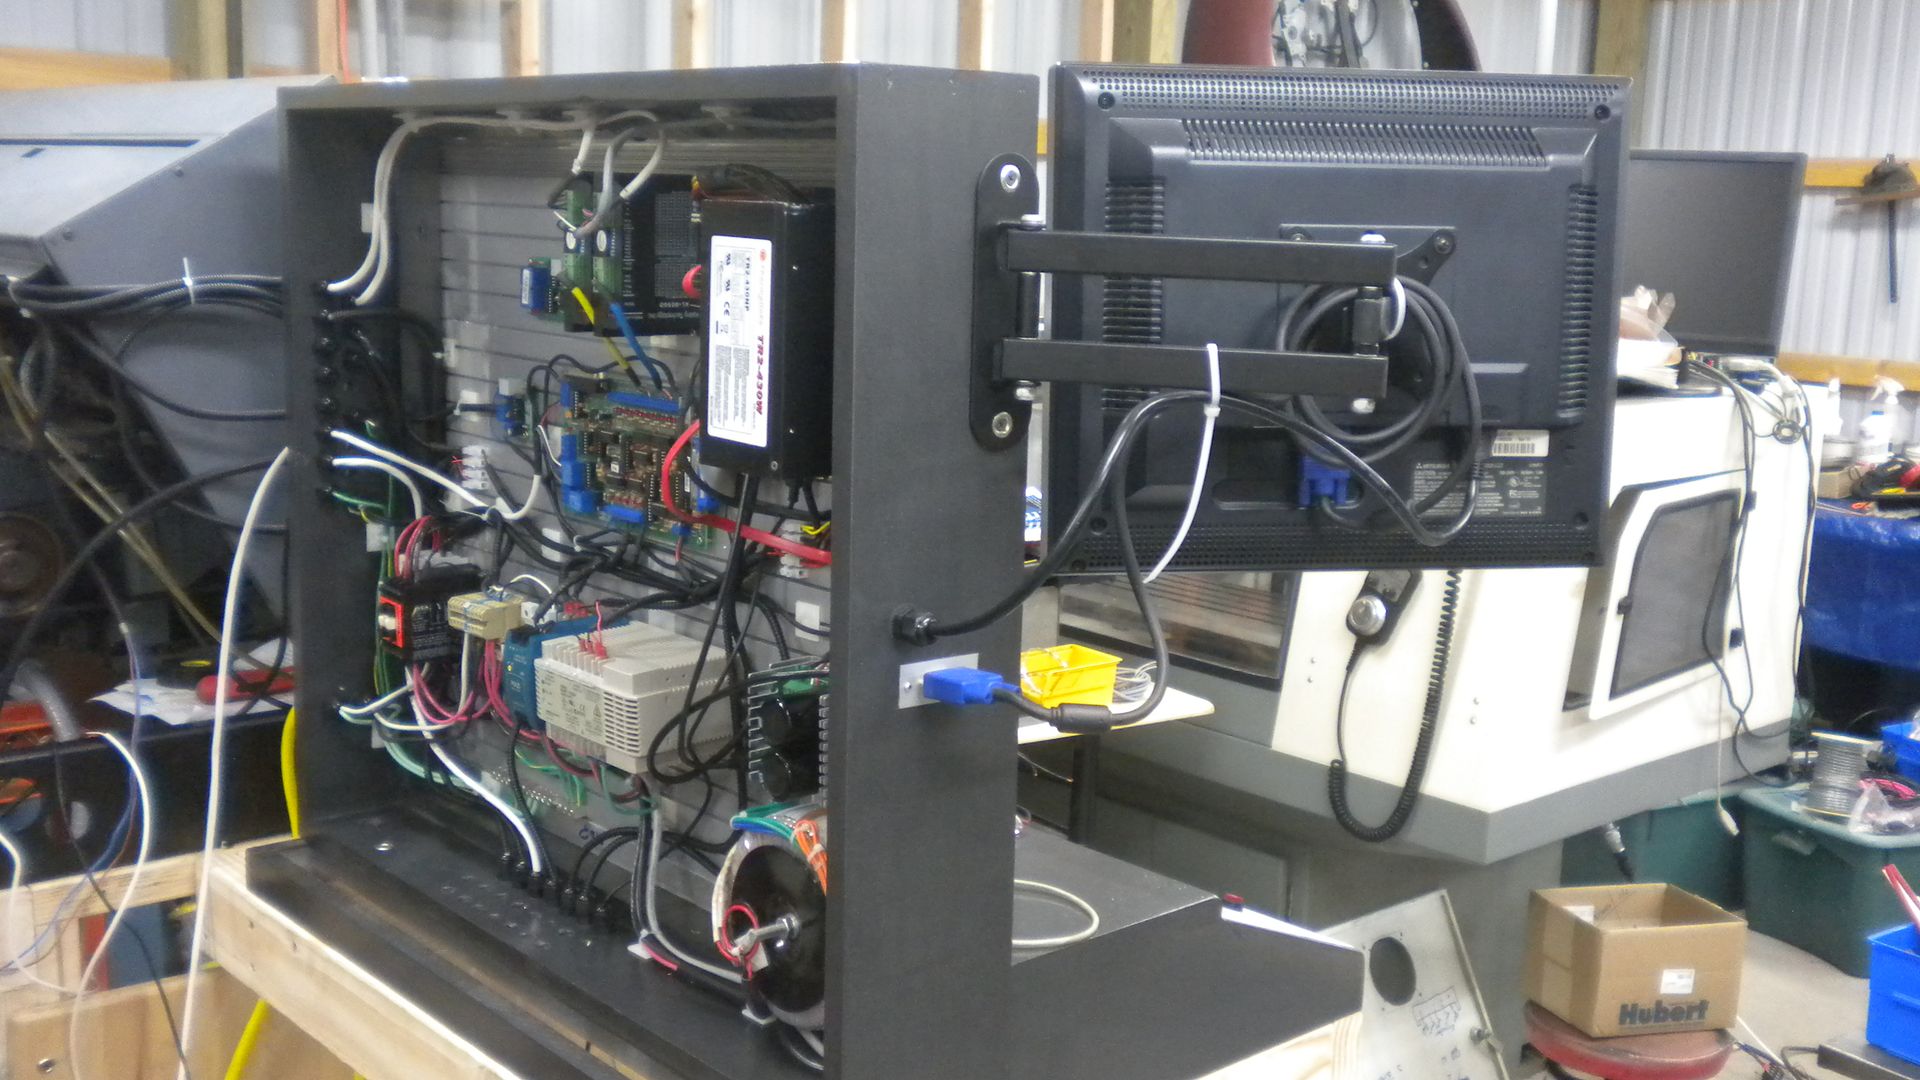
Here’s a group shot of the entire panel.
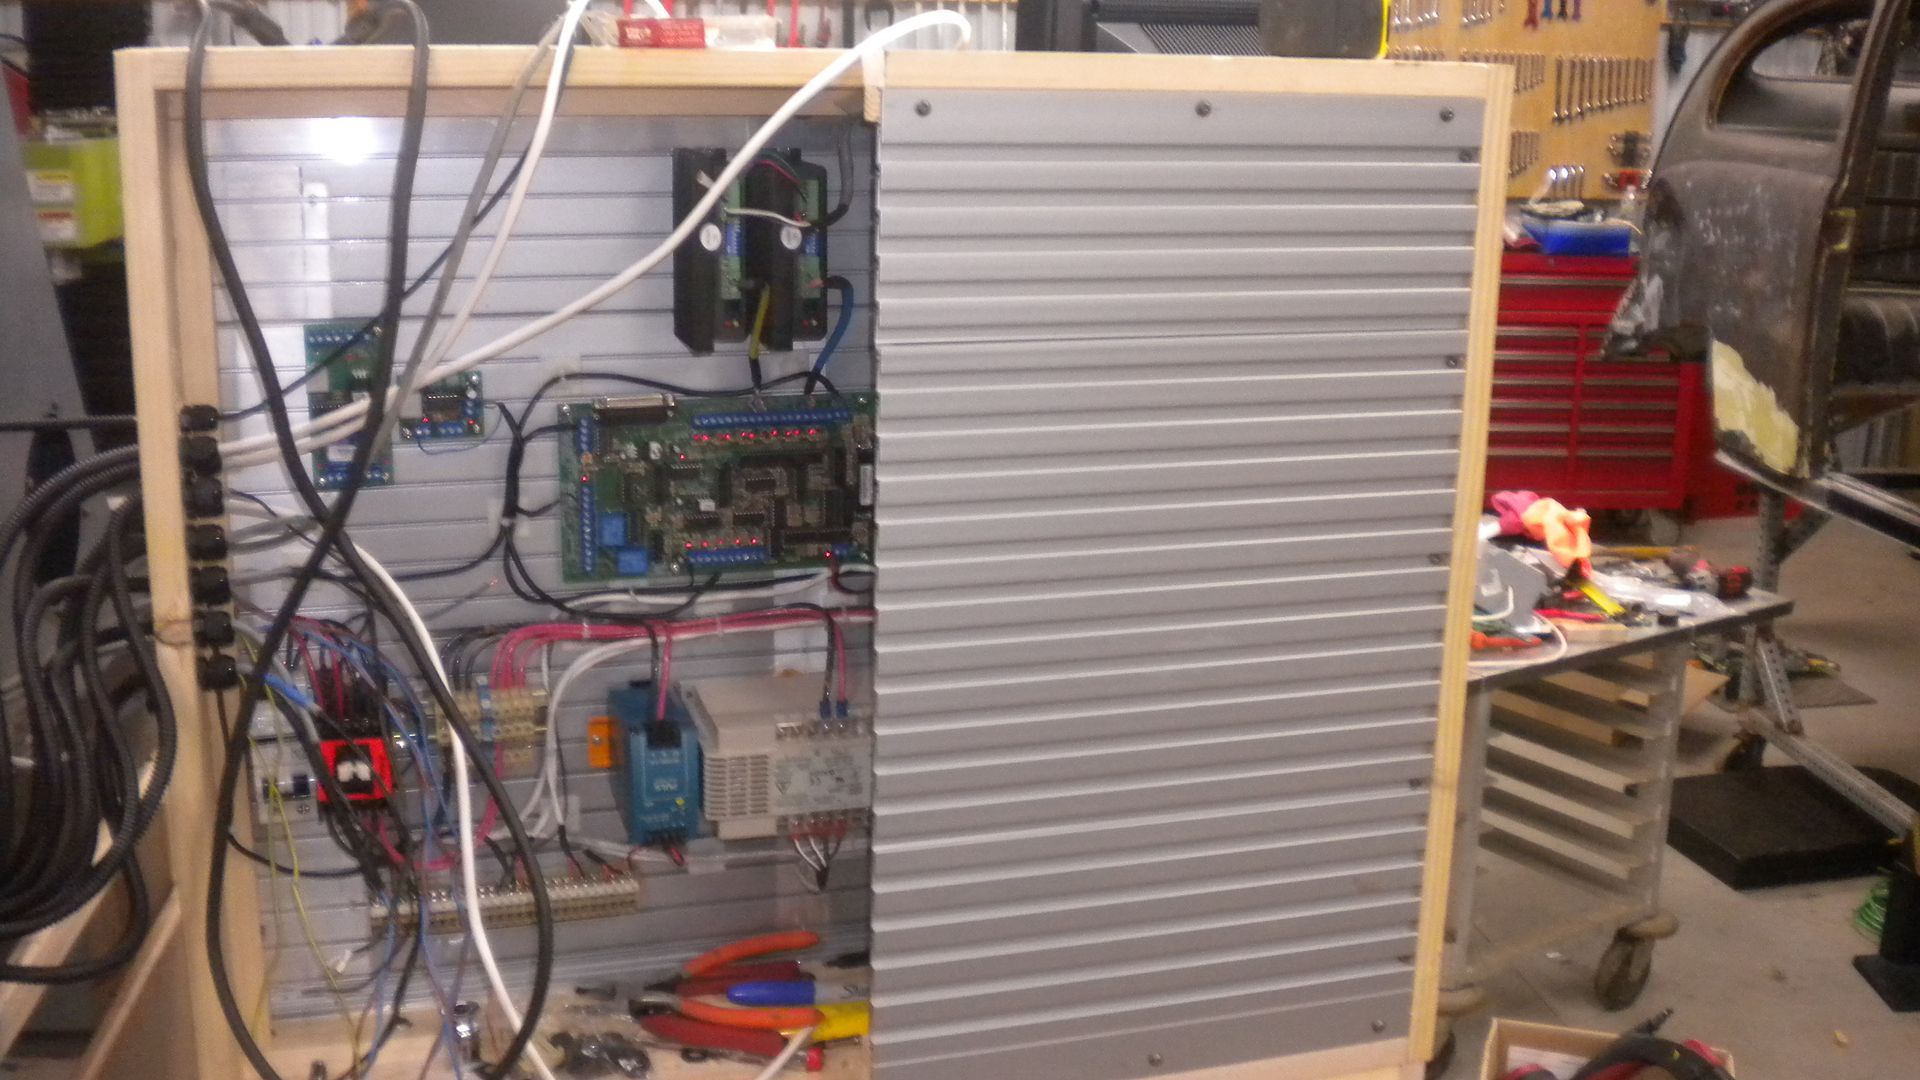
I also made up a set of doors for the rear. I will be installing a couple of fans on these doors. Here’s one of them.
Almost forgot, my monitor mount….
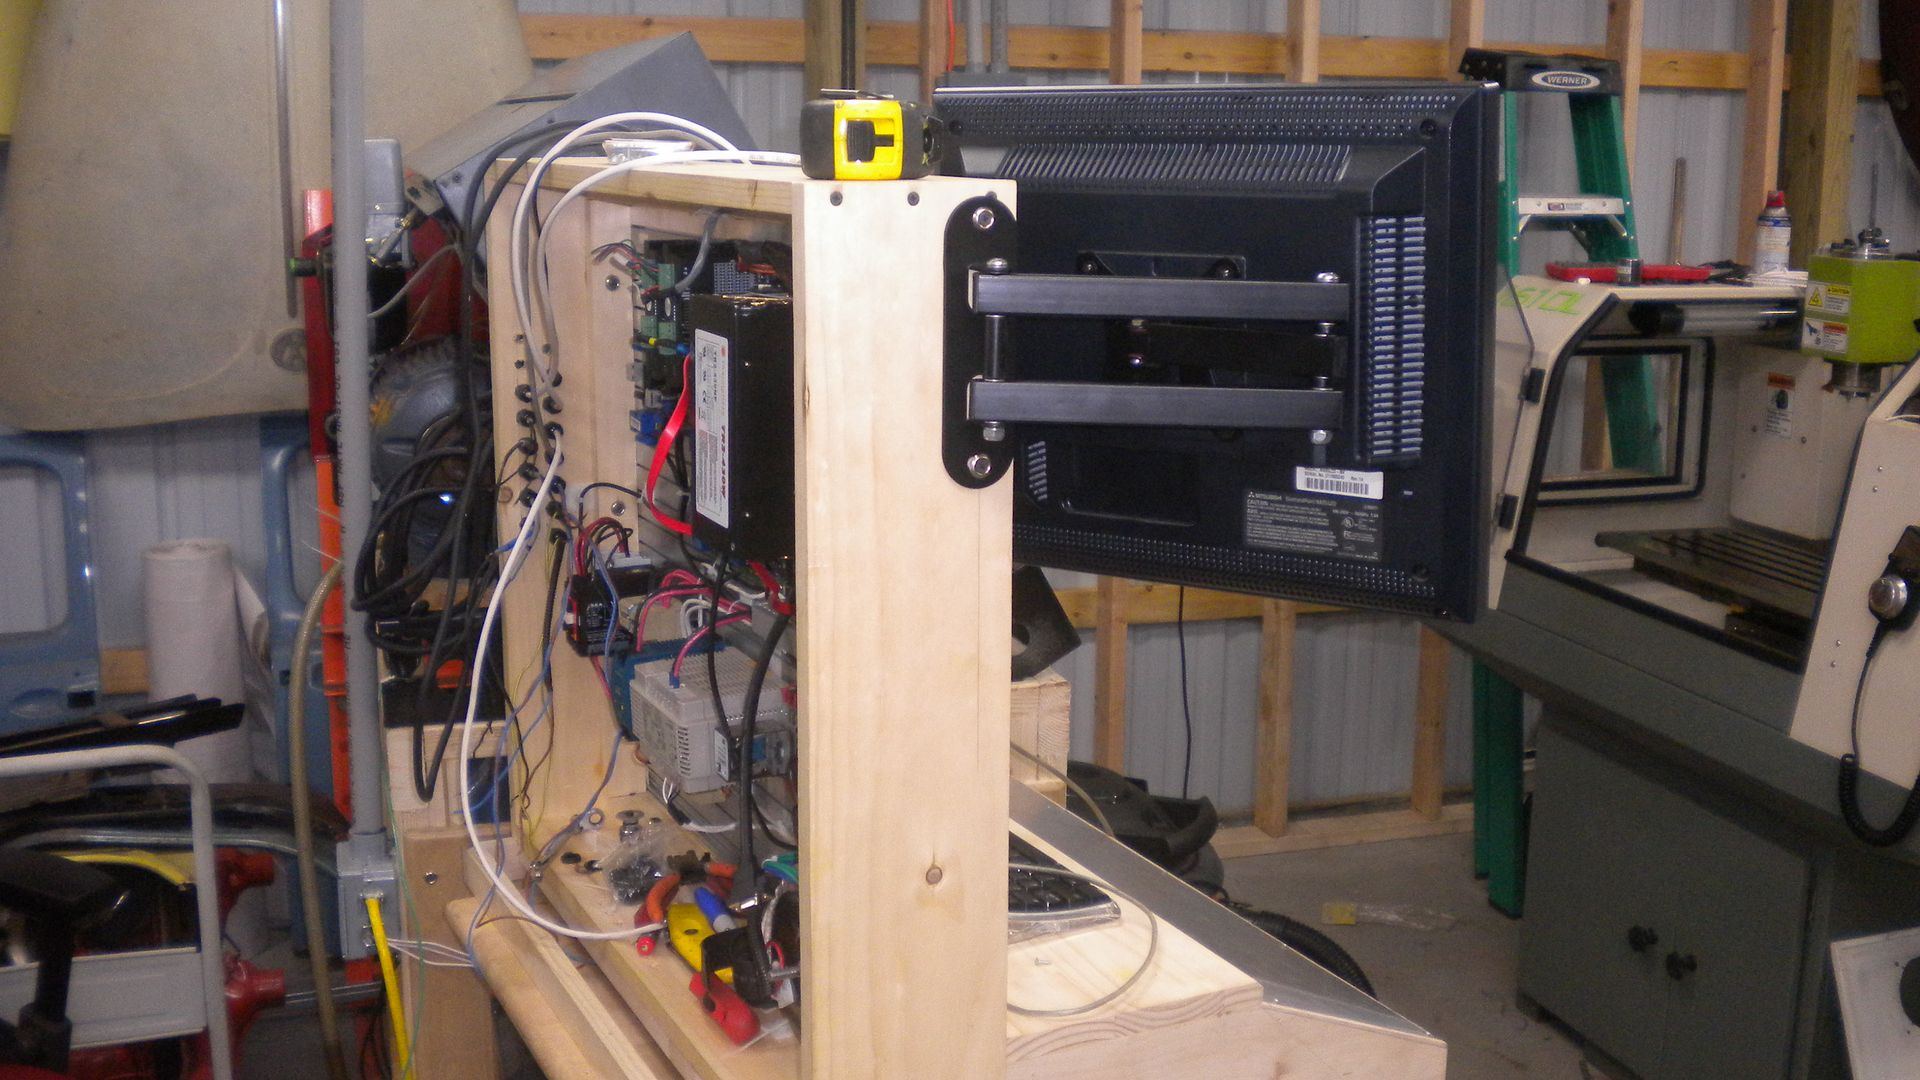
And that is where I stand as of now….more to come
pete
-
08-04-2011, 01:14 AM #6
Registered
- Join Date
- Jul 2006
- Posts
- 367
Some more progress..
I changed some of the wiring and gave the box a paint job.....
the control board.....
almost done..
-
08-04-2011, 03:54 AM #7
Registered
- Join Date
- Dec 2006
- Posts
- 839
Nothing in the world wrong with wood. Looks like a very nice job and I bet that lathe is nice. Much better than trying to take a asia lathe and CNCing it. That control panel is sweat.
When you get more used to running it shot us a vid of it in action. These lathe do pretty good. I would love to find one setting around needing help.
Jess
-
10-30-2021, 09:41 AM #8
- Join Date
- Oct 2021
- Posts
- 6
Re: Emco 120p Rebuild
DEar
Have you tested in mach3? If yes, Then I need a tool changer scrip for the same
Can you help
Best Regards
MAnthan

 Reply With Quote
Similar Threads
-
emco turn 120p with emco tronic ti control
By rcjacob in forum Vertical Mill, Lathe Project LogReplies: 0Last Post: 03-26-2014, 05:01 PM -
Siemens CNC spindle motor 1GL5104 for EMCO 120 120P Compact 6 6P
By phidauex in forum For Sale OnlyReplies: 0Last Post: 11-22-2013, 07:49 PM -
Emco 120p grease??????
By slowtwitch in forum EMCO LatheReplies: 0Last Post: 12-07-2011, 05:26 PM -
WTB: EMCO MAIER EMCOTURN 120P
By slowtwitch in forum Want To Buy...Need help!Replies: 0Last Post: 01-02-2011, 10:33 PM -
Emco VMC-100 Mill or 120P Lathe
By dannyboysd89 in forum Benchtop MachinesReplies: 14Last Post: 02-05-2010, 10:34 AM
