


Uh, Oh....the demon rum. I'm wowed that you take your booze so seriously enough to build your own brewery......... buy a bottle shop, maybe, but actually go to the source and build your own......now that's a connoisseur of alcoholic stimulants to be sure, to be sure....LOL.
We're all aching to see some chips landing on the floor, now that all the back breaking work is done.
Is it true that a brewed beverage makes good coolant, because it kills all bacteria, so no bad smells from coolant degredation, and also it won't corrode steel etc, and is bio-degradeable, or is it just cheaper?...LOL.
Ian.
Thread: Slant bed CNC lathe from scratch
Results 361 to 380 of 405
-
08-23-2010, 12:51 AM #361
 Member
- Join Date
- Sep 2006
- Posts
- 6463
-
09-20-2010, 05:35 AM #362
Registered
- Join Date
- May 2003
- Posts
- 267
In post #260, you machined your own bronze bearings. How did you get that groove on the inside of the bearings? What maching process was that?
-
09-20-2010, 10:46 AM #363
Registered
- Join Date
- May 2006
- Posts
- 573
That wasn't me:-) I use ball bearings
-
09-20-2010, 03:57 PM #364
Member
- Join Date
- Sep 2006
- Posts
- 6463
Hi georgebarr, that post was by SJH, Steve.
Ian.
-
09-23-2010, 02:41 PM #365
Registered

- Join Date
- Jul 2008
- Posts
- 199
dear guldberg, Originally Posted by Guldberg

luckily, i just finished my lathe project and it is running now with two tools only. I am building a turret now (try to copy you). the problem is that i have no experience with pneumatic. i have a compressor that delievers upto 100psi. (we use that for painting out machines, hope the same will work). i am looking for a decent cylinder that can push my turret. do you think this type of cylinder will work?
http://cgi.ebay.com/SMC-Pneumatics-A...item4ced6e997d
if not then please suggest me an item that should be enough to push the toolplate and springs of the turret. btw what size of cylinder and compressor you have used in your turret?
You have good experience with all these things so i will be thankful for your help.
jasminder singhIt is better to die for something than to live for nothing.
-
09-24-2010, 02:47 PM #366
Registered
- Join Date
- Apr 2010
- Posts
- 21
Oh come on, you can't leave us all hanging. If not for yourself, finish it for us. Originally Posted by Guldberg

Greebe
-
09-28-2010, 04:09 AM #367
Benutzer
- Join Date
- Nov 2008
- Posts
- 50
This was a really inspiring thread, and it really makes you want to build a CNC lathe by yourself (even if you plan on buying/maybe converting one like me).
I do know that it's easy to order laser-cut parts in steel, but not as easy to assemble them as nicely as you seem to do though. All the parts that I have ordered had quite a bit of slant in them. I guess that's why you have a facemill (at least with small parts), but with bigger parts it would help to know someone with a big CNC mill. I don't so I guess it would be really hard to do something like this. You can order aged cast iron plate, but it's expensive as hell - at least here, but I bet it's more or less the same everywhere?
There can't be much left on the lathe now. Keep fighting! I really want to know how it went with the turret also, did it work with the new stepper? Maybe you haven't had time for that yet!?
Really nice looking lathe!
Good luck with the brewery! =)
-
10-03-2010, 08:07 PM #368
Registered
- Join Date
- May 2006
- Posts
- 573
Hurray. I finally made some chips today. I told myself I wouldn't, before all the covers and casing were finish, but I couldn't resist. After all, the first post in this thread dates back to the beginning of 2008!!
Many hours have been spend on dis- and reassembly of the whole lathe, while greasing and adjusting all the bearings, bolts and nuts. I had to make yet another cabelcarrier for the pneumatic and stepper motor cabel for the turret. For now I will let Mach 3 control the turret, but later on, I want to make the turret have a brain of its own and just let Mach send the requested tool position. Been playing with Arduino for a while, this would be a nice little project of its own.
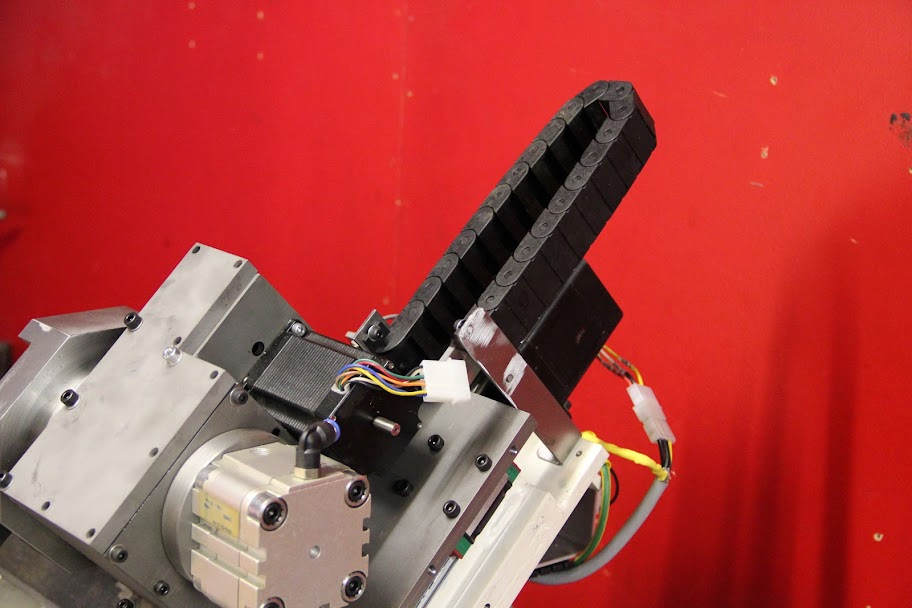
Next I made a quick prototype of a "mounting tool" and mounted the tool in the turret
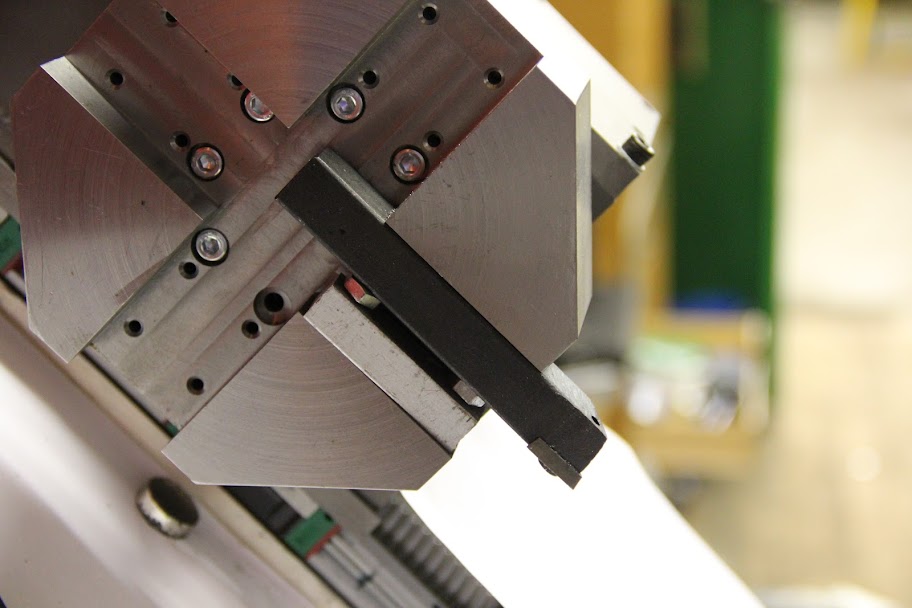
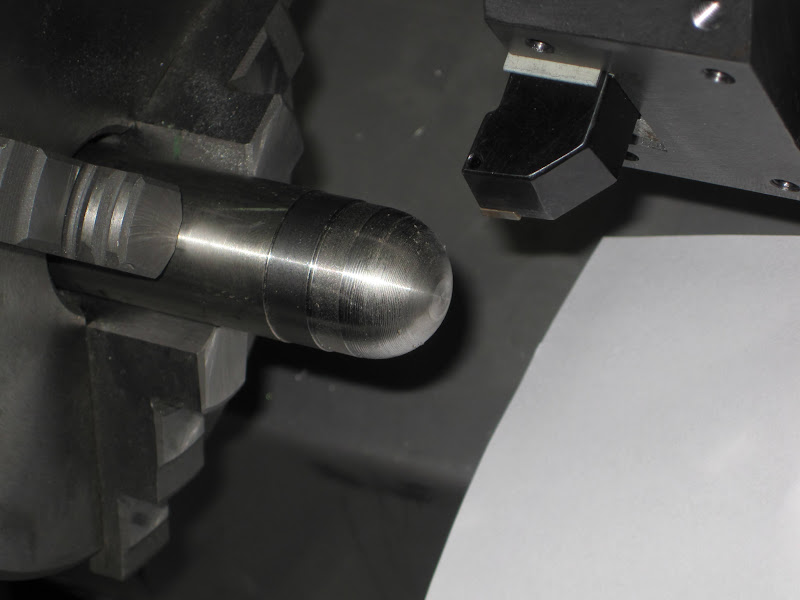
My very first cut on the lathe! The chuck adapter didnt fit my chucks, so I had to turn it down to size. Hit it dead on <0.01. Its made of cast iron, so a fine dust spread all over my spindle and bearings. I wont be turning cast iron until I have it all covered.

Lastly I mounted the chuck and took a fast cut at a Ø25mm alu bar. My tool is ~1.4mm below center, which should be reasonable easy to adjust with some shims under the turret
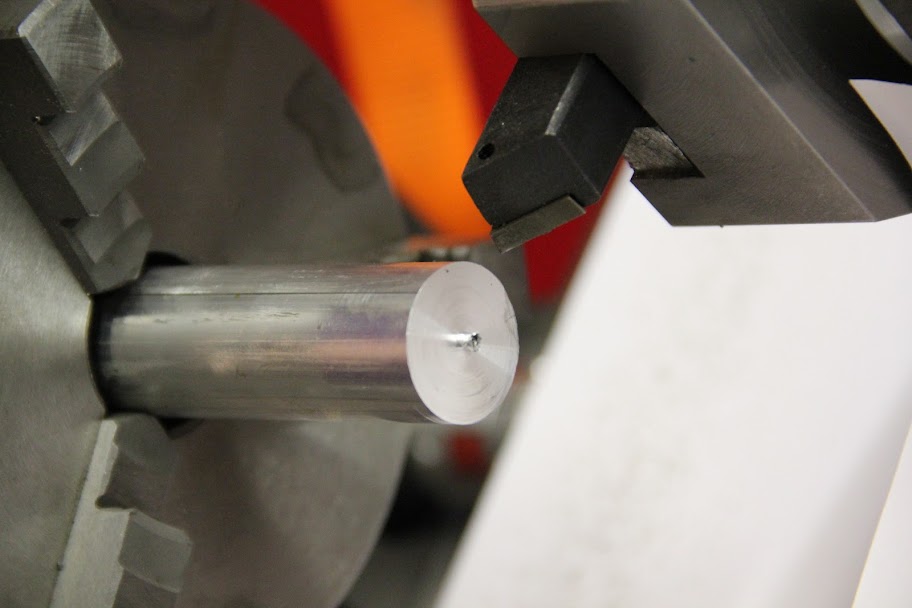
Im sure there is a lot of adjustments to be made, but at least its getting there. My fear is that the spindle will be a pain to align with the Z-axis, due to the slanted design, but well see how it goes
-
10-04-2010, 02:53 PM #369
Registered
- Join Date
- May 2006
- Posts
- 573
jasminder: You might want to start a thread on your own for that build. Its a good way to get input.
What you want is a cylinder that can counteract the springs you are using + the friction involved. You only want 10-15mm of travel distance, so the wider and shorter a cylinder, the better. The one you linked to is quite the opposite
-
10-04-2010, 03:04 PM #370
Gold Member
- Join Date
- Jun 2004
- Posts
- 6618
Ahh. At long last.

Well worth the wait. Looking good.
Adjustments are a very good thing to design into machines. Shims work great for areas that need to be solid like your turret.
Looking forward to future posts.Lee
-
10-22-2010, 09:32 AM #371
Registered
- Join Date
- May 2006
- Posts
- 573
Still moving forward step by step. This sheet metal stuff and all those little details takes forever...
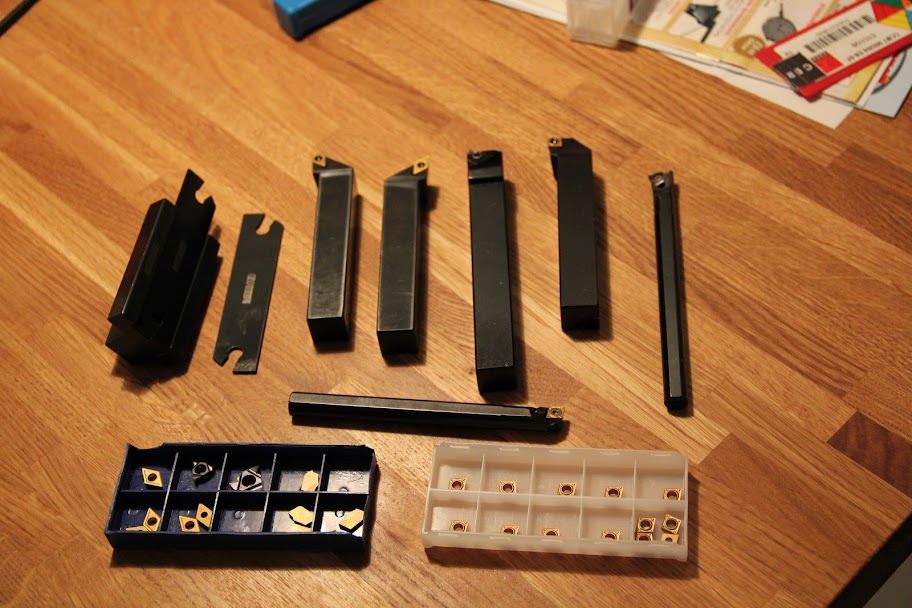
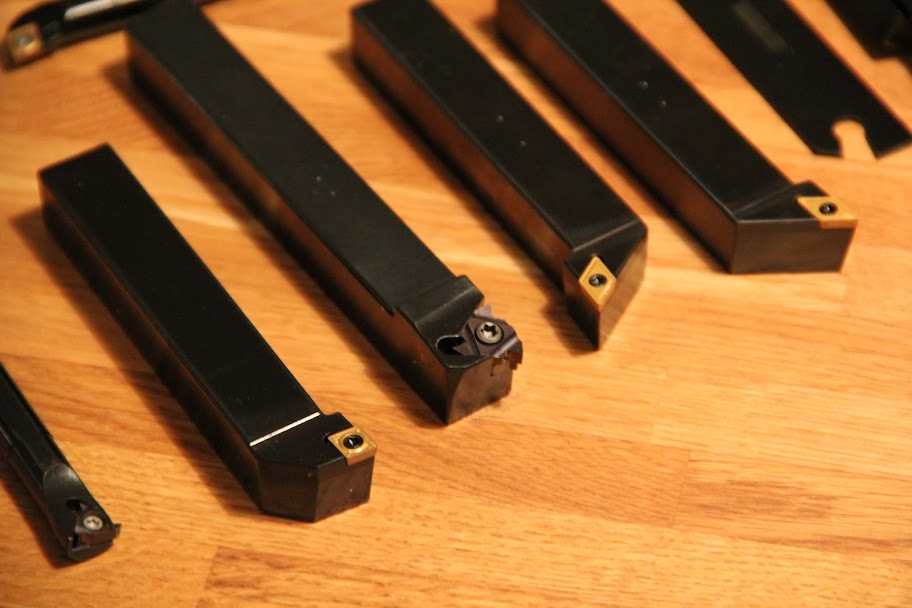
I do have some more interesting stuff to show. A batch of tools just arrived
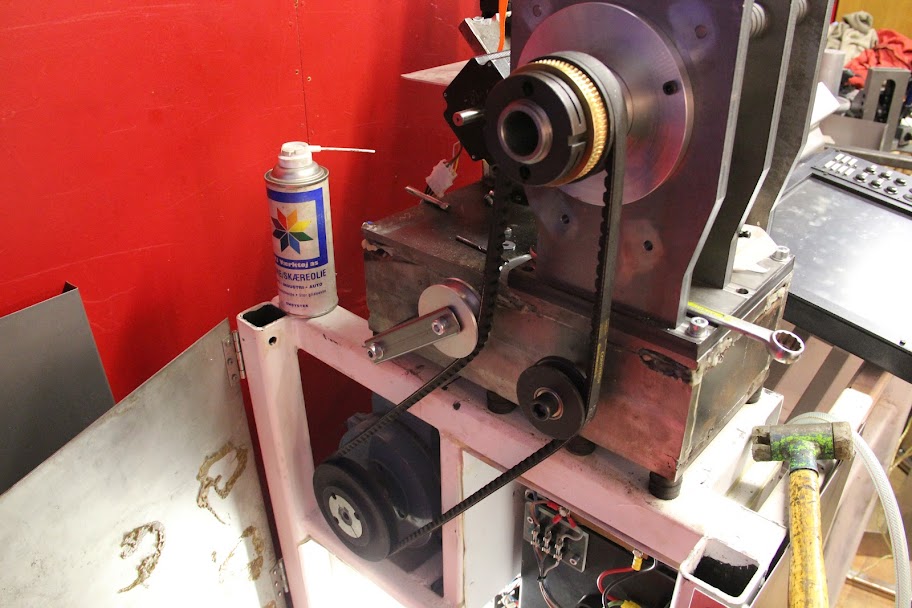
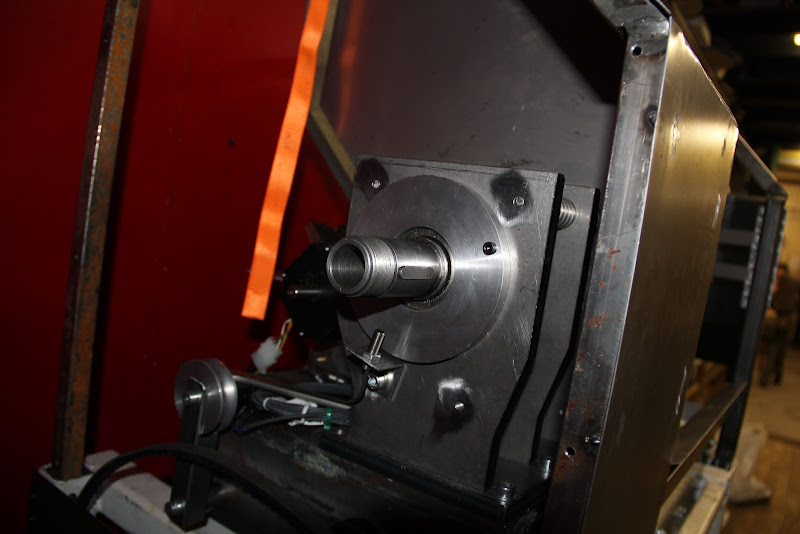
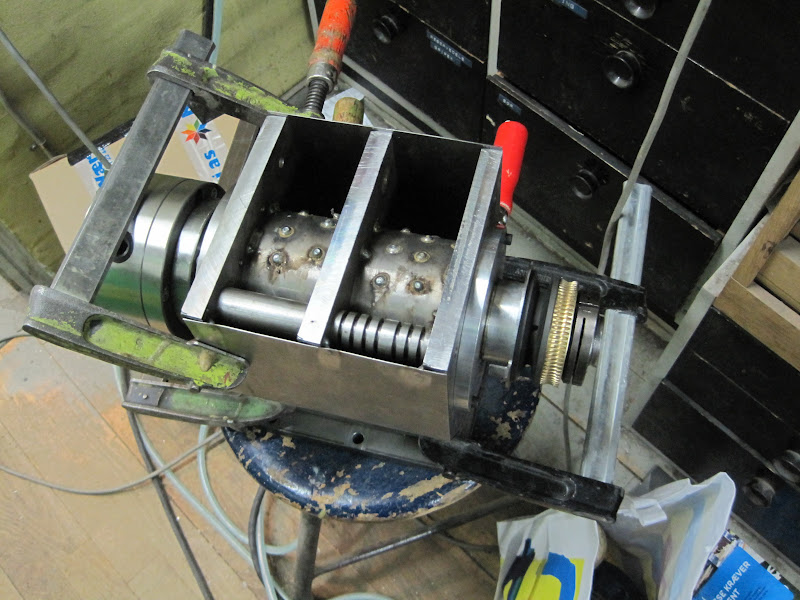
I also found this picture of the drive side of the spindle I think I forgot to post
Im getting closer to finising the enclosure. The door even has a lexan window now, so besides from a paint job its done.
-
10-22-2010, 04:40 PM #372
Member
- Join Date
- Jun 2006
- Posts
- 475
Wow,
Nice tooling!!!! I just spent $1000 AUD (which is the same as UDS) on only half as much tooling as you have shown though. Could have picked it cheaper on e-bay but needed it now for a job. Nice selection of tools you have there. Well done!
Chich
-
10-22-2010, 10:11 PM #373
Registered
- Join Date
- May 2006
- Posts
- 573
I bet you got quality then:-) This is from a manufature called Glanze Welcome to Glanze :: Homepage ::
Hadn't hear of it before, but the quality seams equal to the quality stuff we have at work. Dont know for the inserts yet, but it uses standard insert so I can upgrade to some of the more known brand if I feel like it later on (doubt it though). Paid something like 500$ in total
-
11-14-2010, 08:18 PM #374
Registered
- Join Date
- May 2006
- Posts
- 573
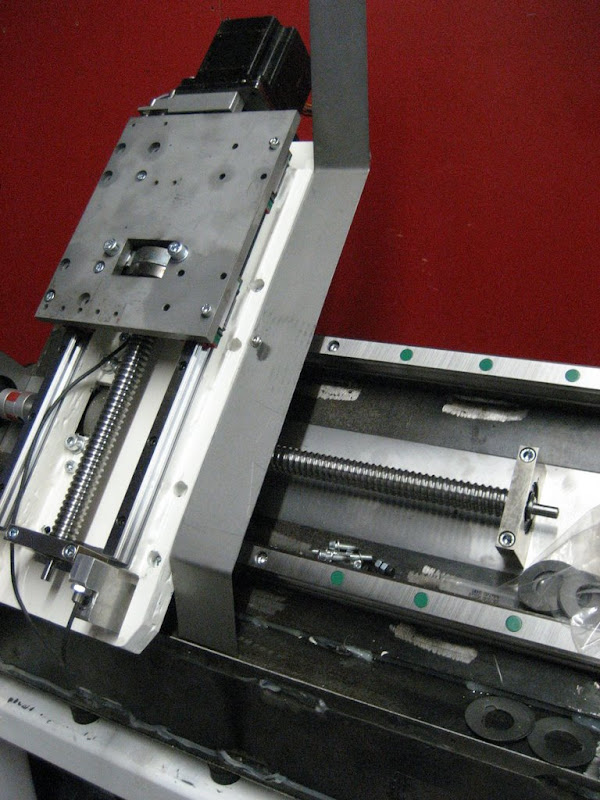
I have plenty of time, but the ½ hour drive to the workshop, keeps me from getting there so often. Anyway, been working on the indexing feature. Threading is one of the first things I need to do
Also the sheet metal work continuous
-
02-23-2011, 09:03 AM #375
Registered
- Join Date
- May 2006
- Posts
- 573
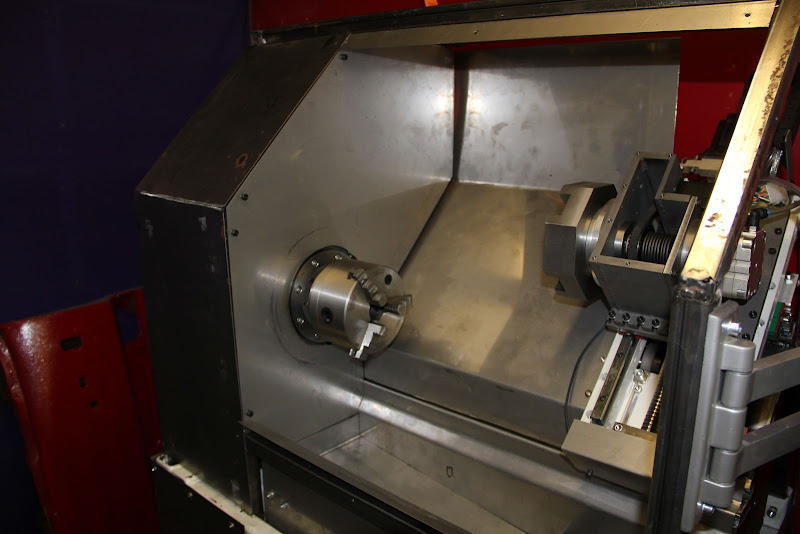
A couple of random pics since last post.
Did a test run, but was not satisfied with the surface finish, so I disassembled it yet another time. The tolerances was fine thought <0.01mm
Decided to fill the headstock with the same epoxy-gravel mix as the rest of the base. Thought it would dampen the vibration caused by the drive belt at high speed.


It may have improved a little, but the problem is still there. It might have more to do with choosing the correct feedrate, than vibration, but I think I still need to do something about that vibrating belt. Any ideas?
Before I disassembled it, I tried some threadcutting. Turned out quite nice, but still needs some adjustments

Finally got around to install physical e-stop. I will trust this more than the "software" e-stop of my pendant. Its not quite a "hardwired" e-stop though, It will kill the VFD by cutting power to the "on" relay and at the same time signal the BOB to go into e-stop mode.
Last picture is of a new spindle control board I got from Homann Designs. I had a DC-06 board I bought years ago, but I couldnt get it to work, so I wrote to Peter. Turns out that the 06 was product he designed as per request, but it was not recommended for PWM drive, so he offered me to replace it, free of charge, with a new DC-03 board. Now that is what I call service!!!

-
02-24-2011, 04:29 PM #376
Community Moderator


- Join Date
- Mar 2004
- Posts
- 1661
I think the belt is quite long, does it rattle when speeding? Try to add another support tensioner or two. Might be worth trying it out by hand first.
-
02-25-2011, 11:38 AM #377
Registered
- Join Date
- May 2006
- Posts
- 573
Not a bad idea! Im considering moving the motor on top of the headstock. There is almost room for it. Either that or just below the head stock, but that would require a total rebuild of the cabinet below. More tensioner might do the trick
-
02-25-2011, 01:09 PM #378
Registered
- Join Date
- May 2004
- Posts
- 35
Guldberg,
Check out this site:PowerTwist Plus V-Belts - Fenner Drives
These belts are supposed to vibrate less. I personally have not used these for long belt installation, so I cannot say for sure.
Some other thoughts: add an idler and use two shorter belts. This could also be configured to give a second speed for jobs requiring lower speed and more torque. Usefull even with VFD Drives. Also, on a long belt you could us a metal plate that the back of the belt would rub against at speed and a tensioner on the slack side of the belt. I have seen this arrangement used on some passenger car accessory belt drives.
Nice Project, keep it up.
Jimbo7
-
03-08-2011, 08:28 AM #379
Registered
- Join Date
- Apr 2006
- Posts
- 158
The belt is not the issue with the surface finish, Monarch lathes use very long belts to drive the spindle specifically to isolate gear noise from the spindle. I have tried those power twist belts and they are a joke. No way do they run smoother. Quite the opposite. A good A series belt is hard to beat. Also look at poly-v flat belts or a HTD style timing belt.
What kind of steel are you trying to turn? Try something like 12L14 or 1144 stressproof and see what the finish is. You may have some cruddy generic cold rolled steel which never turns well. At the very least use hot rolled steel. It is not as gummy as CRS.
If you still do not get a good finish with the two steels above then you may have an inherent design issue with the lathe. Possibly the spindle, possibly the frame of the machine.
-
03-08-2011, 01:28 PM #380
Registered
- Join Date
- May 2006
- Posts
- 573
Right now im just testing with aluminum. When I take deeper cuts or run at lower speed, I get good surface finish. Its the finishing pass at high RPM that is causing me trouble. I think I can overcome much of this problem, by selecting the right feeds and speeds

 Reply With Quote
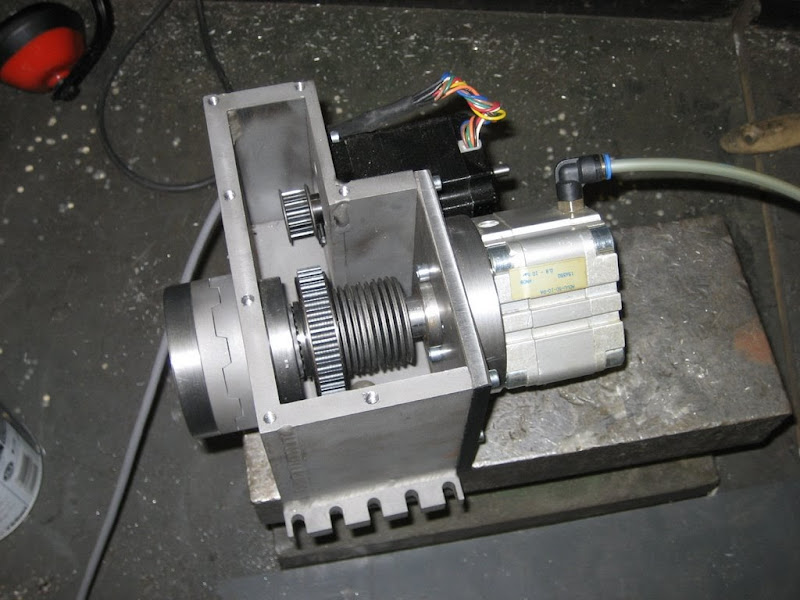
Similar Threads
-
CNC lathe scratch build!
By aarongough in forum Vertical Mill, Lathe Project LogReplies: 37Last Post: 02-07-2013, 10:06 PM -
Looking for Specs for a scratch built lathe
By breathe in forum Vertical Mill, Lathe Project LogReplies: 18Last Post: 06-16-2011, 12:56 PM -
From scratch. Lathe, Mill, or maybe both.
By MrBean in forum Vertical Mill, Lathe Project LogReplies: 27Last Post: 10-28-2010, 01:25 PM -
CNC Lathe from Scratch
By mackeym in forum Vertical Mill, Lathe Project LogReplies: 85Last Post: 06-02-2010, 12:20 AM
