Looks good to me Sarge,
There's nothing to hold you back now. Look forward to seeing more.
Joe
Thread: Thank You ! ! !
Results 21 to 31 of 31
-
01-04-2010, 12:25 AM #21
 Registered
- Join Date
- May 2006
- Posts
- 202
-
01-04-2010, 01:19 PM #22
Registered
- Join Date
- Jan 2007
- Posts
- 229
Hi Folks,
this is a nice corner here!
I have also found a cnc router forum in the UKsign boards or uk sign forums, as well as at signs101 dot com. However, both places are not overly keen on non-signwriters asking for help.
Our router has a 2.05 metre x 4.2 metre bed, and about 5" clearance under the router, depending on the cutter length, of course.
It was a dinosaur- built in 1990 as an Esab Signmare 1000 or 2000, and retrofitted with upgraded stuff in 2001.
We bought it 18 months ago. In hindsight I possibly could have built one with all I've learned trouble-shooting its problems! The learning curve with driving the router, plus the learning curve with 3D files was huge, but enjoyable.
Now the test is how to most-efficiently machine certain 3D parts to not take half a day on the bed, yet still render suitable fine detail...
The size of the machine is very useful- you can cut full 5 x 10 ft sheets of alupanel nicely. You can also attach a job to the bed, do some of it, and then fit another job in, and come back to your former one a day or two later- there's room to move. You just need some easily findable pre-set origins in various places on the bed.
-
01-07-2010, 04:03 AM #23
Registered
- Join Date
- Jul 2009
- Posts
- 272
Welcome to our little corner

Here we are all about sharing info. 3d takes time and there is no way around it.
Unless you rout very soft material with high feed speed. Ball nose bits are required to have 90% stepover to be able achieve high detail, also depends on model detail as well. Some things can be done in 2d and simulate 3d taking advantage in use of certain tooling such us roundover bits as Joe pointed out in cutting letters. 2d work is easy to design and faster to machine....
-
01-08-2010, 12:24 PM #24
Registered
- Join Date
- Apr 2009
- Posts
- 149
"Fancy" is irrelevant. This is a beautiful piece. Thanks for sharing. Originally Posted by Big-tex

Our customers do not care how fast your machine is, or what "fantastic" things it can do, just "how can this benefit me and my business." Someone previously posted that a slow machine has never hurt their projects. The customer does not care how fast your machine is, just as long as they get the product delivered on time, at the price quoted, with the quality craftsmanship they have come to expect from you.
Again, nice piece. If you can spare the time, please post how you created this piece in the "Tips and Tricks" section, especially on your prep and finishing processes.
-
01-08-2010, 07:21 PM #25
Registered
- Join Date
- Jul 2009
- Posts
- 272
Will do tonight.
-
01-09-2010, 06:45 PM #26
Registered
- Join Date
- Jul 2009
- Posts
- 272
Posted in tips and tricks
-
01-23-2010, 04:41 PM #27
Registered
- Join Date
- May 2006
- Posts
- 202
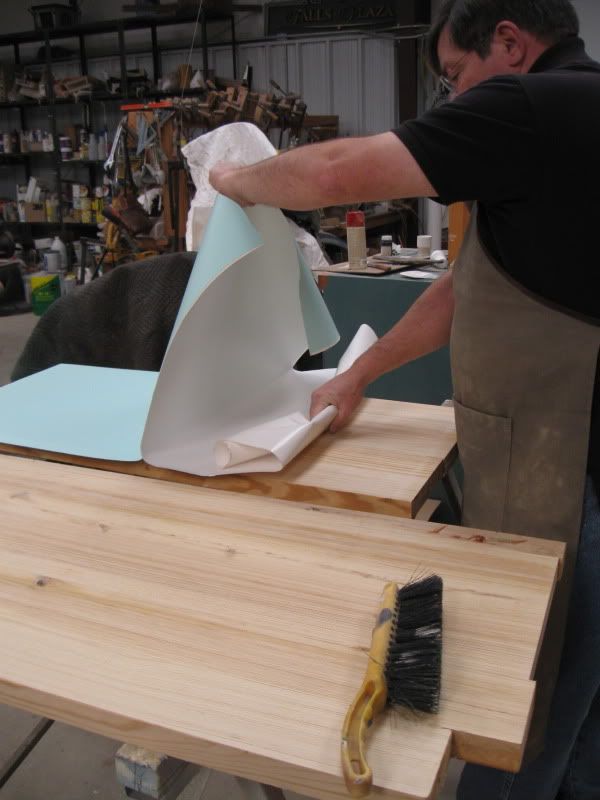
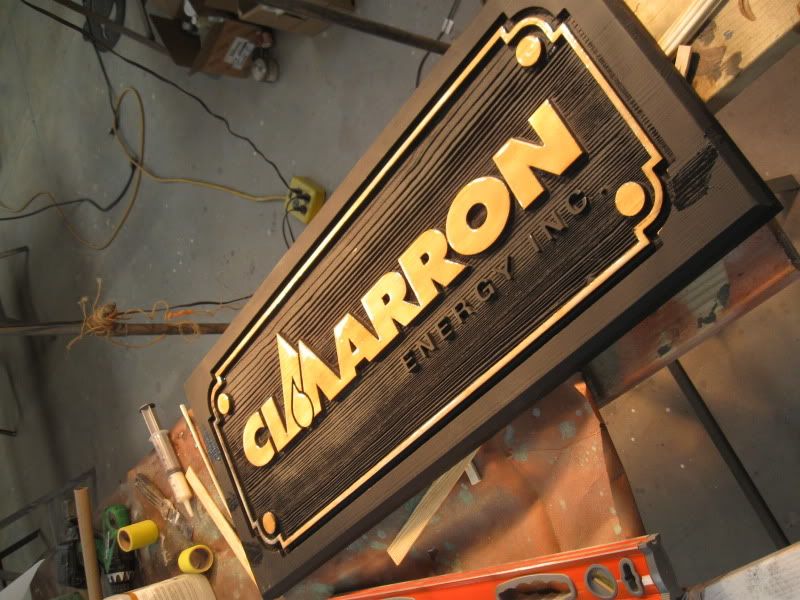
Pine & Gold
Coming to a finish on another Pine and Gold sign
I glued up yellow pine and Ron applied Sandblast Mask. We used the router to score it. Then an area clearance down .40
[IMG]http://i38.photobucket.com/alb
Although I only wanted a little texture, this material is so hard it took a little extra sandblasting.
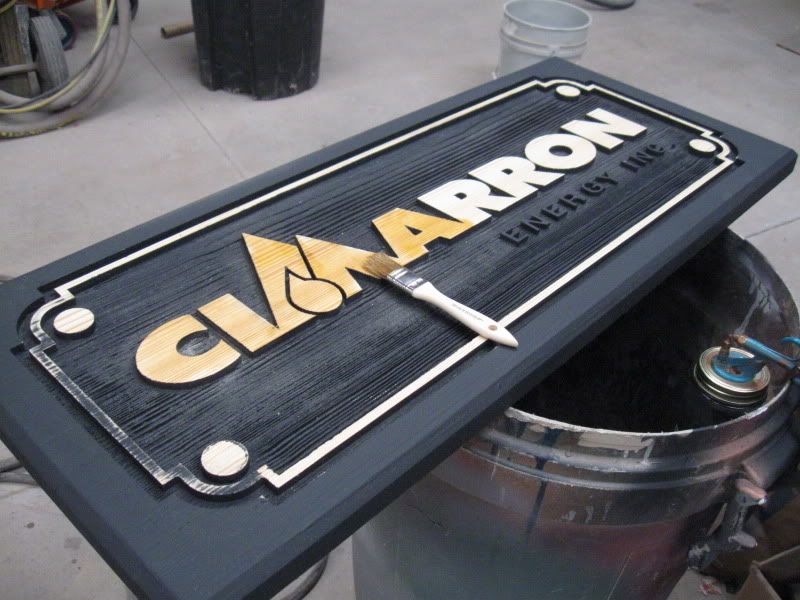
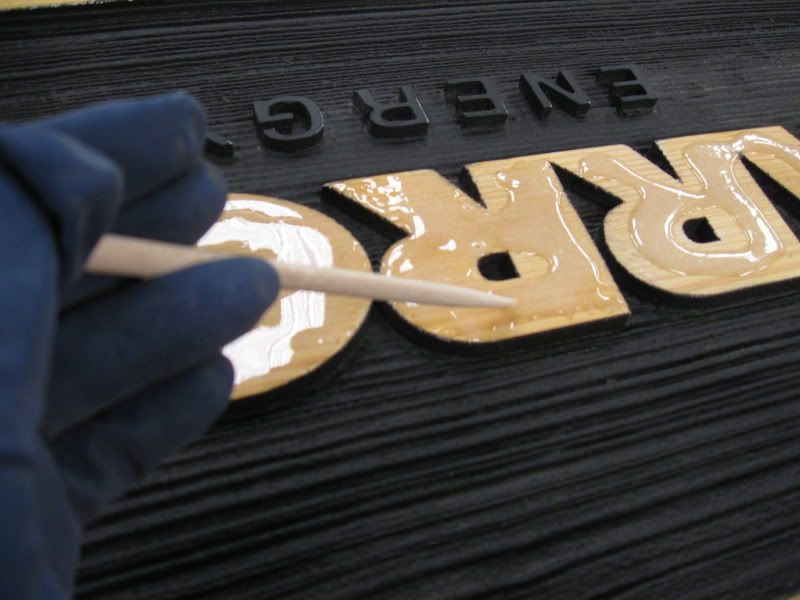
To make a perfectly smooth surface on the letters and border I pour on epoxy and move it with chop stix. Now she's ready for gold. That's todays chore.
Joe Crumley
www.normansignco.com
-
01-25-2010, 07:28 PM #28
Registered
- Join Date
- Jul 2009
- Posts
- 272
Very nice work Joe.... did Harco mask survived blasting? What size bit did you use to clear background?
-
01-26-2010, 01:08 AM #29
Registered
- Join Date
- May 2006
- Posts
- 202
With the depth already routed it out, the mask wasn't under any kind of pressure.
I went around all the letters and trim with a 1/8" down sprial in .125 increments to .40. At that point I did an area clean with a 1/4" bit. Not much step-over. Eeeesy peesy.
-
01-26-2010, 01:53 AM #30
Registered
- Join Date
- Jul 2009
- Posts
- 272
Yes that is easy and fast. Than blasting with glass beads (what grid) I take and what air pleasure.
Thanks for all your help and pointers.
-
01-26-2010, 12:41 PM #31
Registered
- Join Date
- May 2006
- Posts
- 202
100 ps
185 CFM

 Reply With Quote